This was
The Second Project

The second project was a two part assignment
1) Vinyl Cut
2) Laser Cut
Vinyl Cutter
Decided to make something that was practical
Realized our TA - Anthony doesn’t have a name tape on his sign.
After 5 years, he now has a sign on his door.

Laser Cutter
Started to CAD it up. Note - there are significantly better tools for this - however because I am turning my object into a 3-dimensional piece; I want to see how the parts will look - specifically the legs.
This is how the trace techniques worked - Its not perfect but its good enough. Note - we will be utilizing this


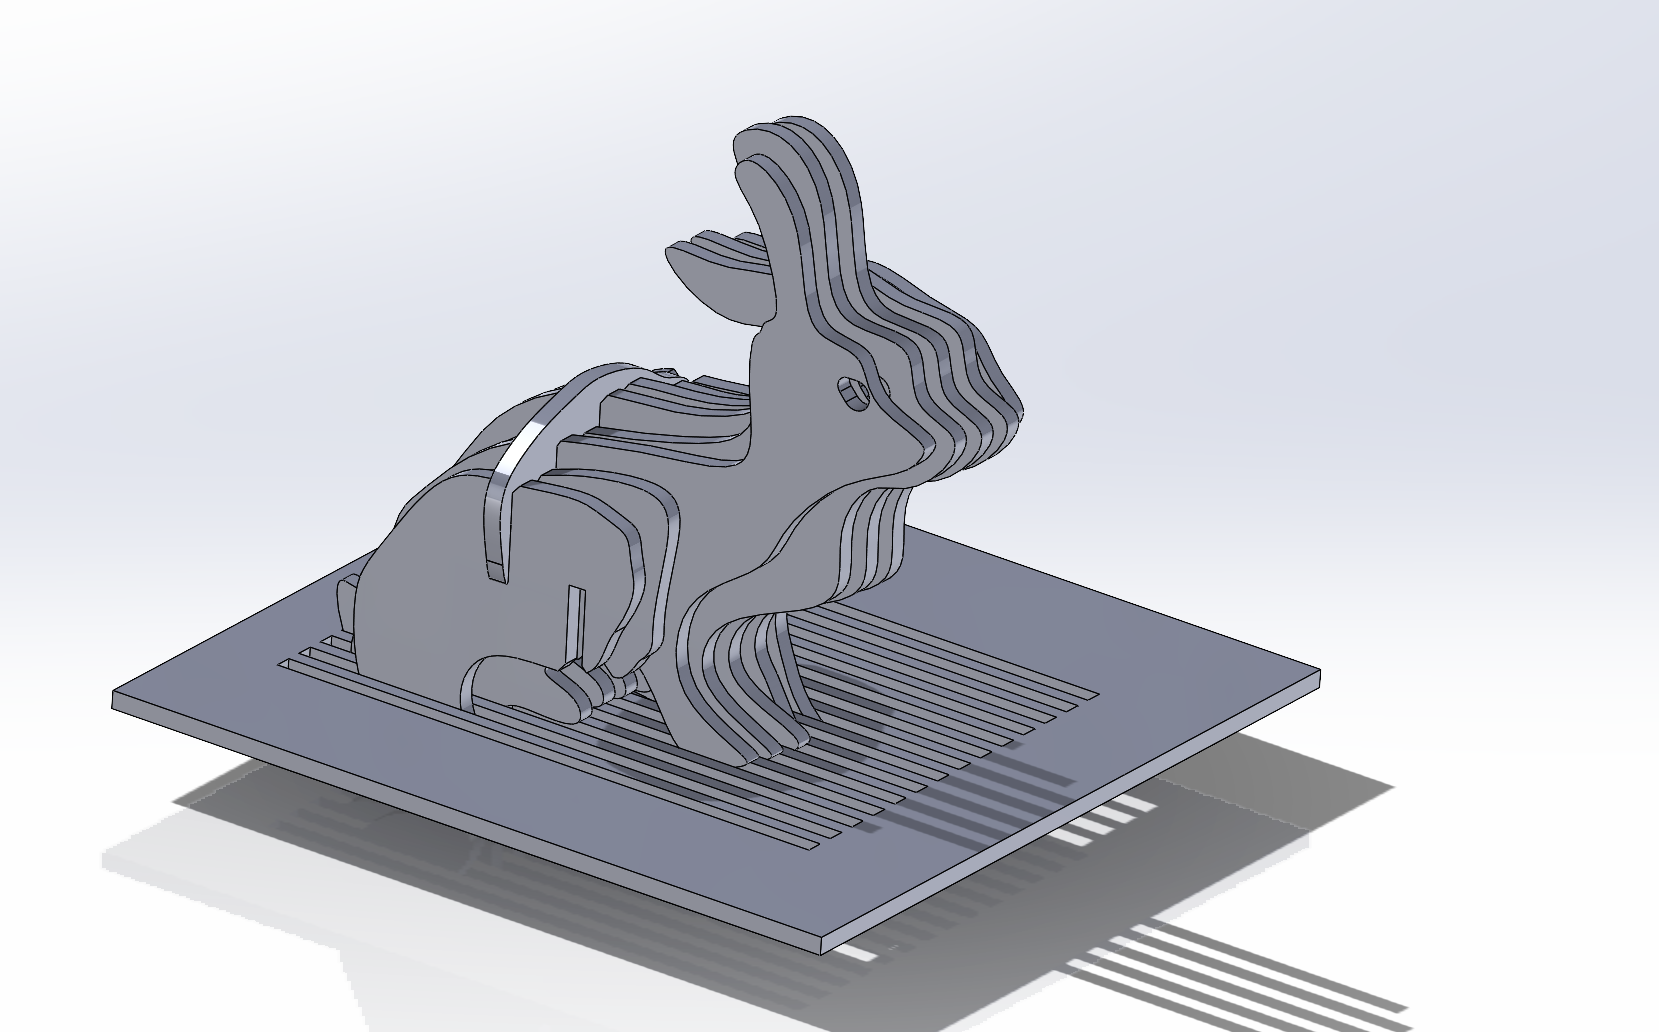
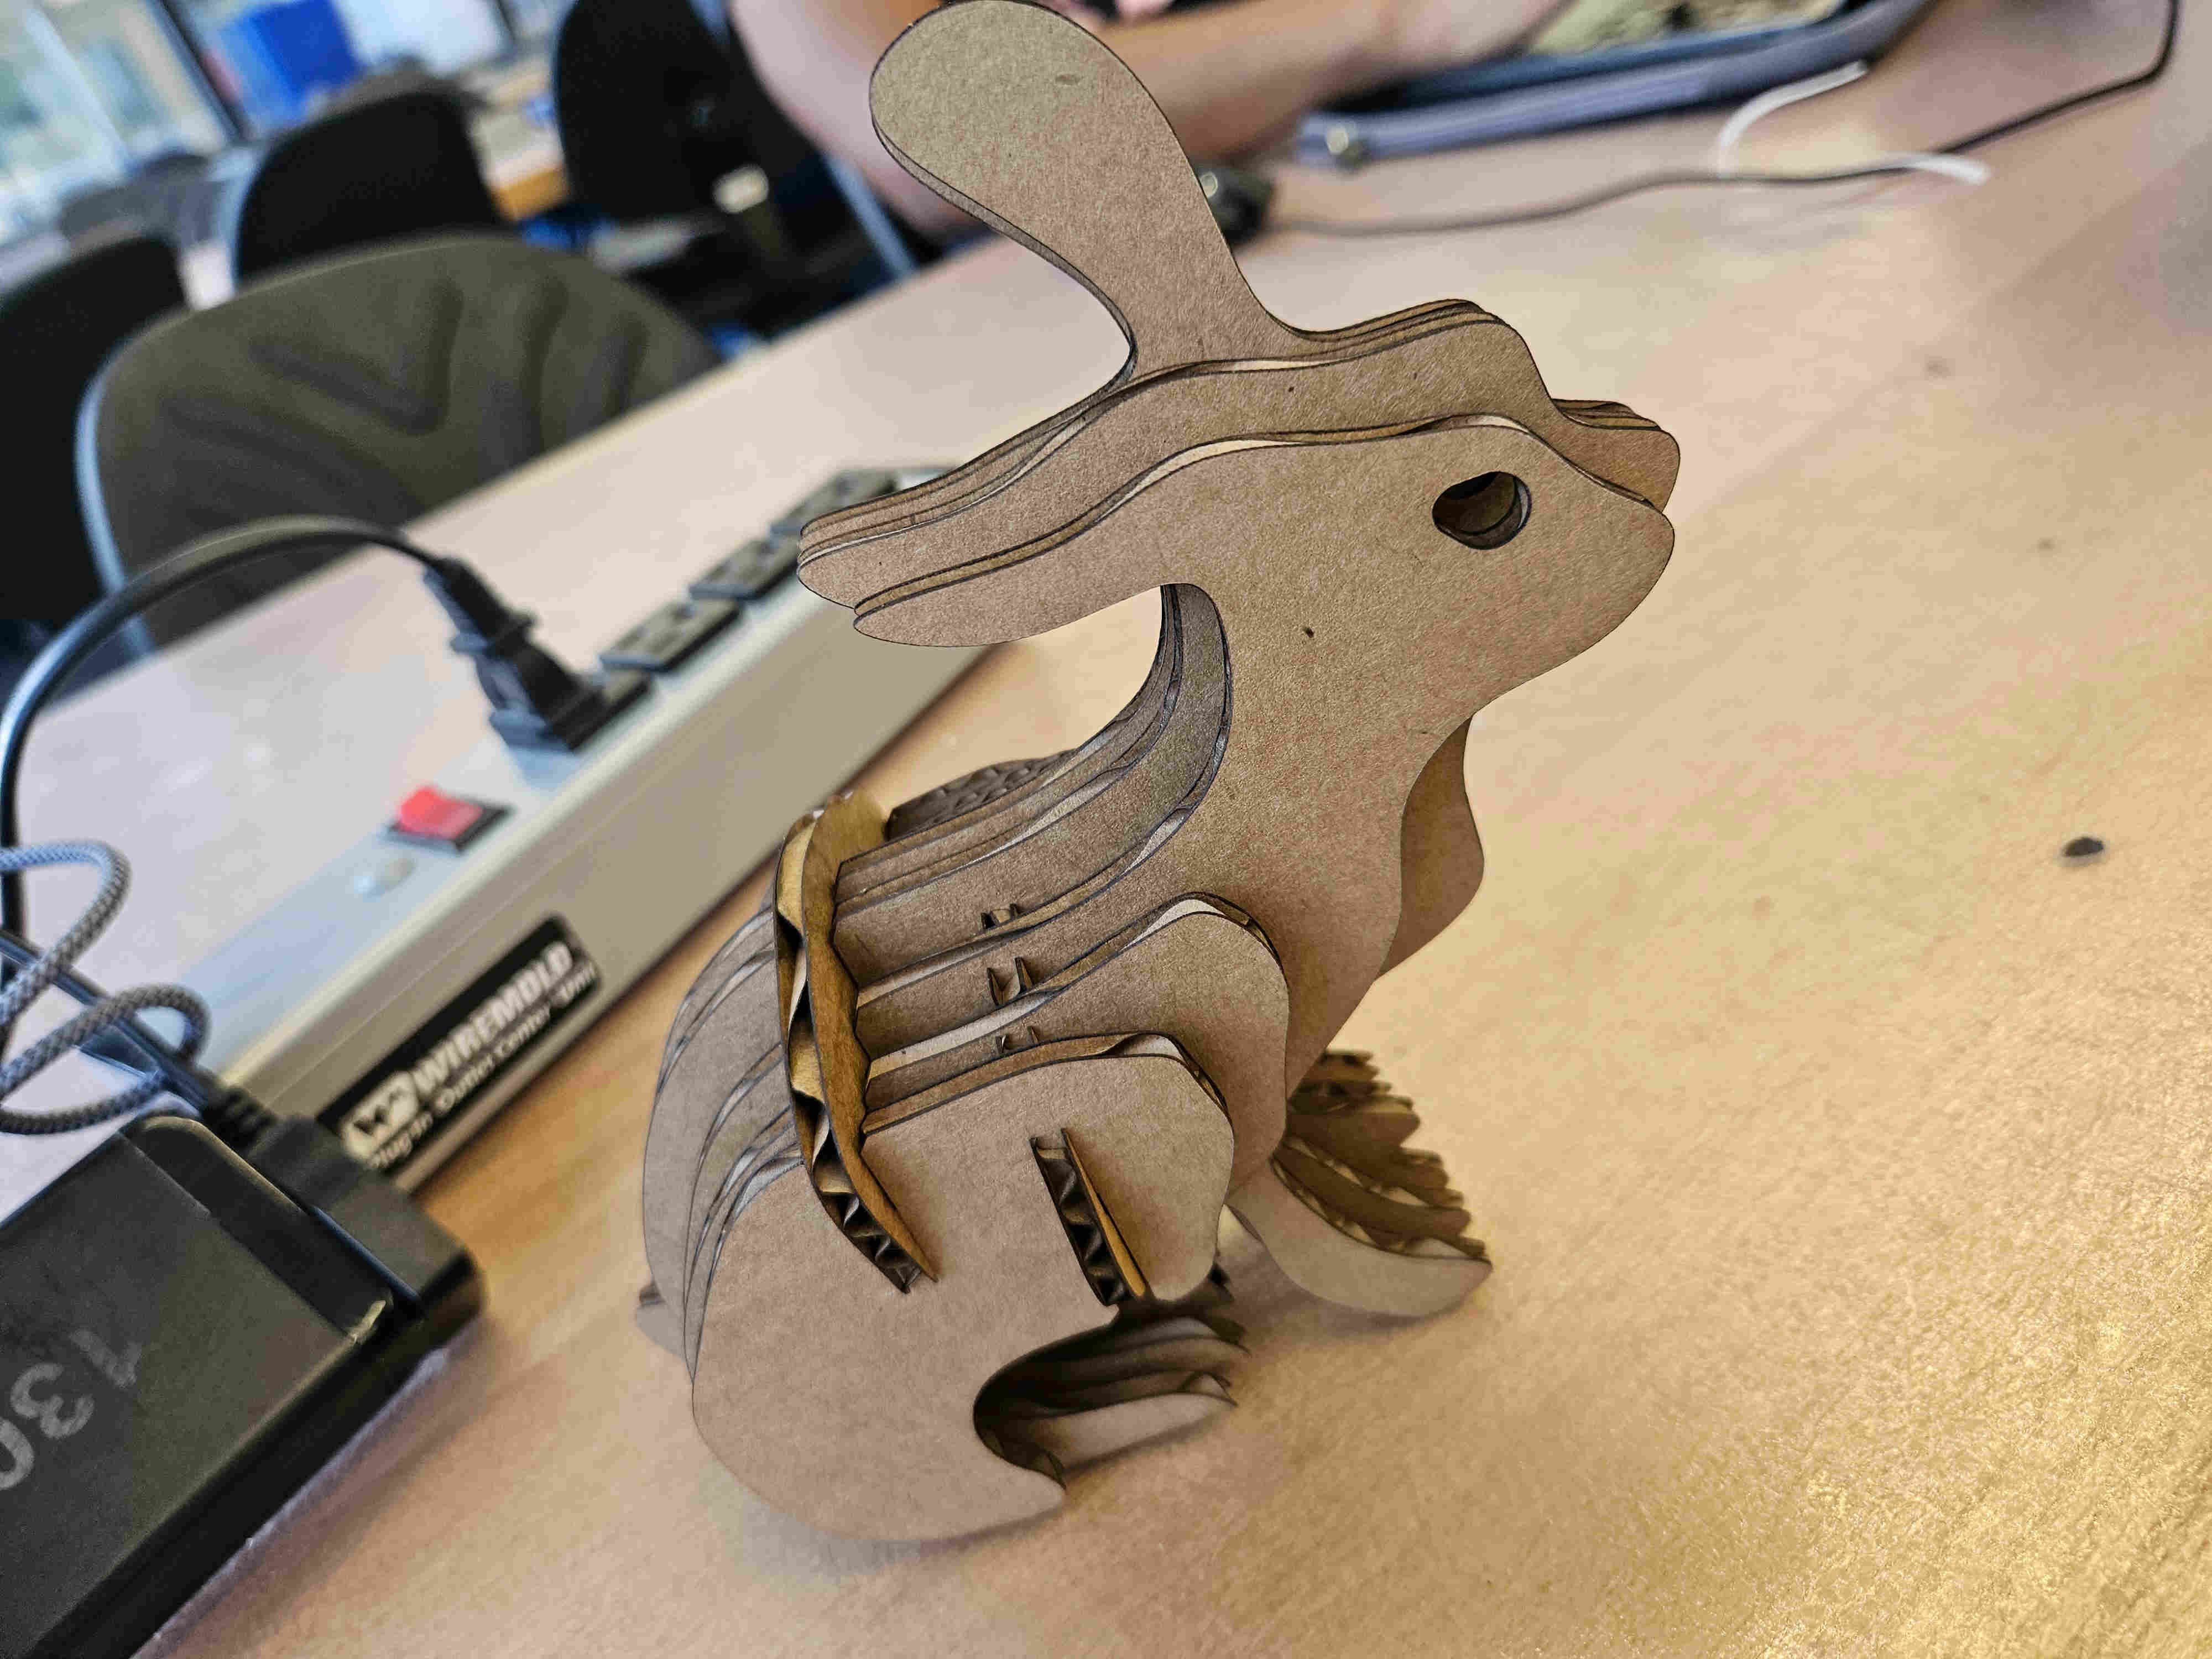
After four layers in the front and two layers in the back - I am complete with the rabbit. The simple part of the parametric design is changing the base of the material to match the thickness. However, after sketching the rabbits, I realized that it would probably need internal supports. I redesigned the front layers to include a singular point where all layers would meet. This would allow me to create a thin walled support where I can create a "brace" cardboard cutout.
A few design notes.
As you can see, all layers meet at the rabbits but - both the front and back feet are designed to wedge into a support cardboard. The issue is when I don’t have the front feet there in order to create a 3-dimensional object out of 2-D cardboard cutouts, how do I support them?
Issue - I think looking at this, because I don't want to create 200 layers of rabbit. In order to get a 3-D effect, I should either 1) space out the rabbit or 2) create duplicity of some of the layers.
I think I will play with a little bit of both. I can cut 3x of each piece and I would only need to cut out multiple base boards to get the "3D effect I want"
adding parametric variables. Note - since we "free" drew most of the rabbit contours. The model is limitedly parametric. We will find issues getting past a certain amount of code

Iterative designs
Board - the board is intended to be supports - this we will
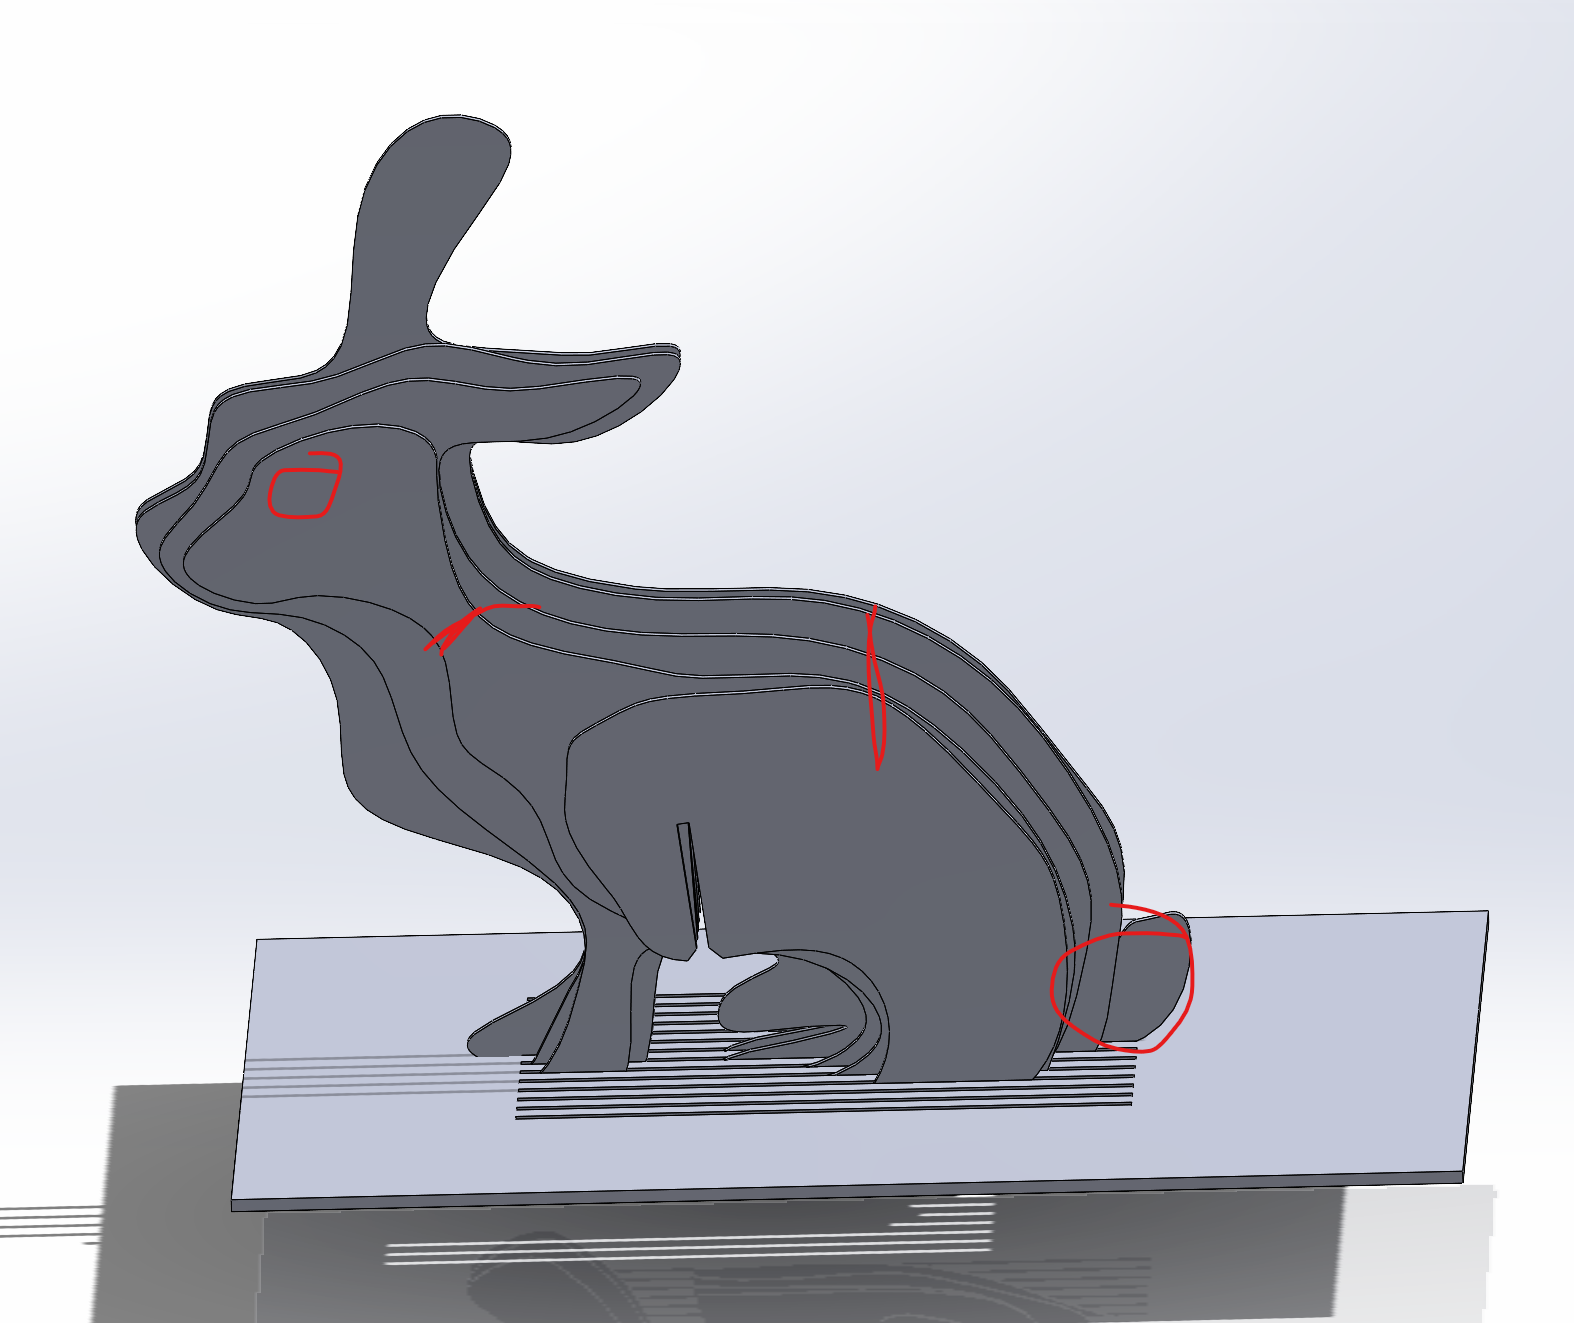
Lets include an eyeball (circle) using the same technique as before where we copy and paste the geometry with the spline contours
I think at +3, we can remove the head portion on that specific contour, itll give it a more "3D" perspective
We will include another support near the rear
At +1, we will include some more tail
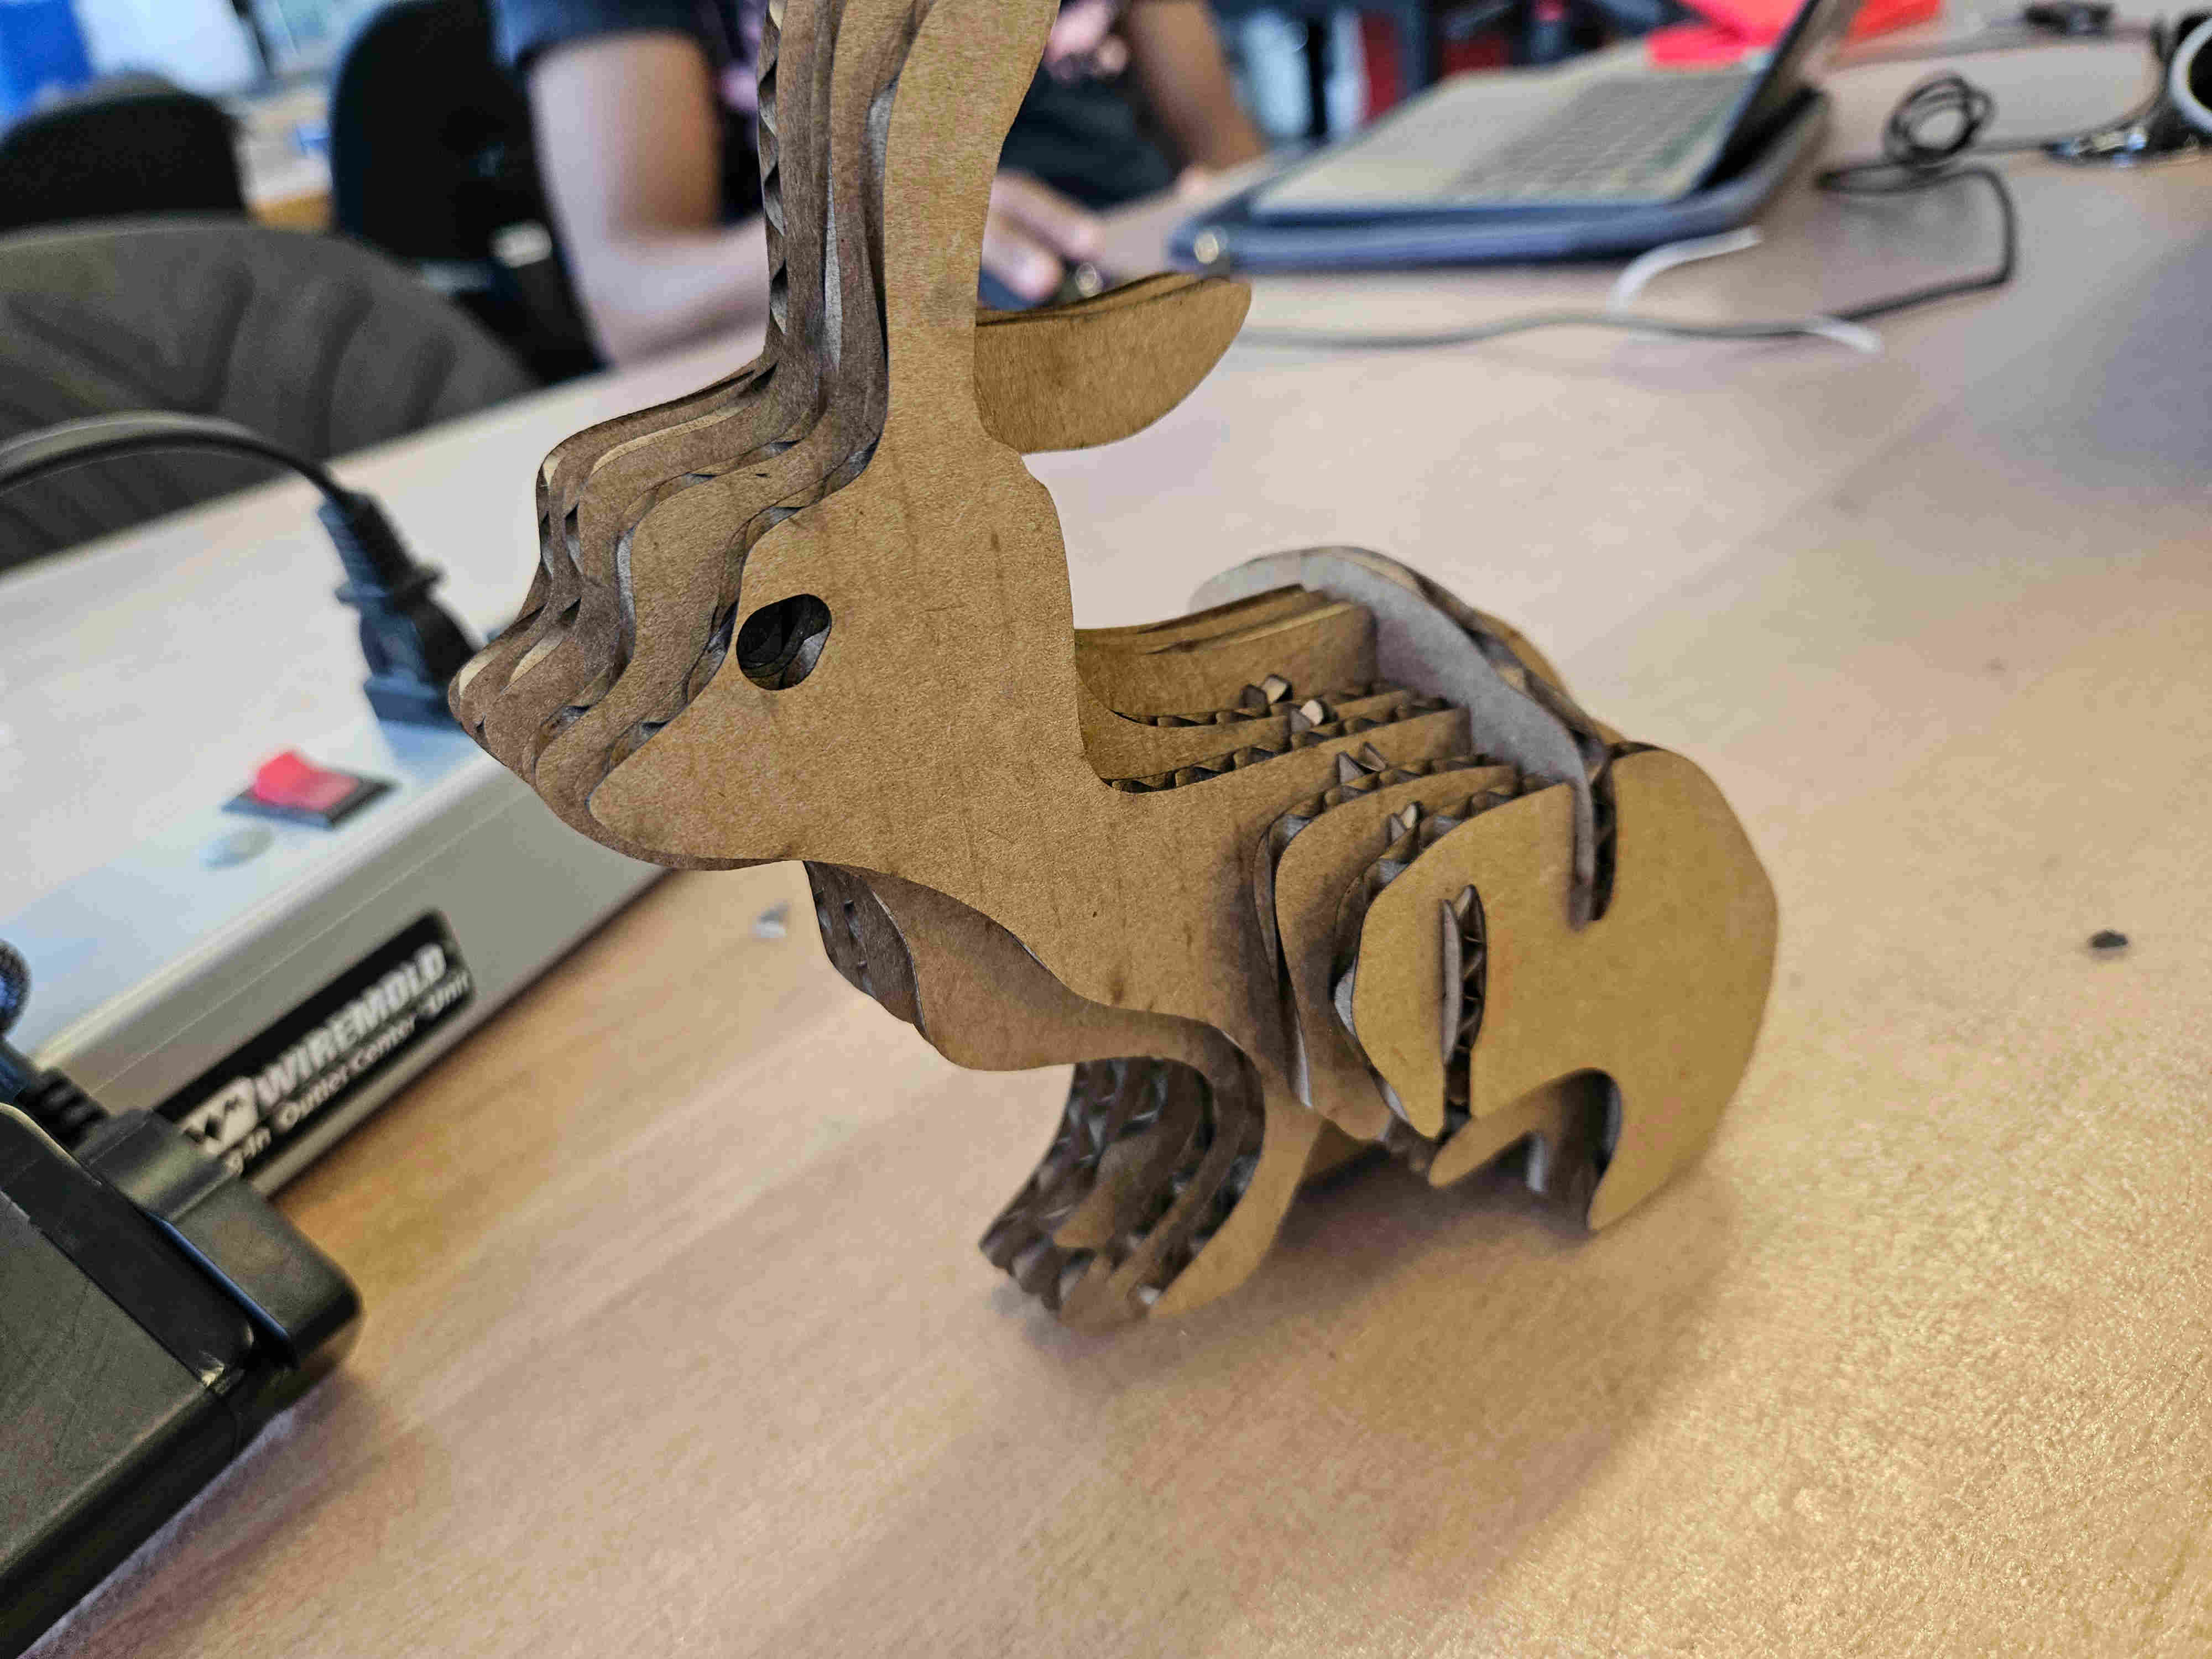
Luckily the manufacturing for this week is easy for this specific project.
Final Result
Carnage of cardboard rabbits trying to test tolerances/kerf
