This was
The Seventh Project
Molding/Casting
Mixing, Pouring, and Failing. Rinse and Repeat

Summary:
Today we will be continuing and trying new aspects for our final project. In this case, we are going to make a button. This will involve creating the button in #CAD, generating that button in the positive on the CNC via wax, creating that button out of stone, then glueing it into the button.
Tools
Software- #SolidWorks - CAD
- #Fusion360 - CAD (negative only) + CAM
- CNC Machine
- 1/4in Straight Flute
- 1/16in Straight Flute
- Wax (7" x 3" x 1.5") Mold
- OOMOO ~ 1/2 liter
- USG Hydro-Stone
- A ziptie or sharp pointy object
1) CAD our Design
We changed the design rail dimensions. Luckily we set this as parametric - we changed the railing sized. These rails were fine if injection molded/AM'ed but they are significantly less tolerant to the process above. This was our final #CAD for our button. It was very closely mirrored from a Cherry MX switch adaptation.
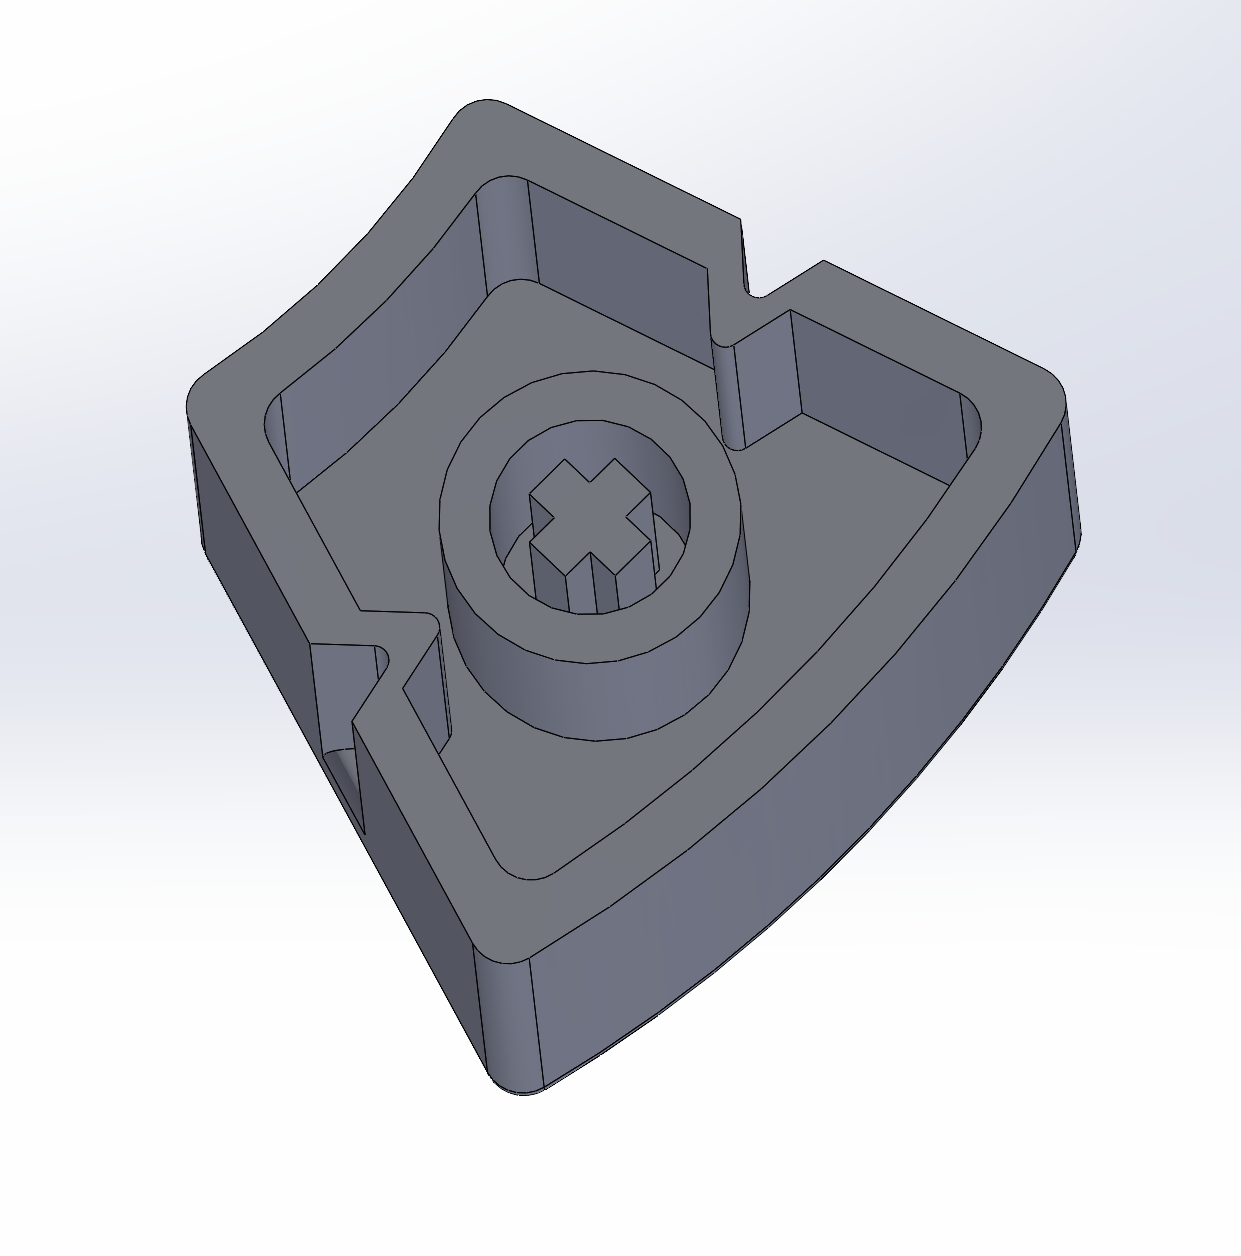
ANext we optimized our CAD for our CAM process.
We created the stock (7x3x1.5in mold) and applied our model in #Fusion360.
We then translated our model using the CAM features in #F360.
This allowed us to input our tools (1/4" and 1/16" fluted bits) and autogenerate paths.
Our biggest error was the spacing between the support walls and our respective object.
This space was too small for our 1/4" drill bit.
After a few back and forths with the model, we eventually were able to get a clean CAM model.
We loaded up the model, set up the wax mold for machining and then proceeded to carve out the machine.
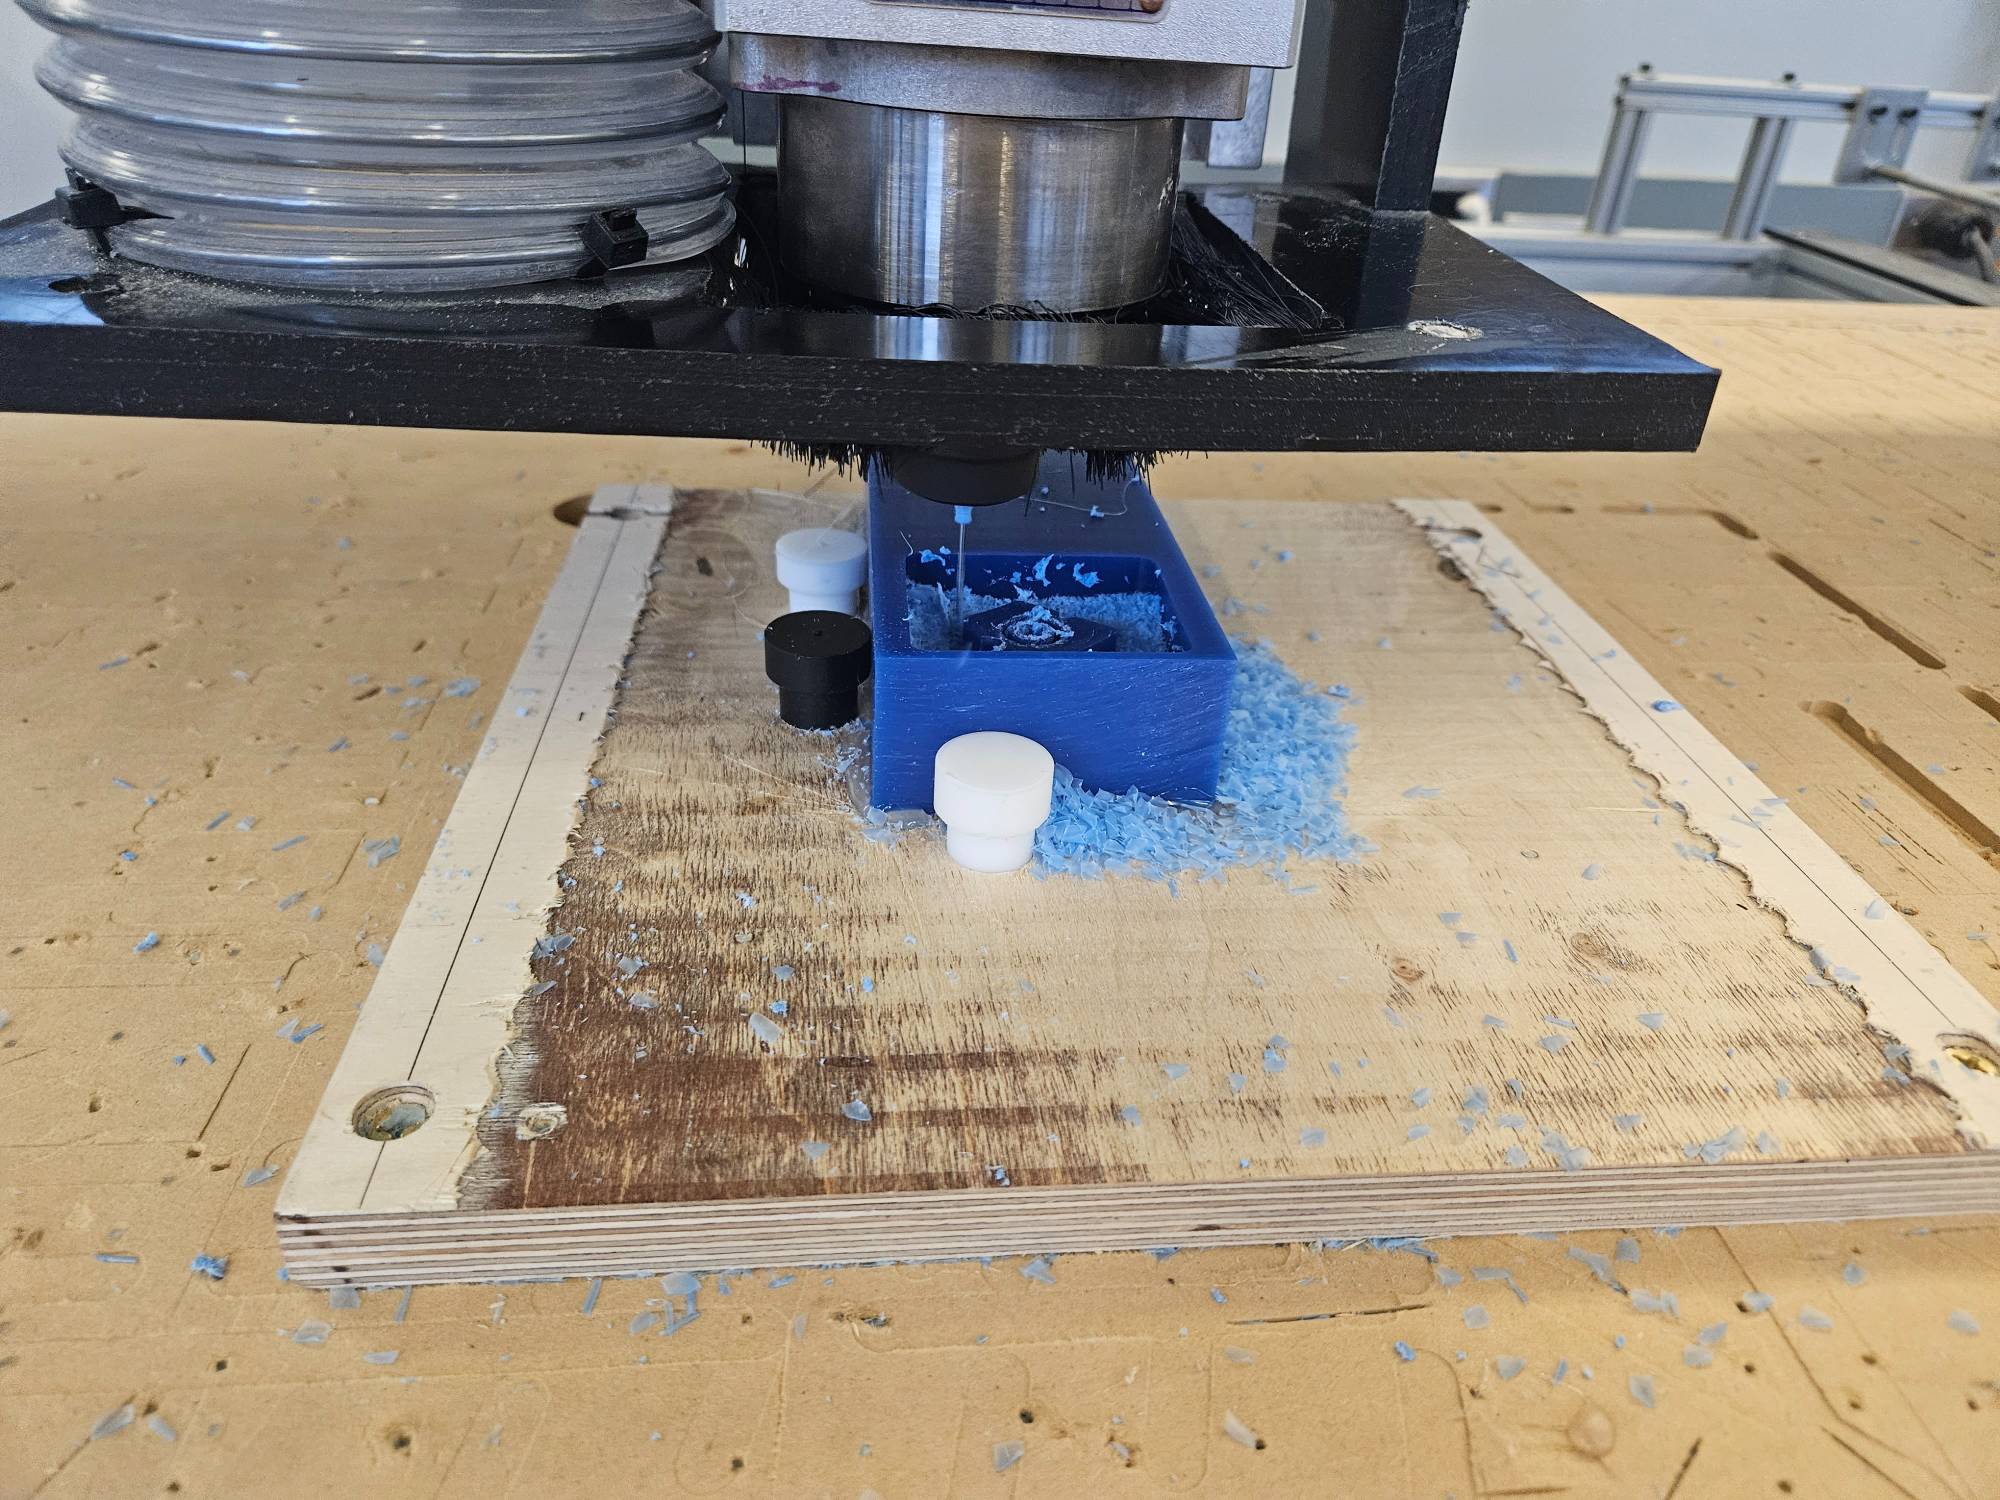
We only used about a 1/3rd of the block so we save the rest of the block for someone else ;)
We got the following wax machined result!
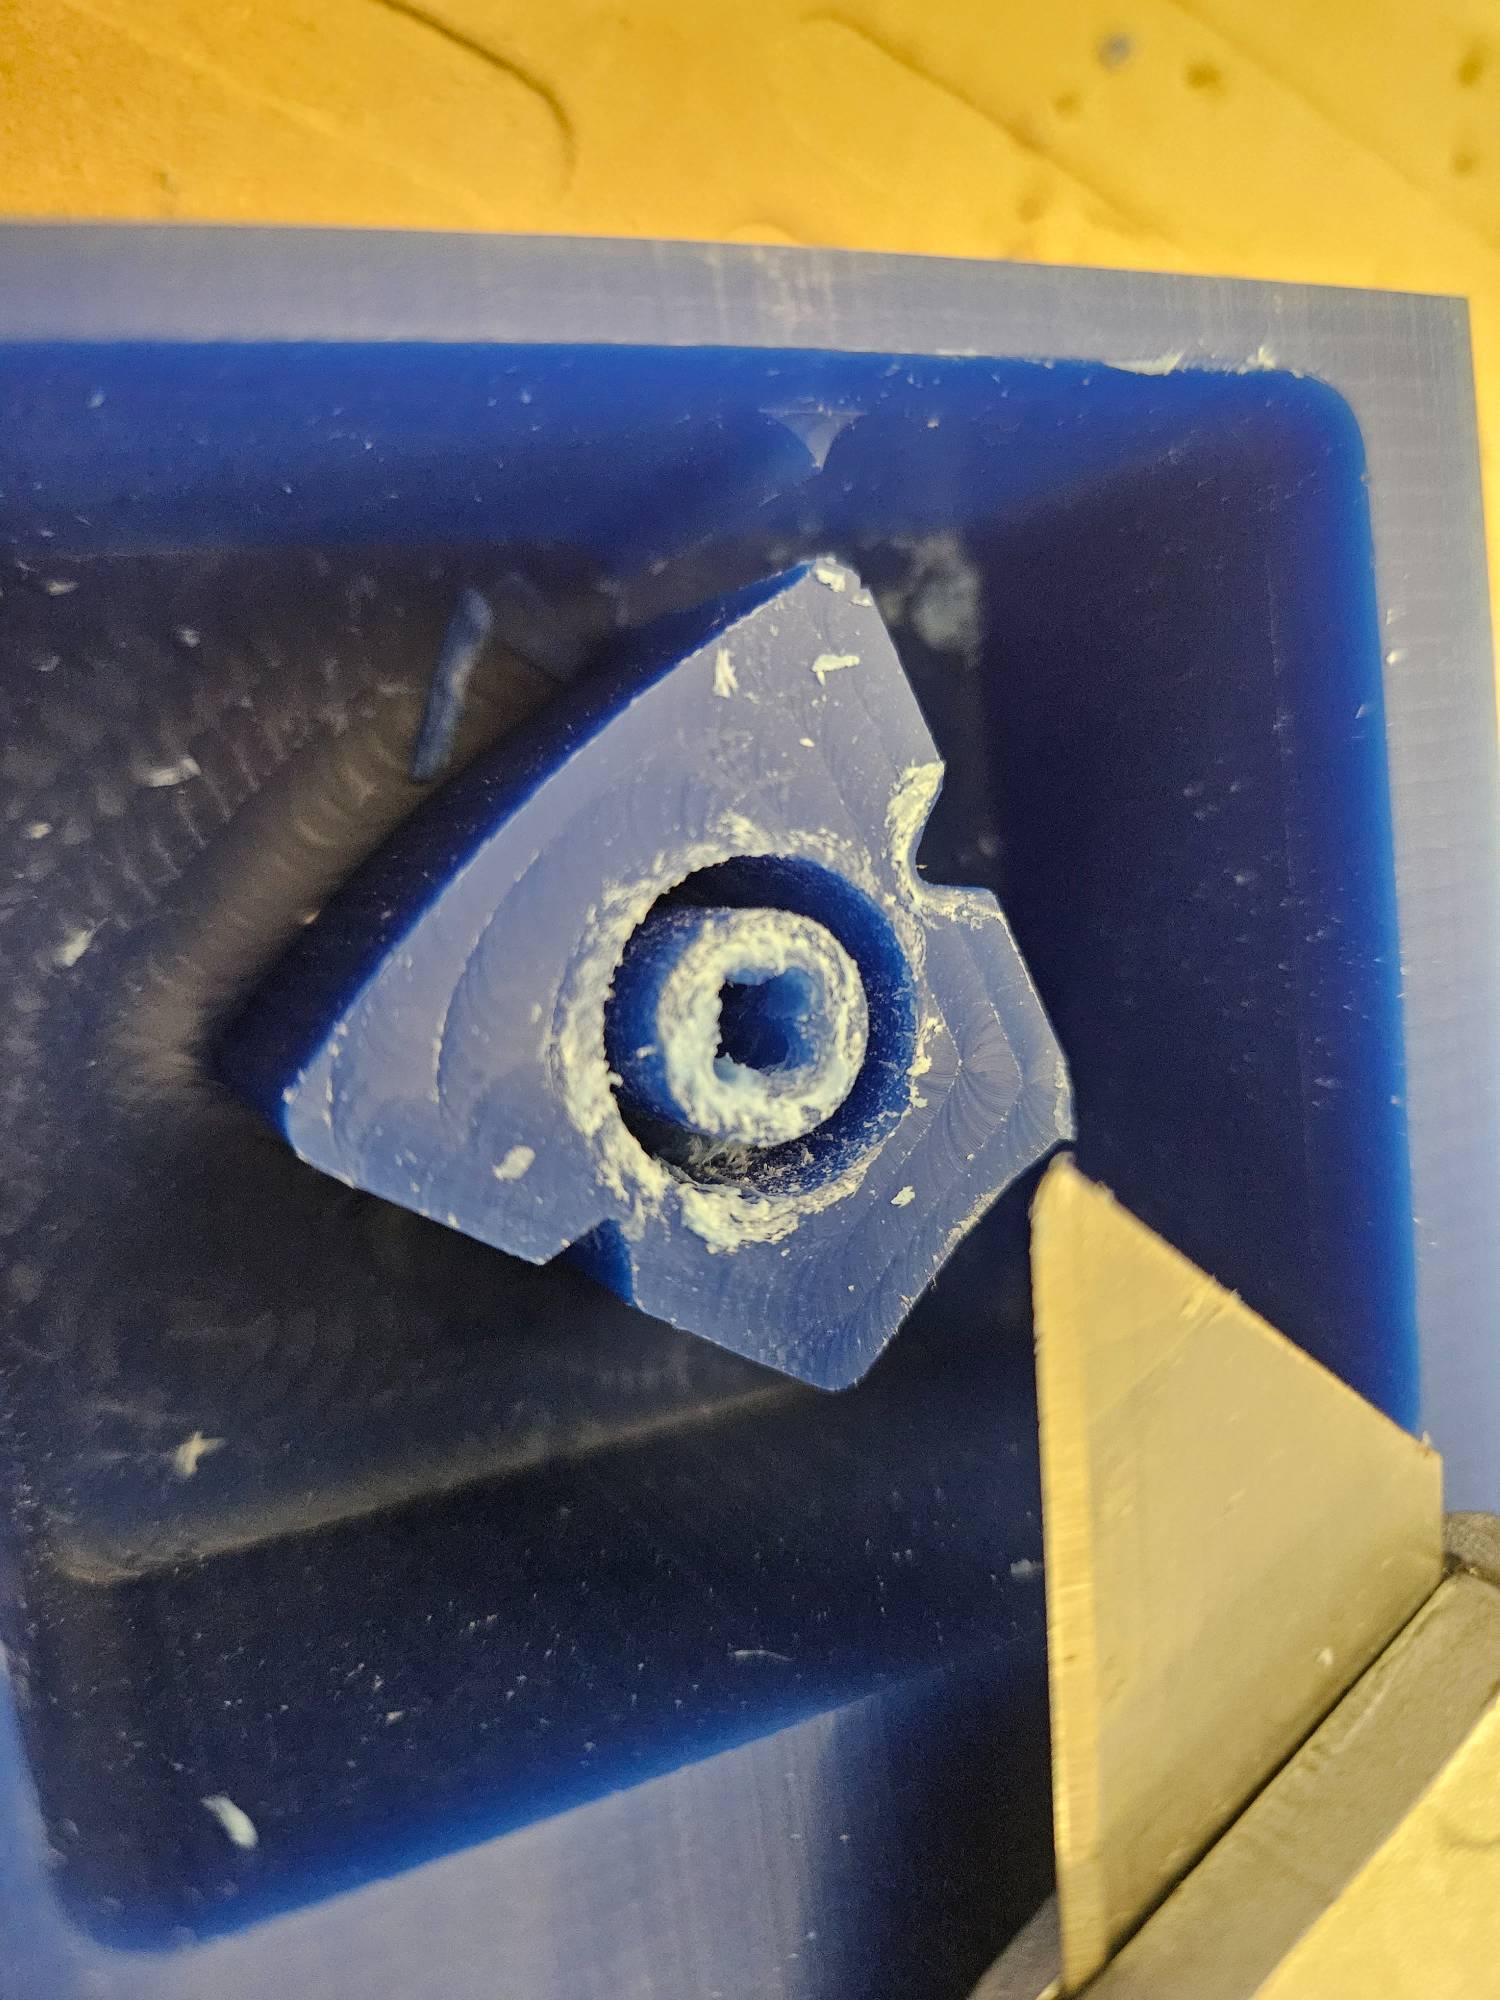
Design Notes
- It came out with some "burring" on the top. Unsure if this was due to melted wax or dull tool or both.
- We had to push the the model a bit "up" the block.
- I did NOT sand the machine marks. This came out in the final mold
Casting
After casting it - here is the mold
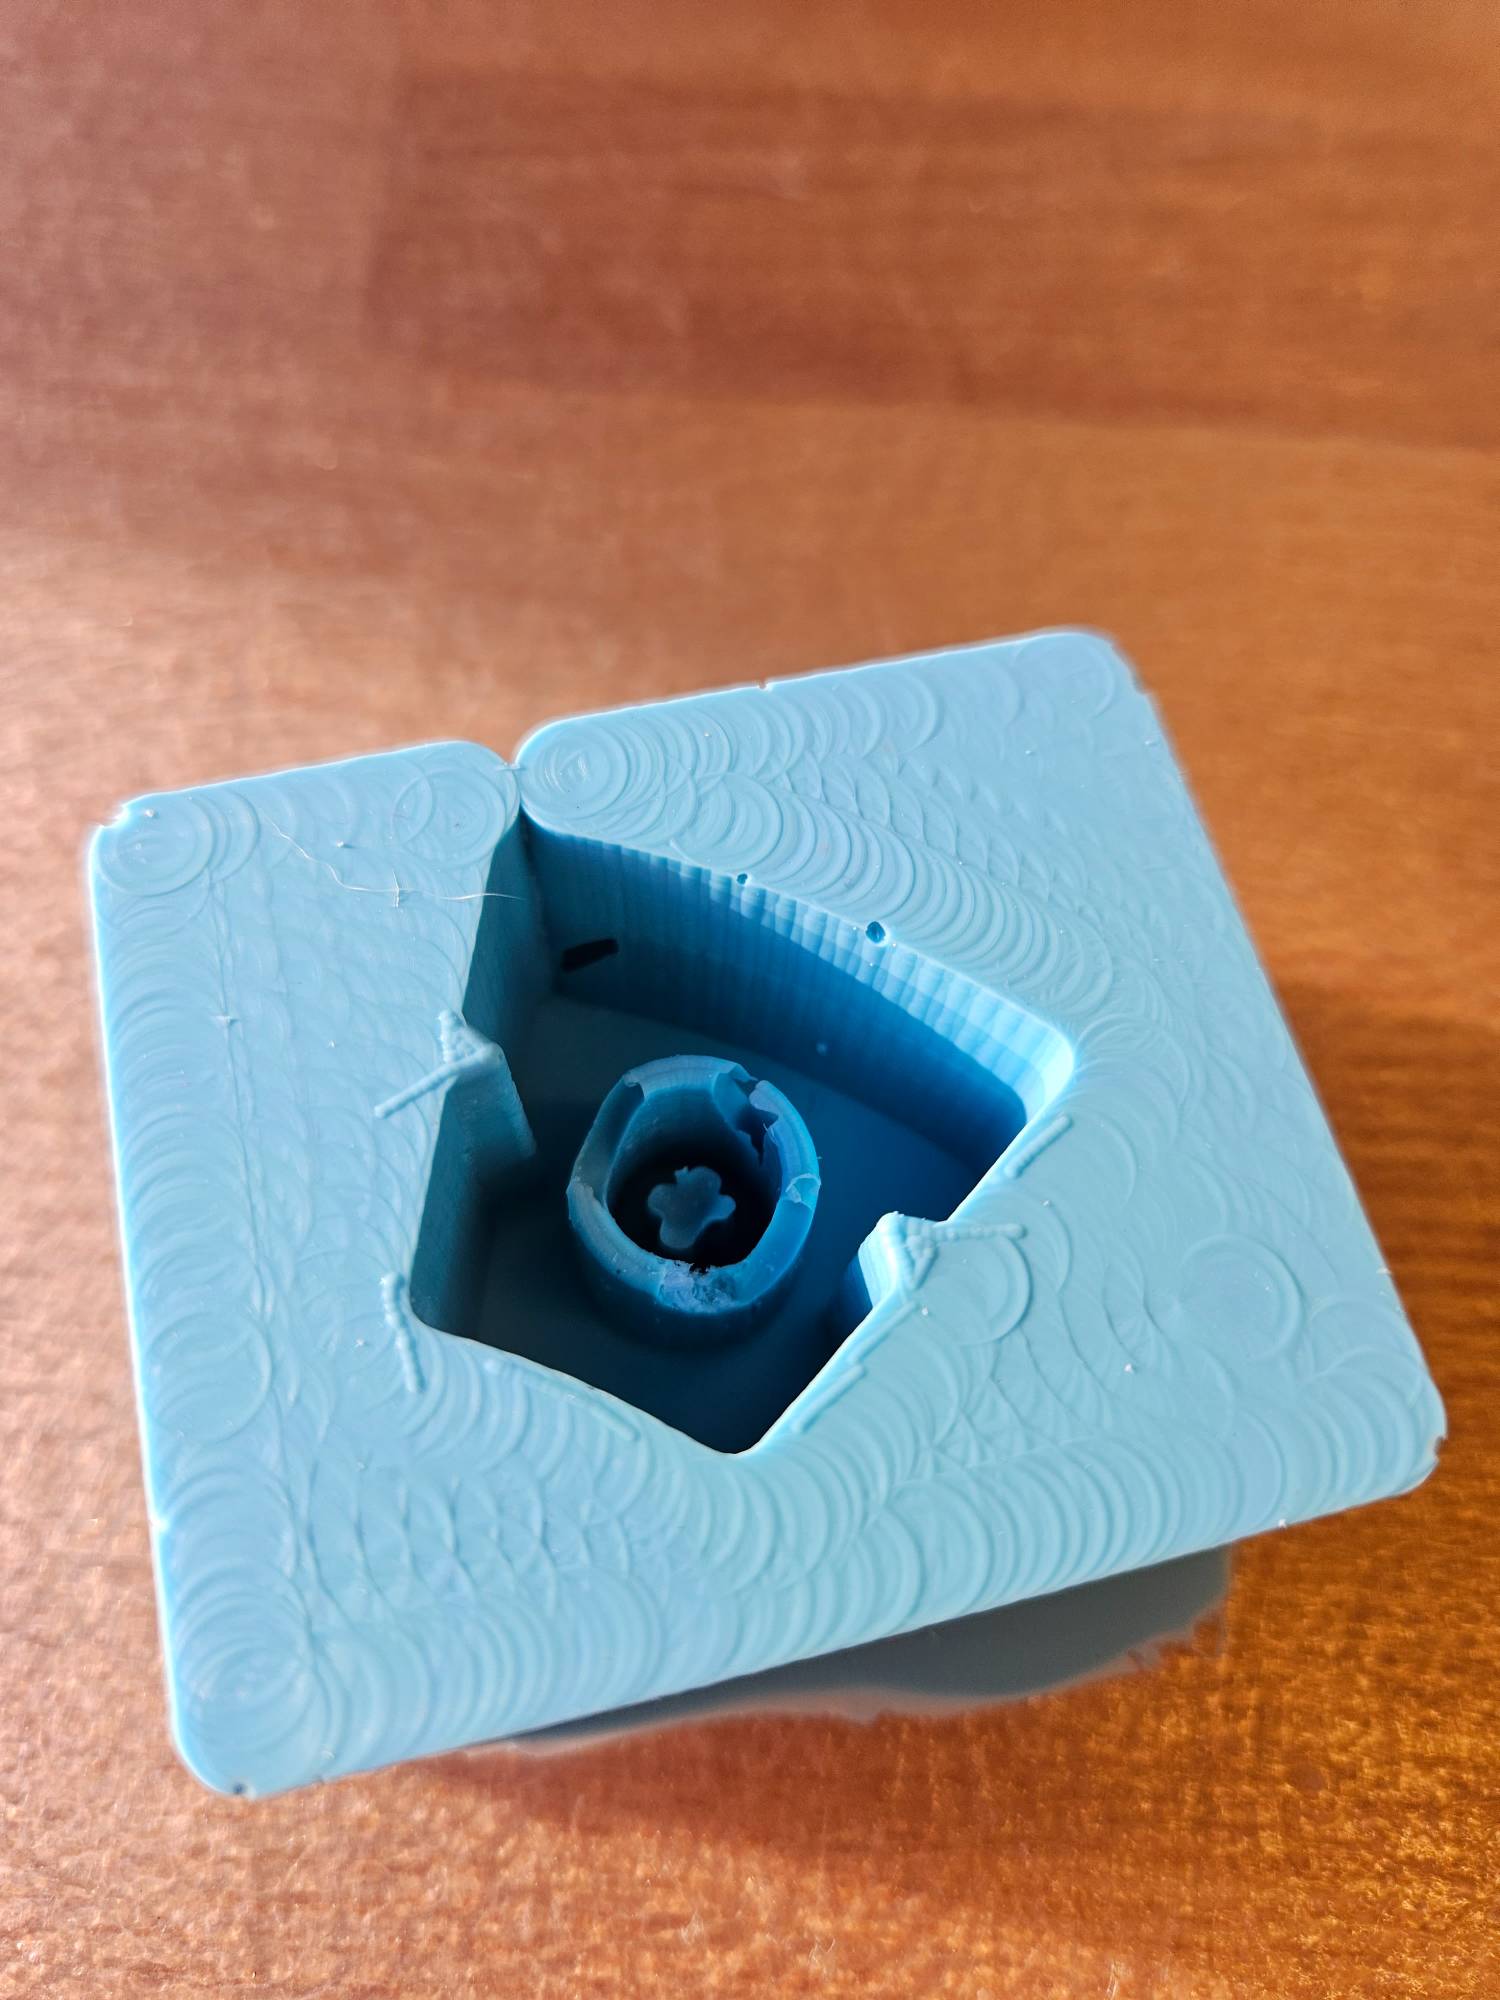
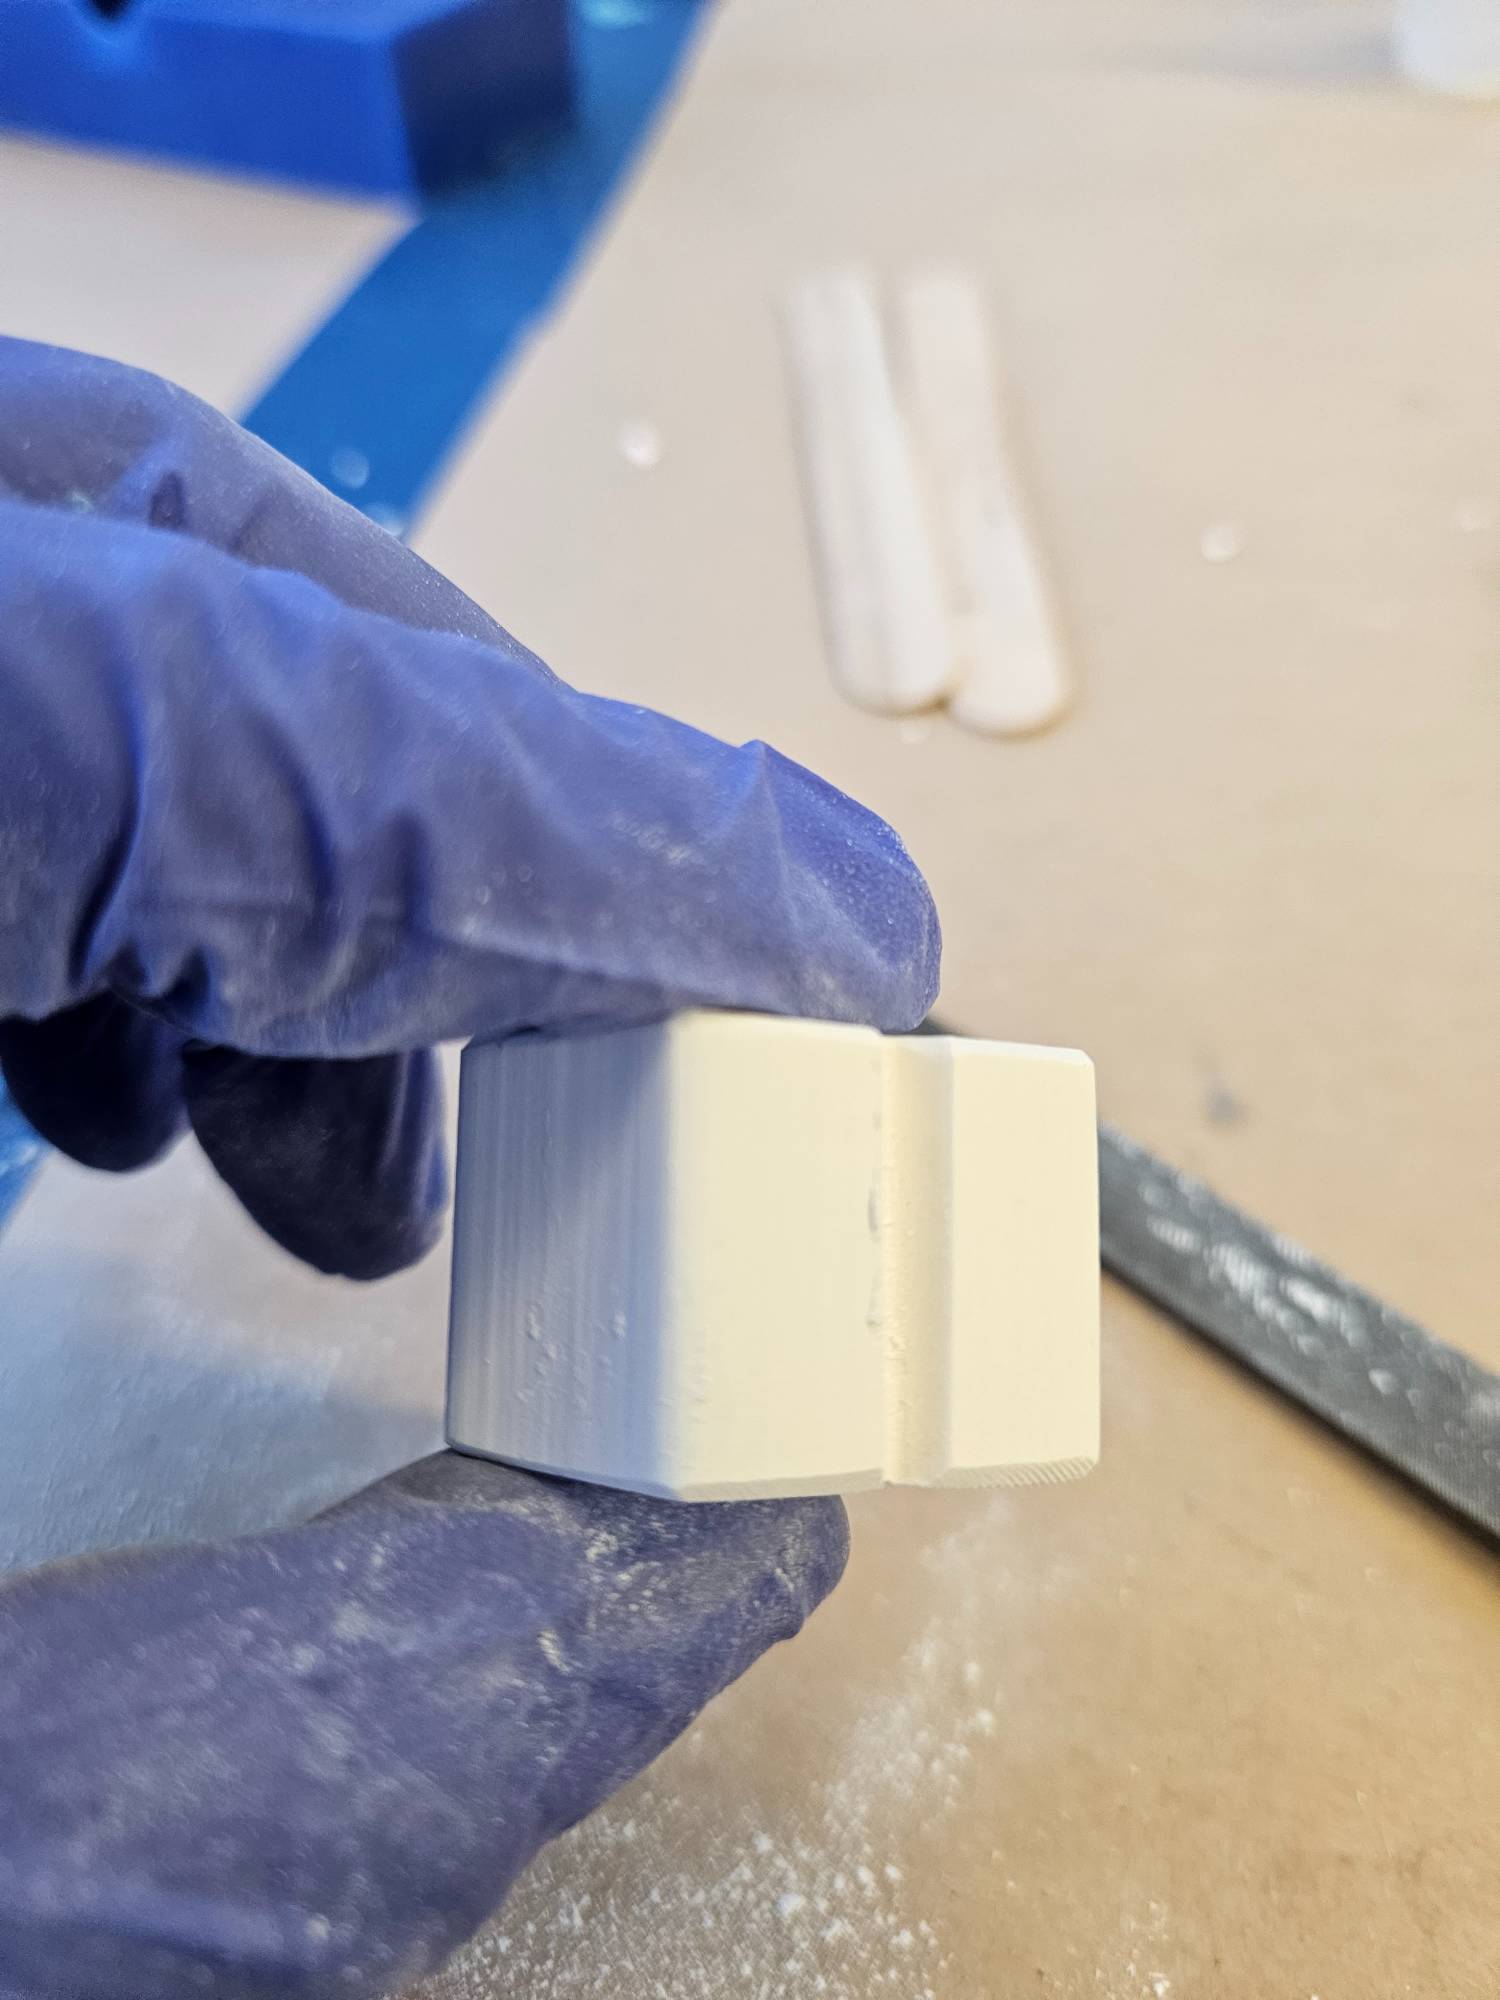
We recasted this while we waited for the hydrostone to dry. Differences: we used a newer mix and used a broken end of a pullthrough wire.
Here is the difference:
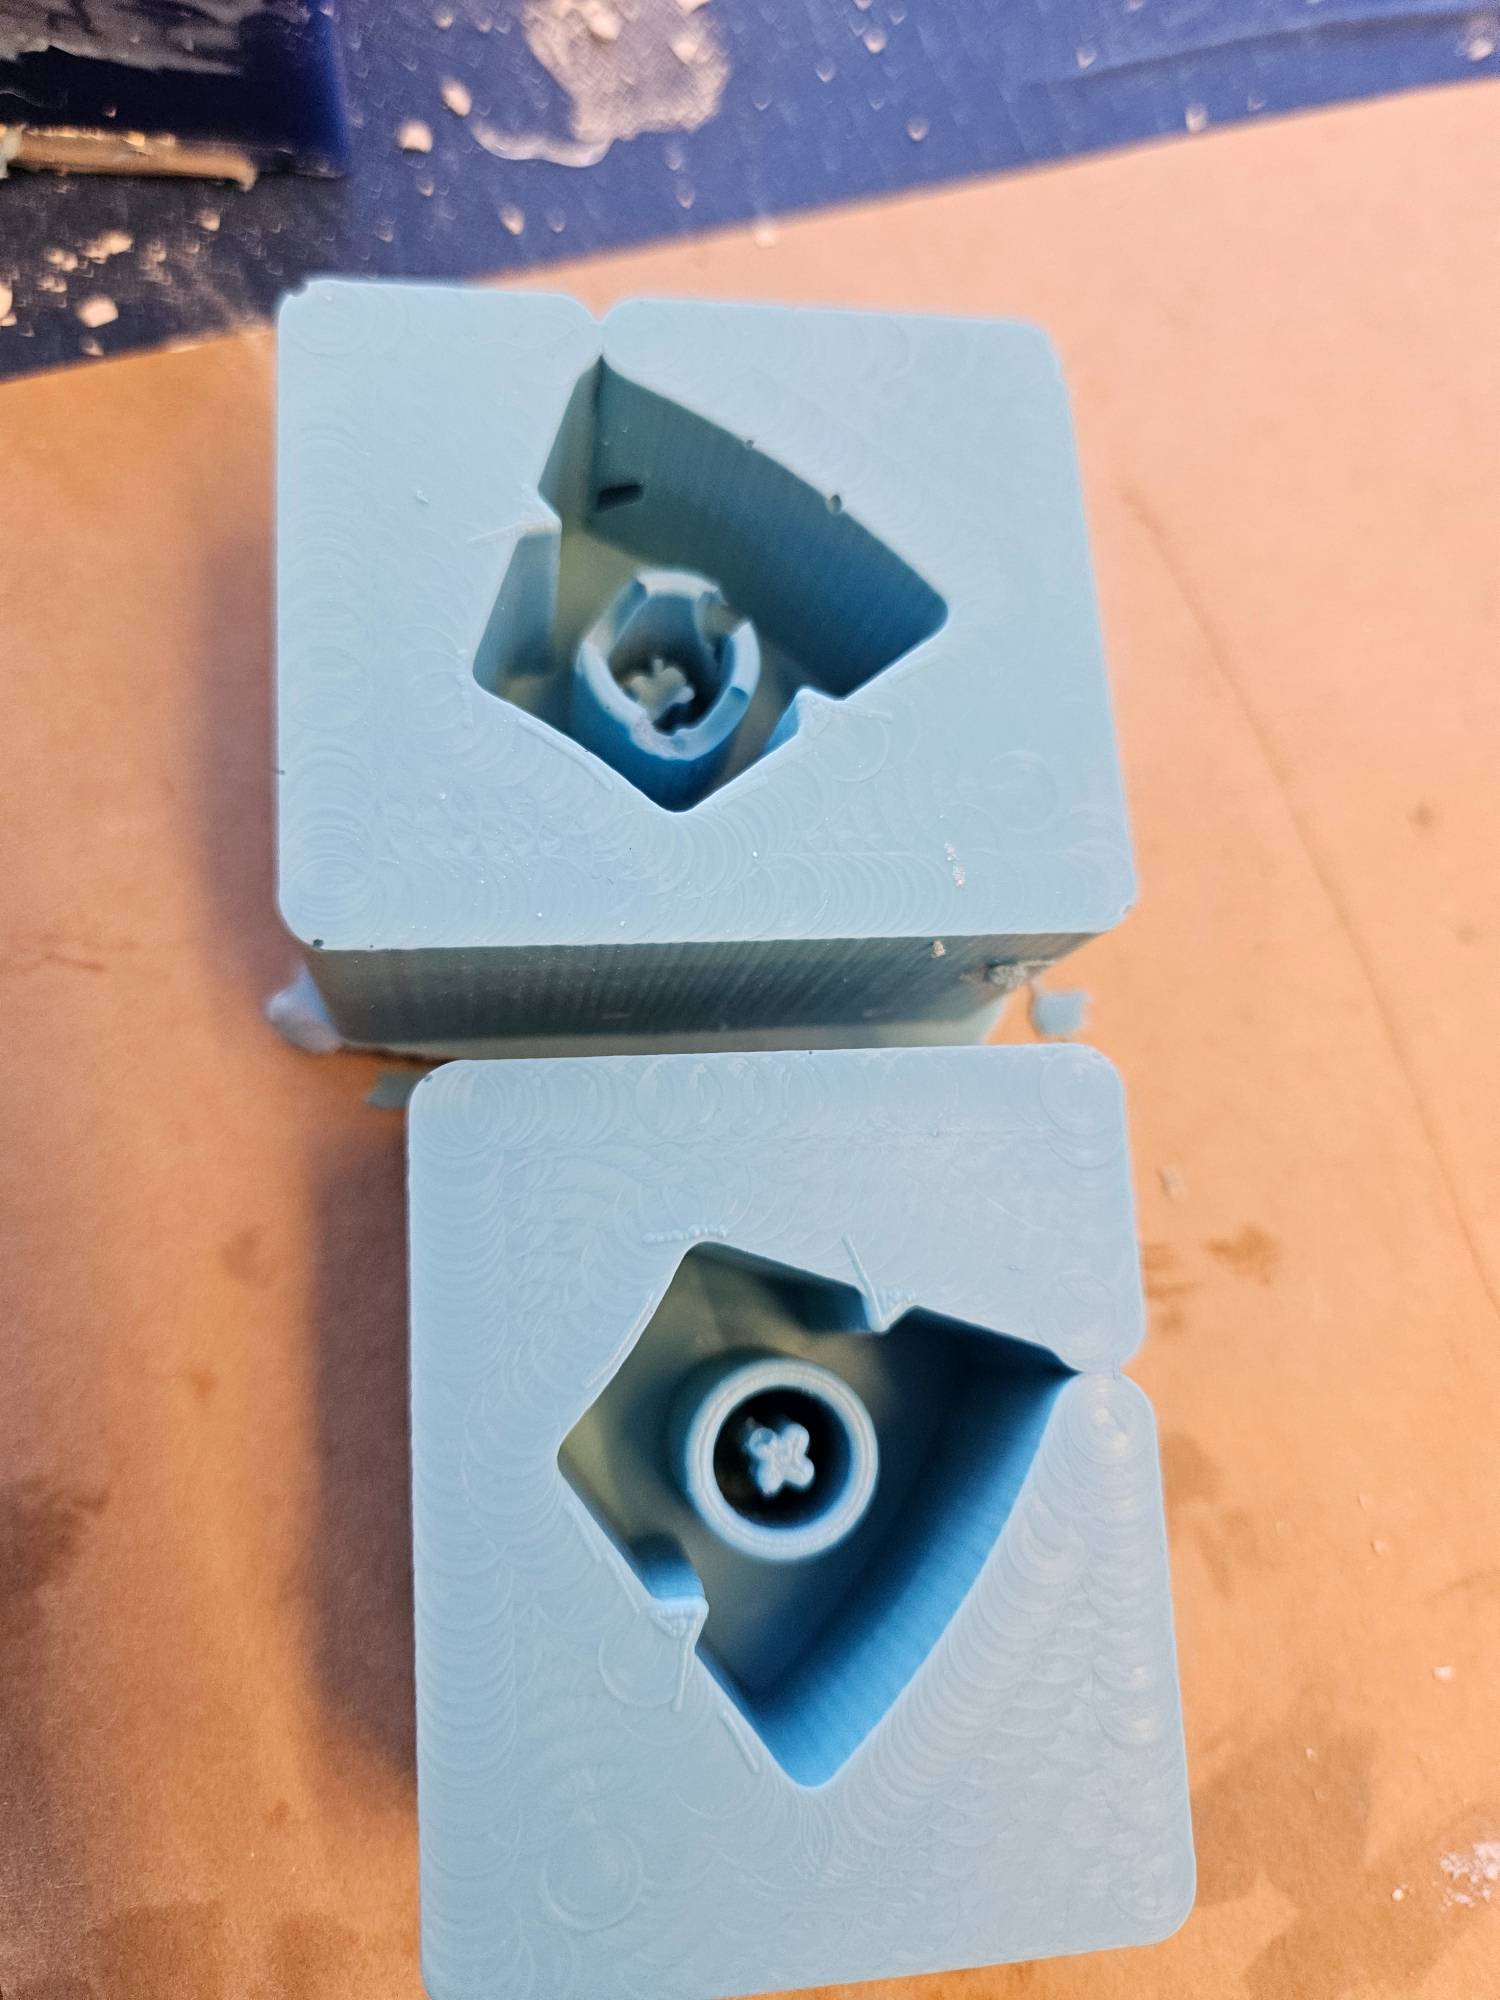
While we waited for the second mold to cure, we also casted our hydrostone. As expected, we had large gaping holes in our model. The inside of the cross was hard to capture but you can see our "cross" is not as crisp as it needed to be.!

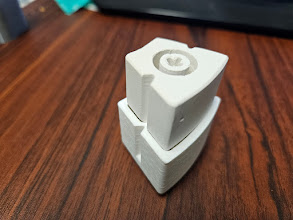
Results:
Lessons Learned
- If you dont have time to do it right the first time, you'll have to make time to do it right the second
- If at first you don't succeed, mix and pour again
- Think about machine tolerances with respect to fabrication when meshing parts made differently
- © Untitled
- Design: HTML5 UP