This was
The Third Project
Editors note: I learned I hate semicolons
Embedded Programming

I figured the third week was going to be the hardest from me. The last time I took an EE class (or anything for that matter) was 2010. Time to brush up on resistors, capacitors, and some random penguins that jumped off the iceberg that is my short term memory.
The (I thought) would be the hardest part of the course for me.
Chip
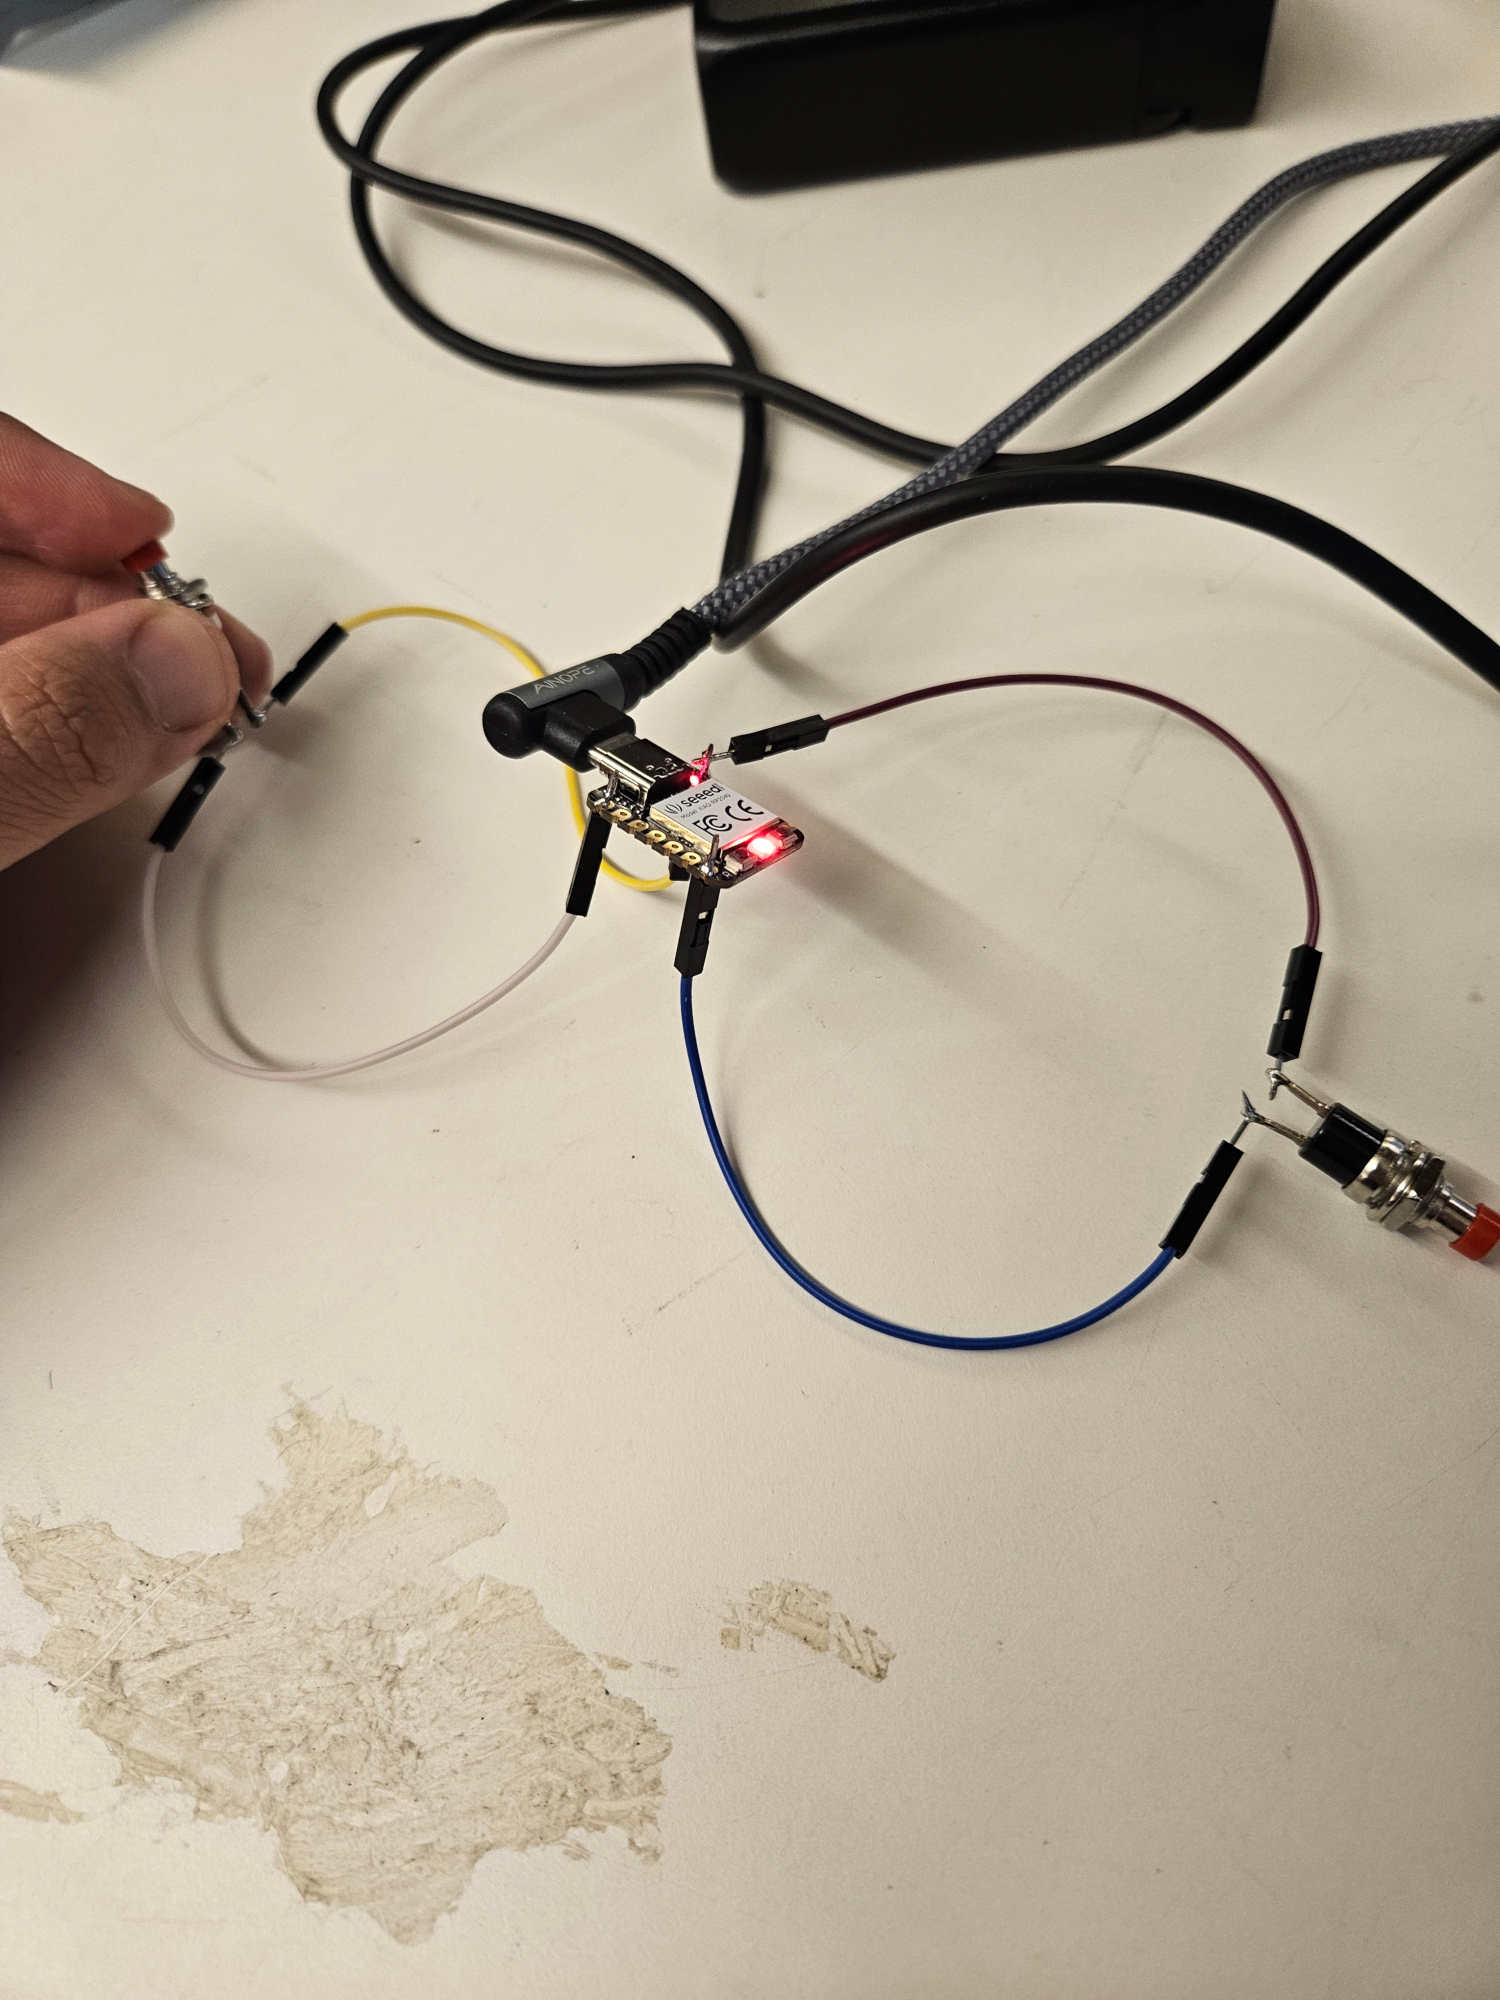
XIAO RP2040
Decided on the chip because it was what Neil recommended. Additionally, it had a ton of support on the backend with regards to TA support!C/C++/Arduino vs MicroPython
We tried (miserably) to go into Python as I have more familiarity with the language, but then resorted to Arduino IDE/Arduino lanugage becuase it was easier to opperate, had more files on it and still had all the necessary libraries for my final project.Base Code
We took the base code from Neils given code in order to test.
We were able to successfully control the lights
Now time to up the game.
Adding Buttons
We took the remaining code and soldered two buttons into the D0 and D6 socket
Issue: PORT Zero is defined as "D0" not "0". It was only after taking a look at the board diagram below that we found that out.

Here is (most of) the code!
I realized after posting and saving the document, I did not save the variables I declared at the top of the .ino. Feel free to use your imagination to see what I declared
Two-Button Code - .INO
Adafruit_NeoPixel pixel(numpixels,pixelpin,NEO_GRB+NEO_KHZ800);
void setup() {
Serial.begin();
pixel.begin();
pinMode(buttonPin, INPUT_PULLUP);
pinMode(buttonPin2, INPUT_PULLUP);
pinMode(pixelpower,OUTPUT);
digitalWrite(pixelpower,HIGH);
digitalWrite(ledPin, ledState);
}
//
// main loop
//
void loop() {
buttonState1 = digitalRead(buttonPin);
buttonState2 = digitalRead(buttonPin2);
if (buttonState1 == LOW && buttonState2 == LOW){
Serial.print("한글:");
if (mode == 0){
mode = 1;
Serial.print ("MODE CHANGED! - Mode 1 - KOREAN");
pixel.setPixelColor(0, pixel.Color(255,255,255));
pixel.show();
}
else{
mode = 0;
Serial.print("MODE CHANGED! - Mode ZERO - ENGLISH");
pixel.setPixelColor(0, pixel.Color(255,255, 255));
pixel.show();
}
}
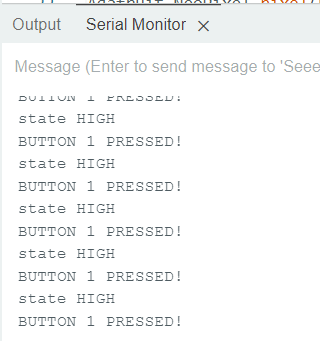
if (buttonState1 == LOW) {
pixel.setPixelColor(0, pixel.Color(255,0,0));
pixel.show();
Serial.println( " BUTTON 1 PRESSED!");
delay (10);
}
if (buttonState2 == LOW) {
pixel.setPixelColor(0, pixel.Color(0,255,0));
pixel.show();
Serial.println( " Button 2 Pressed Button 2!");
delay (10);
}
if (buttonState1 == HIGH && buttonState2 == HIGH)
{
pixel.setPixelColor(0,pixel.Color(0,0,0));
pixel.show();
Serial.println(" state HIGH");
Serial.println("한글:");
delay(10);
}
delay (50);
Serial.println( "Please add semicolons to your code Sungi");
}
We took the opportunity to test both the button presses and the Korean language output into the system.
This should be an easy translation when we decide to up our game.
Mode Change
We then tried to add a "Change Mode" feature
This would be useful in swapping Korean to English or different modes
This may get pushed into a third button if we need to!
Issues
First Issues: I always forget semi colons. Second Issue: I need to identify a time-buffer in order to stop running multiple actions within. I think I should just be able to declare a variable and declare it against a previous buffer window - alot of online documentation on this
Revision Updates:
Pushed a new Mode Update result
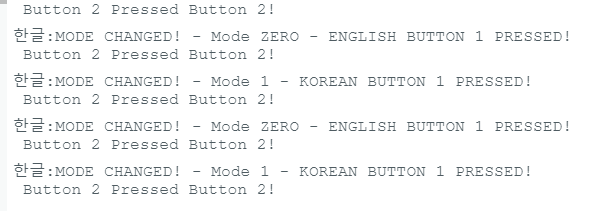
Also shows that Korean works!