Electronics Design
To get used to KiCad 7.0 I did a pretty simple Circuit. I wanted to hit a button and turn on a LED. So first thing I did was download KiCad.
Then with the help of TAs Quentin and Claire I was able to navigate how KiCad worked. Which I then downloaded all of the assets for the fablab.
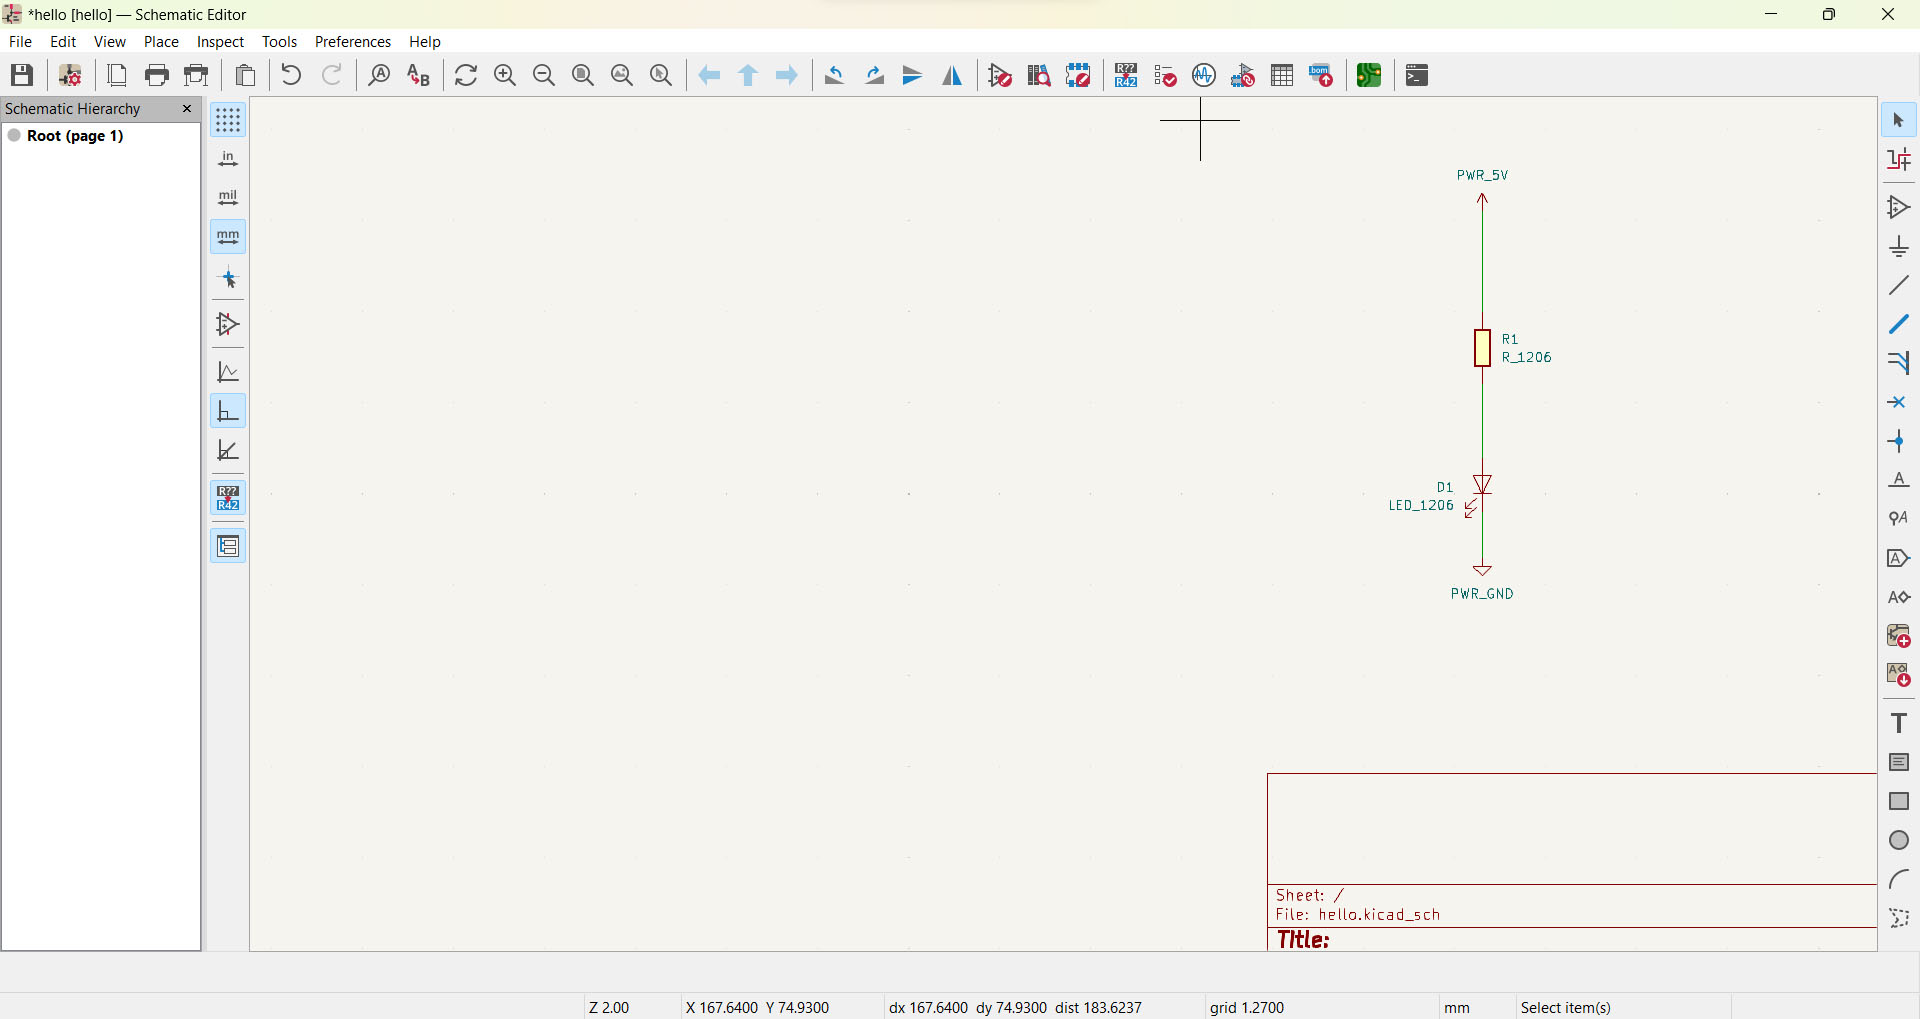
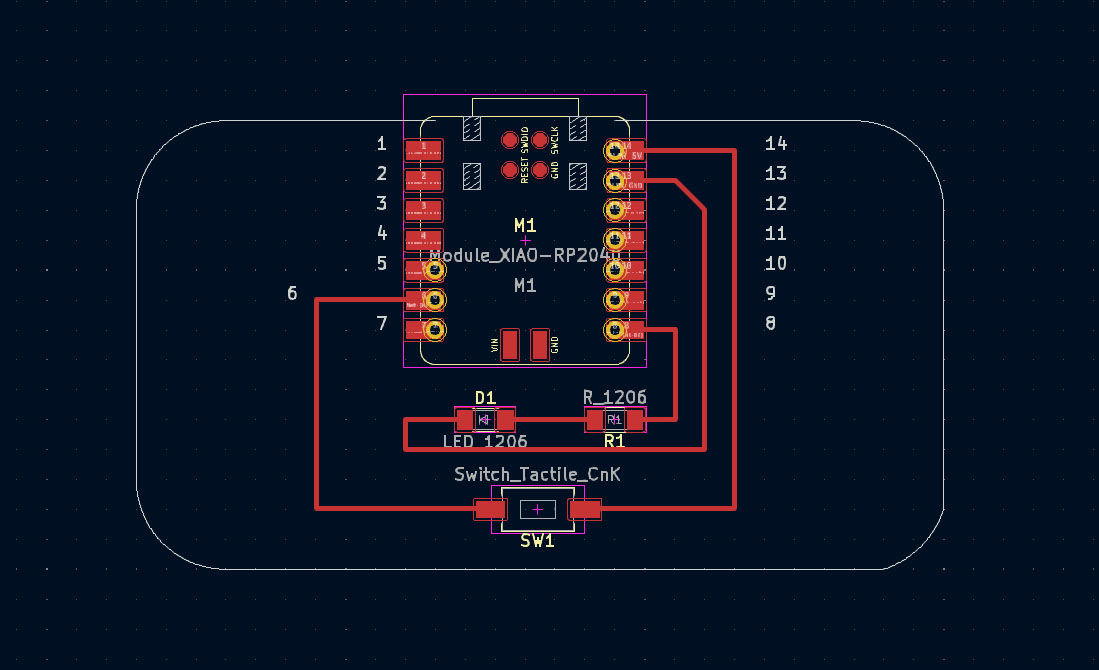
After adding a New Schematic and PCB, I went to the Schematic Editor and TA Quentin showed how to add new symbols and added in a resistor, LED, power V5, and GND symbols and connected them to get used to the interface.
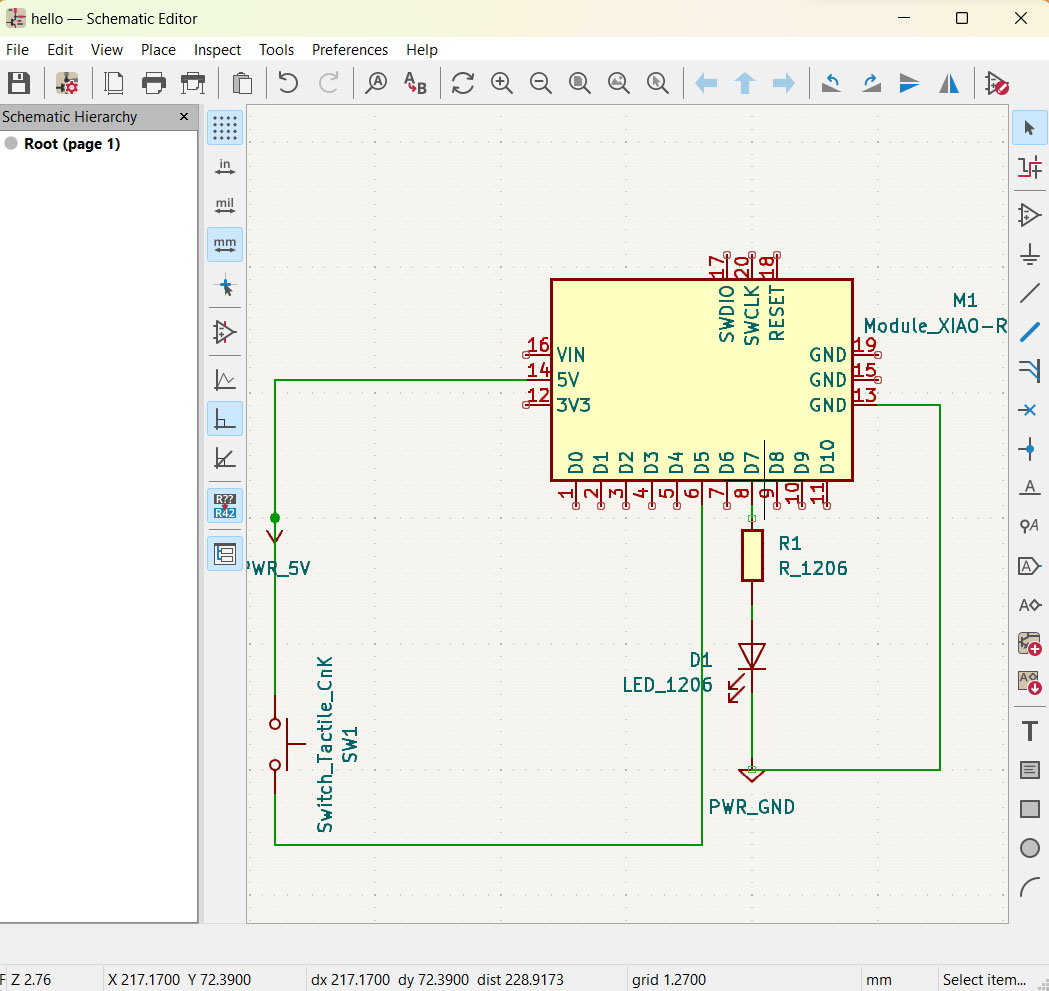
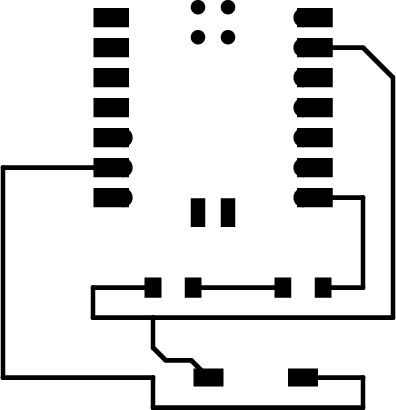
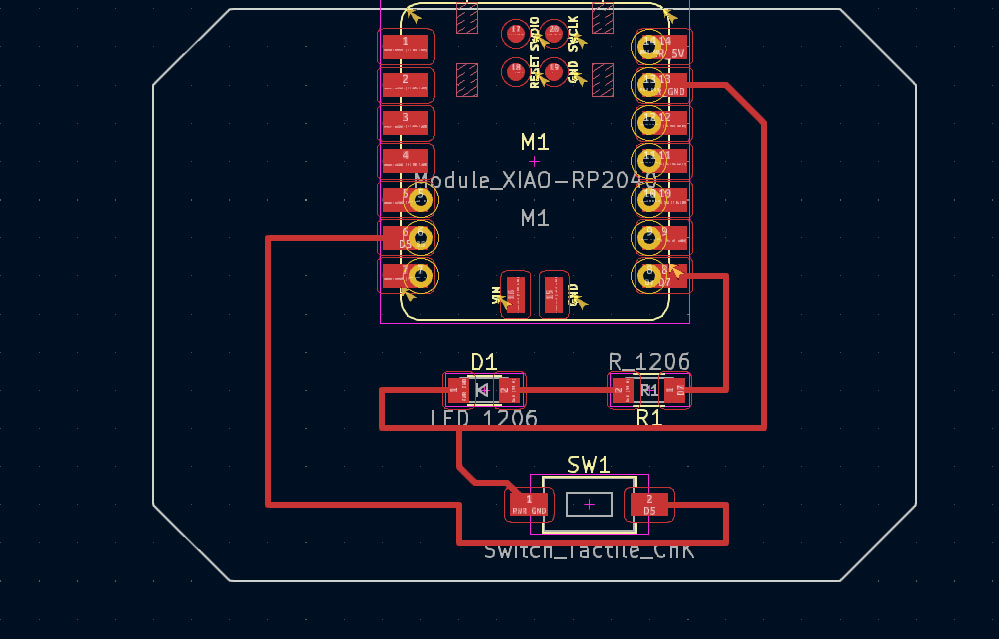
Then after getting more used to it I went to try and make a circuit with the Xiao rp2040, LED_1206, R_1206, Switch_Tactile_Cnk. I connected the the switch to the 5V and then to pin D5, then from pin D7 I added the resistor, then from there I connected the LED and went to GND 13. I don't fully understand what should be done in order to not fry the board. I also realized that the gnd symbol was not connected.
After some confusion about Grounding I went back and forth with connecting the wiring? for the switch to the wiring? for the LED. Then with asking TA Quentin for what he thinks, and then later a friend of mine who brought up that the voltage is used when the switch lets it go through which would turn on the LED. But I am not 100% sure if this is fine or not.
Turns out it was not correct
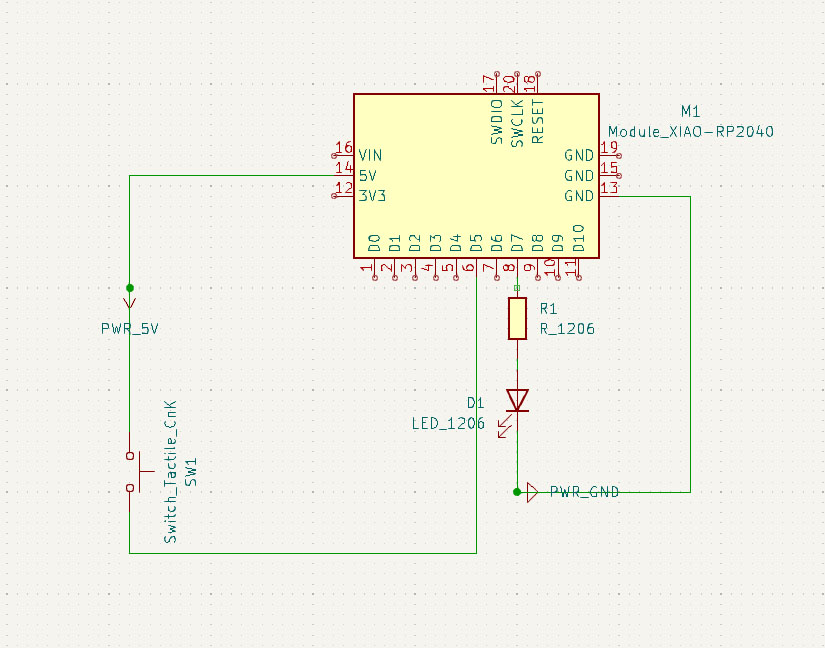
With Claire's help I put labels on it instead of connecting it straight to the Xiao, and took off the connection the Switch had to the power 5V. Connecting the switch then to the GND.