Mold Making and Casting
The Modeling Part 1
Just like the last week, milling was the bane to my existence. The modeling of the positive was the easy part, but that machine caused me so much problems. Catherine and I were debugging and testing the MonoFab Roland in the Harvard shop for too long, with a few failed attempts in order to realize everything that needs to be done or not done. But also even though I have made a good amount of molds I never designed them digitally so this was an interesting experience.
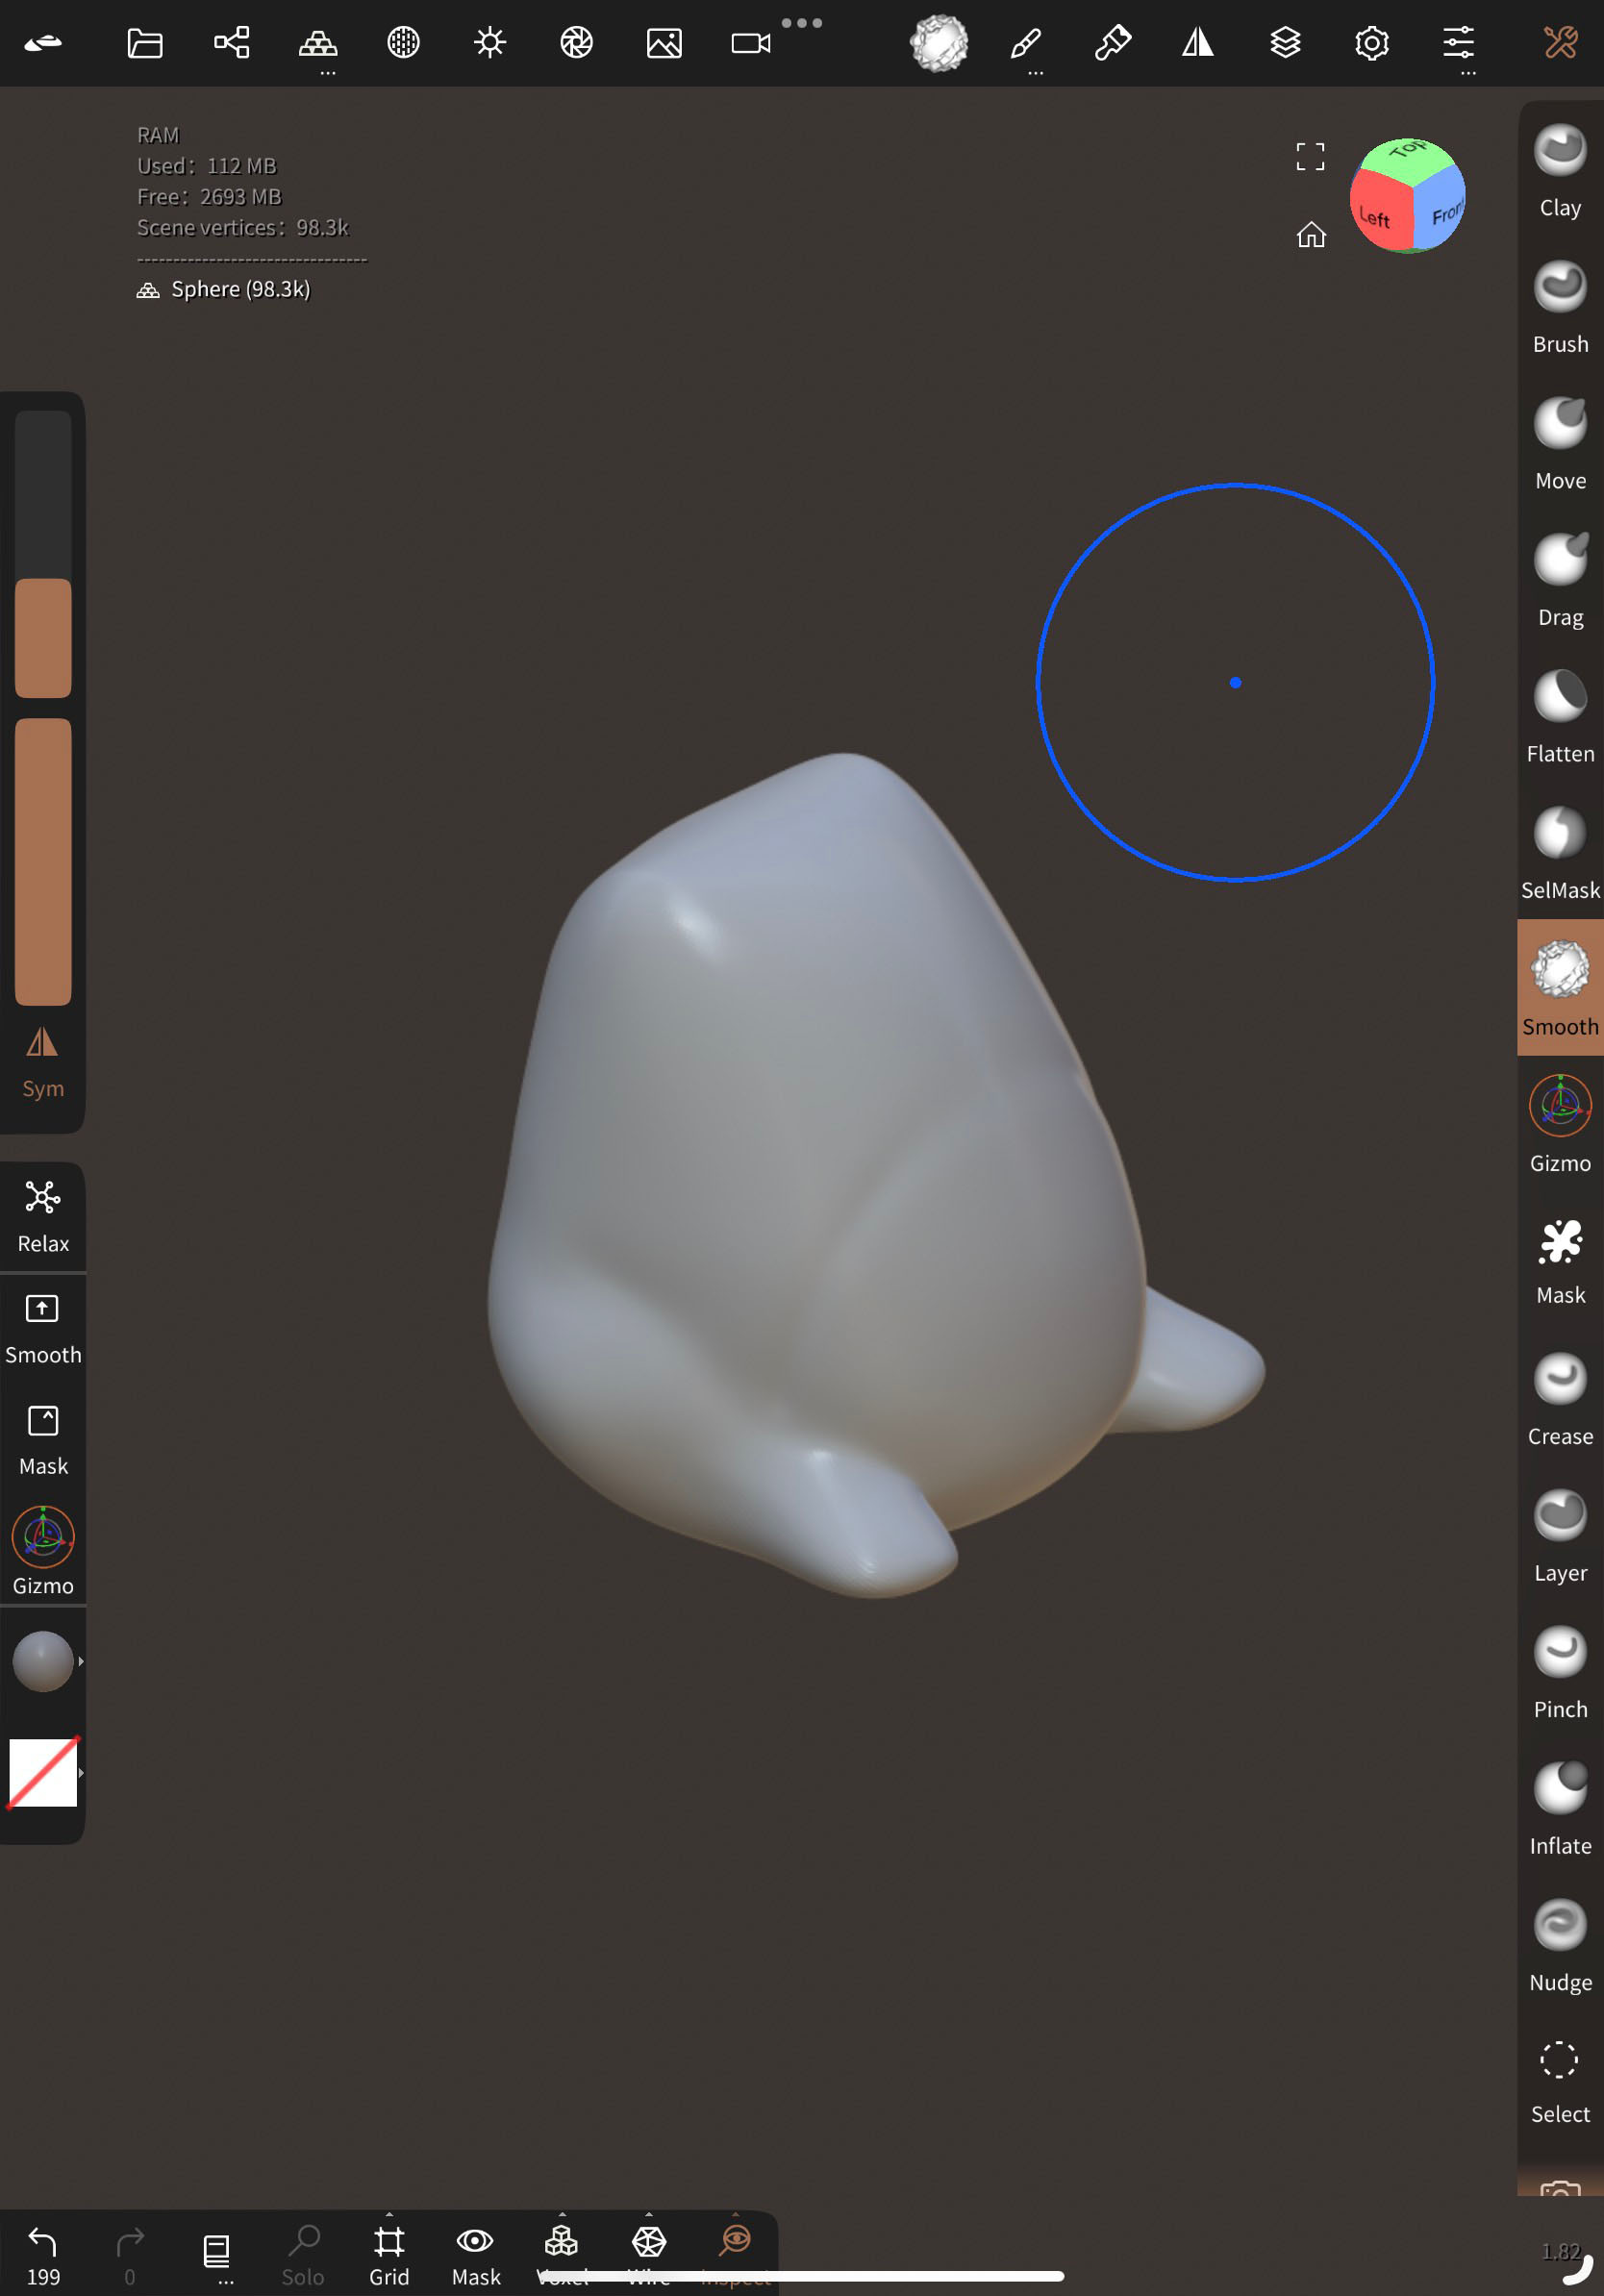

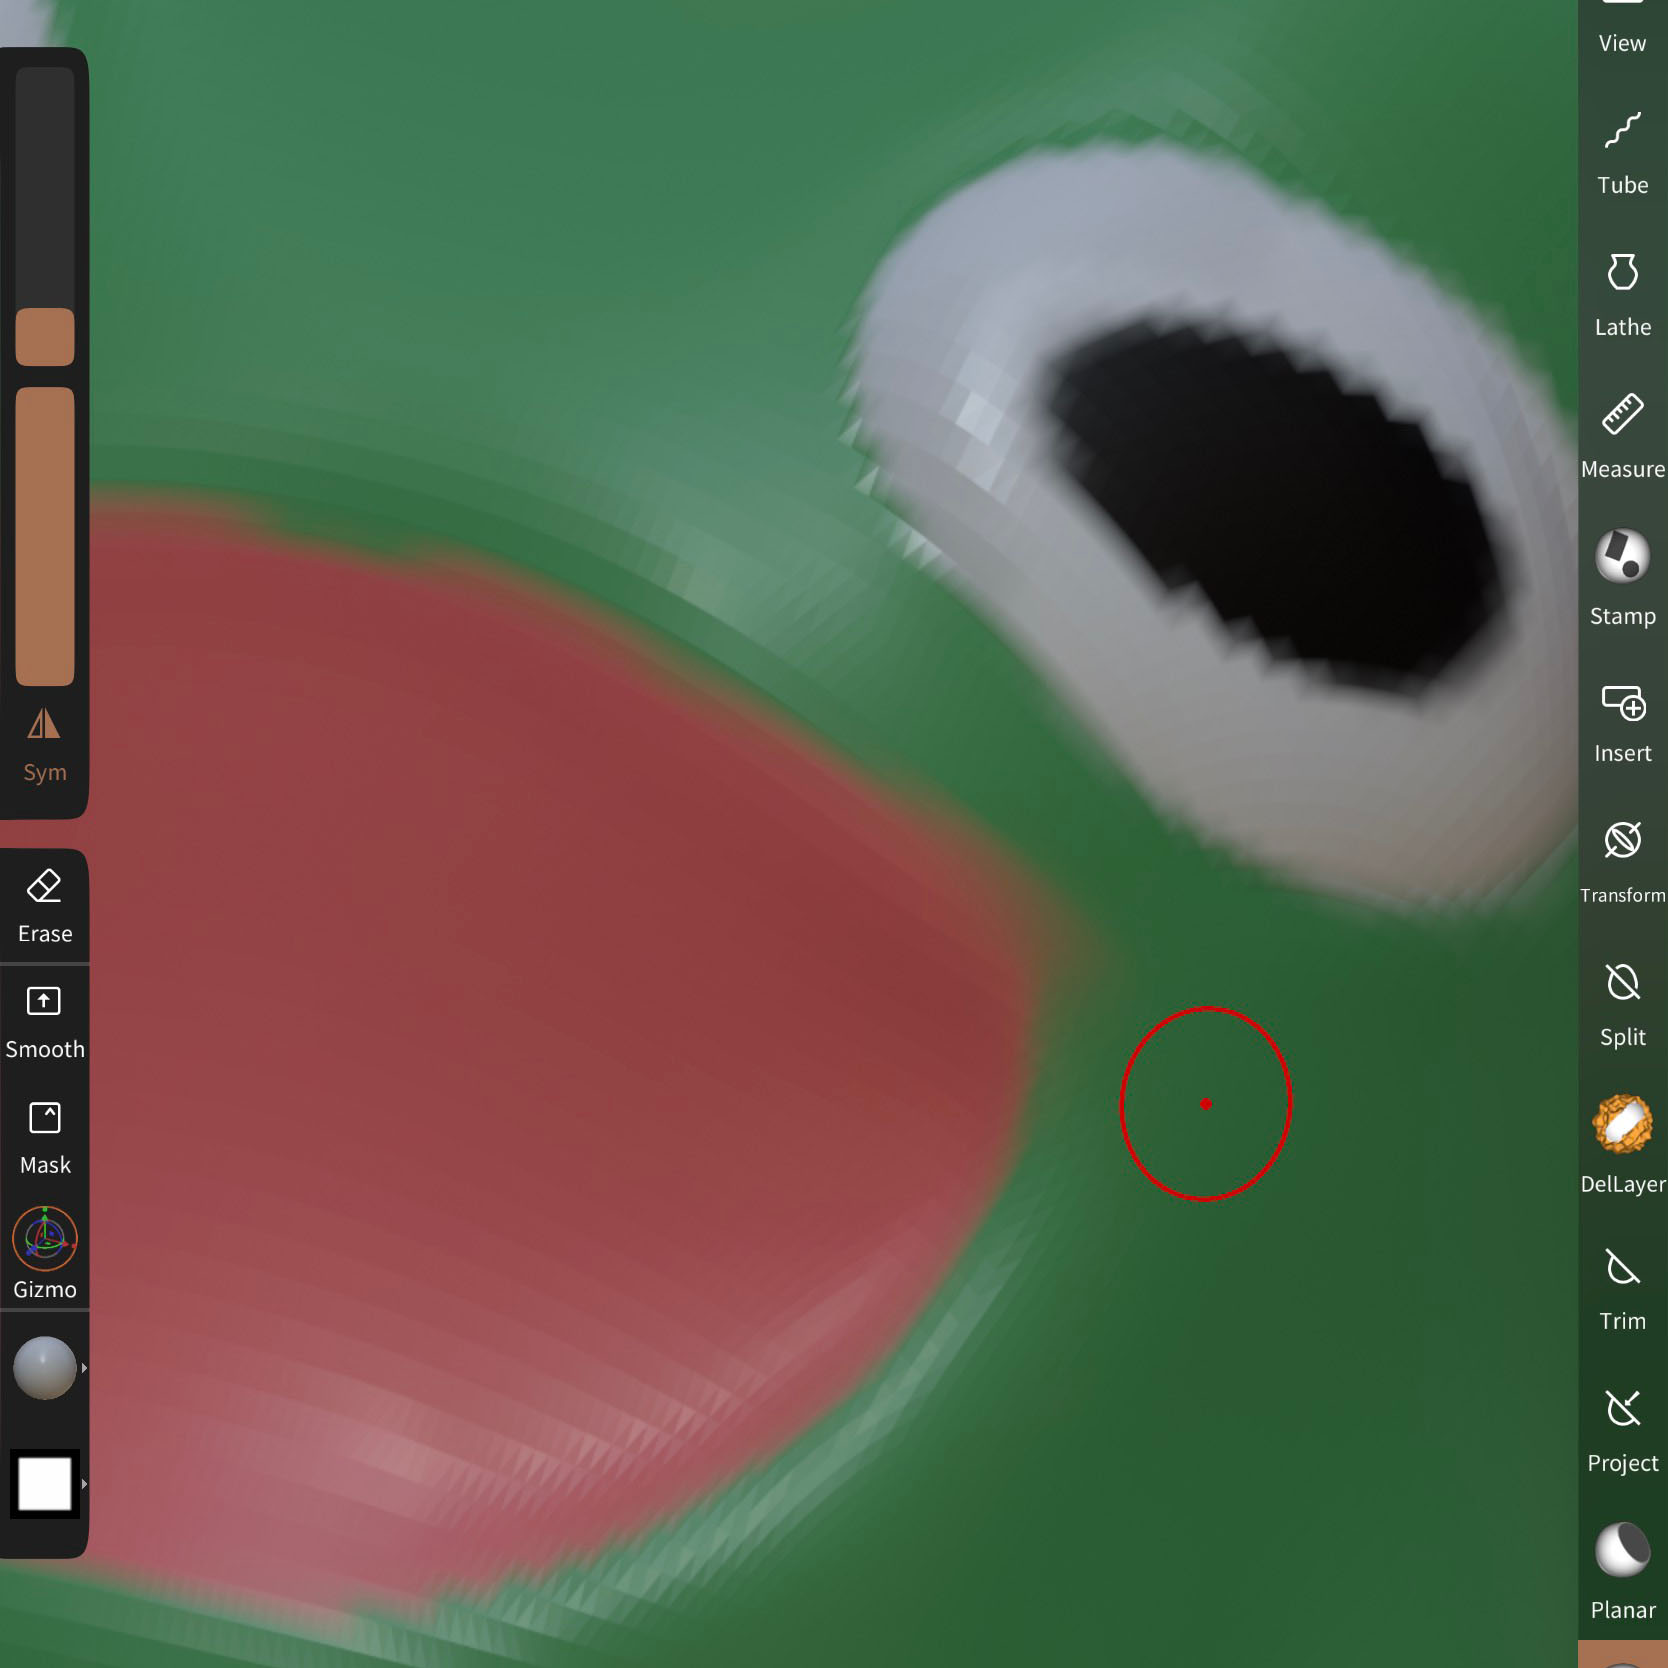
First thing I did use Nomad to model a small frog with little to no places for it to catch or have undercuts and create it with the idea that it will be a 4 part mold. So after I finished that, I exported it as an .stl and I added it to Rhino 7 in order to make the positive mold.
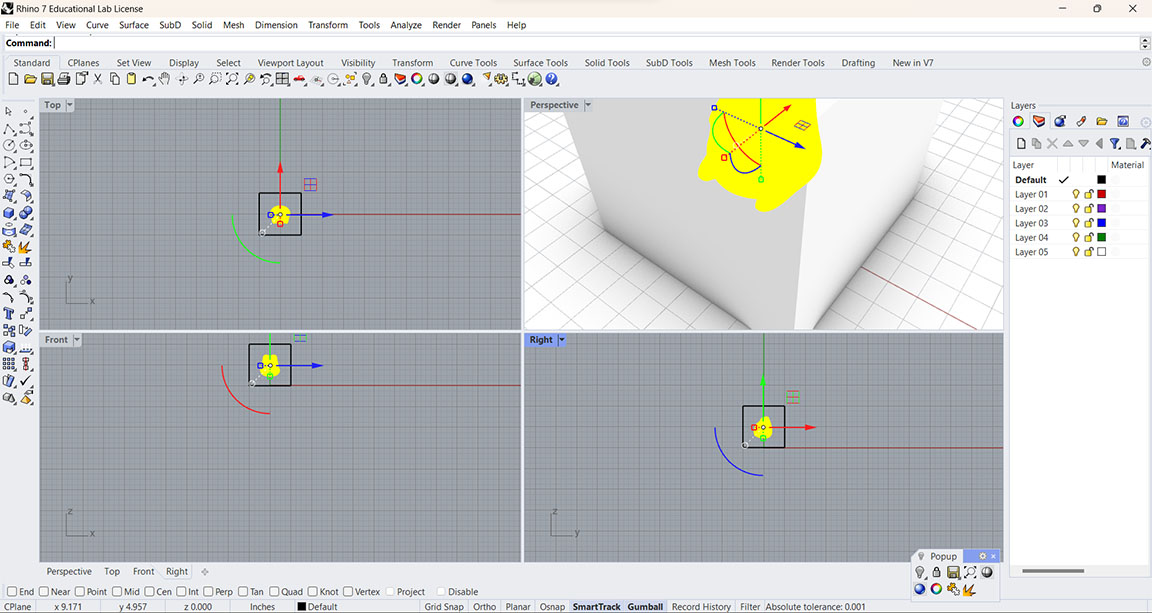

First thing I do is make a box around the frog mesh(which comes in as a block instance which I just needed to FillMeshHoles in order to have rhino recognize it as a mesh). Then the next thing I did was raise the frog up and add 2 planes in order to see the best way to make intersections in it. Using PlanarSrf on each plane to make sure there is a surface to reference where the cuts would be.

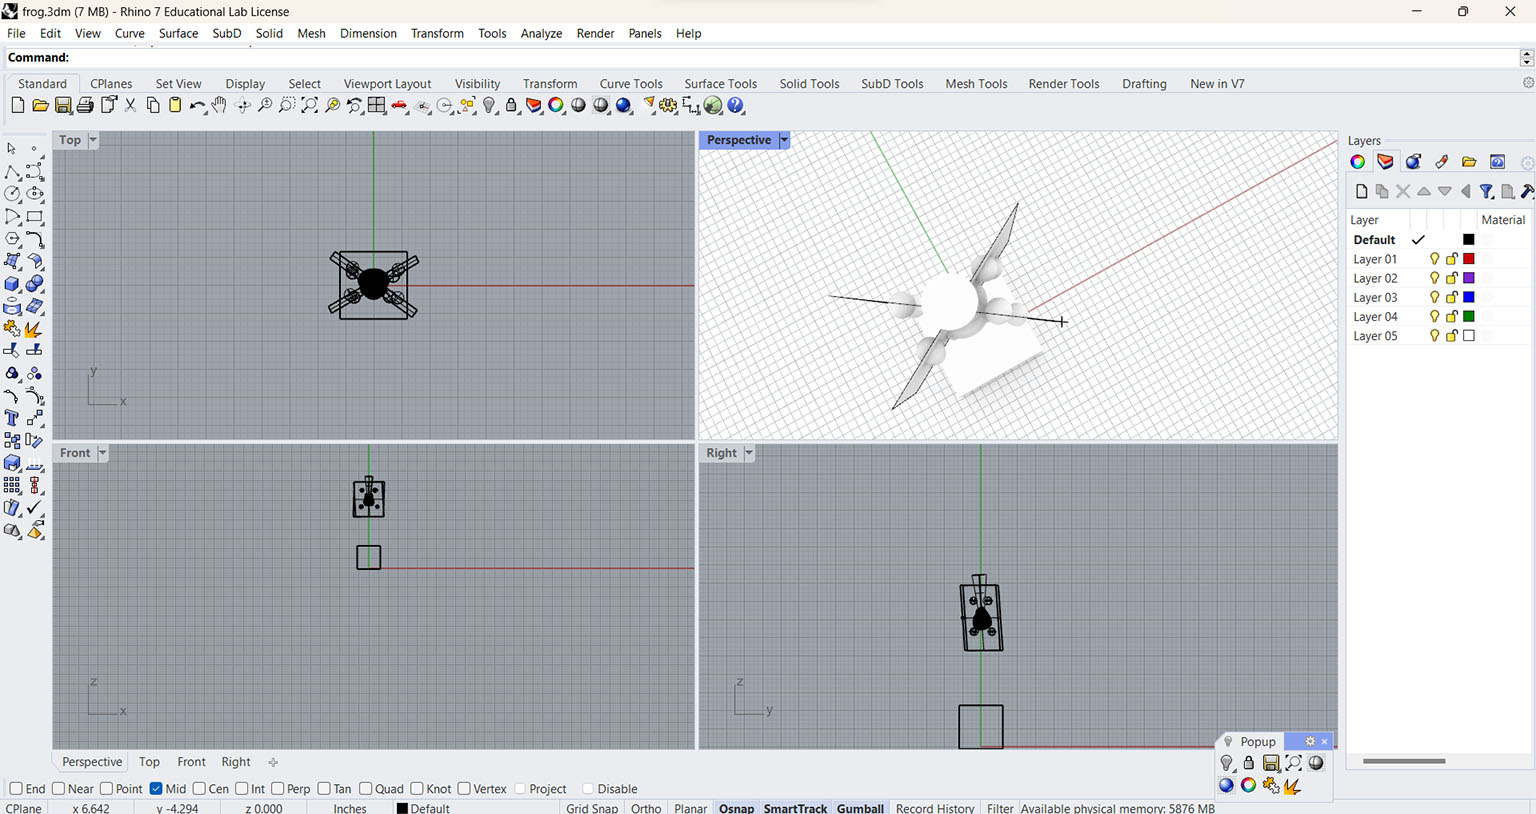
Orienting the planes to make sure there would be wider pieces on the front and back and narrow pieces on the sides, to make sure there are no undercuts.

After the parting of the mold has been decided the next step is to make the Keys aka registration points, so I made a small sphere and made it so that the sphere was a little less exposed on the side that was going to have when milled so it would have less undercutting. But if I were to put it on the smaller slices then it would have gotten in the way of the milling. Then adding a truncated cylinder at the top and have it centered inbetween all 4 sections to act as the sprue.

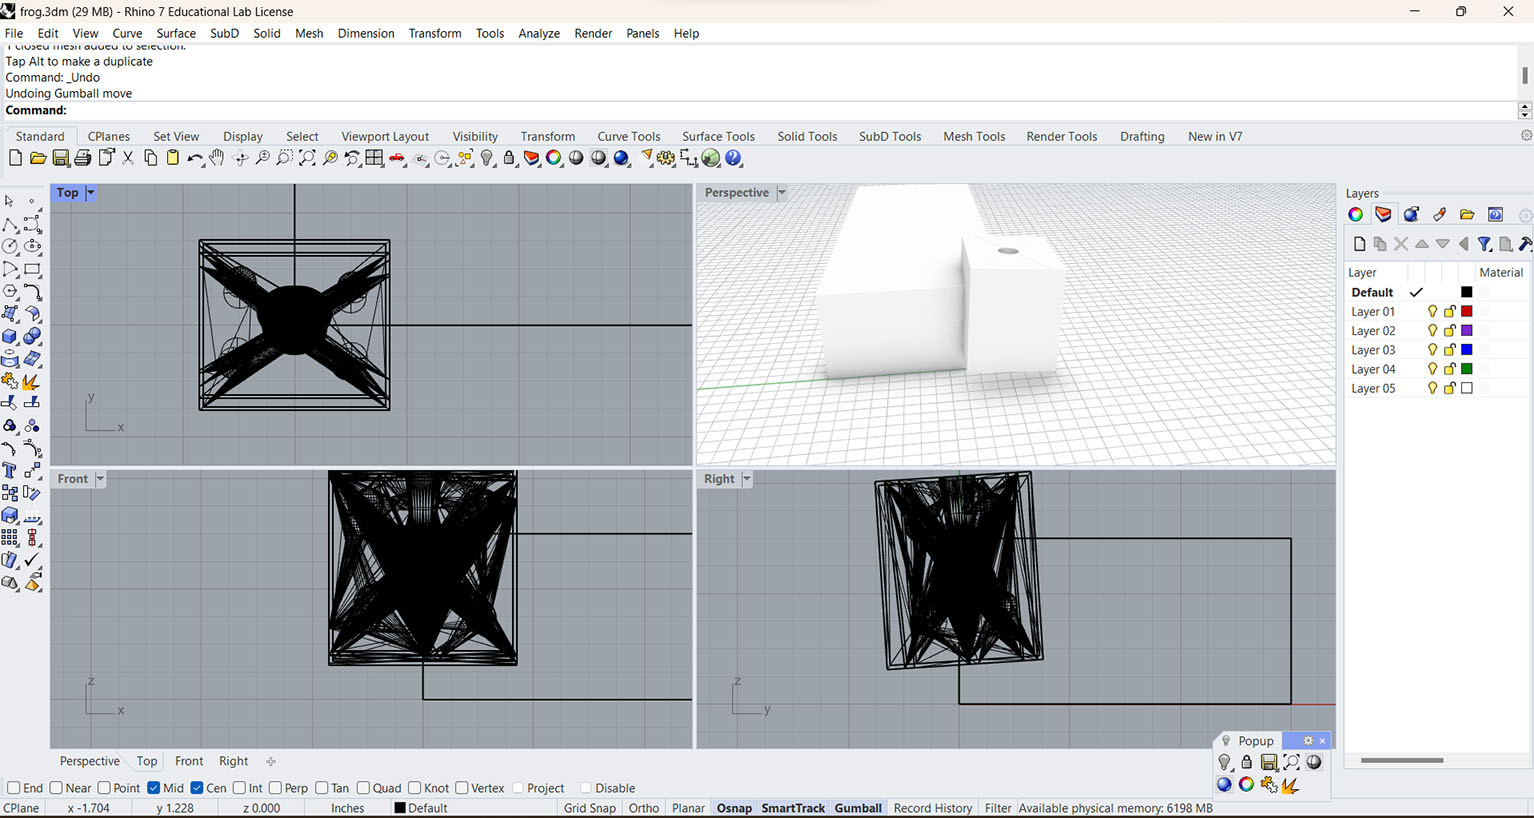
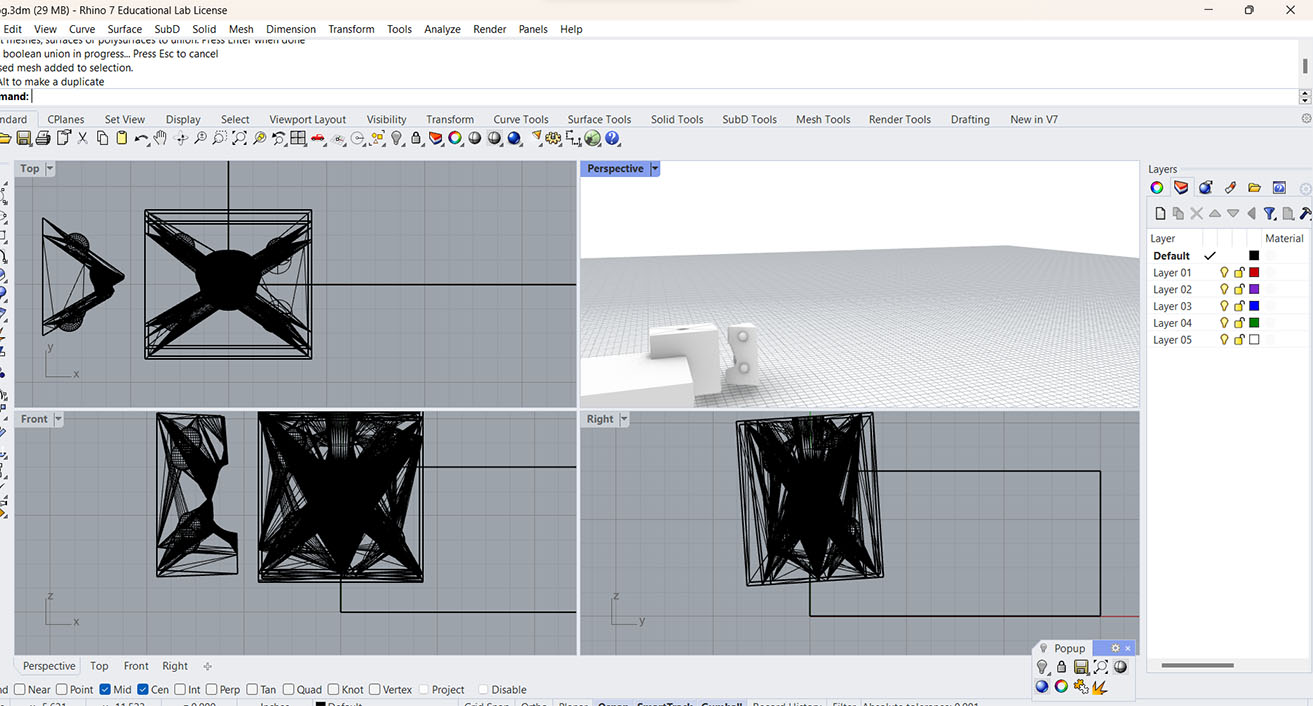


Once I was satisfied with the positioning the next step is to use MeshBoolean Split on the cube with the planes, frog, and sprue. Then MeshBooleanSplit ing the registation points from the larger sections and MeshBooleanUnion the spheres to the smaller sections. This is in order to get the negative part of the mold so that I can subtract it from the 8x3x1.5in block.(Which I change to 7x3x1.5in since 8in is wrong) But in the end, due to me making this model before finding out there needs to be a 10 degree angle on straight up sides. When I tried to fix the problem for some reason my mesh had become an open mesh and I wasn't going to be able to fix it in time so I scrapped it for the time being and did another smaller mold.
The Milling Part 1
The pain that was milling was a pain to deal with, mainly because where I live it's a bit of a journey to get to the Harvard Shop. But thankfully after the 3rd day of coming there with one day being for 6 hours, another for 3 hours, and one for 12-13 hours. I was able to get the mold done.

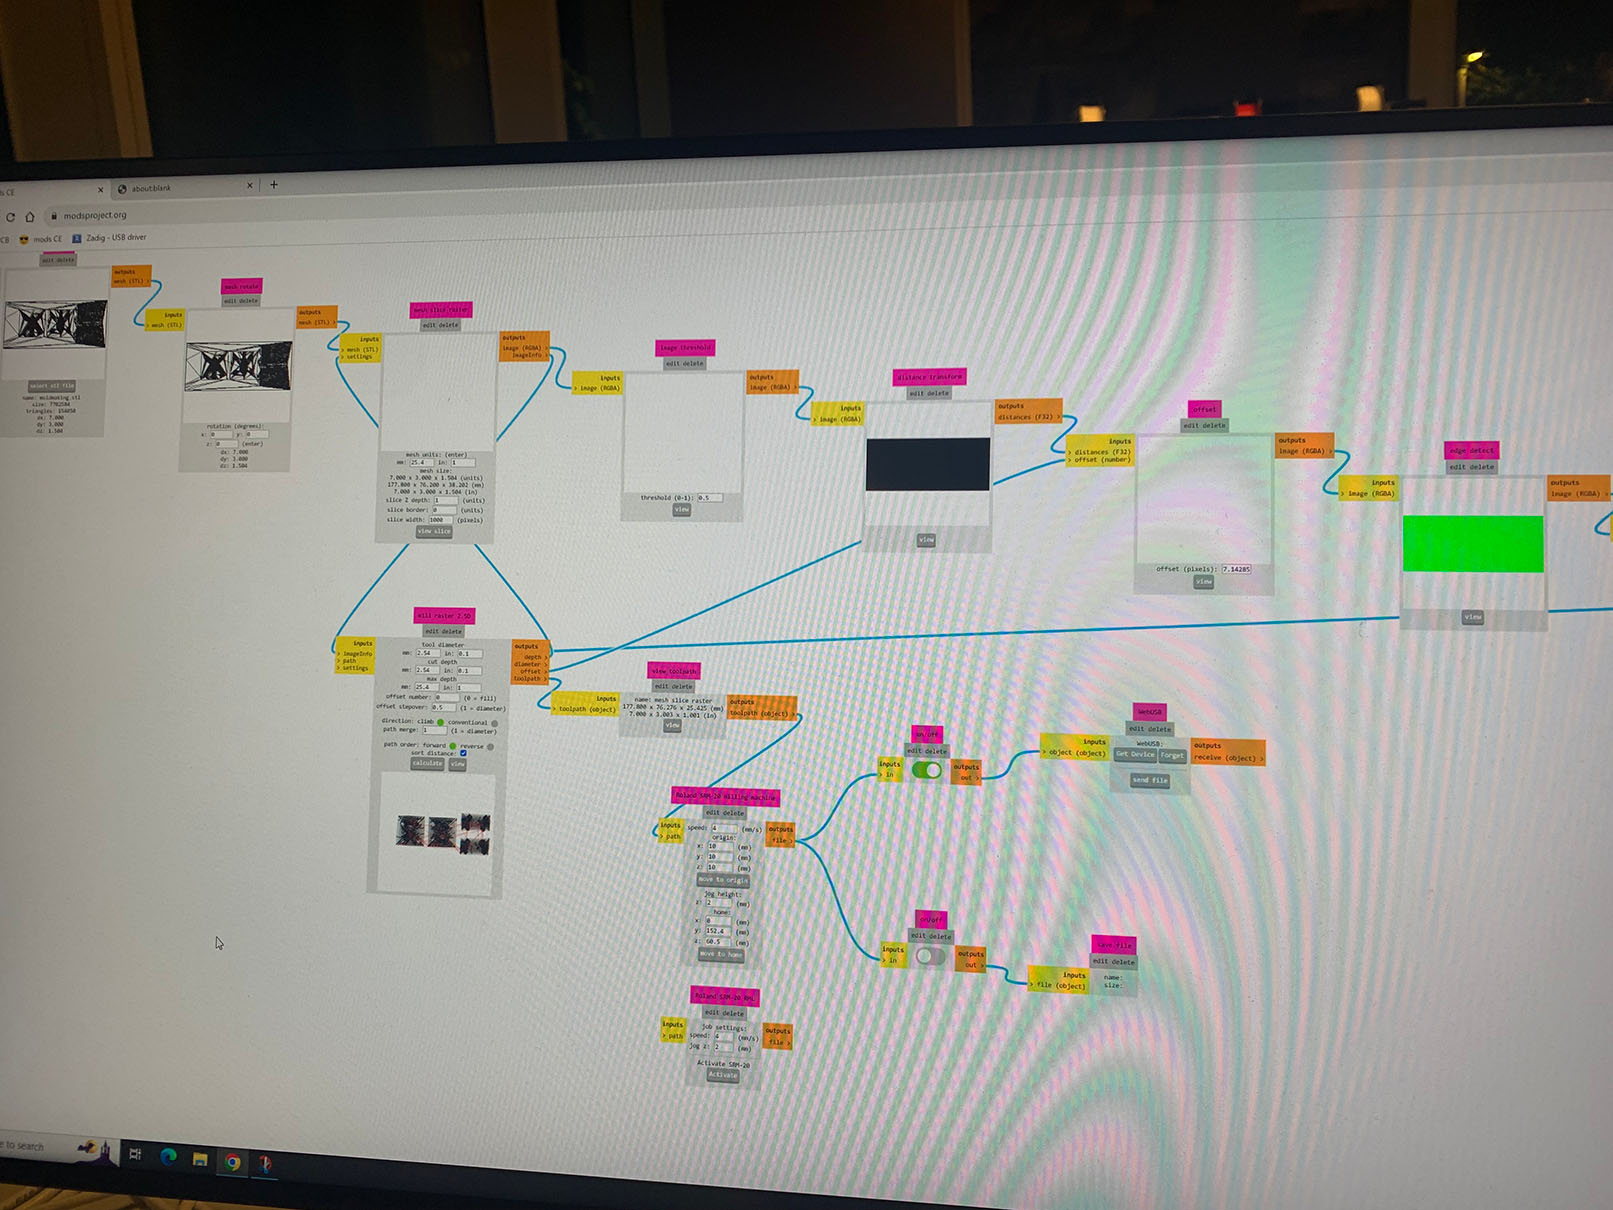
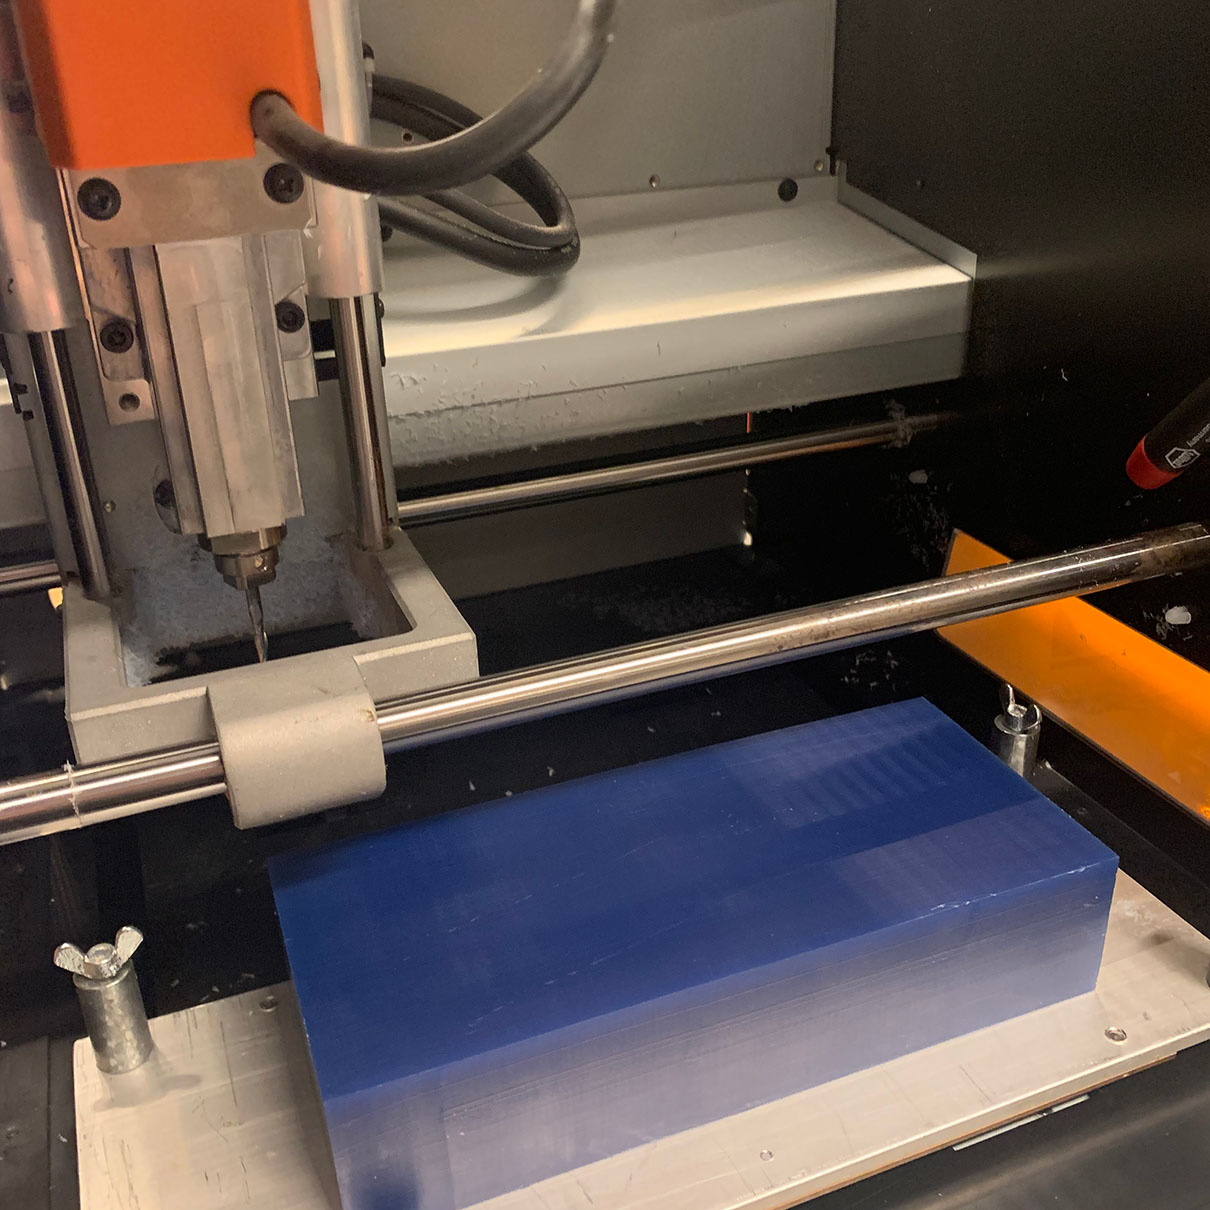
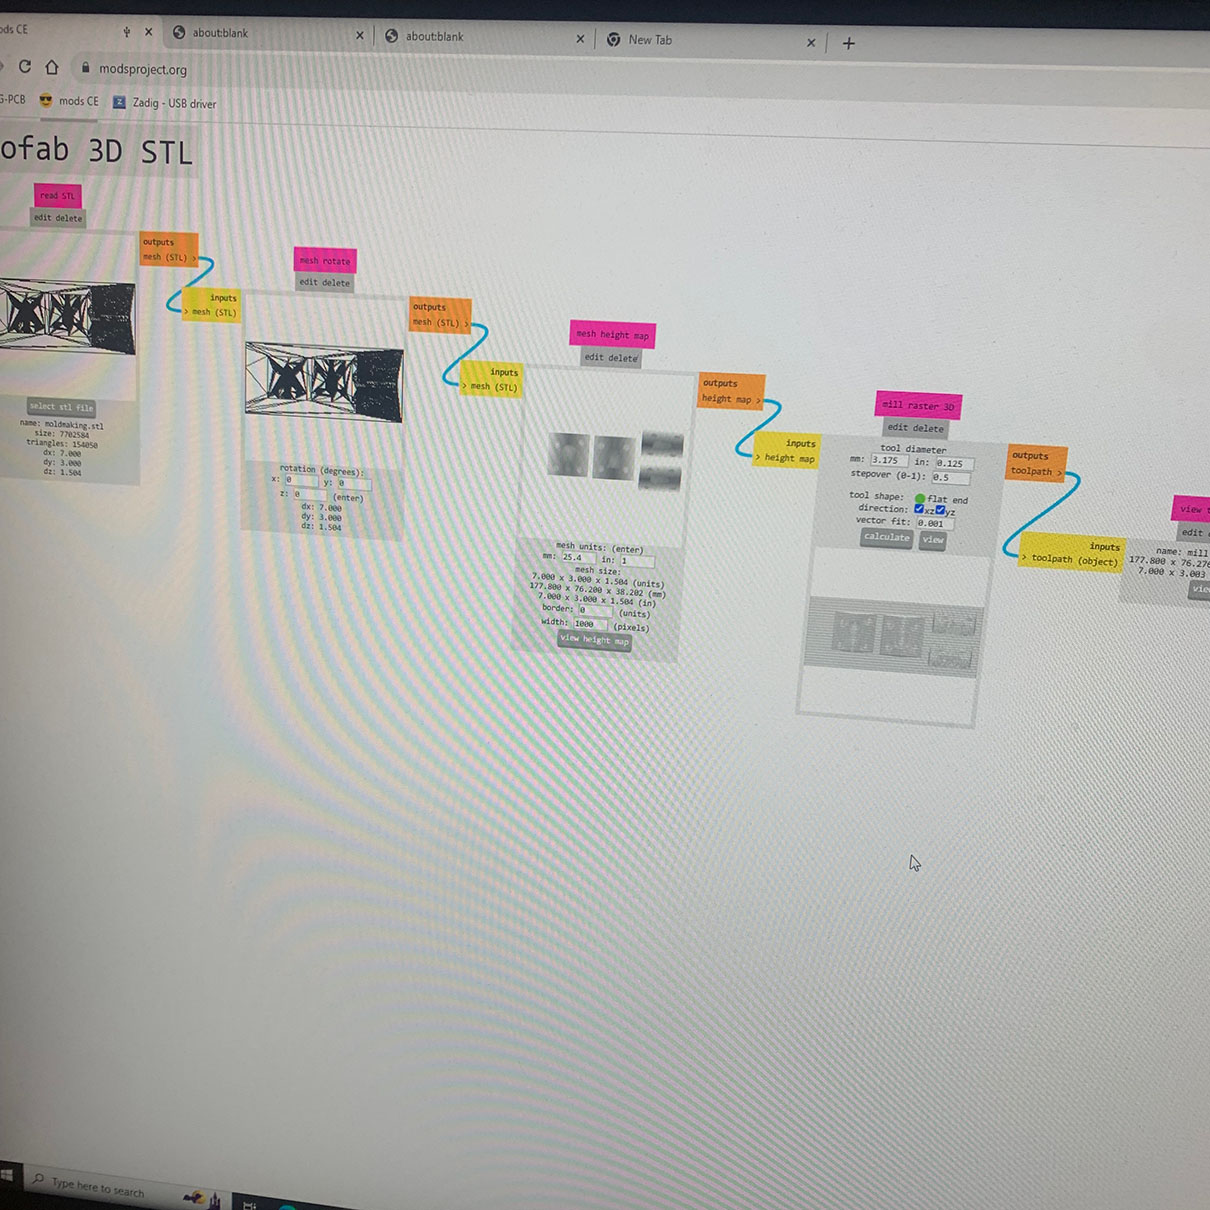
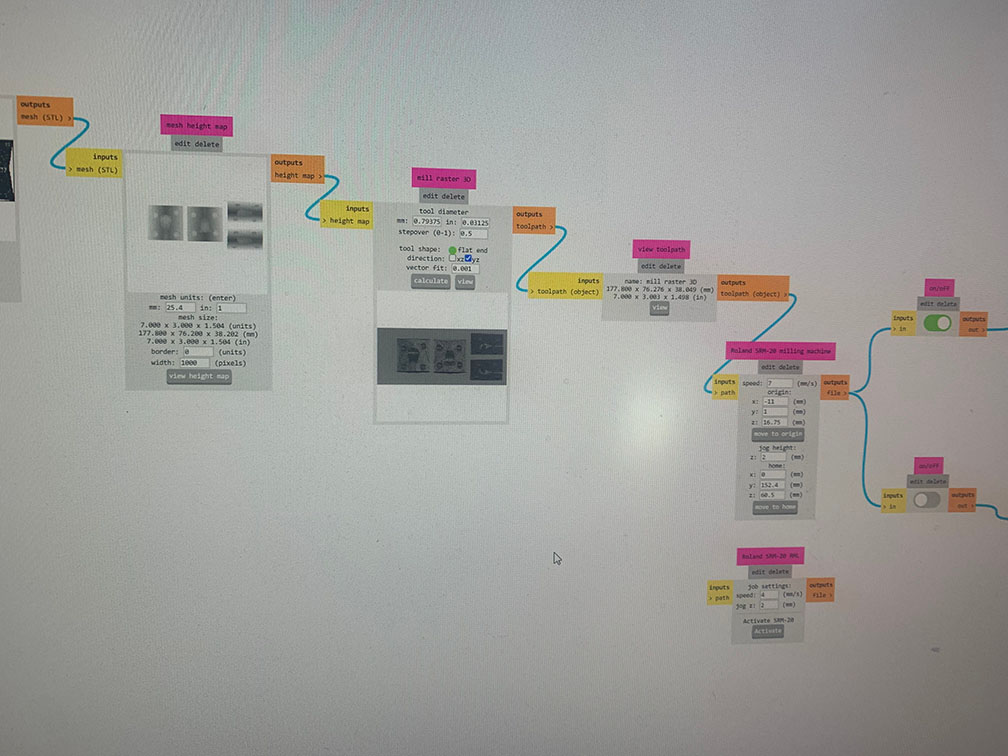
So I exported my mesh as a .stl and brought it over to the Roland MonoFab and opened the 2.5D Mill program. Changed the inches to make sure they equaled 1. Made sure the machine was paired, changed out the nib for a 1/8in. All the while Claire is helping me out with the milling process as we are trying to get it to work. I found my origin point and then we were ready to try it out. (Mistake: We did not remember that we were supposed to bring the bit up by 1mm)

The rough pass took about 1 hour and 30 min. Next was to do the the MonoFab 3D finishing pass, which we were just going straight for the 1/32 bit instead of doing the middle step of 1/16. We forgot to change the tool diameter to 0.03125in. But stopped it soon after starting so we could change it.


After feeling comfortable with the pass and the fact that it was 11pm, I left it overnight. Turns out something was very wrong with the finishing pass, we found out what specifically was the next day.


Second Attempt for First Model


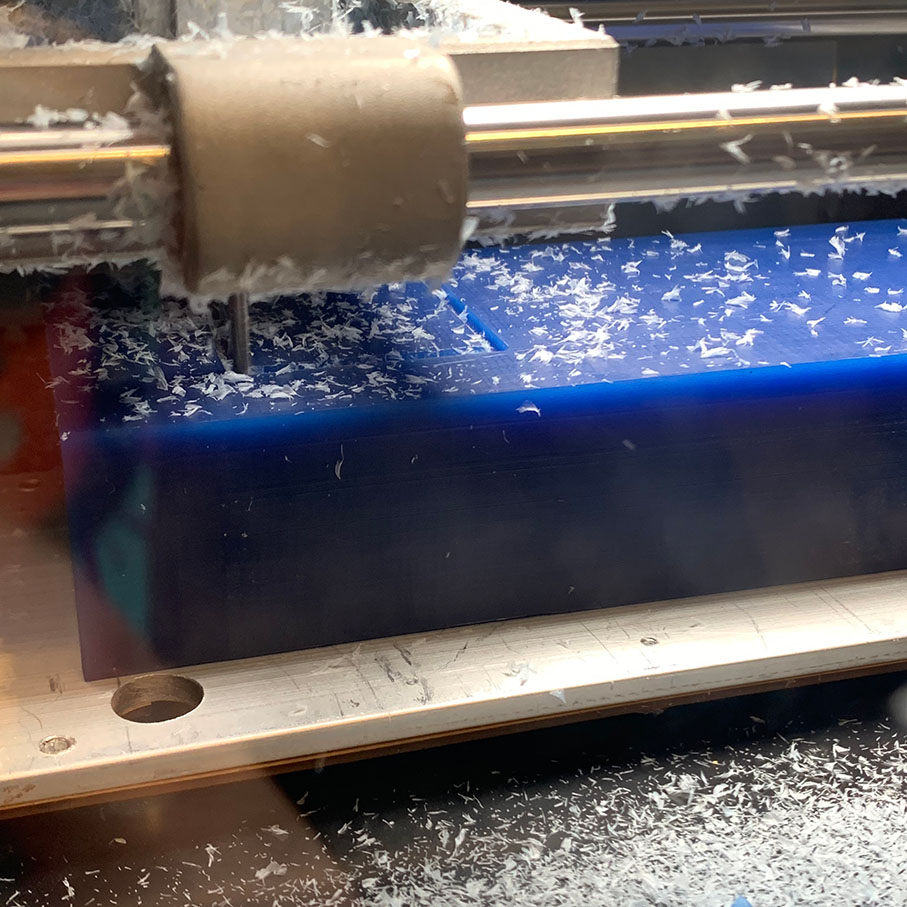
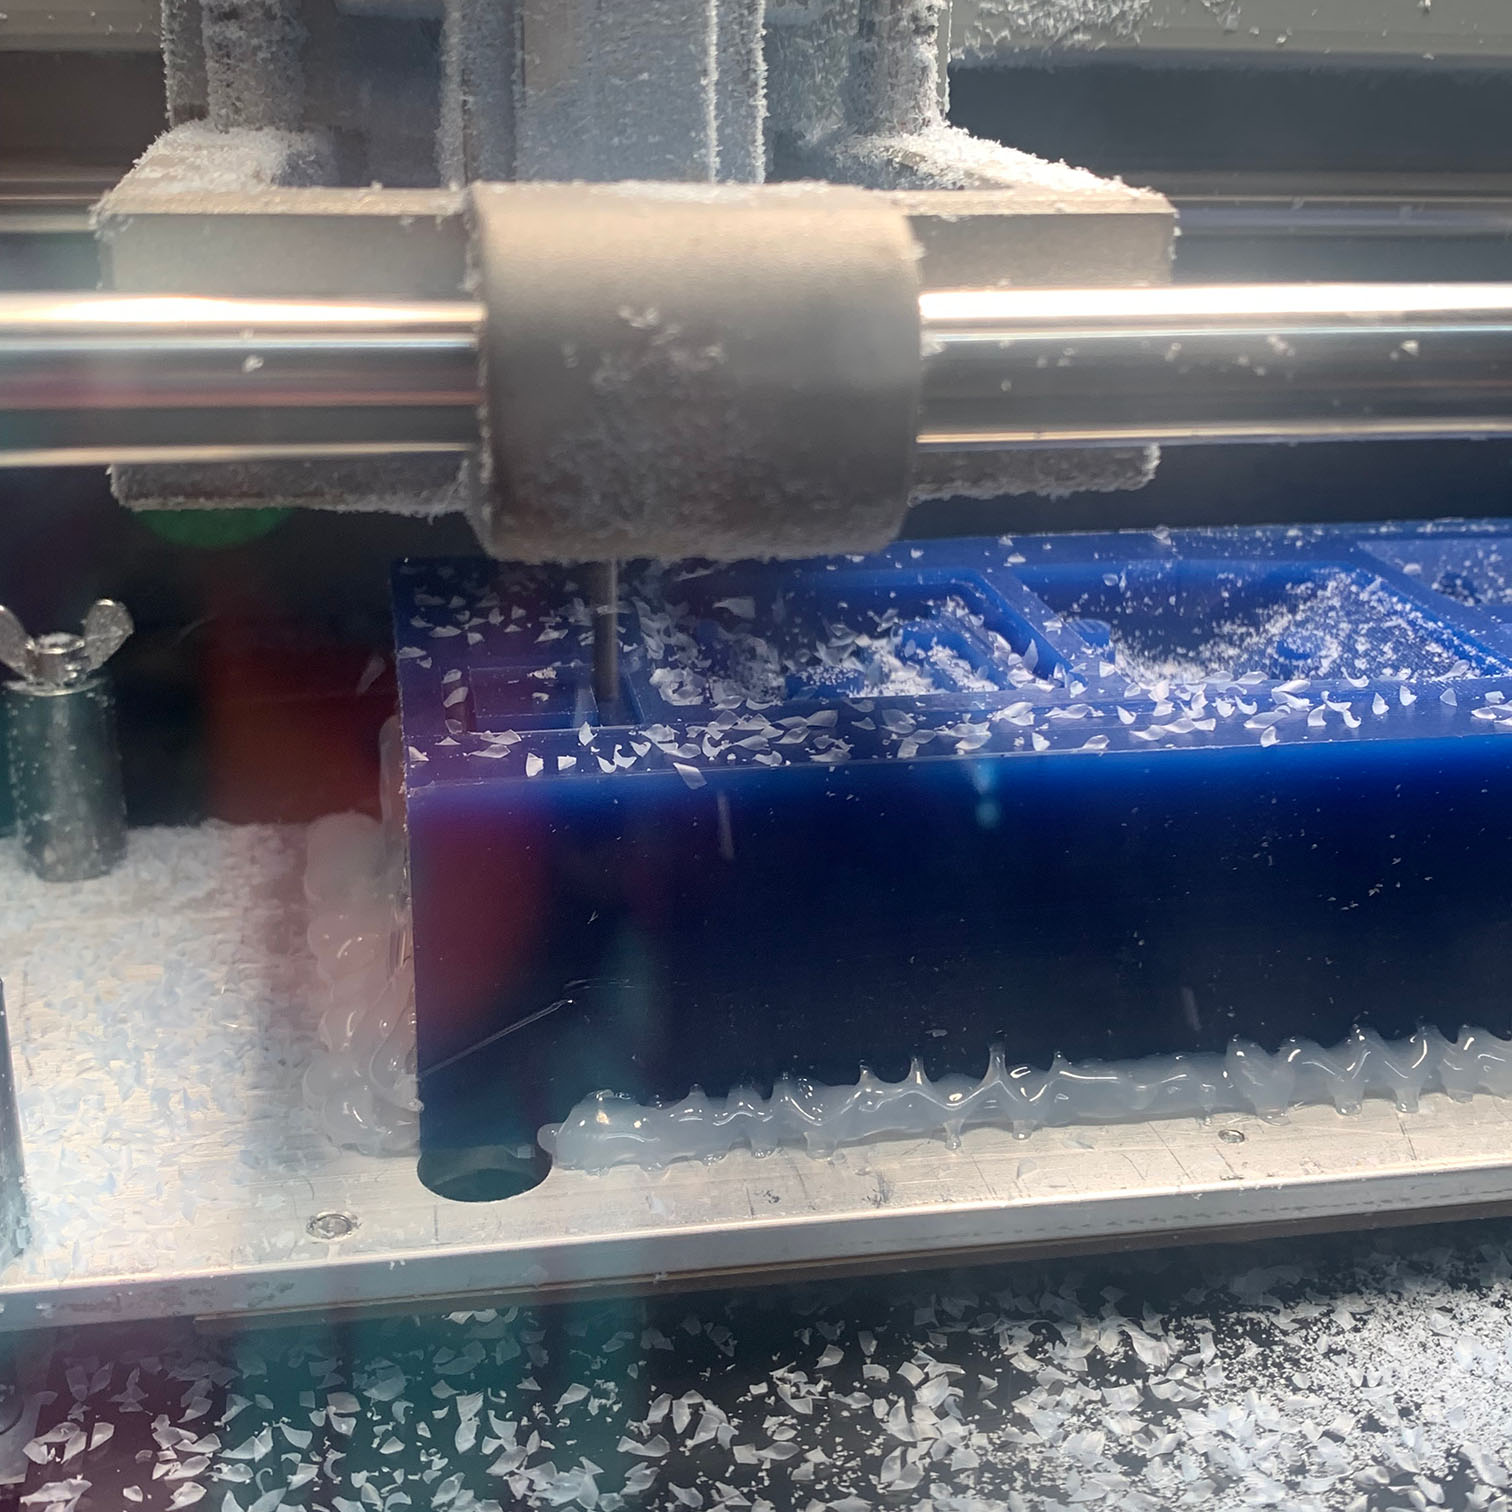
The second time I did the rough cut, since we had to scrap the first attempt, I made sure to raise the bit up by 1mm,changed the speed to 6mm/s, and this pass looked so much cleaner than the first one. But stuff didn't go well after that.


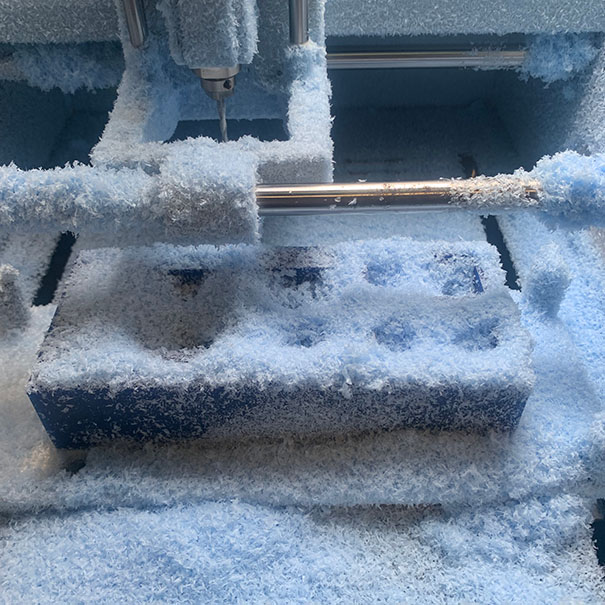
While Cathrine and I were figuring out the problems with the finishing cut, we learned that only the YZ would work. After maybe 14 passes the bit head slopes upwards by about 3mm and will continue at that height for the rest of the process.
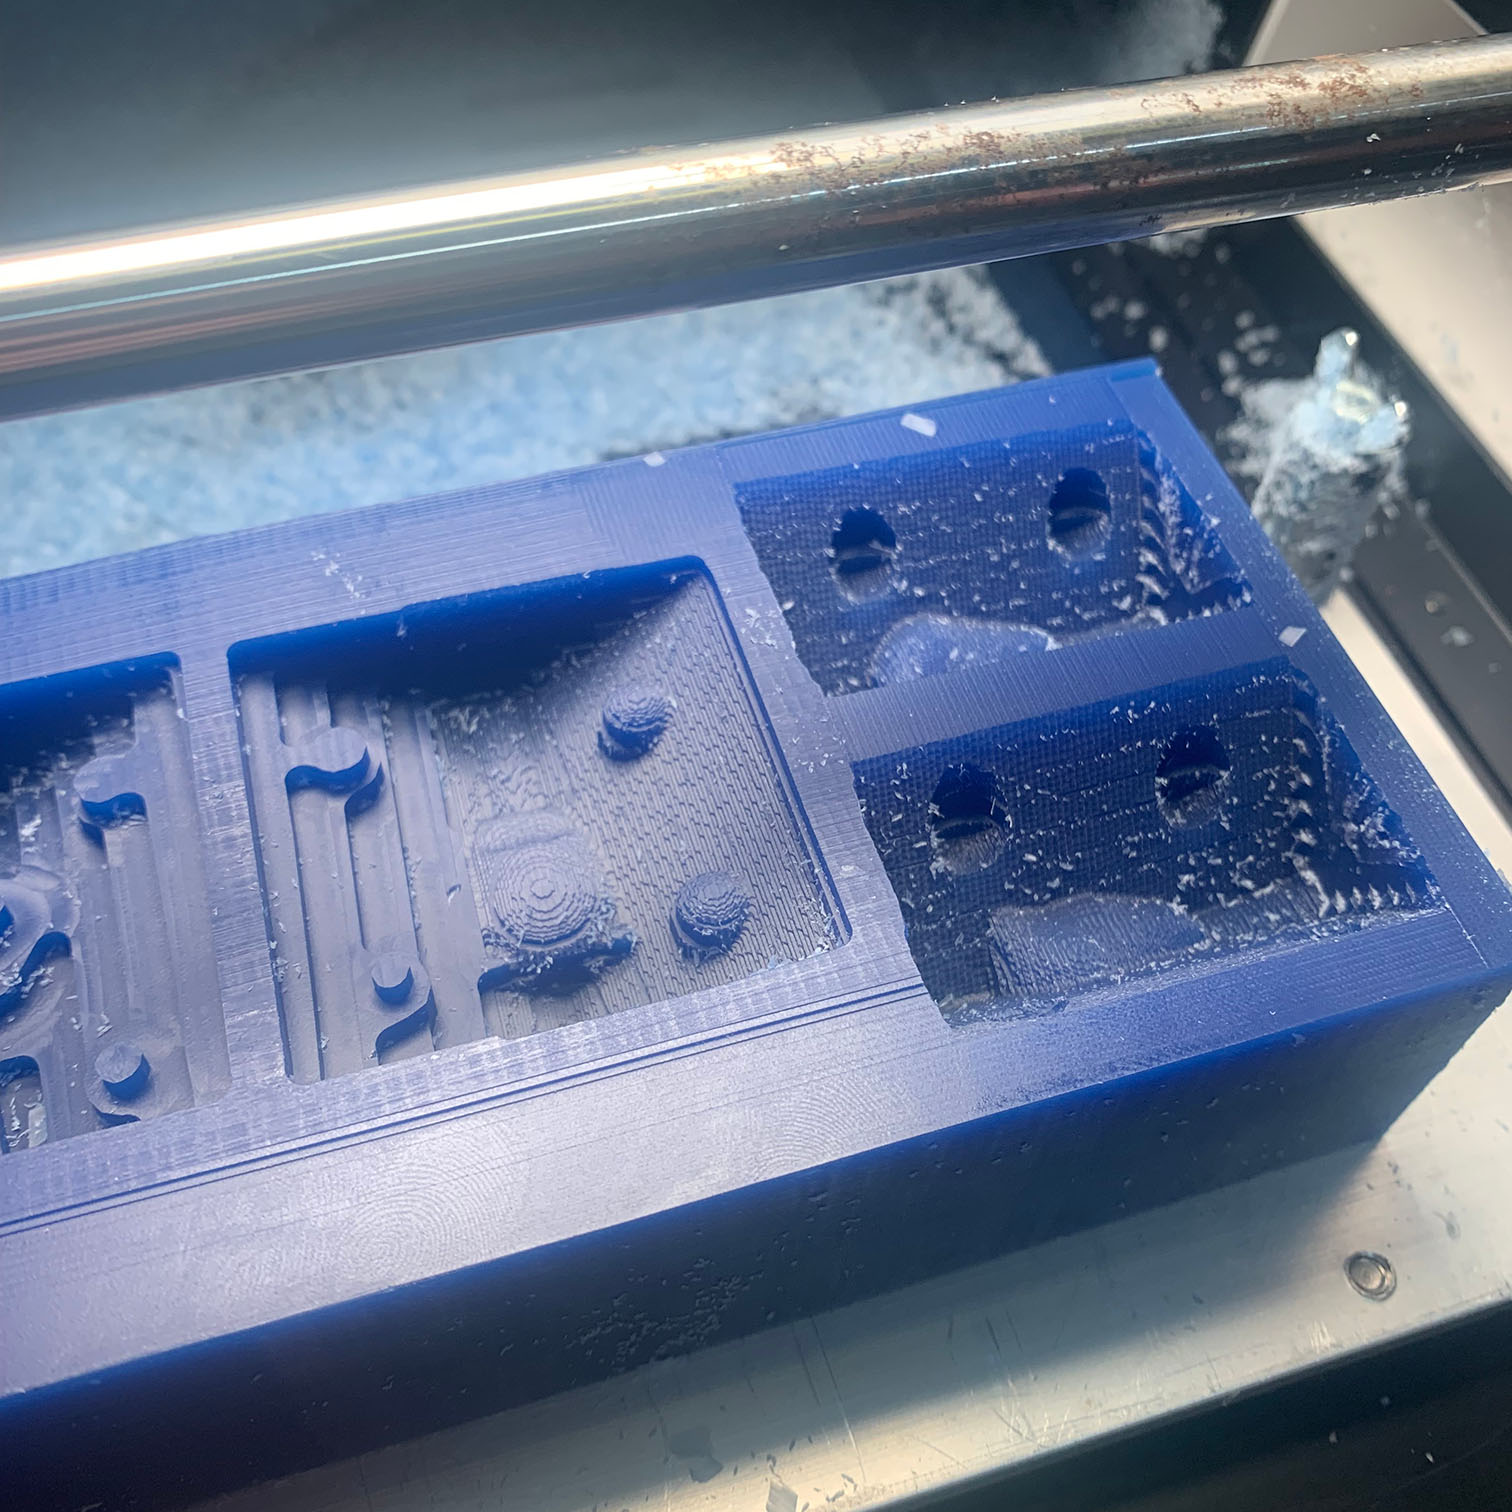
So with changing the bit and turning the speed up to 7mm/s I attempted the finishing cut. But had to stop since the block was unadhering on one side. So we stopped it and I pressed hard to get it to readhere and restarted it. Later on I realised that it was because there was no angle on some of the sides. So with the help of Claire and Quentin, we decided to not waste another block of wax and hot glue it onto the bed, which worked really well and came off very easy. So I was told to add the angle and start it from the same point so it can fix itself. But on Rhino 7, my mesh somehow became an open mesh and I wasn't aware of that. It is very hard to fix a mesh after that in Rhino. So I quickly had to make a new mold so that I could have something to show and did not have to come back a fourth day.
Modeling Part 2


On Nomad I just made a very simple face that I could make a two part mold from. Brought it into Rhino 7 and with one plane, cylinder, cube, and 4 spheres, did the same process as the first modeling but with only a two part mold. Faced the two negative pieces into the 7x3x1.5in block and MeshBooleanDifference them from the side of the block that has extra room.
Milling Part 2

Went through the same steps as I did the second time milling, just this time with a different mesh design. Which because of how small and simple it was, was able to work out just fine.


The Mold Making and Casting


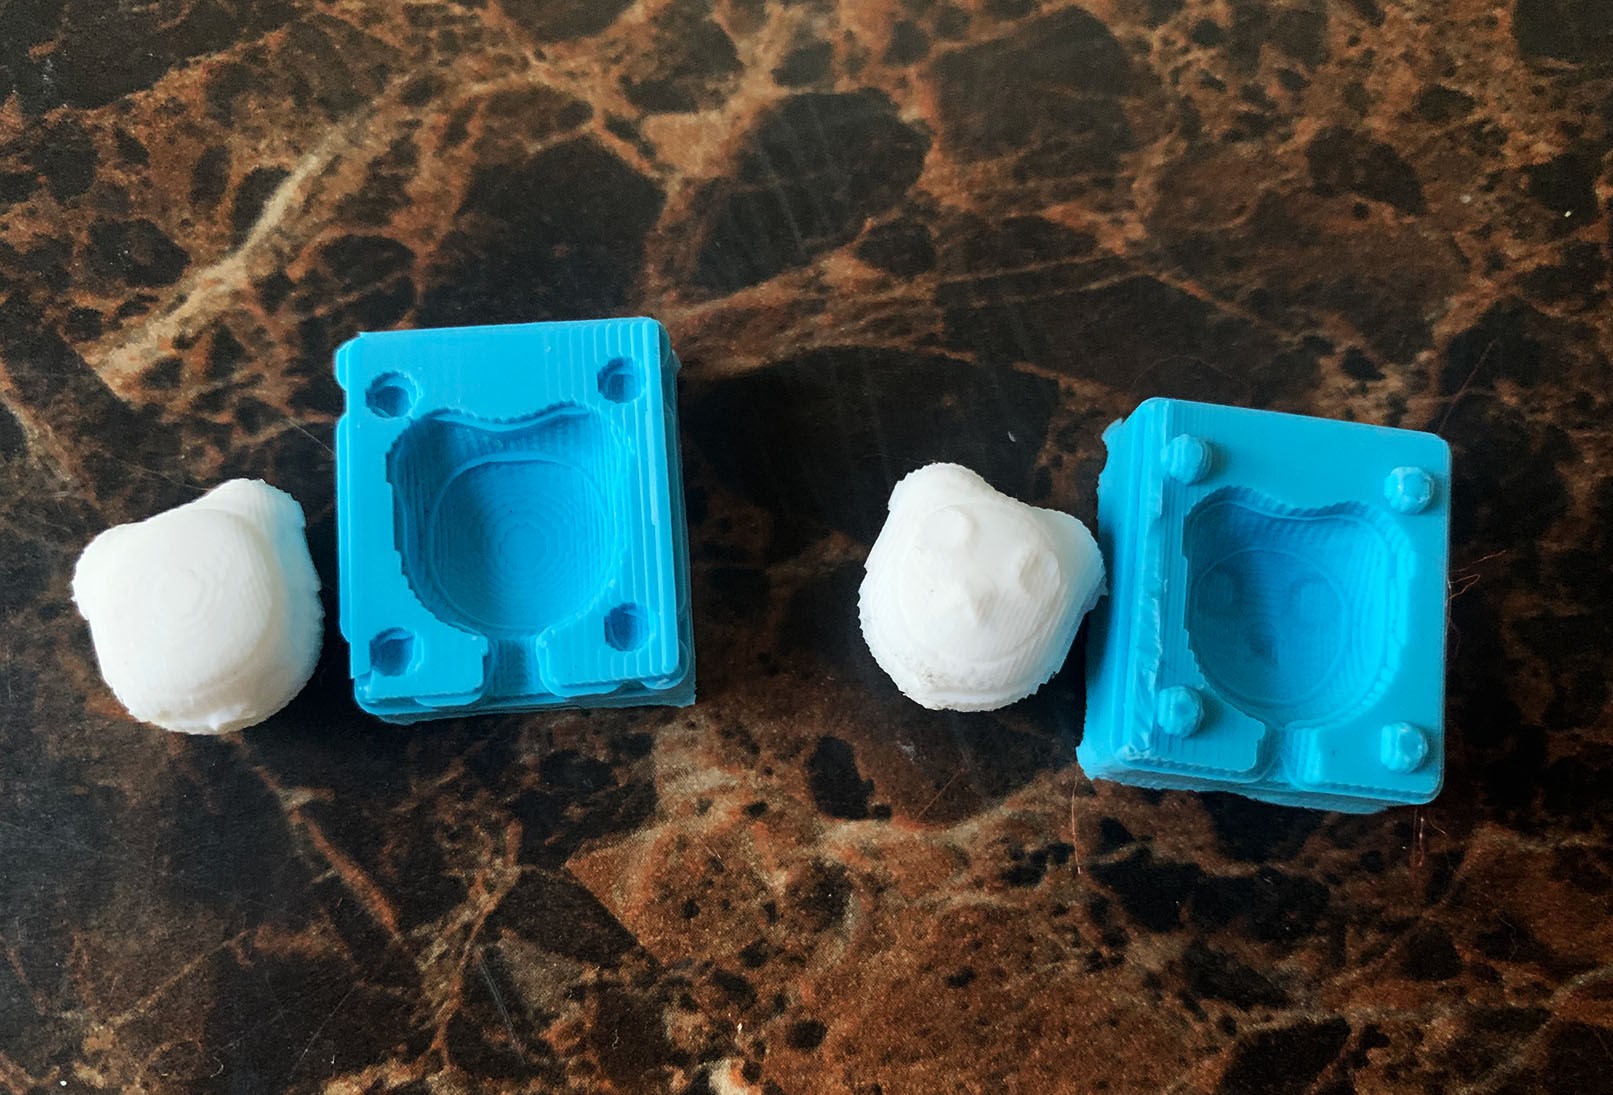
The next thing I did was get the Oomoo 25 and make a small half and half amount of it mixed together. Which then me and Cathrine were helped to figure out the vacuum chamber to try and get any airbubbles out of the silicone. After pouring the Oomoo, I waited around 75 minutes to make sure it was mostly cured, and went home. The next morning I demolded it was left with two small airbubble free mold parts.


Later that day I went to the mold making room in my school and grabbed some white semi-rigid urethane resin from smoothons SmoothCast series. Pouring out small equal parts of each into two different cups(Because these don't have measurements on them). Gently mixing both parts and with a small funnel I made out of some paper, and an elastic band to hold the mold together. I poured the resin into the mold and hit it on the table a few times. Waited like 5 minutes since the pot life is about 1 minute and it cures faster the more volume it has. Repeated the process one more time and I was left with two perfect bear head things.