How to Make (Almost) Anything
Week 2
Task1: install and learn GitLab, design a webpage in html and push to server.
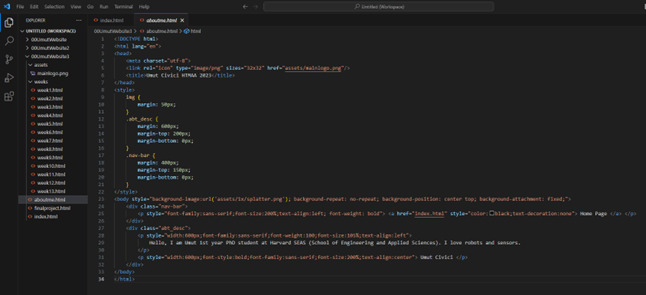
For the 2nd week assignment, we are asked to create a html website so that we can publish our weekly assignments, progress, and prototypes. First, I started with HTML5 UP templates (https://html5up.net/), then I decided to switch more simple web design so that I can control in more detail and learn from scratch as well. I setup the GitLab to my computer and VS code, currently I am using VS code locally to develop my website and once I am satisfied with the progress I am uploading to server.

Task2: Characterize the laser cutter settings as a group.
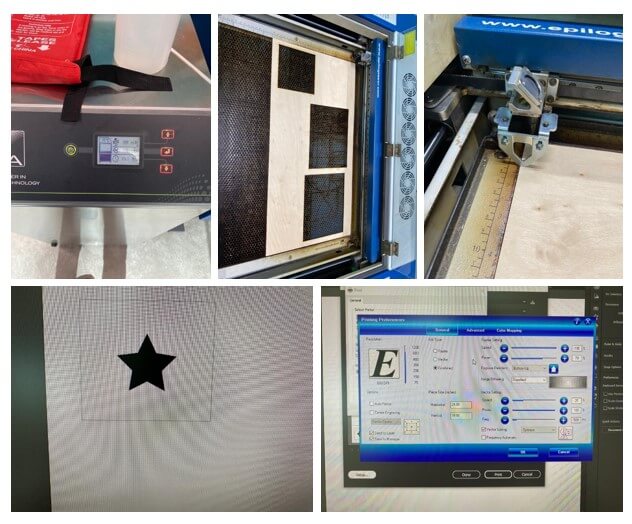
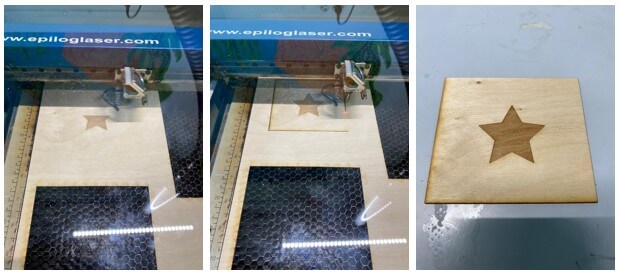
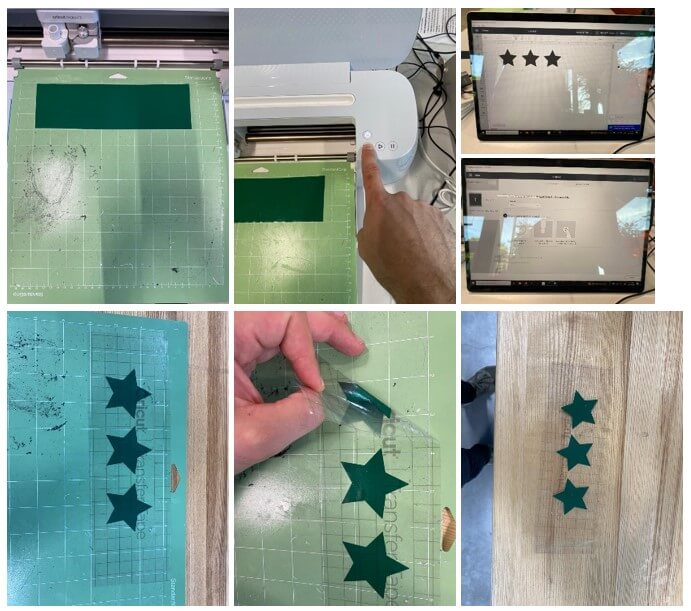
As a group we got trained in Harvard REEF and learned how to use vinyl cutter and laser cutter. Some steps to use epilog laser cutter in Harvard REEF; first, turn on the fume extractor, then place the material on the bed, use the levelling tool and make sure a letter size paper can fit between the material and levelling tool, design your file (a star) in Ai, click print and setup the required settings for material and your design (raster, vector etc.). In my laser cutting training I used wooden plate 1/8’, for raster I used 100% speed and 70% power, for vector I used 25% speed, 100% power and 500 Hz frequency. Here are some quick snapshots from the processes.
Task3: Cut something on the vinyl cutter.
For the 3rd task, I design and cut laptop stickers on the vinyl cutter. The machine I used was Cricut, it was easy to use, it has sensors for levelling and x-y spacing of the material, so on the manual side I only placed the material and selected the tool holder. After cutting the material, I removed the unnecessary/excess material, and I placed the adhesive transfer tape on top of the stars I just cut. After peeling of the transfer tape, the stars are transferred and ready to use on the laptop cover! Success!
Task4: Design, laser cut, and document a parametric construction kit. Account for laser cutter kerf, and assembly in multiple ways.
Note: This design can be adapted and be used for soda cans as well.
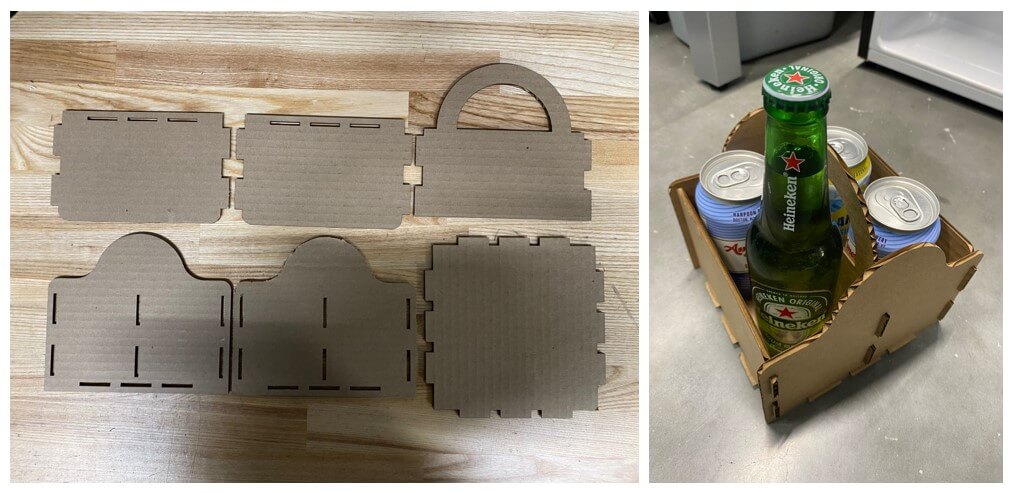
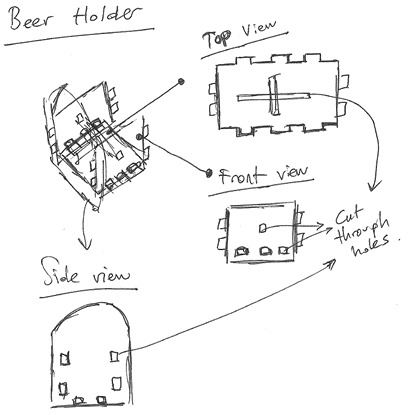
For the 4th task, I designed a 4-pack beer (no 6-pack sorry, I am trying to cut) holder parametric construction kit with cardboard (3.76 mm thickness). So, first I had to decide the type of beer (bottle or can), I have decided to use can and selected the Heineken as a good candidate. Below is the conceptual design and hand sketch, it has 7 laser cut cardboard pieces, and they are assembled with cut through joints. 1 can of beer is approximately 384 grams, and it is 66 mm diameter, and 122 mm heigh, accounting for the size and weight.
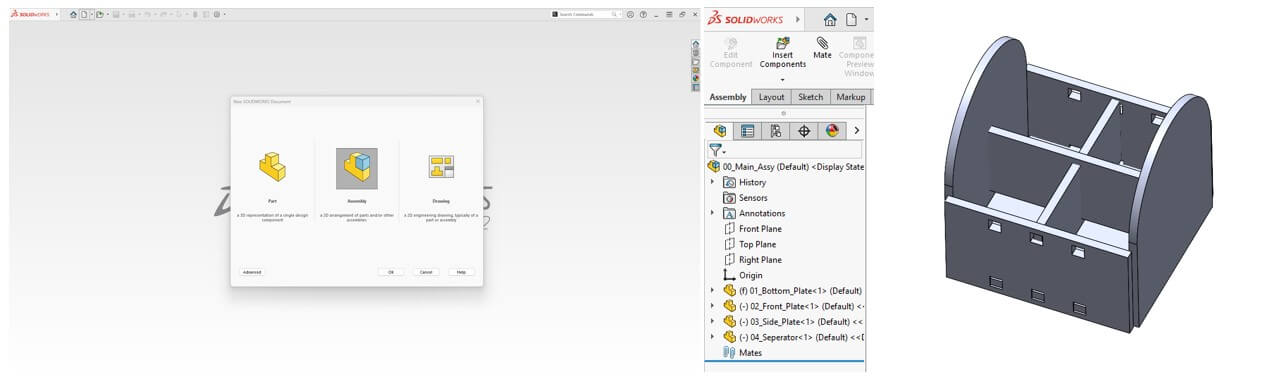
Now it is time to design the concept in 3D, I used SolidWorks for this. Main goal in this step is to create the general shape, parts, and rough dimensions, the reason is for this step to allow early design changes and save time. First, I started creating an assembly file which I can add the parts inside.
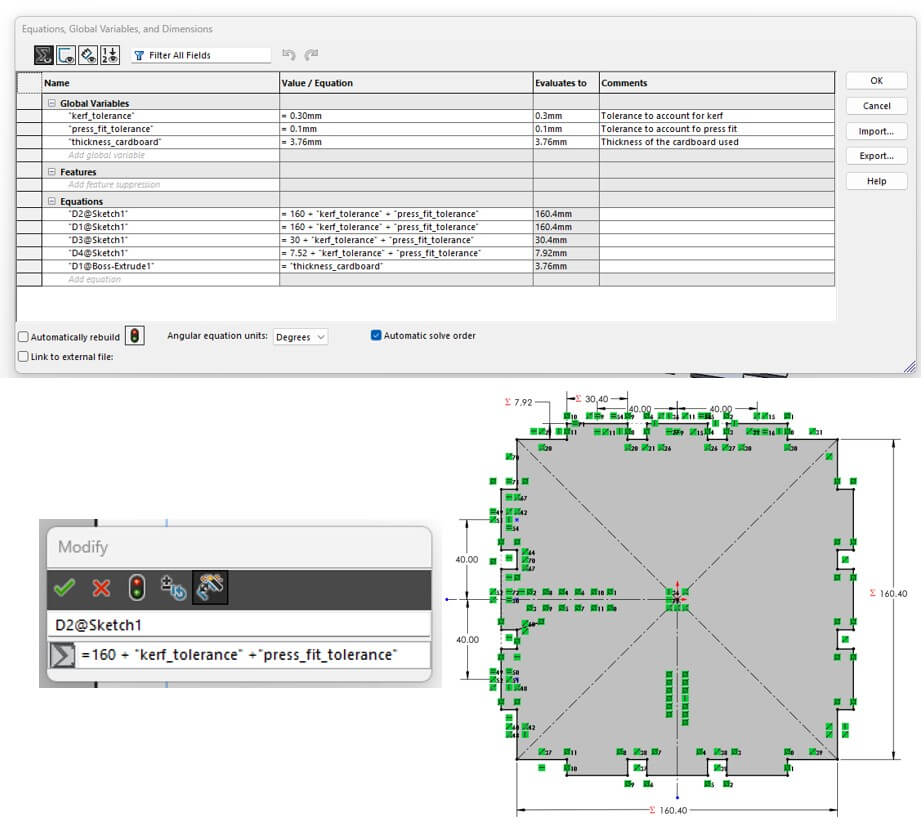
After this step, I had to test the press fit tolerances and characterize the laser kerf, so I laser cut a very basic fit design to understand how much tolerance it has, below left pic is the CAD and right is the real cut material and measurement.
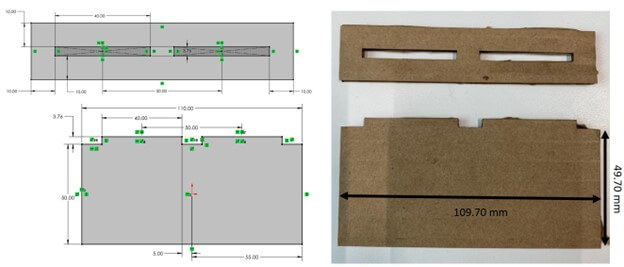
After cutting a test press fit design, as can be seen above, laser cutter has 0.6 mm kerf diameter (design 50 mm, cut piece 49.7 mm so 0.3 mm x2 = 0.6 mm total kerf tolerance). Although parts are fitting well, there is room for improvement, so I decided to account for the kerf, so I will be offsetting any dimension by 0.15 mm (for one side), so that it will be ended the exact dimension I have. Also, I decided to put press fit tolerance of 0.1 mm (inside offset for the holes, outside offset for fit rectangles).
After I designed the parametric components, I laser cut the cardboard with the cutting speed of 15, power of 65%, and 1000 PPI. Below is the cardboard beer holder and some beers in it. Enjoy!