|
Table of contents
Starting the microscope and Turning on the Lasers
Turn on the lasers:
Turn on the computer.
Turn on Mercury Lamp (using on/off switch on uppermost white box)
Turn on main system power (on power strip under optical table).
Turn on the two HeNe lasers (633nm, 545nm) by turning the key.
Argon Laser (Take Care!):
Ensure silver toggle is in "Standby" position and power knob is turned all the way counter-clockwise
Turn the power on (black switch)
Turn the key to the 1 position
WAIT 3 MINUTES for it to warm up
Switch silver toggle to run position (up)
Slowly turn power knob to 6.1
If the microscope is off, turn it on (with green switch on the right side of the scope)
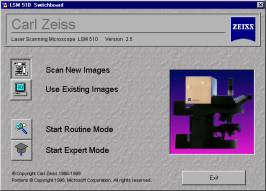
Start Zeiss Software
Login to the computer:
Username: neuro
Password: abacus35
Launch Pascal 4.0 SP2, select "online" mode and hit "Start."
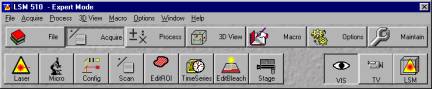
Choose acquire mode from the tab.
Configuring the laser
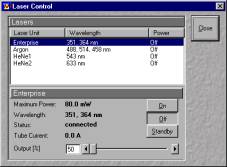
Click on the acquire button in the main window and choose Laser sub window.
This brings the laser control window. To switch on the laser, choose the laser you
want turned on and click on the on tab. You can adjust the laser intensity now or later.
To set the required laser path settings, choose "Config" button from the main menu. The following
window appears.
Configuring microscope mode
To set the microscope, hit "Acquire" and choose "Micro". This should open up a control window.
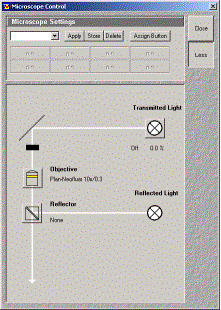
Click on the objective lens icon to choose an appropriate lens. There are manual and automated
focusing wheels on the microscope.
Set sample on the stage and adjust focus manually
We have a inverted configuration for the microscope. This is so that it is easy enough to set an
experiment on the microscope, and still be able to image in real time. Thus the lens sits below the
stage. For an inverted stage, you have to put the sample upside down sometimes. Use a double sided
tape to stick the sample to a glass slab. Also a cover slip on a glass slab works well too.
Be very careful not to touch the lens below the stage. Do not drop anything on the lens.
To view specimens directly with the microscope itself, switch the two sliders on the front of the scope to the left-most position (eyes).
For transmitted light, click "transmitted light" button at the top of the axiovert control
window. Switch the halogen light on, and vary transmitted light intensity by the scroll bar next to it (or manually using the switch on the front of the scope).
Use the manual focus wheel to raise the objective lens until the specimen is in focus.
Configure scanning parameters
Push the bottom slider on the microscope front to right, to prepare microscope for scanning mode.
Click "Acquire", and choose "Scan" from the menu. The scan control window appears.
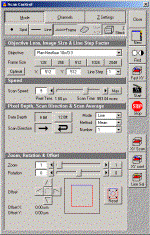
For a fast scan, click "Fast XY" on the right side of the control window(an image window appears).
At this point, the image need to be optimized. Choose "channels" sub window. You should see three
scroll bars. "Detector gain" sets the gain on the photo-detector. "Amplifier Offset" sets the
background, and "Amplifier gain" alters amplification factor.
Check the pin-hole factor in the channel window. The microscope can automatically set the
pin-hole size for you based on the objective lens being used.
For choosing the right settings of detector gain and laser power to be used for a sample, click on
"pallet" button on the scanning image window and choose red and blue range indicator. Now adjust the
detector gain and laser power settings such that you avoid under-saturation and over saturation of
your imaging photo-detector. Over saturation is shown by red color on the image, while under saturation
is shown by blue color. Optimize such that both these colors are minimized.
To improve image quality, you can choose the appropriate frame size. (For high quality scan choose 1024*1024,
for a low quality scan 512*512 scans are good). You can also adjust the scan speed(5 or 6 for low
scan). Magnify, move, rotate the image if needed using buttons at the bottom.
Click 'Stop' if the image has been optimized. You can click on single to get a 'single' image of the
sample. Click 'Save as' to save the image to the database. If you are using fluorescence in your
images work quickly cause you will be bleaching your sample quickly.
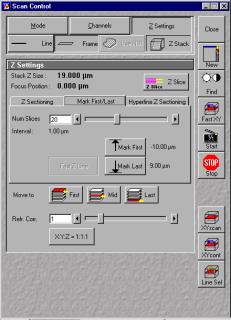
Set Z slice parameters
For taking images with different Z slices, the slice parameter needs to be set. This way you can
create true 3-D images of your sample. Click on 'Z-stack' button in the scan control window(this
will open Z settings panel). Choose 'Fast XY'. Choose the focus wheel to set the start of z-stack.
Click 'Mark first' in the panel. Now change the focus to go to bottom of the stack and click
'mark last'. Optimize the z-stack slices by clicking the "Z-slice" button and clicking optimize. This will set the scan heights to the nyquist frequency of your optical slice. Click 'start' to start scanning for different z stacks.
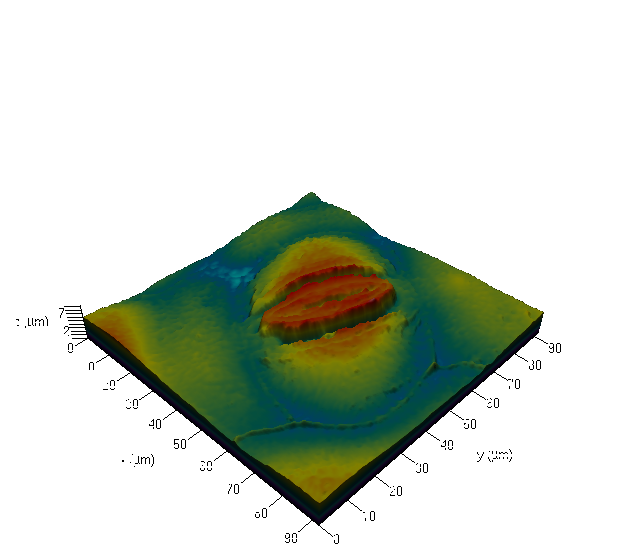
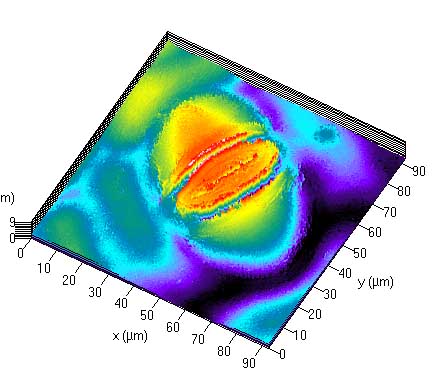
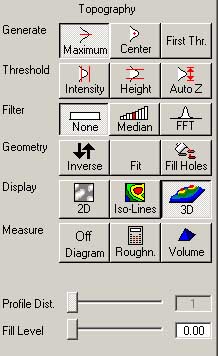
Creating 2.5D topological images
To create a 2.5D topological view of the image, click 'Topo'. This should show the view where
all the z slices are shown together, with a z scale.
You can choose a noise filter from the window panel on the right, choose either "none", "median"
or an "FFT". The intensity threshold can also be set from the panel. A useful function is to
fill holes in the 3D data by "fill holes". Various display options are also available.
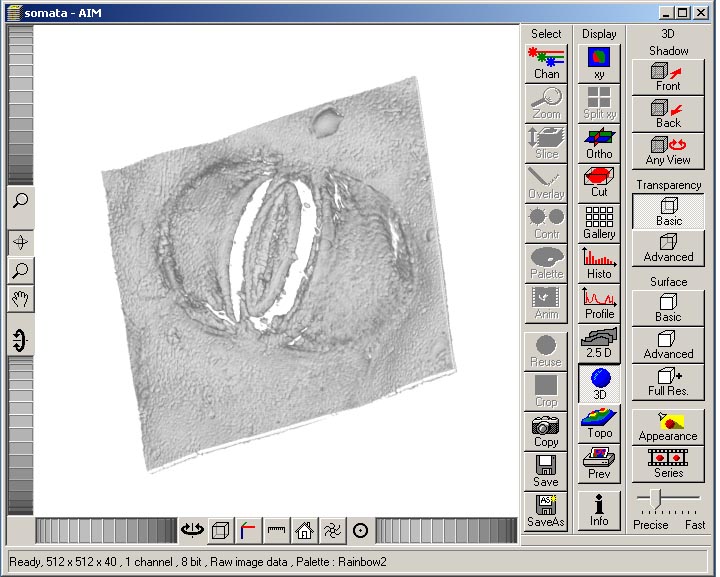
Creating 3D images, storing 3D data
The Zeiss software creates a point cloud representation of the Z slices created by the
scanning of the sample. This can be used to create a rendered 3D image of the sample. Various options
for displaying the surface of the objects can be used. Click on "3D" button to open the 3D
image mode. You can choose surface type form basic, advance and full resolution. Also the 3D
image can be rotated to an view. A movie of the 3D rendered views can be saved in the
software too.
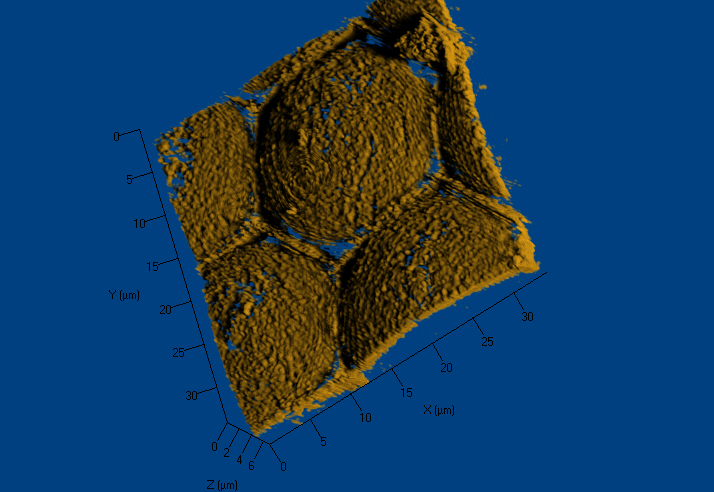
An example 3D view of the imaged somata is shown here.
To save the image in the data base, and the 3D data, click 'Save as'. Choose the location of the .mdb
file and choose the database you want to save the images in. The 3D data can be saved as a .txt file
which gives the point cloud of the 3D image.
Switching off the system
Exit Pascal Software
Shut down the computer
To turn off Argon laser:
Turn power knob counter clockwise (off)
Silver toggle to standby
Key to 0 position
WAIT 3 MINUTES to cooldown
Turn power off
Turn off other lasers
Turn off main system power (on power strip under optical table)
Turn off mercury lamp
Useful links for more info
|
|
|