O U T P U T D E V I C E S
LED ARRAY
The assignment was to create an output device.
THE PROCESS:
1-Make the microcontroller board
2-Program it
I chose to make Neil's LED array board and also the RGB LED becuase they seemed to have the most possible applications for a final project. The array board also provided an easier to read otput for the programming, which made me curious about the code, which I ended up experimenting with.
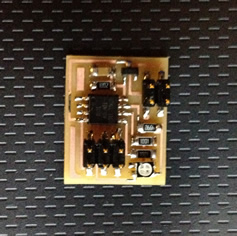
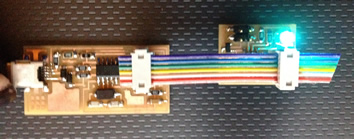
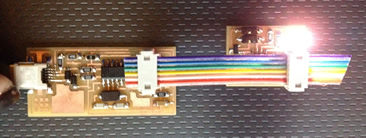
First, I created the RGB LED, since it was the smaller of the two boards. I wanted to make sure I had at least something working for the week.On the first try, the LED only worked with the red and blue, and upon further debugging and looking at the data sheet, we received confirmation that the data sheet was not the one ofr this specific LED model and so LED had to be rotated so that the green and the anode went in their respective positions.

On to the array...
Originally, I had a slight hiccup with the array board. Not all the lights were lighting up, so then I created a map of the LED connections so I could point out exactly which one was tripping up the array
.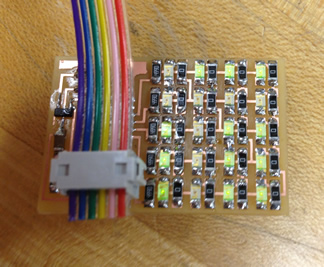
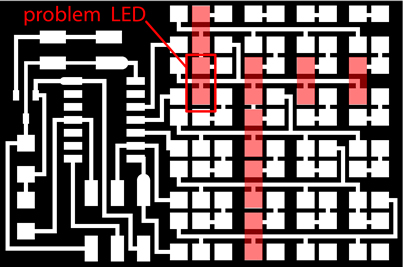
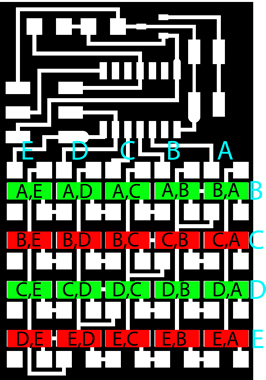
After discovering this, I remover the LED and the resistor before it and the board worked with Nei'l program without a problem. In order to map the program and how it affected the LEDs, I created a second board with alternating lines of red and green LEDs.

I programmed the board as I changed the C code and recorded the results in order to map the names of the LEDs so I could then create a custom code.
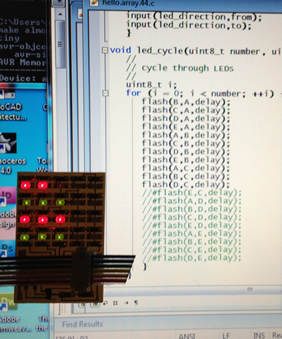

After mapping the code, the I re-wrote the C code to spell out my name
Lessons Learned
It takes some patience to learn the syntax of any code, but once the major principles are clear, then it is pretty simple to manipulate the code and make something fun!