Fabable Expandable Hat!
The final final project is a hat who's brim expands with the intensity of light. It just makes sense, right? The more light there is, the more you want to be covered.
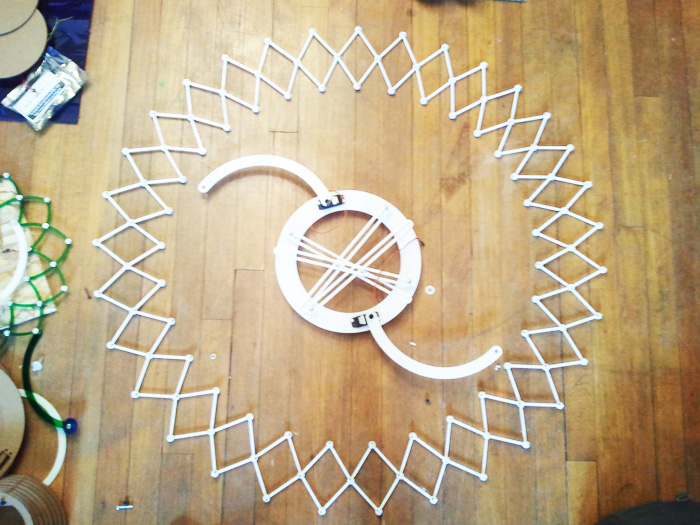
(It's almost a hat. Just missing the skin!)
The Hat
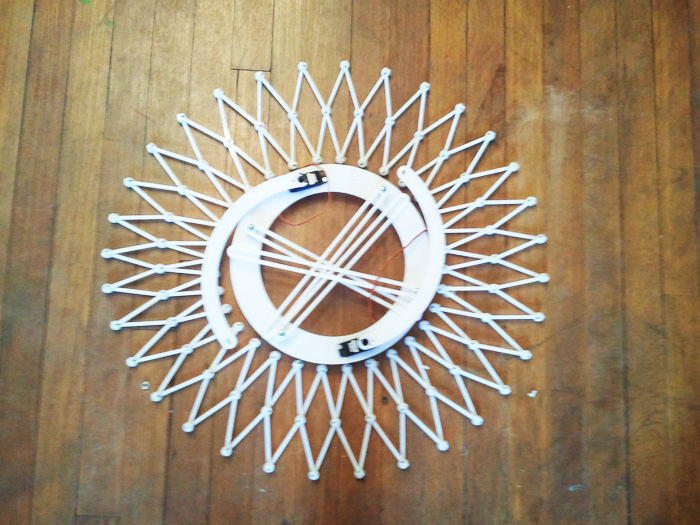
The final components were the completed 32-joint Hoberman Shphere (but just the circle), the constant brim of the hat that held the two servos, the arms that connected the servos to the circle, and two extra arms that provided support for the circle, to keep it from sagging under it's own weight.
The expanding brim
The circle is composed of three basic parts. The legs (64 in total), t-joints, and plastic bearings (part # 6294K432 from McMaster) to make the joints smooth. All the pieces were laser cut from 1/8 inch white acrylic. If you are using another material, even if it's of the same thickness, experiment with the t-joint before printing 80 of them. Acrylic breaks easily, and the dimmension can vary just by the kerf of the laser, which can make an difference in the joint's press fit construction. The crucial dimension is the thinnest part of the T, which is wehre the square part snaps in a perpendicular plane.
The actual hat part
The hat is also composed of 1/8 inch acrylic. I strung together the rings to make a hat, and strung it to the brim, which holds two Polulo VS 2A Servos. I strung them together only because I couldn't get the press fit part right that holds them all in place. But the hat can actually take any shape or form, as long as it connects to the ring that holds the Servos.
The electronics
The brain of the hat is a beautiful Fabduino- a fabable Arduino! I attached 2 servos and a phototransistor to it. The all attach to analog pins on the Fabduino. I opted for making a Fabduino instead of my own custom board for the sake of rapid prototyping. Having pins I could just plug into let me experiment with different Servos, phototransistors, and quantities of each without having to make a new PCB for each iteration. With more time, I would have liked to make a PCB for the finalized design, since many of the Fabduino's pins remained unused.
The code is simple. It sets both Servos to an default position of 45 degrees, then reads the value from the phototransistor and maps it to a position. It then reads the current position of the Servos, and moves it from that position to the new phototransistor-defined position in increments of 5 degrees, with a delay of 50 milliseconds. The delay is implemented to control the speed at which the circle opens and closes.
The phototransistor is just a small PCB with a 50K resistor, a phototransistor, and a 3-pin header for power, ground, and the analog pin.
I don't really know how I thought of the idea. It happened duirng one of our lectures. I thought of it an immediately fell in love with it. I love the idea of smart objects- objects that can react to you or the environment. And I especially love applying to that to clothes or things we wear because those are the objects that we interact with most. They are the most intimate possessions we own.
The Design Process:
The very basic components were mechanism that expands radially, something to actuate it, and a phototransistor to make it react to the enviroment. And this is basically what I ended up making.
Take one:
My first idea was to have a really long coil wound up in a circle about 7 inches in diameter, or whatever would fit comfortably around your head, and it would end in one circle a few inches wider. This wider circle would make the brim of the hat. This coil would then be slowly wound and unwound. As it was unwound, it would be somehow guided throught the fabric to make the outer circle even bigger. I don't really know, and I didn't test it. But it would have been a beautiful hat.
Take two:
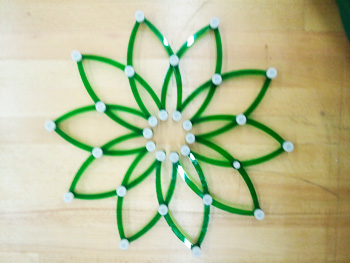
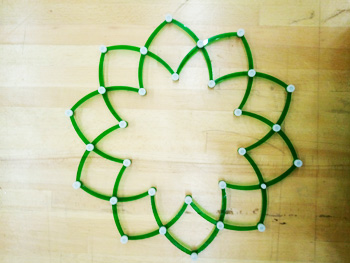
My next idea invoved a toy I had played with. After about five minutes of a Google search and YouTube videos that started out with "expanding circle," I formally discovered Hoberman Spheres. This was the perfect mechanism. Not only was it beautiful, but it was stable and could give me the change in diameter I wanted. I found a link so someone's first week project in 2008. Johann made a press fit construction Hoberman Sphere. I used the geometry of his legs to construct my first prototypes. At first, I made a small one just to get a feel for how to make it. I made it out of 1/8 inch green acrylic. Instead of laser cutting joints, I simply used nuts and bolts. This was fine for a prototype, but also frustrating because the allowed for instability and a significant wobble, and the nuts would come loose often.
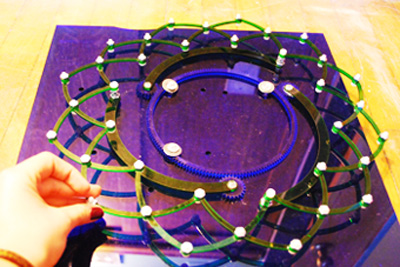
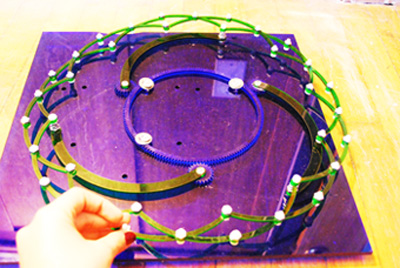
Next I made a larger one, comparable to the size of my final hat. I made it in the same manner, and tried to attach it to a base to simulate what it would be like one actually a hat. The idea behind this one was that there would be one large gear and three small gears, all cut from 1/4 inch acrylic on the laser cutter. The large gear would be actuated by a motor, and it would turn each of the small gears, which would open the arms, and open the entire hat, expanding the hat's diameter. Mainly due to the imprecision of the prototype, the large gear was very difficult to turn. I never actually actuated it with a motor, but it was much much easier to move by using two points on the shpere instead of the gear.
Take three:
The last idea I explored involved folding structures. What was most appealing about this idea was that the structure would serve as both the skin and the skeleton of the hat, making it an uncoupled design and thus a better design. This would certainly deviate more from the conventional notion of a hat, but I ultimately discarded it becuase if my limited knowledge of folding structures.
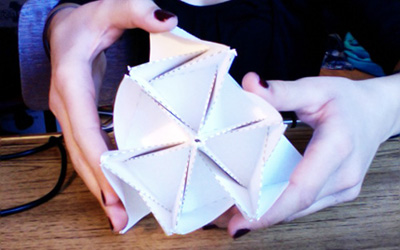

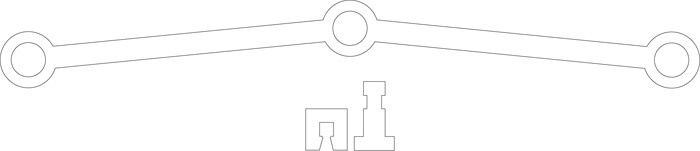
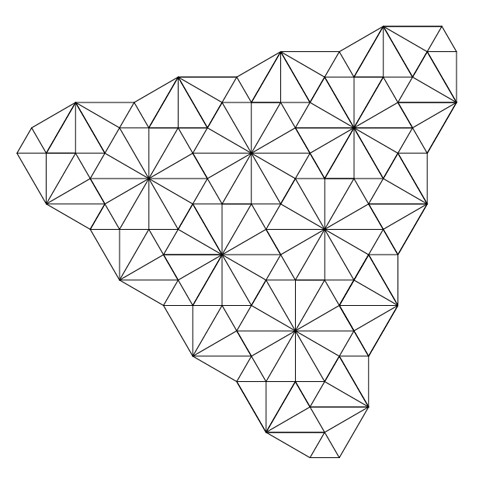
Here was the DWG file I intended to use to test the folding structure. It would have six peaks and a triangular shape. I tried it, but the material I used was too thick, and I was unable actually fold it correctly.
And finally... The fabable expandable hat:
Finally, I derived the geometry of each leg I needed in order to create a
Download final design files.