Making something big
Computer controlled machining and giant beachballs
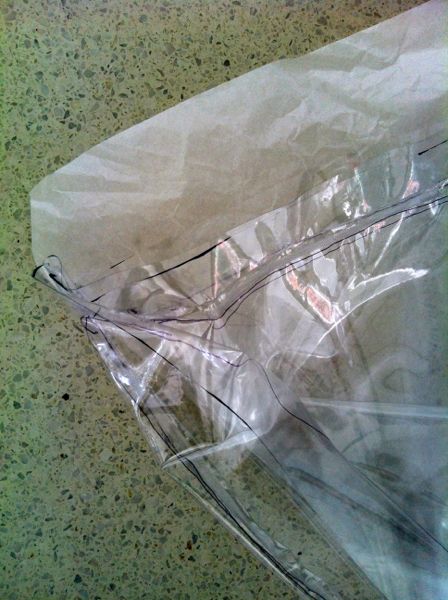
This week was about large-scale machining on the ShopBot (and optionally the Water Jet cutter). I decided to use the week's assignment "Make Something Big" to try to fabricate my giant inflatable public sphere that I'll need for my final project. I want the sphere to be transparent so after looking over some various plastics and doing some research into beachballs, I ordered thin, clear vinyl from fabric.com.
How big is something big? Well, I want my networked public sphere to be bigger than one person alone, so around 8-10 feet seemed like a good size to shoot for.
My first problem was trying to figure out how to model the pieces for the inflatable in the computer. I started by browsing fabric beachball patterns on craft websites like this one. I wasn't sure I could trust the downloadable patterns from sites like these at such a large scale and with non-stretchy fabric. I tried doing the math myself (given that the diameter = 9 feet), but got stymied on how to calculate the curve of the arc while also allowing at least 1 inch on all sides for seaming. I put out a message to the hive for some geometry support in return for free homemade pumpkin bread delivered to their office. I got two great responses:
- Jennifer Jacobs calculated some curves for me based on a project that she had done where she needed to create an ellipsoidal form. Here's a link to her illustrator paths and her explanation.
- Matt Hirsch sent me a helpful geometric solution to calculate the arc based on calculating the circumfrence at different latitudes of the sphere.
- A third way of doing it that Jennifer and NovySan reminded me of would be to model a sphere in a CAD program like Rhino and then either use the Rhino uv unwrap function or else upload the model into Pepakura.
Images
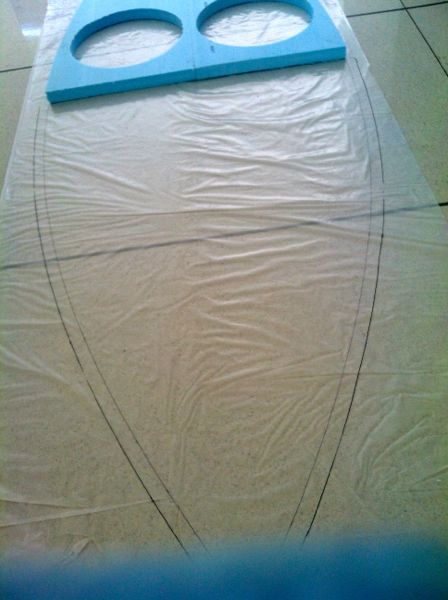
In the end, I was pressed for time because I got an early time on the ShopBot. To try any of the above solutions I would have preferred first to make a model to be sure that they actually came together but I didn't have time for that. So instead of solving it that way, I just cut apart a six-sectioned beach ball, created a high-contrast trace of one section, and scanned that into the computer.

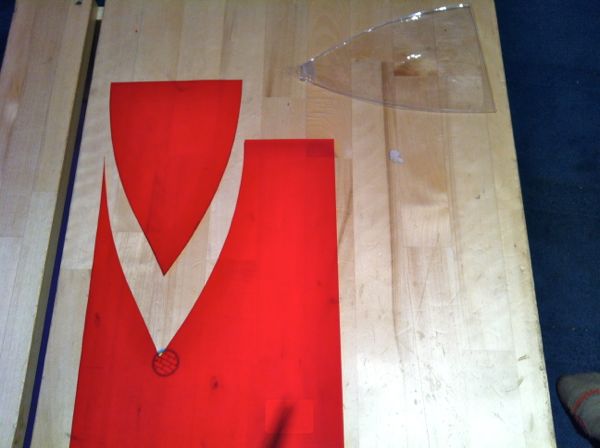
Here's my illustrator file as a png and as an AI file. The circle is inside the arc because we only got one sheet of foam per student so I had to save space.

It was so exciting and slightly terrifying to watch the Shopbot cut that I forgot to take pictures.
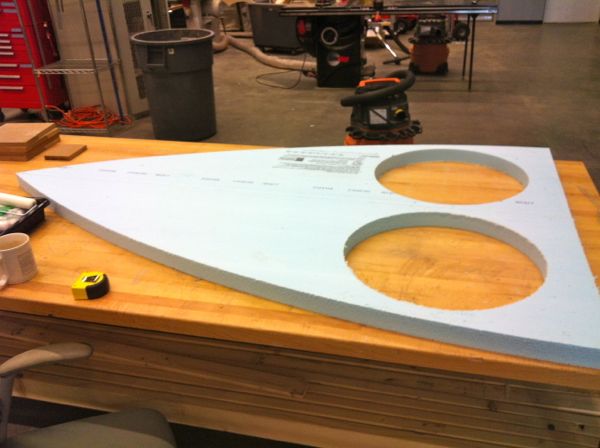
I cut my file twice and glued the two together so I at least had half of my beach ball section.
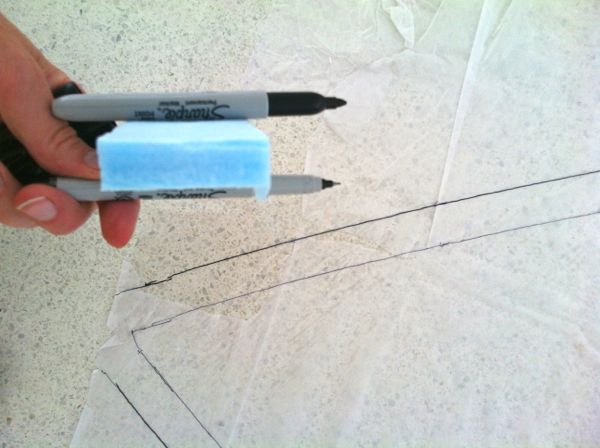
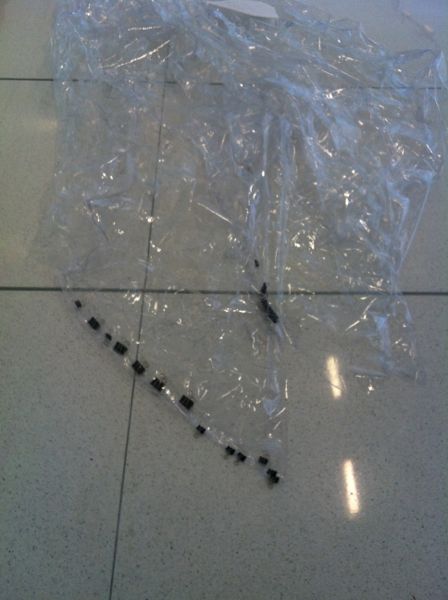
I made a high-tech drawing tool to help me calculate a 1.5 inch seam allowance.
I used the cutout from the ShopBot to trace a pattern on the fabric and then cut it out six times. This was pretty time-consuming and took maybe 2 hours to cut out six sections and two circles for the caps.
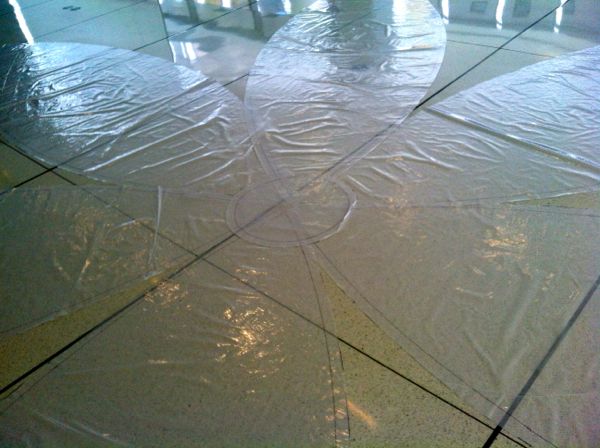
I laid everything out and tried to figure out the best way to put it together. I would start by joining two sections at a time, then join those together, and then finally piece together all six pieces while leaving a good-sized hole to turn it right-side in so the seams didn't show.
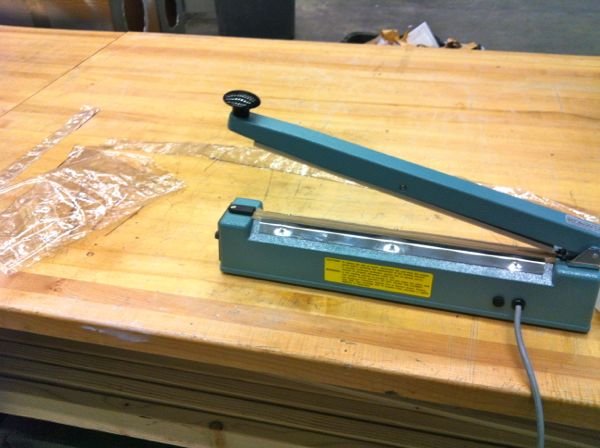
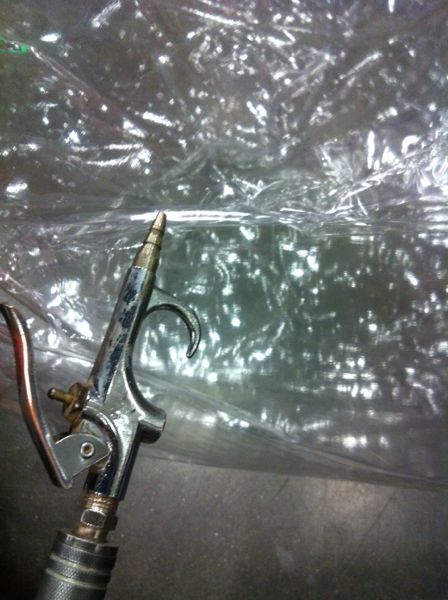
I experimented for about an hour with the ultrasonic welder and then asked Sam if I could borrow his impulse sealer as a backup. The ultrasonic machine was VERY difficult to control. Because the fabric is so thin, I had the ultrasonic's power settings on the absolute minimum (1), the pressure on the front and back anvil on fairly low (around 10) and the speed at 20. This made it pull the fabric through VERY FAST. But if I put the speed any lower it would start to burn through the vinyl. I though the impulse sealer might be easier to control, however it turned out that its long straight lines were not very useful for curves.
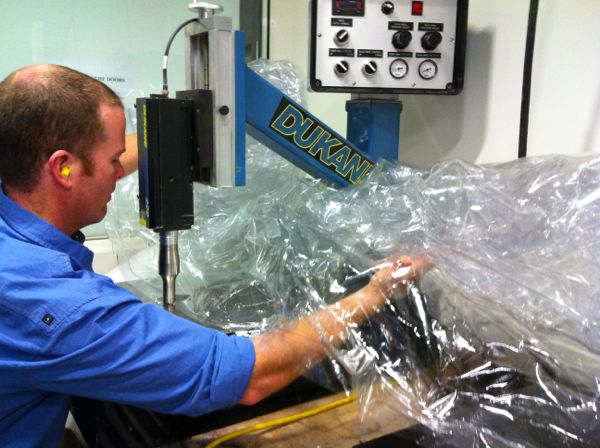
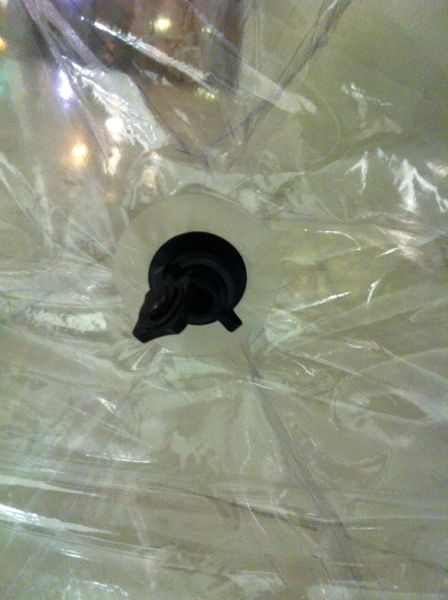
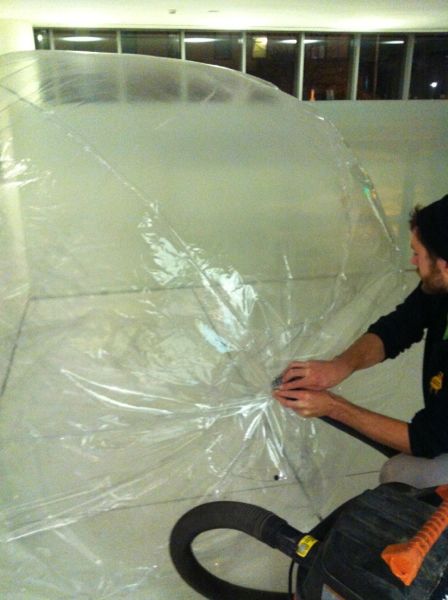
This is my husband Dave who graciously agreed to help me assemble the pieces on a precious weekend day. We ended up using the ultrasonic welder but ended up with holes where we had stopped the machine in order to reposition the fabric. It was pretty difficult to handle all the fabric, particularly as more and more pieces came together. We developed a system of rolling back the unused parts which made it a little easier (but not error-free) to feed through the machine. It's my hope that I'll use some vinyl adhesive to seal the holes in the seams left by the ultrasonic.


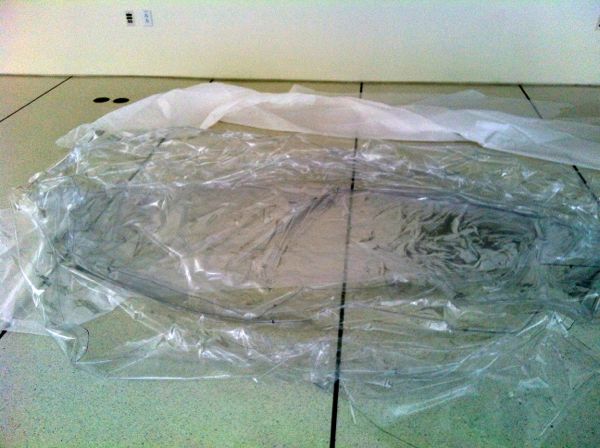

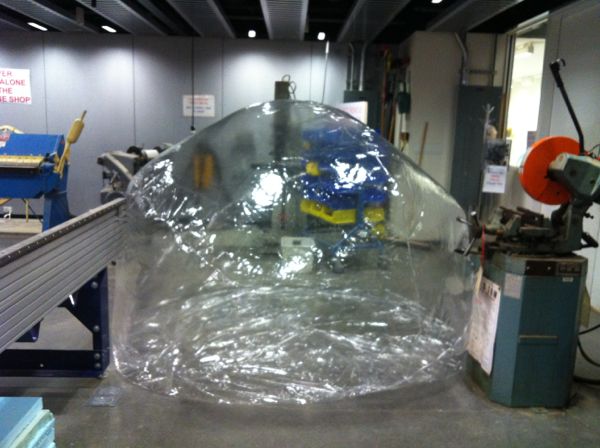

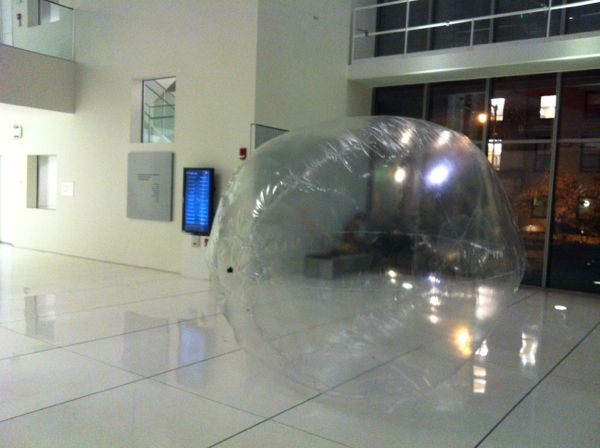
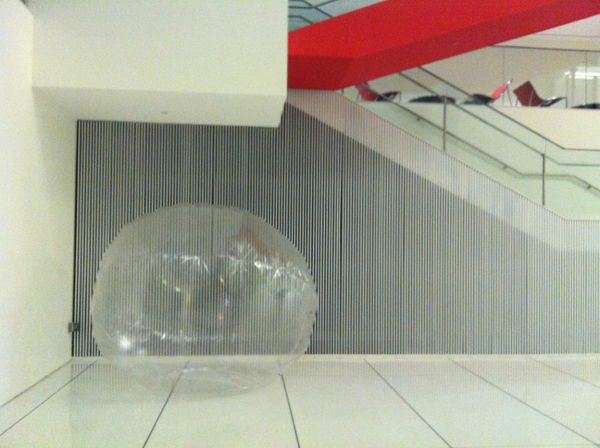
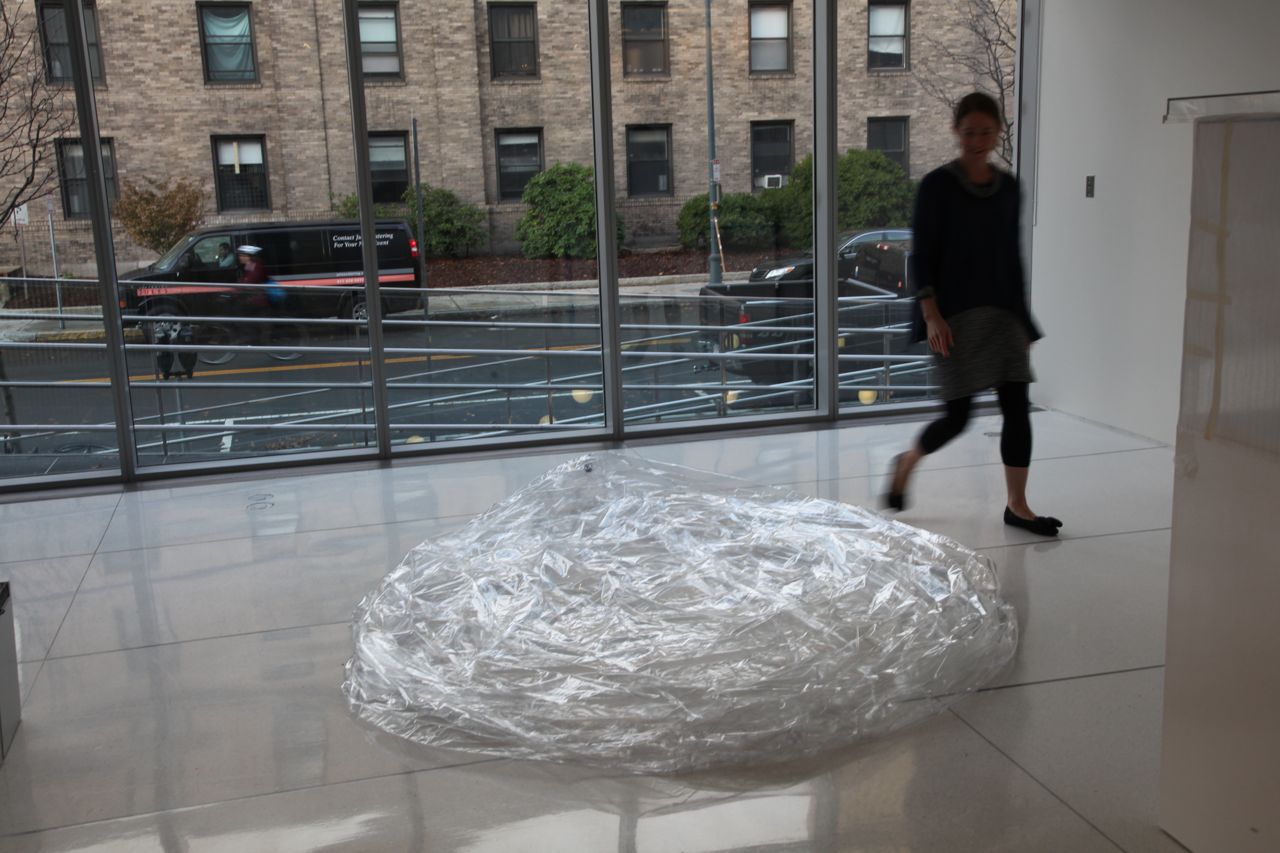
So this looks awesome, right? However, it deflates after about 3 hours to look like a puddle with a dome...