Week Ten: Composites
vaccum? vacuum? vaccuum? vacuume?
Task
Make a 3D mold and produce a fiber composite part in it.
Result
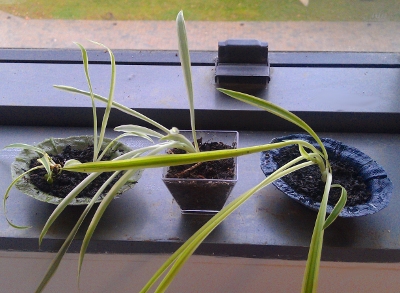
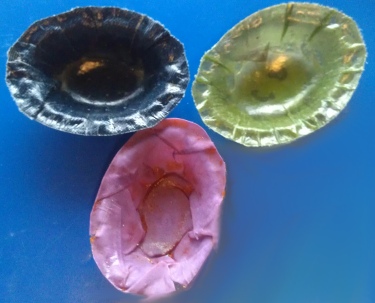
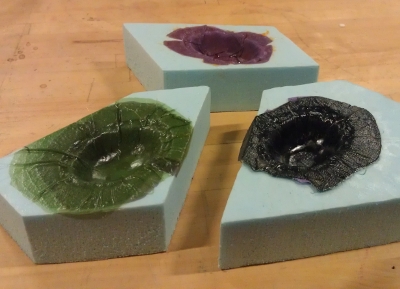
This week I made miniature flower pots so I could add a few more plants to my workspace. I made three pots using a variety of fabrics and binders--including Jell-o! Here are the results:
Files
Approach
Molds
I designed my flower pots in R using the functions I created in week four. I left the surface triangles somewhat granular to produce a fluted edge on the pot. I sized the file in Partsworks 3D to fit the dimension of the blue foam and the my window sill. As in previous weeks, I used the ShopBot to cut the mold.
Composite assembly & vacuum bagging
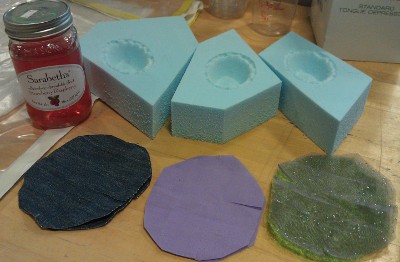
I wanted to try composites from a variety of fabrics. I decided the go for a range of textures--denim, cotton knit, and sheer synthetic material. Because my pots were a fairly basic shape, I was able to cut the fabric by eye. I started with a large oval and added slits on the sides so it could fold in on itself. I also prepared my Jell-o "adhesive" using two packets of Jell-o to 1.25 cups of boiling water.
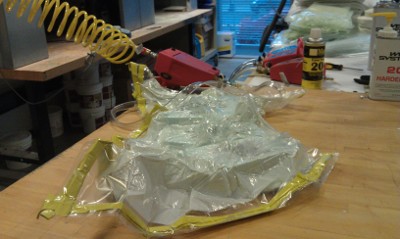
I followed Kenny's procedure to prepare the vacuum bag. This is a three layer set-up: vacuum bag, breather, and perforated film, with double sided adhesive sealant along the edge of the bag. The vacuum bag is roughly 4 inches larger than the other layers on all sides.
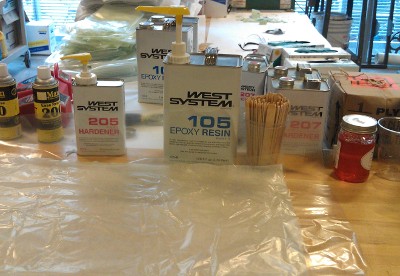
I then prepared and assembled the composite into the mold. I applied two layers of the release spray to the foam as instructed. Wearing gloves, I thoroughly mixed the an equal number of pumps of the epoxy parts in a plastic cup. I used the tongue depressor to evenly and generously spread the epoxy mixture on both sides of the fabric. I placed the fabric into the molds, using two layers of denim plus two layers of cotton weave in one mold and four layers of shimmery fabric in the other mold. I also prepared the Jell-o mold by submerging a few layers of fabric in the lukewarm Jell-o and lightly draining it before placing it into the mold.
I placed the molds on one half of the vacuum bag set-up and folded the layers over one at a time. I removed the protective layer of the adhesive one side at a time to close the sides. I left an open space to insert the tube to the vacuum, included extra breather here, and ensured that the adhesive sealed cleanly. Kenny helped me bunch up the bag above the molds so that there was plenty of material to create a tight seal. Finally, I attach the vacuum pump to the shop air, traced around the edges of the bag to reinforce the seal, and pressed into the molds as the vacuum pulled.
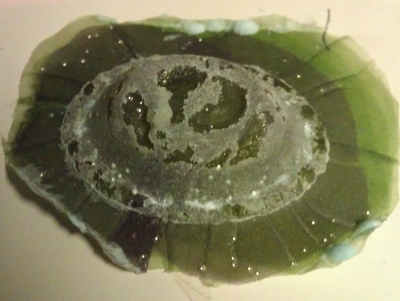
After leaving the pump for about four hours, I unattached the air and removed the molds for the bag. I carefully removed the composite parts from the mold by hand, as the material was still somewhat flexible. I let the Epoxy composites sit at room temperature for a few days and put the Jell-o composite in an open container in the refrigerator to set. Finally, I trimmed off the excess material with the bandsaw.
Trials and Tribulations
Despite using the release spray on the molds, my composite stuck to the cut part of the molds. Someone suggested I could lightly sand it to remove the foam, which I tried briefly, until another person warned me that sanding epoxy was not particularly safe. It was only mildly successful as well.
The synthetic sheer fabric was more difficult to work with than the denim. It tended to stick to the gloves and resist sitting into the mold. The polyester composite also didn't have the strength of the denim/cotton composite--more layers may have helped this had they been easier to affix. Overall, I was happy that I tried alternative fabrics, though my object didn't require particular robustness so it's possible that strength was compromised without my knowledge.