
Week Four: 3D Scanning and Printing
don't beam me up with that 3D scanner!
Task
3D scan an object; design and 3D print an object.
Result
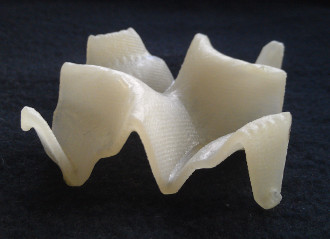
Here are images of my 3D scans and prints:
Files
Here is a selection of the files. Other files, including wrp and stl files for scans, are available on request--they have not been included due to size constraints:
Approach
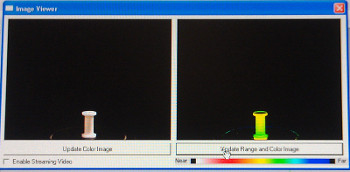
3D Scanning
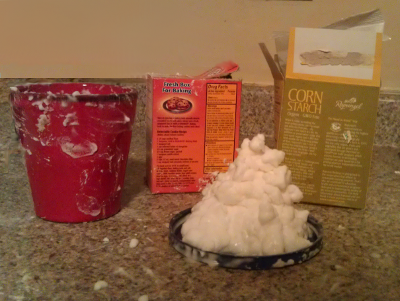
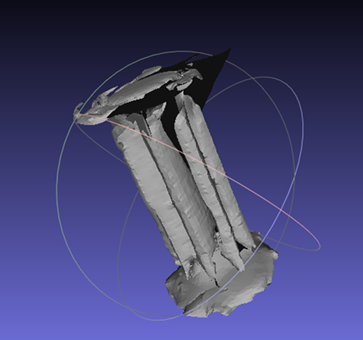
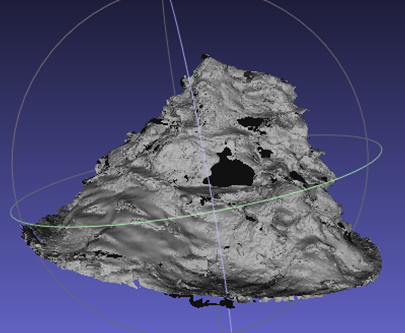
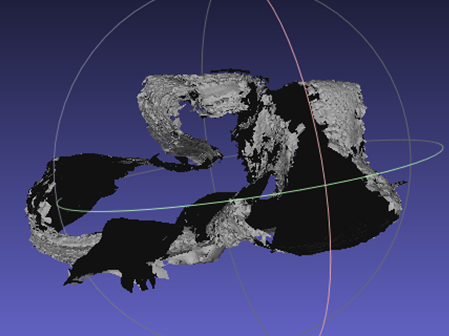
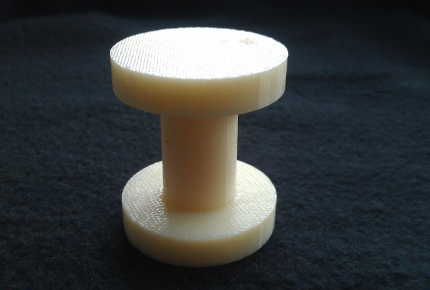
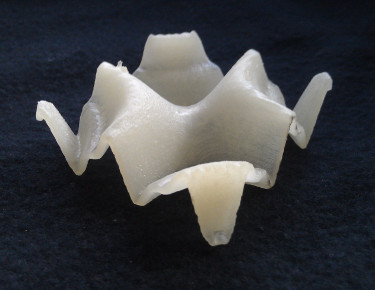
I wanted to try scanning a variety of objects. I picked a spool of thread as an easy object (white, simple structure), a drip castle as a medium object (solid, forgiving shape), and a folded ribbon as a difficult object (thin, reflective gold strip, overlapping structure).
I thought the drip castle would be a nice curved "organic" object that was one step easier than the ribbon. But I had to figure out how to make it, as it's not exactly the beach time of year. After some experimentation with other materials, baking soda turned out to be the best cheap alternative to sand. To get the castle to hold its structure I had to use less water than I would have for a sand drip castle, since baking soda is finer than sand and I built it on a plastic surface that didn't drain. It turned out a little globby but overall not too bad.
I followed Jin Joo's tutorial to scan and clean my objects. The results were not as nice as I'd hoped--see the Trials and Tribulations section for more information.
3D Printing
Because my 3D scans weren't very clean, I decided to 3D print a simple object then play around with other ways of generating 3D objects.
First, I used FreeCAD to draw what my 3D scanned spool ought to have looked like. I saved it as an stl file, double checked it in MeshLab and sent it to be printed on the Envision 3D printer. Later it was printed on the Dimension.
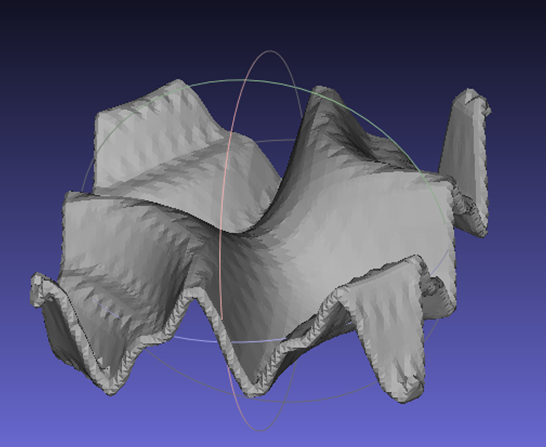
With that done and with some inspiration from Prashant's use of MatLab, I decided to continue my quest to use R as a CAD replacement. Some googling revealed that there were packages that plotted in 3D and made surface triangles from a mathematical functions, but nothing that created and wrote out an stl file.
Fortunately, creating the stl file was mostly a matter of data restructuring. The surfaceTriangles function in package misc3d returned a list including three matrices, each a set of co-ordinates for the first, second, and third vertex of the triangles. I'd read that setting the normal vectors to (0, 0, 0) in the stl file should work, so I stuck with that approach. From there, I defined the character constants, structured the vertices and triangles correctly, and write out the file. See the Results section for the code--it's not the most efficient, but it runs quickly enough.
After making a stl files from a few "pretty" functions, I double checked them in MeshLab--it worked! Though in order for these to be 3D printable, they had to be a volume instead of a surface. As a temporary fix, I thickened the surface in MeshLab, using Filter->Remeshing->Uniform Mesh Resampling with settings: precision at 1.0%, offset at 53.0%, and absolute distance selected. This gave a nice printed thickness--sturdy enough, but still surface-like. But long term I'd like to have this process all R-contained. The general approach would be to subtract epsilon from the surface and add vertical planes at the limits to close the sides. I didn't see any surfaceTriangle examples on a volumes though, so I'm not sure if the function will like this. Also, how precise do the corners have to be for the shape to close properly--how much room is there for fuzziness? Is some overflow allowed? Is it important to include the line of intersection? Next on the to-do list!
I'd also love to make this big--what would it be like to walk on your favorite mathematical function? Or make it into a (not so functional) table surface? Or ceiling? There's something aesthetically pleasing about many functions and they could be used in such a variety of ways. Though 3D printing doesn't seem to be the best mechanism for the realm of "really big."
Trials and Tribulations
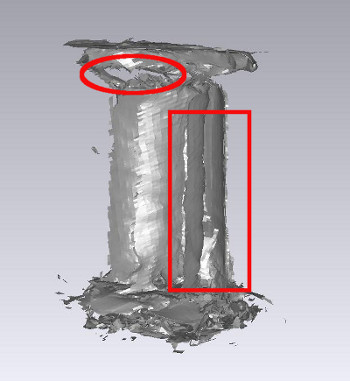
My 3D scanning attempts led to some less than ideal results. I expected the ribbon to be difficult, as it is a thin surface twisted on itself. But I thought the drip castle and the spool would be fairly straightforward. The problem with the drip castle seemed to be its large base--I couldn't get that hole to fill, even trying partial filling, bridges, and plane intersection. I expected the spool would be simple since it's a straightforward geometric object, but I ran into a number of issues. First, the scan missed the connection between the top piece and the center cylinder, due to the sharp angle between them. Second, the spool may not have been "solid" enough. It seemed like some of the internal structure (wagon wheel spokes) showed up in the scan. Because of this, I ended up with many large internal holes with complex geometry that I couldn't close. I tried covering the spool with a layer of paper and re-scanning but that didn't make a difference. Maybe something thicker would have--or perhaps this problem had a different cause.
Learning all the various CAD-esque programs has also been a bit of a hassle. There seem to be a million menus and knowledge doesn't always transfer well from one program to the next. I've learned to google immediately instead of pouring through the menus trying to find the tool I want.
My spool was next to an object that had a meltdown during printing on the envision, so it got turned into a blob. Round two on the Dimension went fine.