Week 8: Embedded Programming
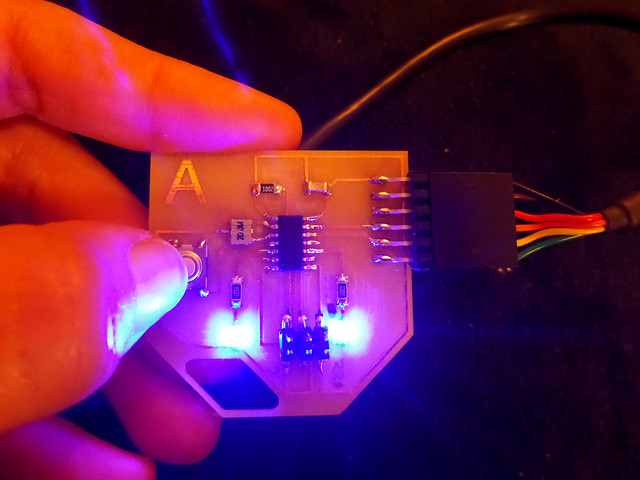
This week our assignment was to read the AVR microcontroller data sheet and to program our hello board. My board has two LEDs and one switch. I first programmed the board using Arduino and made the lights blink in week 6. This time I tried writing the code in C language and used Fab ISP as the programmer.

Reading the AVR microcontroller data sheet
When I first read the datasheet, it didn't make any sense to me. I read the first few pages in detail and just skimmed through the rest.
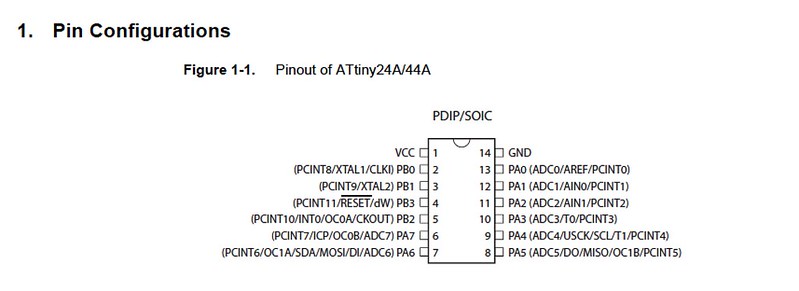
The part on Pin configuration and description was helpful. It also helped me better understand the schematic and connections for the hello board.
I went back to the data sheet 10.3 Register description while I was writing the C code.
I felt very intimidated initially as I had no prior experience in both programming and electronics. David Melis explained certain concepts about AVR programming and helped me get started.
He has also created this super awesome tutorial on AVR programming.
Using the FAB ISP as the programmer
An In system programmer (ISP) is needed to load a program onto the AVR chip. I used the FabISP board that I made in week 3.
I first marked the MISO on both the boards and connected both the boards matching the respective points on the AVRISP smd using the ribbon cable.

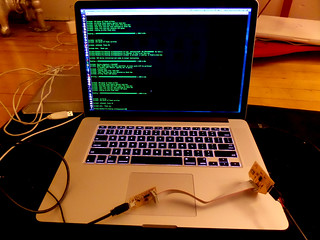
I connected the hello board using the FTDI cable and FabISP using USB tiny cable to my computer .
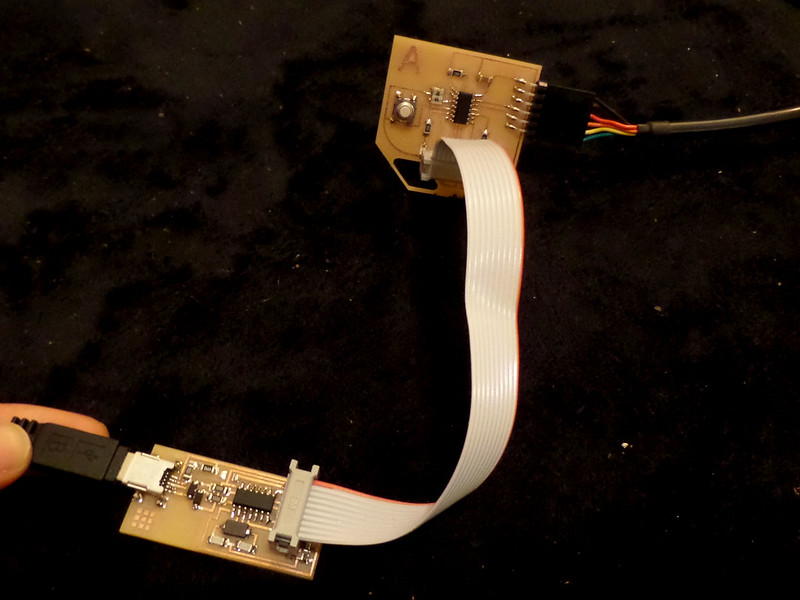
I connected the hello board using the FTDI cable and FabISP using USB tiny cable to my computer .
AVRDUDE
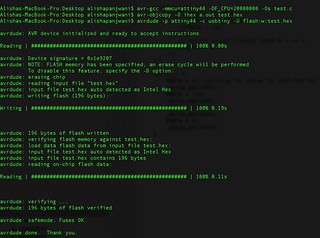
AVRDUDE allows you to upload the program onto your AVR chip.
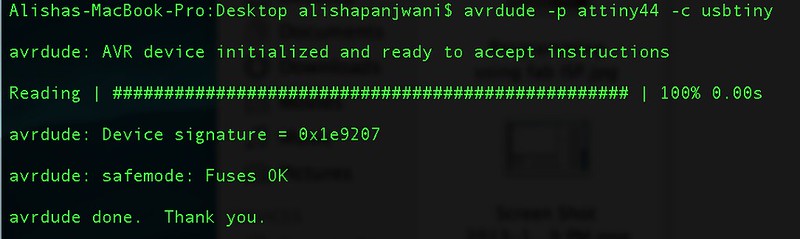
To make sure the connections were correct I typed the following command onto the terminal
avrdude -p attiny44 -c usbtiny
-p is the part number to specify the AVR device(attiny 44) and -c means the type of programmer (usb tiny).
to get a list of programmers for AVR, type avrdude -c asdf on the terminal. It will list all the valid programmers for the AVR. Once you specify the programmer(usbtiny), you can type avrdude -c usbtiny. It will list all the valid parts for the specified programmer.
I got the following feedback when I ran the command and I knew things were connected and ready to communicate with my computer.
Writing the program in C
It was my first experience with C language.
It is not as easy as arduino but definitely worth learning.
I used the basic text editor to create a file called test.c
Here is my first code:
#include // library that comes with the AVR pack
int main() //Main function which is called when the program starts
{
DDRA = 136;// setting PA7 and PA3 as output pins
PORTA = 136;//setting the value for both PA7 and PA3 as high
for (;;) { //starting an infinite loop
PORTA = 136; //setting the value for both PA7 Pa3 as low
}
}
The Attiny microcontroller used Binary math. I had no idea how that works and David explained me the binary math to understand what the function was doing. His tutorial explains it pretty well. Here I also needed to go back to the data sheet to the section on Register description. Registers controls the behavior of the various components on the microcontroller. My program above has two registers: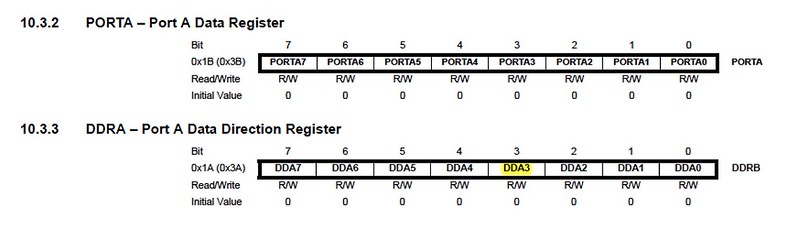
DDRA is the Data register for port A. DDR determines whether the pin is input or output. On my board I attached Lights to PA7 and PA3 pins on PORT A. According to the bit system, 0 means input and 1 means the output. To specify that pins PA7 and PA3 are the output, I used this combination to do the bit math.
to be added...
Here is the video
Here is my first code:
#include
int main() //Main function which is called when the program starts
{
DDRA = 136;// setting PA7 and PA3 as output pins
PORTA = 136;//setting the value for both PA7 and PA3 as high
for (;;) { //starting an infinite loop
PORTA = 136; //setting the value for both PA7 Pa3 as low
}
}
The Attiny microcontroller used Binary math. I had no idea how that works and David explained me the binary math to understand what the function was doing. His tutorial explains it pretty well. Here I also needed to go back to the data sheet to the section on Register description. Registers controls the behavior of the various components on the microcontroller. My program above has two registers:
DDRA is the Data register for port A. DDR determines whether the pin is input or output. On my board I attached Lights to PA7 and PA3 pins on PORT A. According to the bit system, 0 means input and 1 means the output. To specify that pins PA7 and PA3 are the output, I used this combination to do the bit math.
to be added...
Here is the video