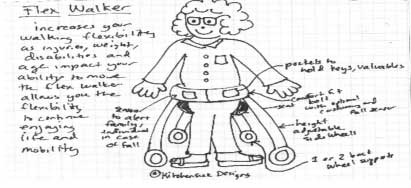
Design an assistive walking device that supports people in various stages of lost mobility. Include sensors to sense if a person is going to fall and a cushion, seat or airbag system that deploys to mitigate the impact of falling. My original design was going to focus on an older population. But I decided instead to focus my efforts first on children and scale up and change the walker as need be for older individuals.
Design a device for developmentally delayed children to navigate their spaces more freely and independently. Improve the ability for developmentally delayed children to age in place, maintain mobility and reduce/mitigate falling.
Create a walker that supports a person who has lost 1 or more limbs.
Nursing and group homes tend to restrict mobility in otherwise mobile individuals because of liability. A developmentally disabled friend is epileptic and has the ability to walk but cannot navigate stairs and without assistance is a falling risk; therefore she is resticted to a wheelchair or a 2 person escort. This device could help people navigate their spaces more independently with a reduced fear of falling. The walker will help disabled individuals better integrate into community settings.
More people are aging in place and want to stay in their homes; however current walkers are insufficient across multiple terrains (i.e., difficult to handle on carpet, cobblestones, up stairs, etc.), bulky (i.e., many arthritic individuals cannot lift them or collapse them easily) and are difficult to adjust for a variety of body types.
Faling is a common and grave concern for older adults (e.g., a friend's grandfather recently died from a brain contusion related to a fall,another older friend is confined to a wheelchair because he has Alzheimer's and is able to walk but is unstable). A walker that could catch a person during or before a fall could mitigate some of the impact of these serious falls and increae indepence and confidence for older adults.
Obesity is a growing health epidemic in teh U.S. and beyond. A walking systems that allows users to walk with assistance could allow an obese individual who might otherwise be restricted to a wheelchair increased mobility and independence which could lead to improved health and longevity.
A young eplileptic or developmentally delayed child could use this device with a reduced risk of seizures while still experiencing gains in mobility and independence.
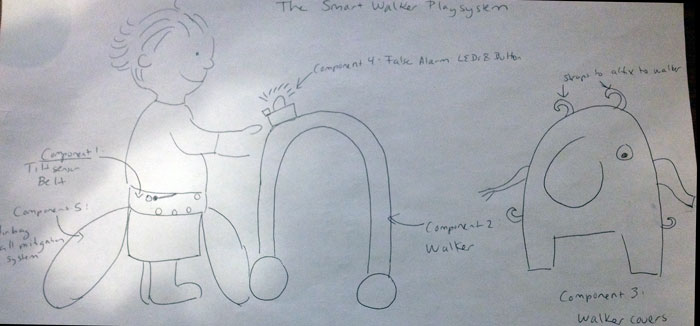
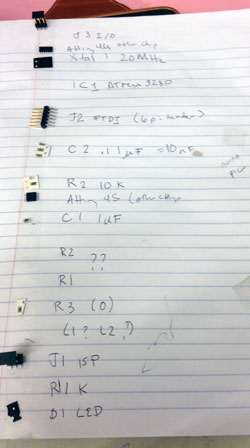
After seeing my project description last week Neil told me to pick one component to focus on. I first chose the tilt sensor. I prototyped several versions of this sensor on paper
This component will include 2 fabric tilt sensors located on a belt worn around the users waist. The side tilt sensor will indicate if the user is falling backwards or forwards. The back tilt sensor will indicate if the user is falling sideways.
Conductive fabric cut on the laser cutter or vinyl cutter, conductive thread, leds
Input Devices, Computer controlled cutting, electronics fabrication, electronics design
I designed a tilt sensor prototytpe on paper using leds two -AA batteries and copper foil from the vinyl cutter. It works on contact but does not have the range of motion needed to indicate falls at different angles.
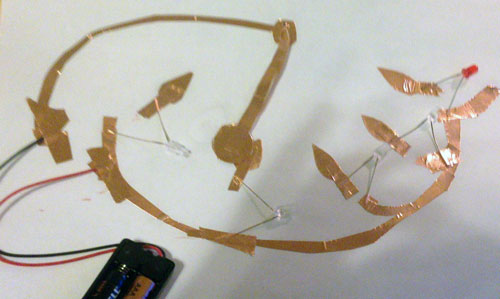
I Googled 'make your own tilt sensor' and came up with 2 tutorials for a tilt sensor bracelet and a conductive tilt sensor pom pom. I ordered and bought the materials needed for both of these projects and made a working prototype on paper with vinyl cut copper traces on paper. I Drew several versions of tilt sensor circuit on paper first and tried to understand it on paper. I played around with conductive paint and painted some traces. These designs need pull up resistors and I was using a 9V battery to power the circuit which I think was too high for the LEDs.
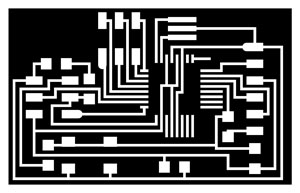
remember to add eagle schematics and files and screenshots
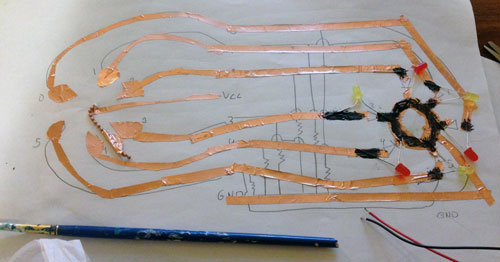
While waiting for my conductive fabric and thread to arrive I designed a tilt circuit on the vinyl cutter. I designed the board in Eagle and laid out the traces. I planned on adding a conductive bead and string similar to the tilt sensor bracelet. I exported it into inksapce and filled in some spaces. I went to the lab and tried to cut the circuit on the vinyl cutter. Fab modules loaded up fine and showed the path of the circuit but when I sent the job to the vinyl cutter it made a triangle path but the blade never depressed. I tried several times, restarting the computer and the vinyl cutter. I figured something may be wrong with my file and vowed to try again in the future.
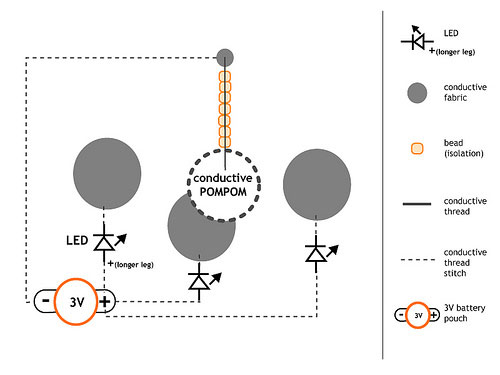
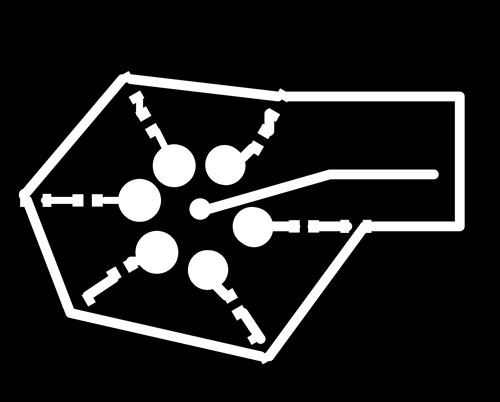
I used the tutorial for building your own conductive pom pom tilt sensor I modified it slightly by adding pull up resistors on the leds so they wouldn't burn out as quickly. When my materials arrived I cut out the conductive fabric and positioned it on a piece of blue crafting foam. I secured the conductive fabric with pins, got a AA battery pack and used the conductive thread to sew traces. I made a conductive pom pom by looping several strands of conductive thread with regular yarn and tying the pom pom together. I looped the conductive thread around the wires of the battery pack. The sensor works well! When the pom pom makes contact with the front or back conductive pads that would indicate the user is falling and alert the user's fall mitigation system and false alarm button to trigger.
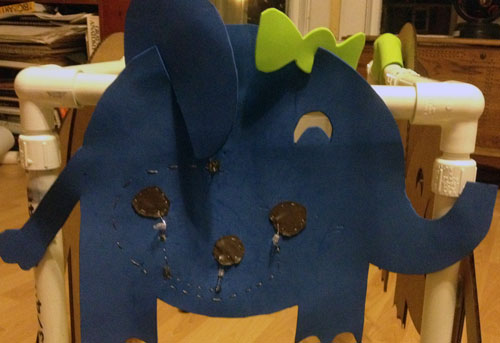
I designed and cut out press fit ears for the tilt sensor elephant and a press fit bow as well and added them to the sensor. I attached the sensor to teh back of teh walker for fun with velcro. I made a back piece for the elephant to cover up the electronics and make both sides visually appealing
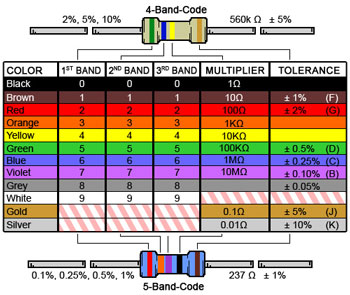
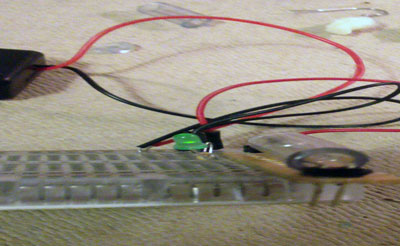
I followed the tutorial Instead of an acrylic tube I used the plumbing supply lines I got at my local hardware store I bought 2 sizes to see whcih one would be better and also 6 ball bearings because I envisioned this being 'quick and easy' and I would make 6 tilt sensors. This was neither quick nor easy. I also lost a few ball bearings. They are so tiny!. So I made one tilt sensor- trying several times and tested it out on a solderless breadboard with a simple LED circuit. I also accidentally bought a straight male header instead of the 90 degree one and I ended up having a hard time making good contact because the pins weren't bent at quite the same angle. I bought a cheap make kit which included a solderless breadboard, an arduino, a bunch of sensors and used this included schematic to figure out the value of resistors and to prototype test out the tilt sensor.
It finally works!! This took hours and hours of testing and tweaking and bending the headers at just the right angles and is not reliable. Neil said it is important to make a reliable board taht doesn't depend on DC contact. I was confused because I thought this is how commercial tilt sensors work but after soem help I decided to make yet another tilt sensor connected to Neil's hello.txrx board and monitor the tilt that way.
Testing the tilt
It makes a lot of sense to just buy the sensor. I bought a kit of sensors and components at RadioShack and a solderless breadboard and compared my homemade tilt sensor with the commercial one and the commerical one was more compact and easier to plug in and use.
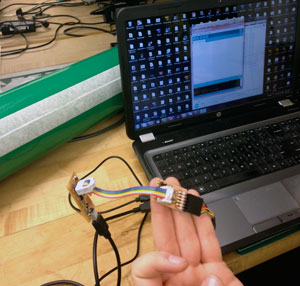
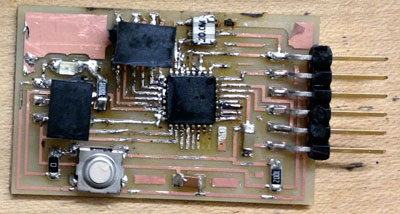
Neil suggested making a tilt sensor that is attached to his transmit receive hello world step response board so the pins of the transmit and receive can sense the liquid or rolling ball movement. He said this is more reliable than relying on DC contact for the tilt sensor. So I went to the lab and mileld out the hello txrx board.

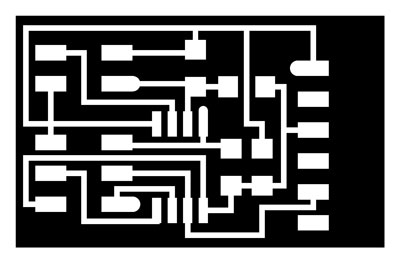
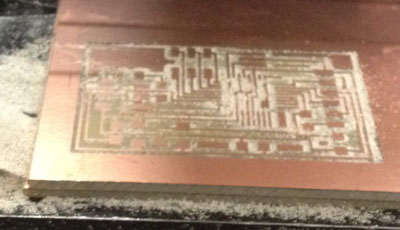
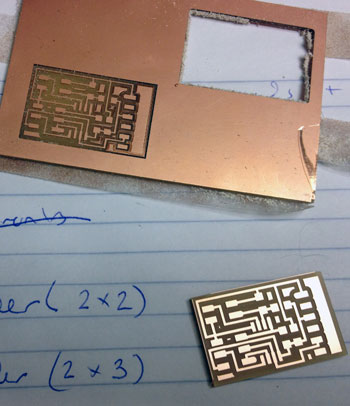
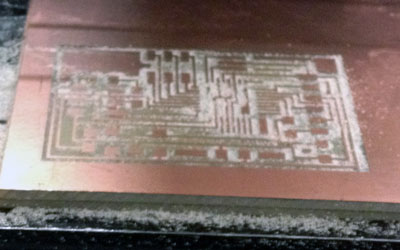
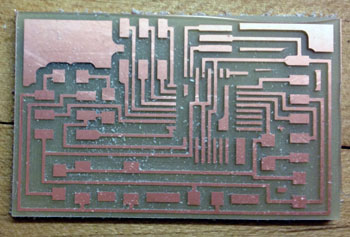
The traces and interior
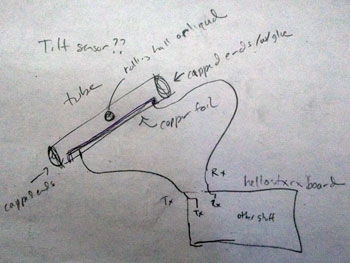
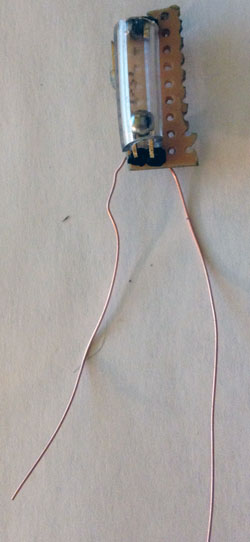
The idea. A tube filled with liquid or a rolling ball- is bent -- not as shown in this picture and copper foil is attached to 2 ends of the tube. This is tied to the transmit and receive pins on the step response board and the step response measures the amount of liquid or rolling ball passing over the copper plate which indicates direction and degree of the tilt.
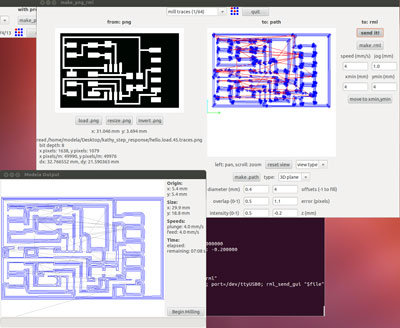
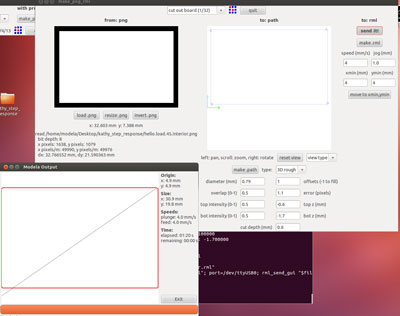
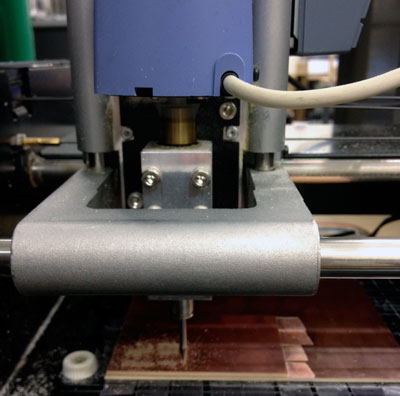
Milling this board was comparatively so quick and easy!!! I meticulously checked my settings made sure that everything was level changed out my sacrifical layer, changed my tools and setting properly! Feeling pretty Modela proficient!!
Then I realized when I went to gather components I'd milled the wrong board! So I set it up again. And this time I accidentally set to settings for .1 tool diameter and this didn't work, so I did it again and it didn't work. So I changed my drill bit and started over and it worked and I was able to mill a new board. I also fogot to adjust my cut depth so it wans't initially cutting deep enough. Silly silly mistakes
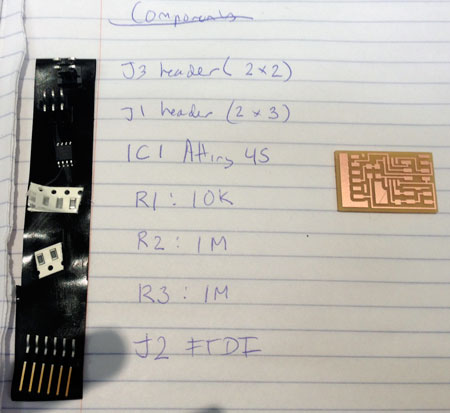
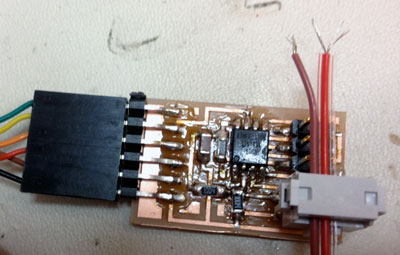
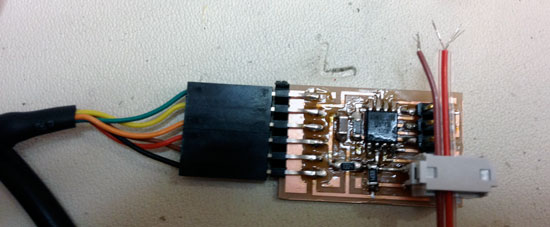
My new board! I gathered all components, washed my board and used flux for the first time ever. Now since switching to lead free solder my boards have gone downhill. I have had a really difficult time mastering it. But with the flux and patience soldering was much much easier!
With Kristin's help I was able to burn a bootloader to program my board so the conections are all great! first time ever!!! So excited.
With Krsistin's help I created a header to connect to the transmit and receive pins.
I tested the connection using the voltmeter
Now I just need to build yet another tilt sensor. Attach it to this board and program the board to measure the degree of tilt.
I have had very limited success in setting up a programming environment on my computer at home. I tried CrossPack it didnt work, I tried using the command line to run Neil's code and that didn't work. I downloaded XCode many many times and was having problems finding make. I downloaded processing in the applications week and that didn't work. I downloaded arduino and teh correct drivers and that didn't work- carefully following David Mellis' tutorial. I have found this very very frustrating. I finally downloaded the code for Neil's hello txrx board today and Downloaded XCode for the millionth time and downloaded developer tools and it actually recognizes make now. So I may have a chance of programming this board yet! I actually studied computer science in school so I'd thought this step would be relatively straightfoward for me but it was not.
I spent so much time focusing on figuring this out and figuring out the hardware that I didn't figure out the software piece. I finally gpot make to work but was having directory does not exist errors so I used Taylor Levy's page and Charles tutorial and followed the directions exactly and was still having errors- I had errors downloading py serial- saying directory not found. This is my next big push is actually getting this sensor to work!!!
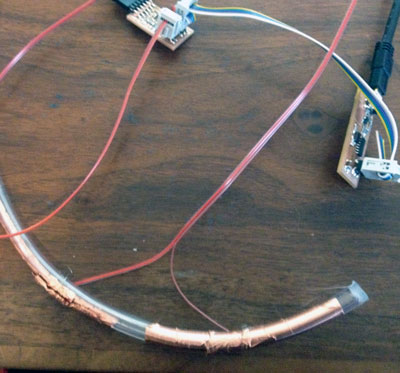
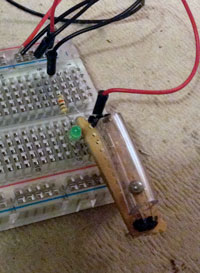
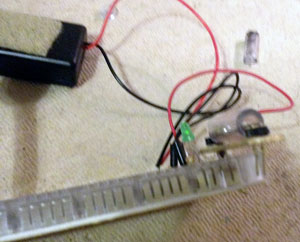
This is the setup. The tube is coated with conductive copper, and filled with water and capped on the ends with hot glue. each copper pad is connected to a wire which is connected to the hello.txrx.board. The water doesn't flow freely- so you really need a bigger tube for the water to be effective. And I lost the last of my 6 ball bearings. The tube should also be curved a bit more and mounted on a stable surface.
This is a major fail. I took so long to figure this out and worked on the different versions of the hardware so long that I never got to finish the software and make the cool board and sensor actually do anything meaningful. Instead of 1 great thing I have 3 mediocre things.
I finally got pyserial to download successfully and Installed avr-osx and now the program makes, but I get New errors, progress???? Still debugging this workflow. I plan to work on this more to actually get it to work
I figured I may need a fabduino in my project later on so I milled a fabduino using Neil's hellofabduino board. It was miraculously the first time I successfully milled a board on the modela on the first try!!

Neil's hello arduino board's
Milling the board went well
I then Gathered my components and stuffed and soldered the board.
This took hours and hours and in the end was very difficult with the lead free solder. I ended up lifting up some traces when trying to solder the microcontroller. Nonetheless here is my stuffed and soldered board. I may test it out in January. Or try to make another one.
The walker will use 2D design and 3D design to create a fun, lightweight and approachable walker
pvc pipe, wheels made in molding and casting, 3D printed connector pieces
3D printing, Molding and casting, 2-D design
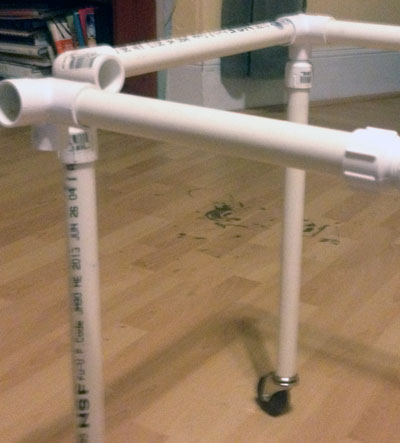
I used the video in the instuctables as basis for my walker. She was having difficuly with her wheels. I made wheels in molding and casting in an earlier class but they actually were too small and not quite right so I decided to buy wheels and redesign weheels at a furure date. I first 3D printed some connector pices on the cubify and the cubify was no good for this piece. The piece didn't stick together and wasn't quite structurally sound. I probably should've used the stratysys. I did an inital design on paper and then in solid works to get an idea of the different connectors needed.
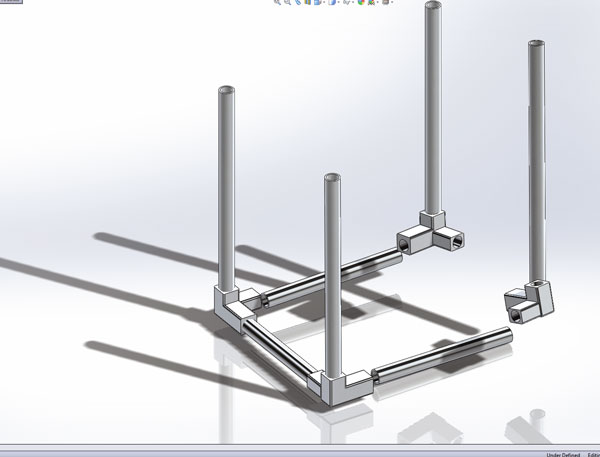
The walker in the video is not easily reconfigurable so I opted for the more expensive male female connector pieces so that the walker would be a bit more versatile and could be taken apart more readily for repairs or to add height.
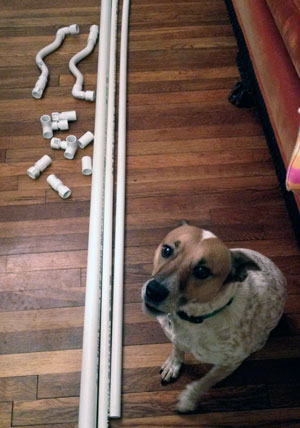
Here are my parts. Miles Davis, the dog, wanted to be a part of the experience.
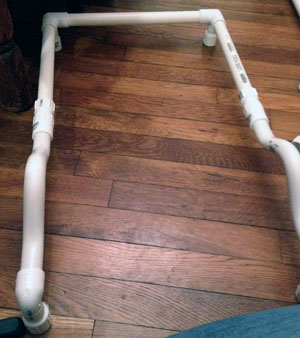
I measured twice, sometimes 3 times and cut once to get all of my pieces down to size.
here is the top.
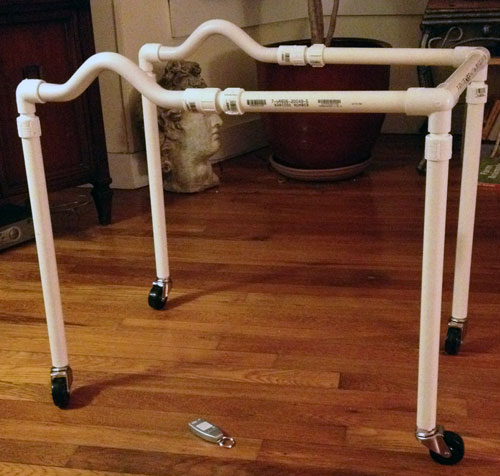
I cut plugs out of foam to attach the caster wheels- my son easily disassembled these in his first test run. I also initially did not glue it at all and it kept falling apart.

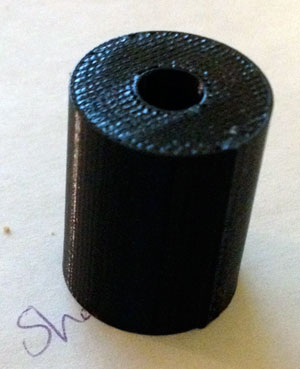
I designed a plug in solidworks to plug the ends and insert the wheels. I used a chart to determine what size hole I needed to my thread count and width of screw on my wheels. I measured teh interior of the pvc pipe with calipers and printed 2 different test runs of the plug to see what tolerances I needed. When I settled on one that was good I printed 5 (4 for teh plusg and one for good measure. When I'd put them in the ends of teh pipe with pvc cement I waited for them to cure then learned to tap them using a tapping tool that our awesome shop manager dave scott showed me how to use. I then screwed the wheels in and tightened them with the largest wrench known to man or Woman!
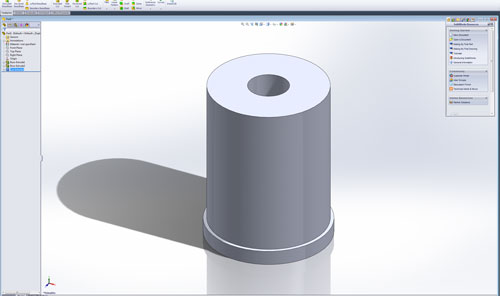
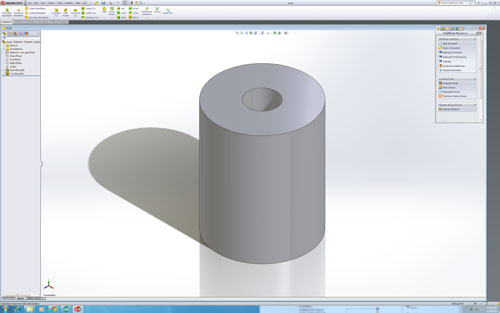
I designed 3 slightly different sizes and printed them out on the Stratysys to see which was best.
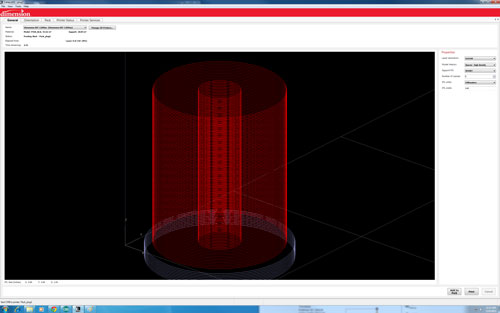
The stratysys software package and the final printed part
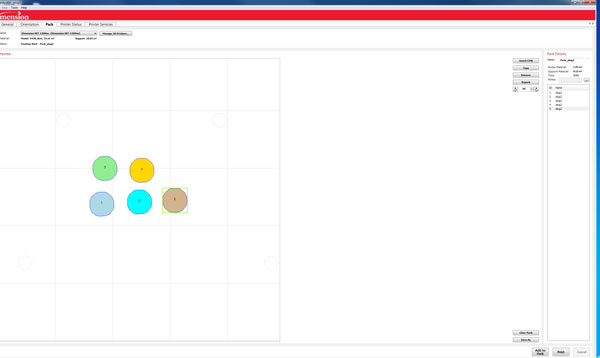
Print 5 at once!
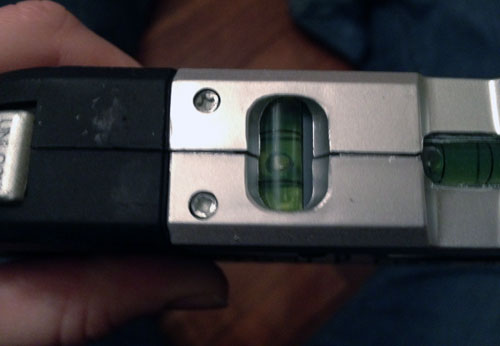
Check to make sure everythng is level and straight before glueing pieces together because PVC cement is strong!!!
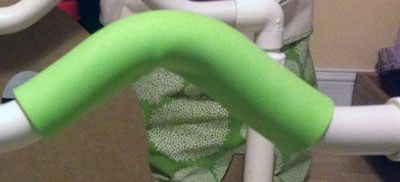
Finally I wrapped the walker in some holiday ribbon I own, I figured this added to the brightness and color of the walker. Wrapping the walker took awhile.
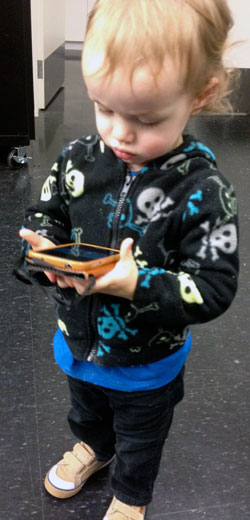
My son helping at the lab
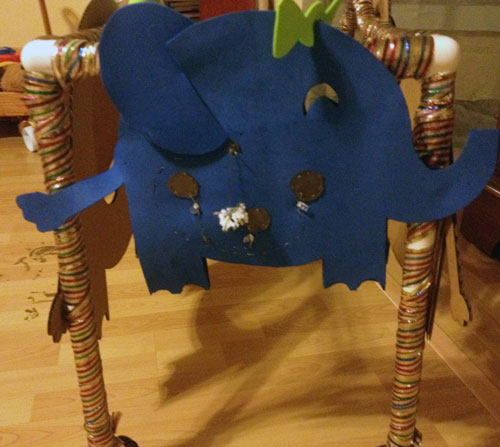
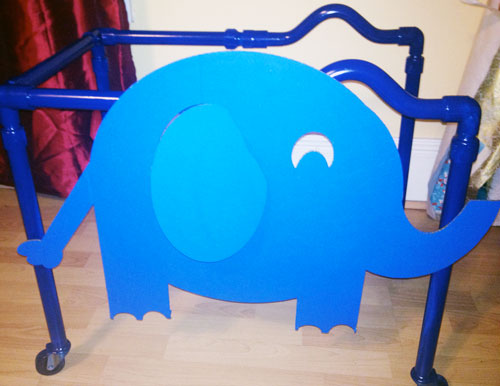
The painted and elephant adorned piece
Here is the evaluation system: in stoplight chart style!
These walker covers will be snap on covers for the walker that can change the look and feel for the kid using them. The kids can customize their walkers with racecars, elephants. This design helps the walker appear more toylike and allows the user to better integrate into their environment in a fun and playful way.
acrylic, hydrostone, burlap, foam
3D design, composites


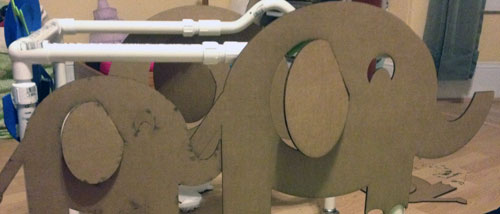
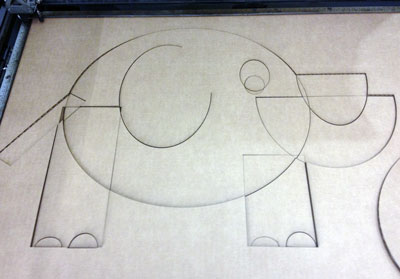
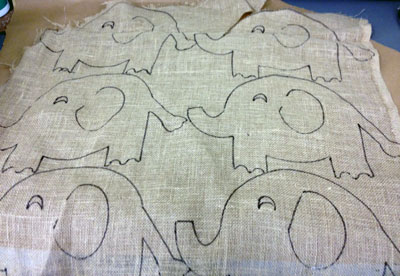
I then laser cut the elephants. I referred to my week1 page for the proper laser cutter settings When I imported my inksape file into coreldraw it was a litle off. I also designed it in inkscape to be all black and corel draw would've tried to just rasterize the whole image so I redrew the elephant in Corel Draw keeping all lines hairline width. I added some 'invisible boxes to cobver over the lines in corel draw. But they still cut anyway.
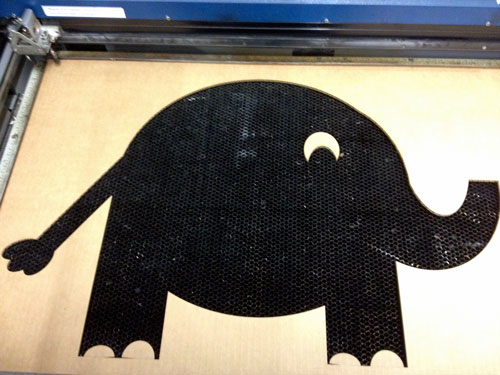
So I went back to Corel Draw and Patrick showed me how to use the union, difference and intersection comands to create 1 vector without layering different shapes on top of each other. I corrected my image, imported it back into coreldraw, checked all lines were hairline width and cut away.
I cut several different sized elephants and soon I had an elephant family
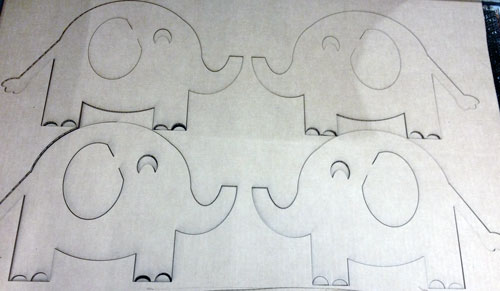
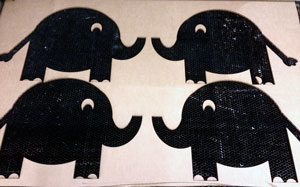
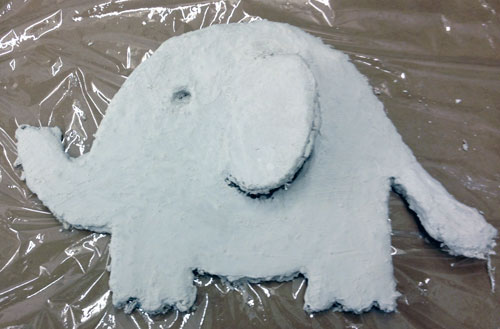
My original idea was to lay up a composite of burlap and hydrostone with a cardboard base. Using the laser cut elephants as a guide I traced and cut out 6 elephants out of burlap. I spoke with David in the IDC (the resident composite guru) and he said I had enough layers to create a composite without a carboard core and was skeptical how well the carboard core would work. He also said if I'd cut them a little oversized it would have been easier to have an inner core. Using his advice and suggestions I layed up 5 layers of hydrostone and burlap. It seemed pretty durable so with my remaining 1 layer I decided to impregnante the burlap with hydrostone to see how just one layer would look. Impregnanting things is WAY more fun than actually being pregnant. I wrapped the 2 composites in plastic wrap and let them dry overnight. The surface finish would've been nicer if I'd used a 2 part mold. They are also way too heavy to use as a cover for the walker. The next step would be to do a new compiste with resin and linen.
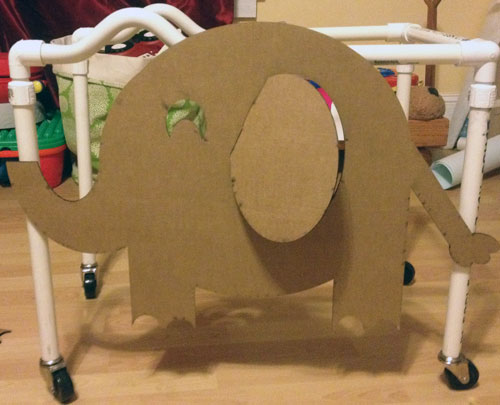
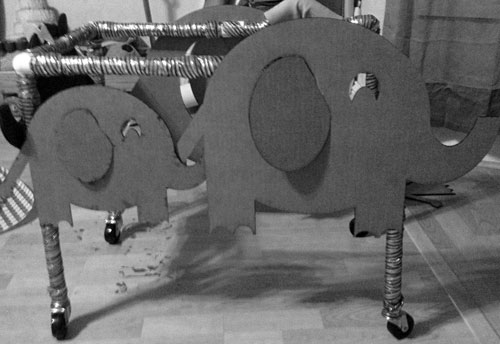
I bought blue linen fabric from JoAnn fabrics and epoxy from west marine but after reading all of the poison labels on the epoxy I decided to table this next idea for now. I painted the wcardboard covers with a cheerful paint and attached them to the walker with velcro so the child can easily swap them out for a different design as their taste's change.
Nothing for this application that I know
I abandoned the idea of composite covers in favor of cardboard covers in the interest of time. The burlap hydrostone composite was far too heavy and the epoxy linen composite may work well for the future. This was marginally successful, I showed a basic prototype of how they can snap on and off and make the walker more approachable but the covers are currently not weatherproof which is an important next step.
Here is the evaluation system: in stoplight chart style!

The remaining components are ones that will be worked on in the future but are not incorporated in the interest of time.
This button will be attached to the walker and will blink red if the user is falling according to the tilt sensor. If the user is not actually falling they can push the button indicating it was a false alarm.
Vinyl cut or milled circuit board
Output devices, networking
If the user's tilt sensor has indicated a fall and the user did not press the false alarm button the user will deploy their own air bags for fall mitigation/prevention.tilt_circuit
vinyl?
computer controlled cutting, inflatables, networking, interfaces
Copyright 2013 Kathy Sinclair