Final Project: Gel Electrophoresis System
Project Goals:
- To construct a gel electrophoresis box that is considerably less expensive than those offered by the leading supplier, namely Bio Rad. The simplest and smallest
electrophoretic system is sold at a list price of $285, sans tax and shipping and handling fees. I will design and construct all parts provided
in these industry standard systems and hopefully do so at a considerably more reasonable cost. SO, the question is CAN I
MAKE A CHEAPER (AND STILL FUNCTIONAL) GEL ELECTROPHORESIS SYSTEM?
- Add a series of LEDs that will serve as markers for the amount of time elapsed during a gel running session.

Industry standard at $285.
Background:
Gel electrophoresis is typically used for the separation of macromolecules (e.g., RNA, DNA, protein) based on change and/or size. Horizontal
gel electrophoresis in particular is often used for the separation of nucleic acids (RNA and DNA) by size, and essentially by size (though
nucleic acids are generally negatively charged). An agarose or polyacrylamide gel is usually poured into the tray component of a
gel electrophoresis apparatus, and after it sets, this substance acts as a molecular sieve. As an electric current is sent across the gel,
usually with nucleic acid samples running toward the cathode (positive end), smaller molecules travel faster than larger ones.
Standard components:
Gel Chamber:
2 wells (essentially, 6 walls)
1 gel platform (3 pieces of acrylic)
2 banana plugs (~$2 each = $4 in total)
2 pieces of 6-inch Nichrome wire
($20 for 525 ft of 28 gauge = ~$0.80 in total)
2 hex nuts ($0.03 each = $0.06 in total)
Gel Tray:
Tray base - 3 pieces of acrylic
Comb frame - 2 pieces of acrylic (one large sheet of acrylic = ~$20)
Chamber lid:
Transparent top
Side bar with banana plug cavities
*Please note that all acrylic used is exactly 0.25" thick.
Materials necessary:
Chamber assembly
24" x 12" acrylic (0.25" thickness)
2 Banana plugs
2 hex nuts (to seal banana plugs)
2 strips of platinum wire
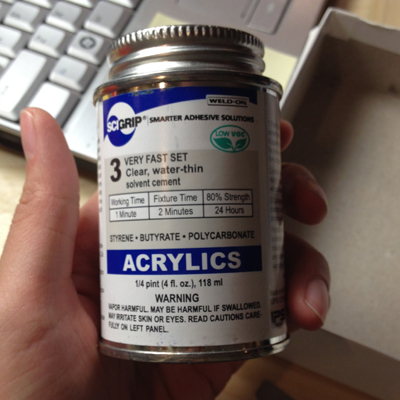
Acrylic cement (~$10/4 oz, but you use about 1/5 of the can at most, so let's say $2)
Banana plug leads (~$6/each = $12 total)
Sum of materials cost:
(Excluding human labor and energy usage costs, adding in a few dollars just in case I missed anything)
$34.86 +(?) $10
Design files:
Chamber:
chamber_old.svg
tray_old.svg
chamber_new.svg
LED Timer Eagle files
LED timer C and make files
LED timer Eagle files
LED assembly
FTDI cable
FabISP
Ribbon cable
LED PCB
Schedule
Design prototype (completed)
Laser cut prototype (completed)
Assemble prototype (completed)
Revise design (completed)
Design LED array (completed)
Mill LED board (completed)
Revise LED board design (completed)
Laser cut final iteration (completed)
Assemble final iteration (completed)
Chamber Assembly
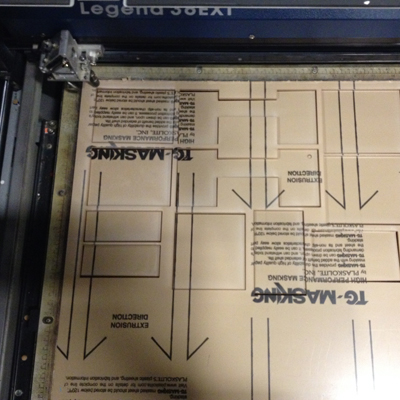
- I designed the walls of the electrophoresis chamber in Adobe Illustrator, exported this as an .svg file and laser cut
my pieces.
Here are some preliminary sketches:
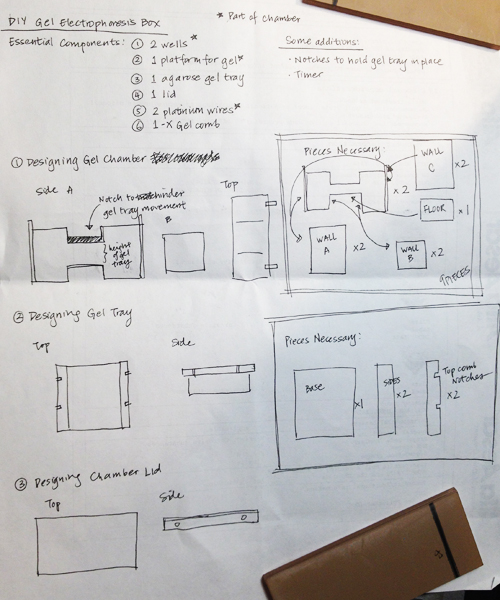
(Please scroll up for design files)
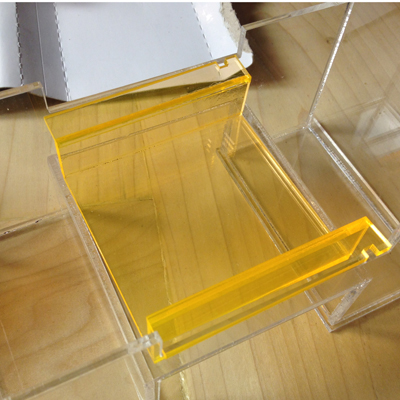
- Solvent welding with solvent cement (the idea is that the solvent compromises the places where it touches the acrylic, or "melts" it, so that as it dries,
the two acrylic parts "seal" themselves together). Seeing as I didn't have a proper solvent dispenser, I used a syringe and needle.
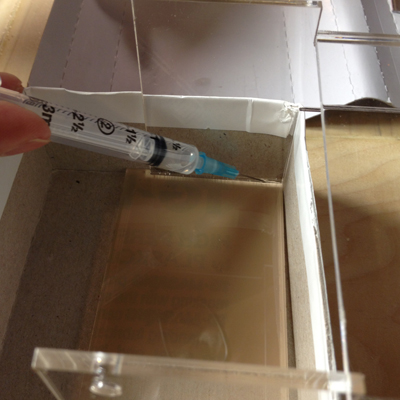
- I put the parts in a box to keep my pieces at right angles.

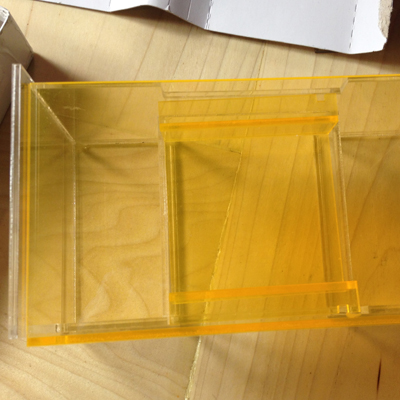
The tray:
The lid:
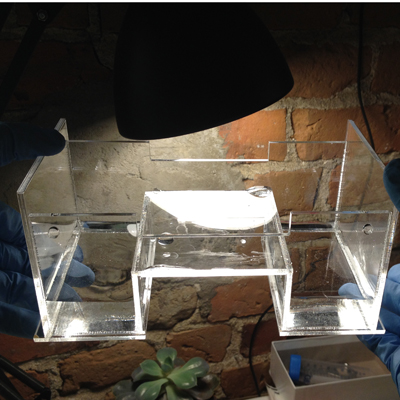
Checking that all edges are sealed with a water retention test:
- Here's the box assembled with most of its parts:
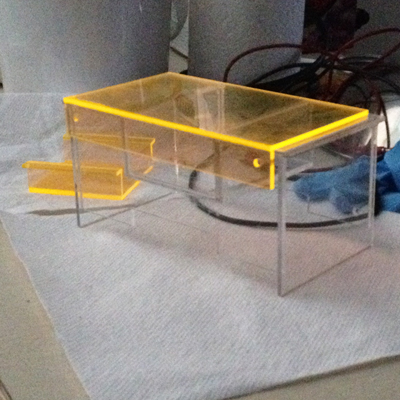
My syringe couldn't take the effects of the solvent glue for long and the plunger busted. This week, I will
attempt to get my hands on some platinum wire and banana plugs. I will also make minor adjustments to
the dimensions of some of my pieces so that I don't have parts jutting out weirdly (the reason that they are now
is that I did not measure the thickness of my acrylic before laser cutting, and simply guestimated).
- I eventually redesigned my gel box (files linked above)

LED Timer Design
- As usual, I used Eagle to design my LED board. I have not used any special parts.
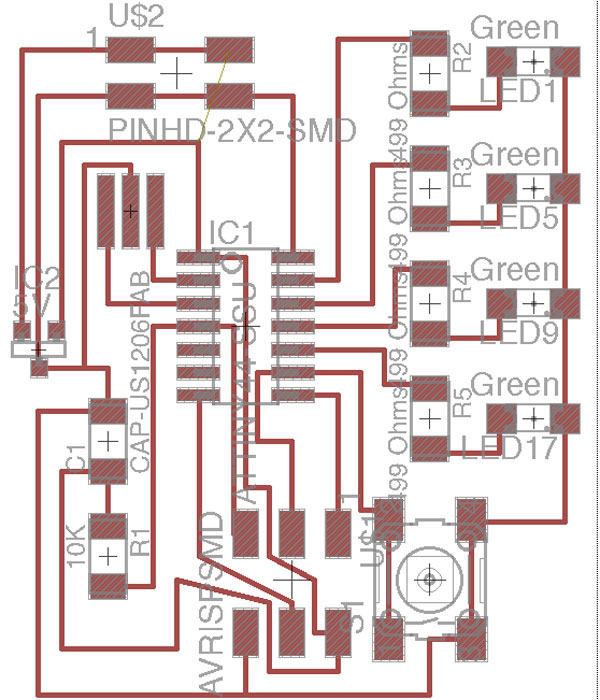
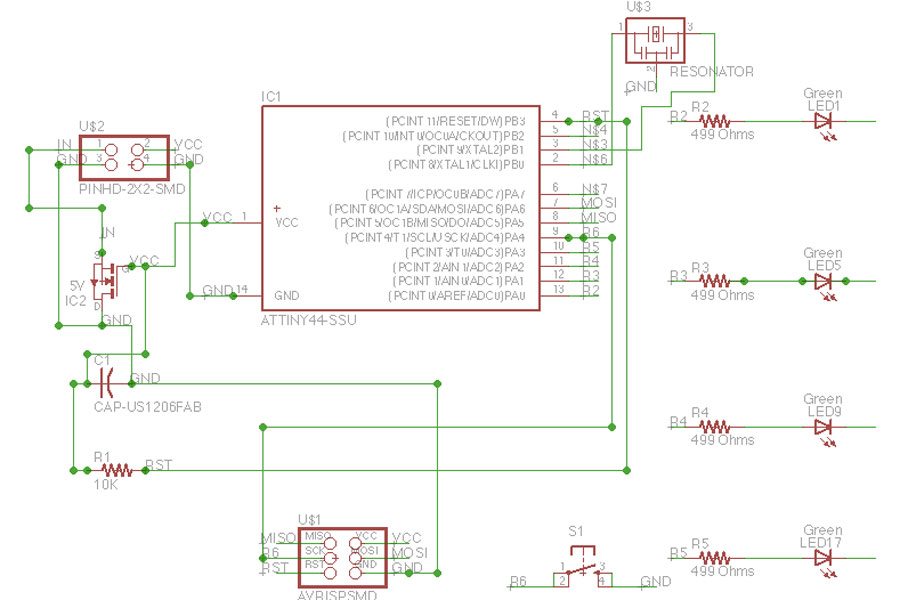
(Scroll up to download Eagle files)
- This is the LED in action:
As soon as the button is clicked, all LEDs light up and a countdown is executed. In this video,
the LEDs are counting down at two-second intervals, but on the actual gel apparatus, the countdown
will be at 15 minute intervals for a typical 1-hour run.
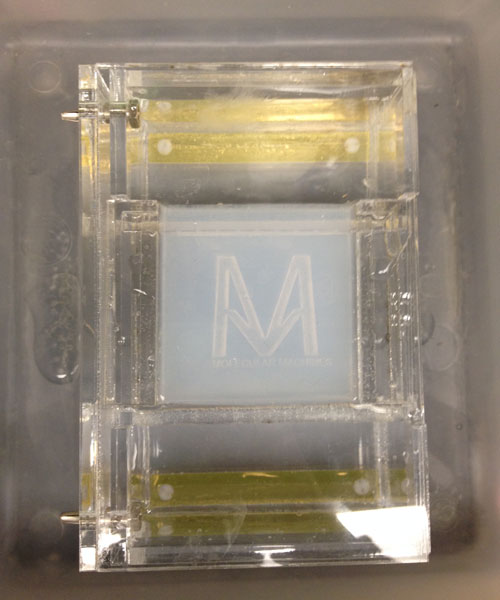
Evaluating the gel apparatus
- Pouring a 1% agarose gel into the gel tray (this takes half an hour to cool and set), and filling the chambers with buffer.
The current runs through this liquid. No leakages were found, so the acrylic cement has sealed all critical points!
- Loading the wells with a dyed material to help visualize the movement of gel contents.
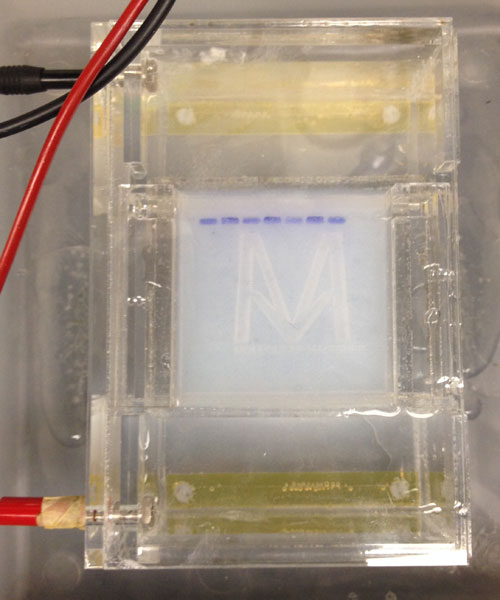
- The imaged gel is skewed toward one end, but I know that to be caused by an extra exposed stretch
of nichrome on one side where the banana plugs are attached. I remedied this by sealing the extraneous parts
with silicone caulking ($0.05 used).
Implications
Assuming that stocks of banana plugs, hex nuts, and nichrome wire are available, I can easily make
at least four gel boxes for every one gel apparatus I buy. It appears that learning how to
make things substantially minimizes the exorbitant sums biologists might be forking over otherwise.
(And for the nth time, thank you so very, very much, Noah, for
all your help in making my PCB programs work. I owe you hella.)