Toks Fifo
Student. Builder.
Bowl: Composites
Fall 2013
By combining 2 materials with completely different strucutral properties, I created a composite material that possesses the beneficial properties of both.
Motivation, Design
I decided to create a burlap-epoxy bowl for storing all the little things that clutter up my desk, such as my watch, earphones, and wallet. The idea is that burlap is strong in tension but not in compression, while epoxy is the exact opposite. Thus, the bowl should theoretically have strength in both tension and compression.
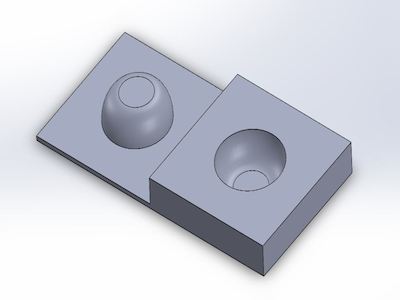
I used the 2 mold method (as opposed to using 1 mold and a vacuum) and designed my molds in SolidWorks. Again, the molds were simple enough that they didn't require the use of SolidWork's mold-making tool.
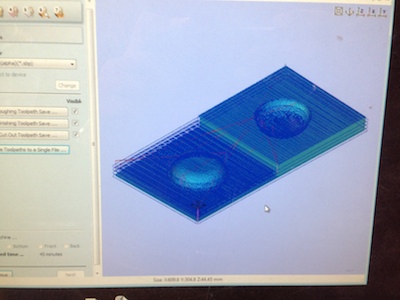
Creating Tool Paths
I used PartWorks 3D to create the tool paths for the molds, after importing them as an .stl. I had to setup the part and create roughing, finishing, and cut-out tool paths. This was a little easier than anticipated, and the preview feature in PartWorks 3D helped to ensure that I wasn't making any mistakes.
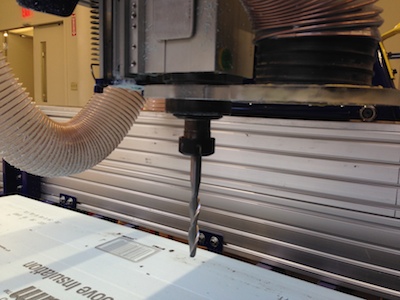
Machining Setup
I used a 1/2" ball-nose bit for all operations. I'll probably secure it a little deeper into the collet in the future.
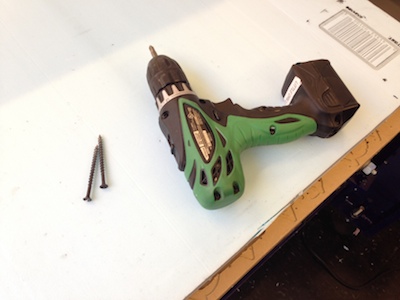
Machining Setup Cont'd
I then screwed the foam onto the ShopBot's sacrificial layer at each corner. The available screws were a little shorter than the height of the foam, so they were squeezing down into the foam.
Milling
The ShopBot is performing the roughing cut on the foam at a spindle speed of 12000RPM.
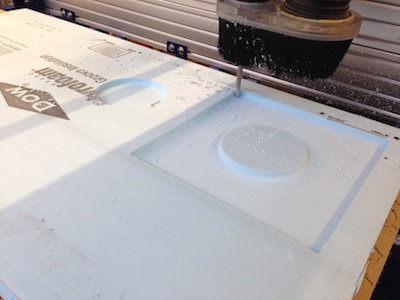
Milling Cont'd
Here's a video of the ShopBot performing the finishing cut on the foam. It took about twice as long as the roughing-cut, as the stepover was much smaller.
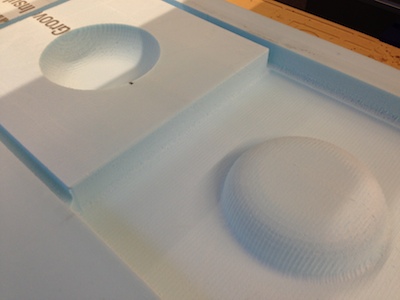
Mold
I was pleased with the final surface finish of the molds, especially for use in creating composites. The whole job took about 45 minutes, as advertised on the ShopBot software.
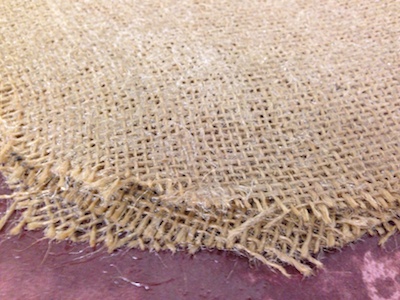
Burlap
With the molds done, I moved onto fiddling with the composite materials. I used burlap for its tensile strength. I was a little worried that the burlap would crease due to the curves on the mold, but it adapted surprisingly well for this particular shape. I traced out the shape of the flattenend out burlap and it turned out to be a circle (for the most part). In the future, I'll explore what shapes 3D objects create when flattened.
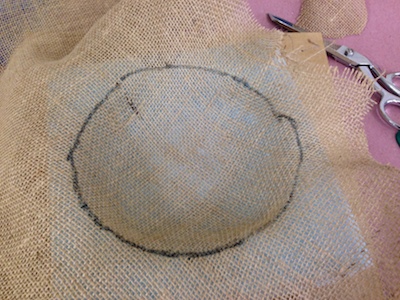
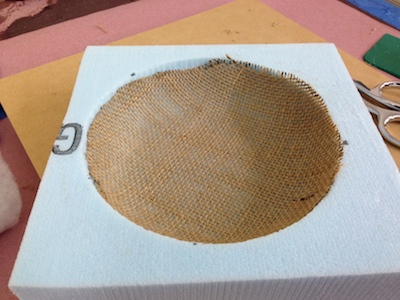
Burlap Cont'd
The circle fits pretty well into the mold cavity.
Epoxy
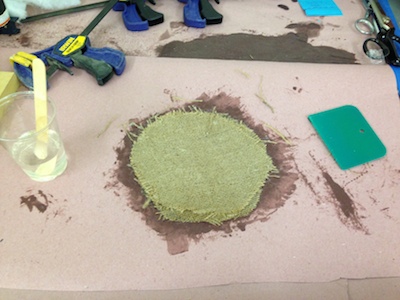
Dealing with the epoxy was straightforward. I mixed the right ratio of resin and hardener and poured it unto the burlap layer by layer, pressing it into the burlap with the green squeegee. I found that the burlap expanded a bit during this process, as the fibers were being separated ever so slightly.
I used 4 layers of burlap in total.
Epoxy Cont'd
Close-up of the epoxy soaked burlap layers.
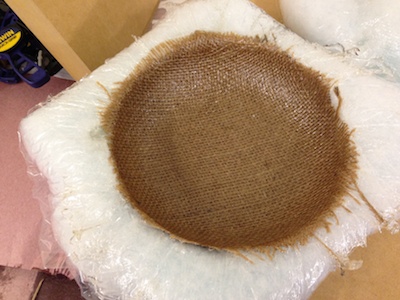
Molding
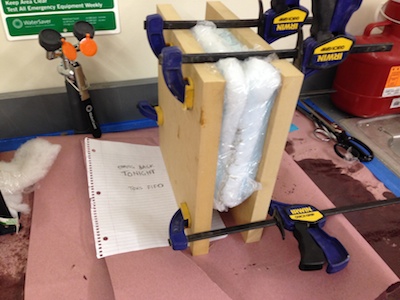
Putting everything in the mold was a little frustrating. Each side of the system had a number of layers, starting from the middle going downwards (or upwards):
- Burlap-epoxy layers
- Plastic (Saran) wrap WITH holes, to allow any excess epoxy to leak through
- Bleeder breather (white cotton) to absorb the excess epoxy
- Plastic (Saran) wrap WITHOUT holes, to stop the excess epoxy from leaking unto the foam
- Foam mold
- MDF backing, so that the clamps wouldn't deform the foam
Everything was held as tightly as possible using 4 clamps, and allowed to cure for 24 hours.
Finished Part
The bowl was fully cured after the advertised 24 hours.
Finished Part Cont'd
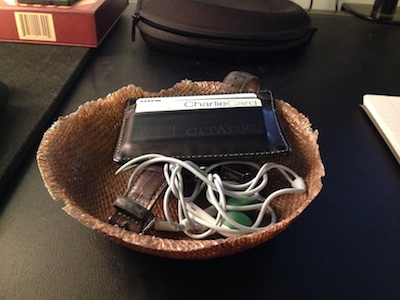
I hastily sanded the edges a bit to remove the sticks of epoxy dangling from the edge of the bowl, and to smoothen the burlap a bit. I'm pleasantly surprised by the outcome; the bowl is very strong and lightweight. I've also gotten several comments on its "natural" look.
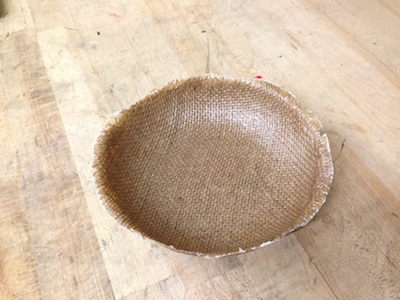
End
Here it is on my desk! The edges are rough and uneven due to the placement of the burlap in the mold; but based on this experience, that shouldn't be a problem as I create more composites moving forward.