
Assignment 11: Networking and Communications
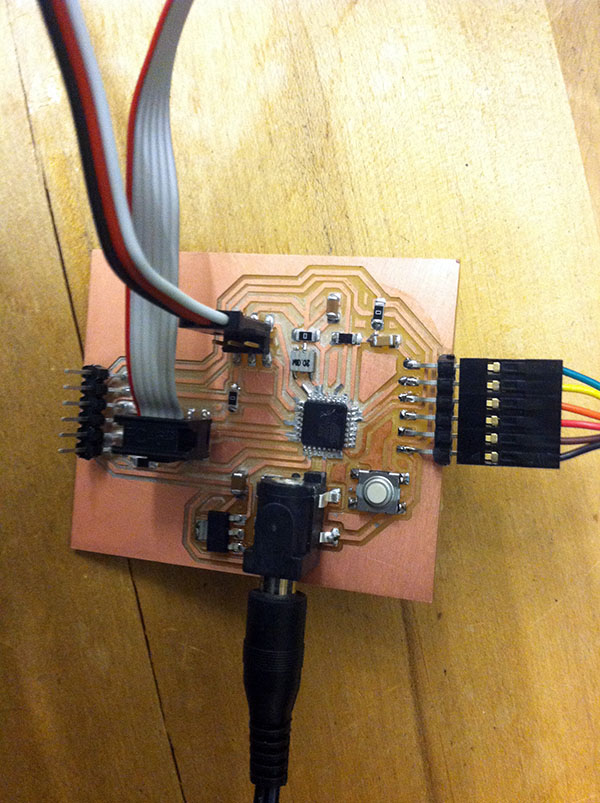
The goal for this week was to build a network connecting two processors. My plan for the week (which ultimately failed, but more on that later) was to use the Fabduino I'd made last week with the WiFi Shield I'd bought over the summer to connect to another processor using one of the supplied wireless modules. Since I'd spent a lot of time last week trying to make a Fabduino tailored to work with the WiFi shield, I thought it would be an easy plug and go, and then I could spend the rest of the week designing and fabricating the second processor. I turned out to be really wrong.
Using the WiFi Shield
Last week, I successfully ran a Servo from my Fabduino, so I was fairly certain that the board was at least mostly functional. I soldered a few jumper wires to the WiFi Shield so I could connect it to my Fabduino. However, I ran into problems very quickly.
The first one is important to note if you are using this tutorial to make a Fabduino board. I used the CC3000 WiFi Shield library provided by Adafruit, and tried running the basic test example provided on it. However, I got an error telling me that the sketch size was too big. It turns out, if you made the Fabduino with an atmega328p instead of the atmega168, you need to modify the boards.txt file to match that - so the Arduino IDE thought I was using an atmega168 with less space available. Fortunately that is an easy fix. The text is below for anyone else making a Fabduino using an atmega328p.
fabduino.name=Fabkit/Fabduino w/ ATmega328p (internal clock)

fabduino.upload.protocol=stk500
fabduino.upload.maximum_size=30000
fabduino.upload.speed=19200

fabduino.bootloader.low_fuses=0xe2
fabduino.bootloader.high_fuses=0xdd
fabduino.bootloader.extended_fuses=0x00
fabduino.bootloader.path=arduino:atmega
fabduino.bootloader.file=ATmegaBOOT_168_atmega328_pro_8MHz.hex
fabduino.bootloader.unlock_bits=0x3F
fabduino.bootloader.lock_bits=0x0F

fabduino.build.mcu=atmega328p
fabduino.build.f_cpu=8000000L
fabduino.build.core=arduino:arduino
fabduino.build.variant=arduino:standard
The next issue I got was that the test sample got stuck on the initialization phase (and then eventually started printing gibberish).
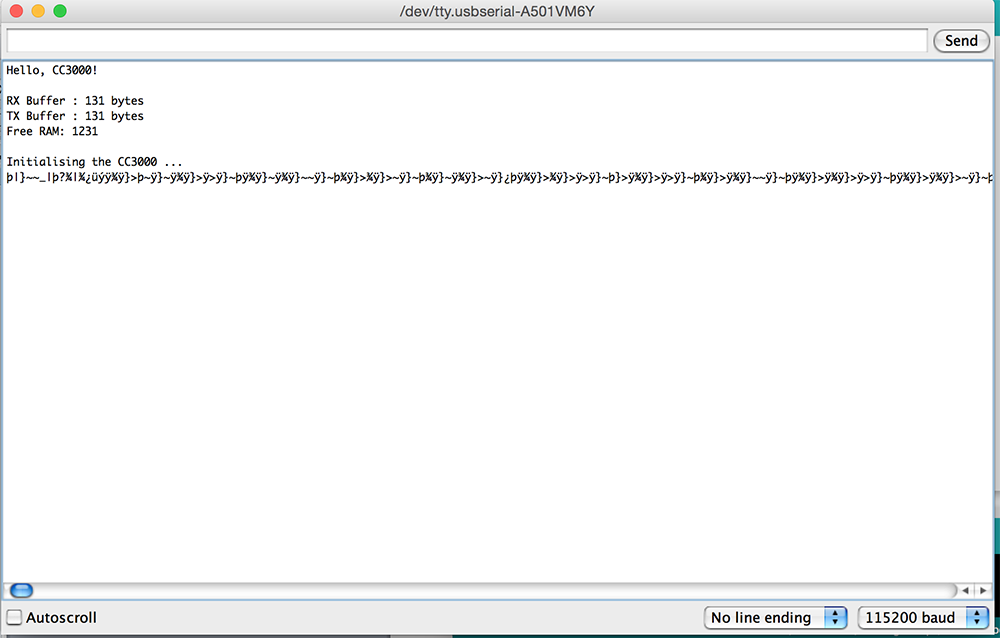
I tried doing a bunch of things to figure out the problem here. First I used print statements to try to narrow down where the problem was occurring, and found it was getting stuck on one of the library functions. So I tried adding more print statements to the library file itself, but they didn't show up in the serial monitor. With Will's help, we tried debugging it in another few different ways. We tried disconnected the ISP header after programming so it wouldn't interfere with the WiFi Shield. We tried connecting my board to a power supply to ensure that the problem was not the result of a insufficient power. We tried using a logic analyzer to figure out if all the pins were getting signals from the board (specifically, we looked at SCK, MOSI, MISO, and CS). Sure enough, we figured out that CS wasn't getting any signal!
It turned out in my original schematic on Eagle, when I added a pull up resistor to CS to make sure it didn't interfere with the WiFi Shield, I forgot to reconnect it to the CS pin on the atmega328p! So I added a jumper wire to the board to fix the problem, plugged it back into my computer and test it again.
And it got stuck in exactly the same place.
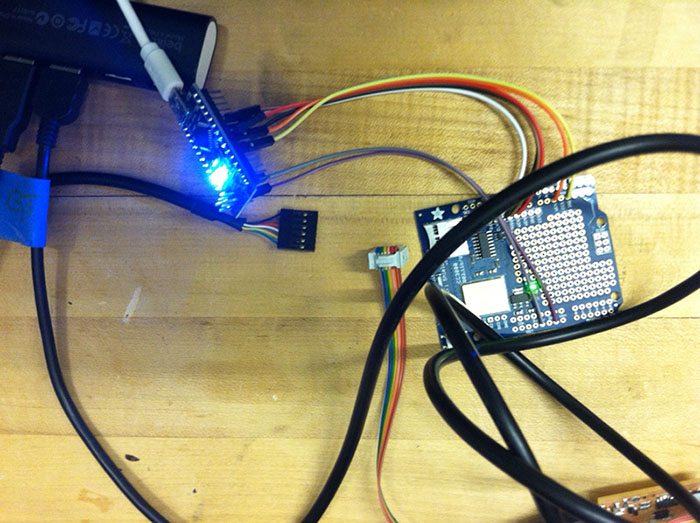
In fact, the logic analyzer showed that it got a signal, but according to Will, it was weird. At this point I borrowed someone's Arduino Nano to make sure the WiFi shield wasn't the problem. It didn't work with the Arduino Nano either, but since we weren't 100% certain it was the shield still. We tried some more debugging that I don't even remember anymore, and then the next day I tried using the WiFi Shield with an Arduino Uno I borrowed, following the exact instructions provided by AdaFruit. The board got stuck in the same place.
At this point, I'm fairly certain the problem is with the WiFi Shield itself. I've tried searching online to see if anyone else had the same problem, and I've also posted to the Adafruit forum (I'm still waiting for a response). So unfortunately for this week, I wasn't able to get even the one processor working with WiFi, and I spent so much time on the WiFi Shield I didn't get a chance to try the WiFi module provided by the class. For the final project I still need get a processor working with WiFi, so I need to figure out if AdaFruit will know what the problem is (or send me a new board), or try to use the esp8266. However, given the amount of hacking required to get the esp8266 to work, I'm not confident in my ability to implement it.