The objective for this week was to program our boards from the
electronics design week in as many programming languages and
environments as possible. I was only successful using Arduino.
Helpful Links
Here is a list of very useful links for this assignment:
If following the tutorial works then you most likely have the board
soldered correctly and if not it narrows down the possible hardware
errors.
Step 2: USB Communication
This was the point where I had the most issues. I spent several
hours with my computer being unable to recognize the FabISB. Every
time I plugged my programmer into the USB port I would get an error
saying that the USB device was not recognized (error 43). In this
case the computer is unable to read the device. It will not allow
you add drivers to the ATtiny. Here are possible reasons for getting
this message:
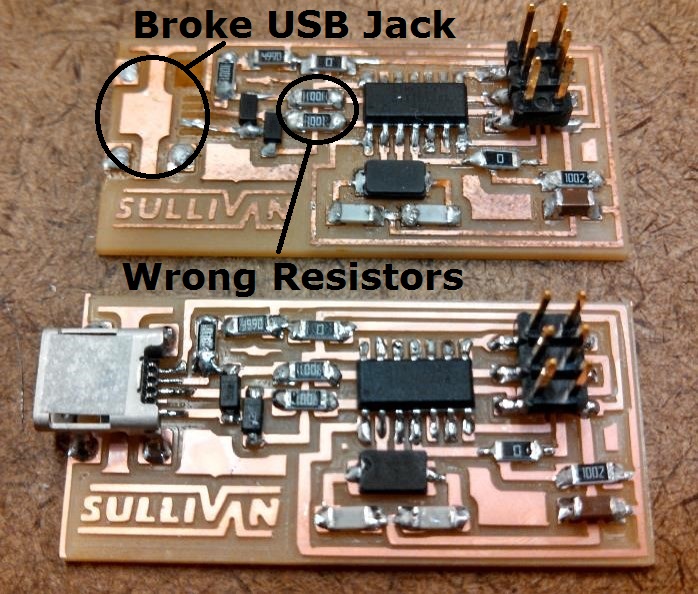
1. You may have soldered the wrong components between the USB jack
and the ATtiny44 (this was my problem). Double check the components.
2. If you are using an old version of Windows 7, sometimes the USB
3.0 jacks have trouble reading the ATtiny44. The solution is to
plug the fabISP into a USB hub rather than directly into a USB 3.0.
3. It is possible that you have the wrong driver for the ATtiny.
It turned out I had soldered 1000 ohm resistors instead of 100 ohm
ones at the top of the board which was preventing my computer from
reading the ATtiny microchip.
Before realizing this I tried to remove the USB jack with the heat
gun and ended up totally ruining my board, which you can see above.
After making a new one with the correct components it worked great!
Step 3: Preparing the Environment
I had many issues here too. Initally the problems I had, stemmed
from my fabISP failing but even when I tried using the AVRISP MkII
I kept getting all sorts of errors. In the end, I had the wrong
driver for the AVRISP. Thanks to
Morris Vanegas
and
Matt Edwards
the correct drivers for Windows can be found at the following links:
Once again I thought something was wrong with my Hello World Board
so again I took the heat gun to it and once again ruined the board,
as you can see from the picture on the left.
After getting the correct drivers installed and soldering the
correct components on my fabISP everything began to work perfectly.
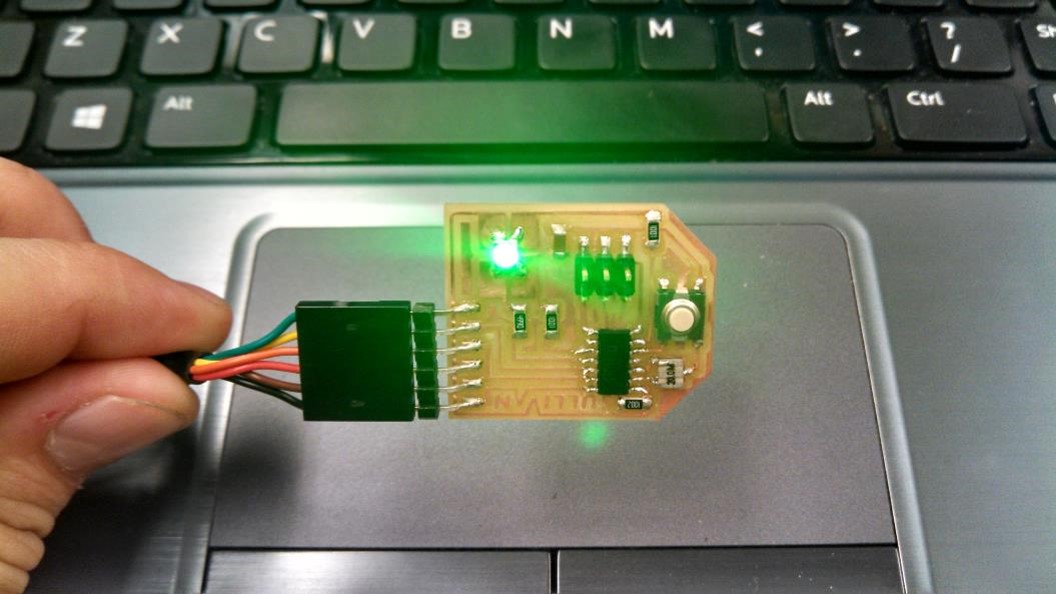
Step 4: Writing the Program
Arduino is extremely simple to use and is full of easy examples that
are full of helpful comments. This was the easy part of the
assignment. By far the most difficult part was just getting the two
boards to work with the computer and the Arduino interface. You can
download my code here for the blinking in the video at the top of
the page:
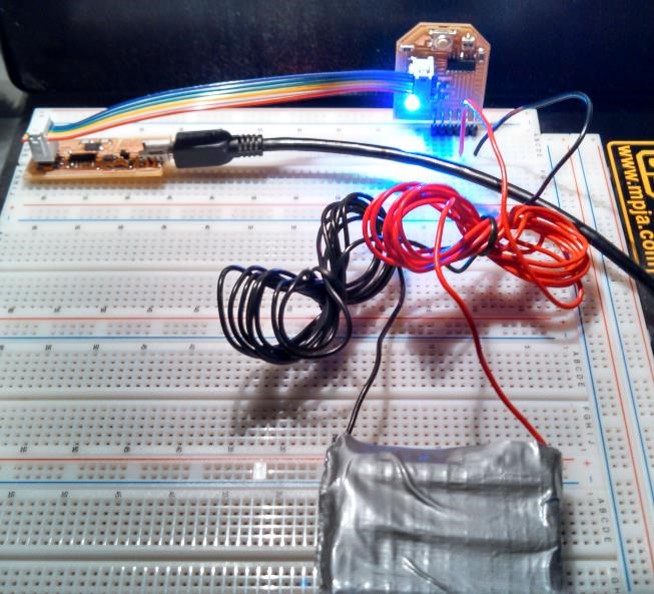
Instead of buying an FTDI cable I just put 3 double A batteries in
series to power my Hello World Board. Then I just used a bread
board to make connecting it simple.
Mistakes I Made
My week was full of mistakes. The biggest one was soldering the wrong
resistors on the fabISP which caused many more problems for me.
The second biggest mistake I made was trying to use the wide tip of
the heat gun to remove small components. I didn't learn my lesson and
ruined two boards in the process.
The third mistake I made was not making sure I was downloading the
correct drivers.
Finally when I milled my second Hello World Board I didn't press the
board down hard enough after taping it to the Modela and it ultimately
shifted while milling making all my traces really wierdly shaped and
thin.
 Here is a list of very useful links for this assignment: