The design prompt this week was to make something big. I decided to update my design for a longboard rack (see press fit assignment) since the acryllic was too brittle to make a functional rack. To be honest, the finished product wasn't very big -- but it's a piece of furniture that I really wanted, and I was still able to practice using the Shopbot. I also created and fabricated two slightly different designs, originally with the intent to use one for my longboard and the other for my snowboard. Because I ended up liking one design much more than the other, I didn't end up using both.
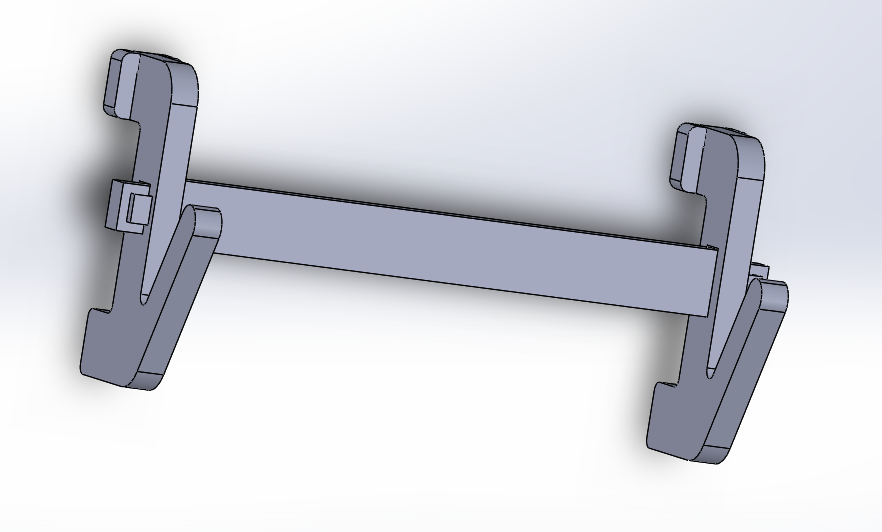
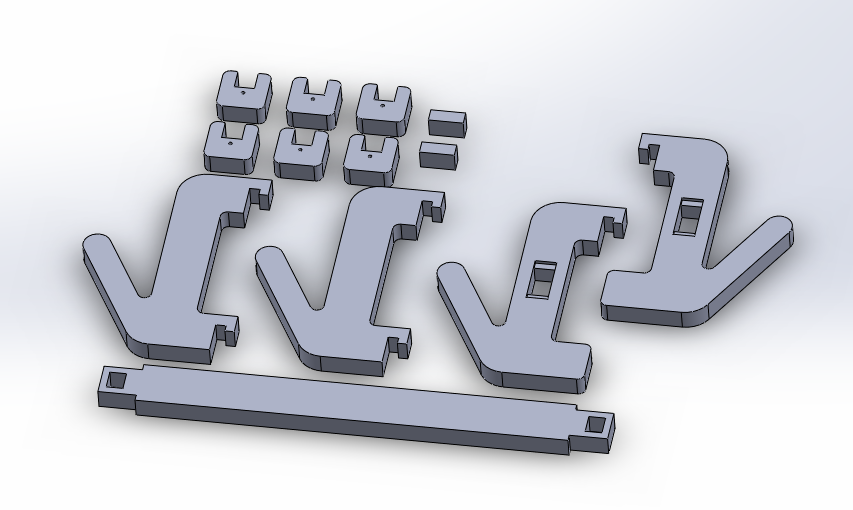
I based my design on some shelves I found on this website. In fact, you'll see that in my final design, the wall mounts look very similar to the ones that they use. I designed two separate patterns in Solidworks -- one that uses a crossbar and two wall mounts and one that uses no crossbar and 4 wall mounts.

After designing each of the parts, I created an assembly with all the parts laid flat so that I would be able to export a single dxf.
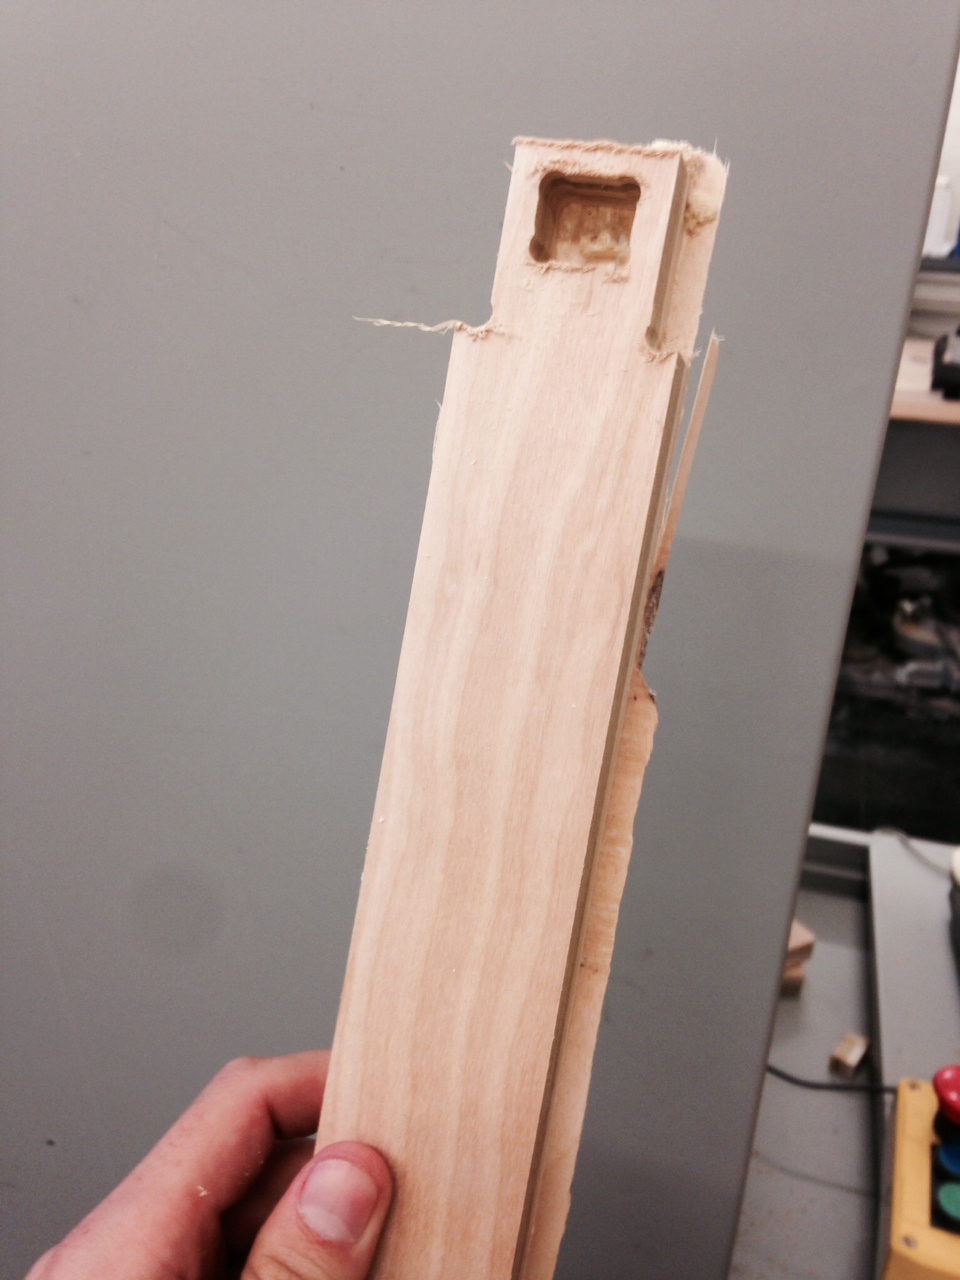
Next, I opened the file in VCarve and did some additional modelling. There were some lines that needed to be used in two separate toolpaths (e.g. for a pocket and for a profile) so I needed to draw extra lines and join them together with the proper vectors to make separate closed loops. Then I added some missing fillets and created toolpaths. The holes in the wall mounts were made with an 1/8" drill and everything else was done with a 1/4" upcutting end mill. I saved the drilling toolpath as one shopbot file and all the other toolpaths as a separate shopbot file. This ensured that the machine wouldn't try to move on to subsequent toolpaths without the proper tool installed. The next step was to send each of these files to the shopbot and perform the cuts

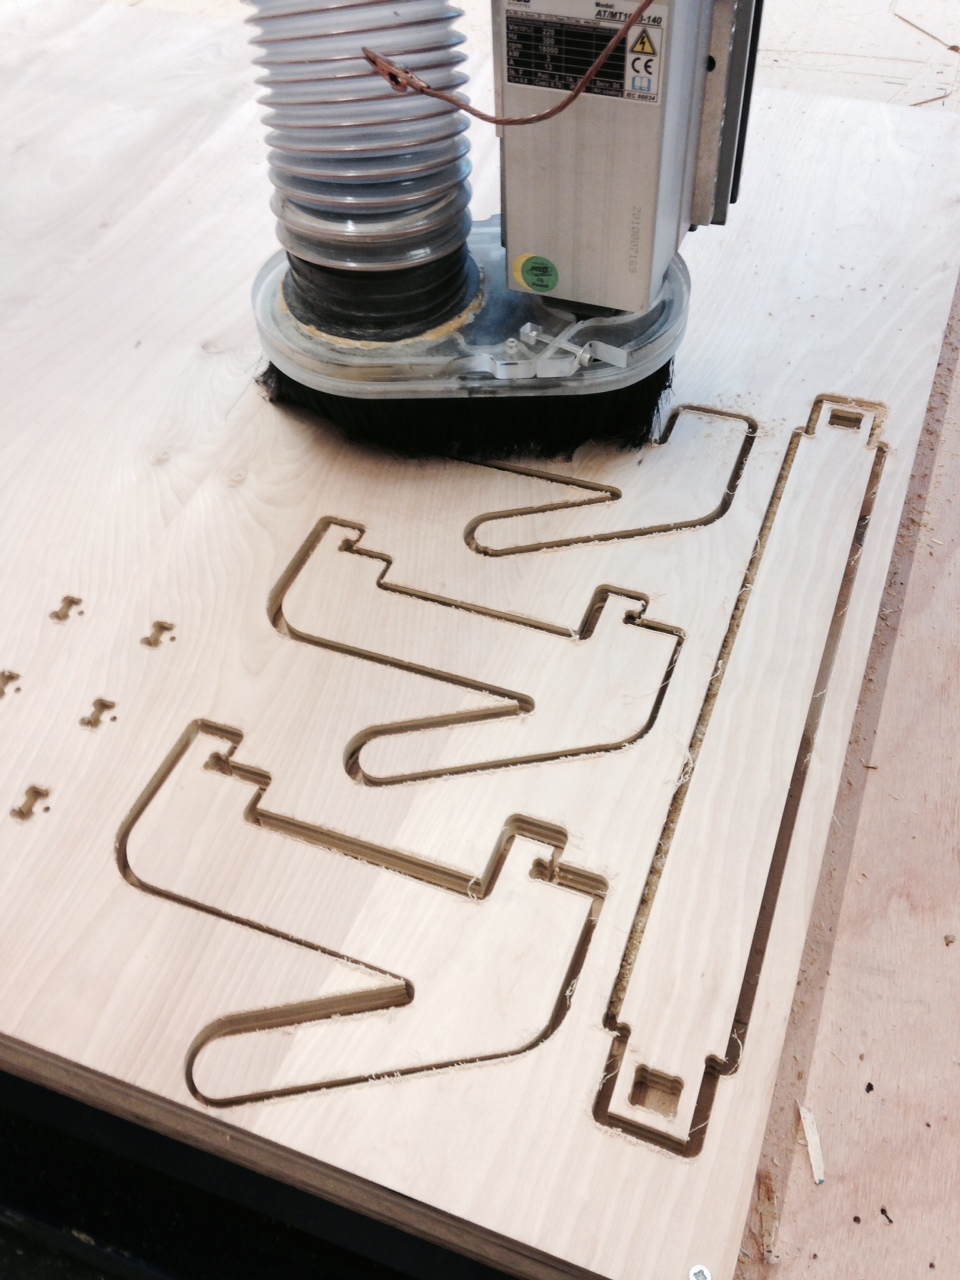
My material was 3/4" plywood and I cut it in 3 passes. At first I used .1" tabs but because of changing material thickness around the sheet, the tabs were cut all the way through in places. This caused parts to come loose during cutting and some parts were destroyed by the machine and had to be cut again. The second time around, I used .2" tabs. As a result, some pieces had very thick tabs. I had to use a file to remove these parts from the sheet.

After removing each part, I cleaned all the edges and removed tabs using a Dremel tool. This worked very well and I HIGHLY RECOMMEND.
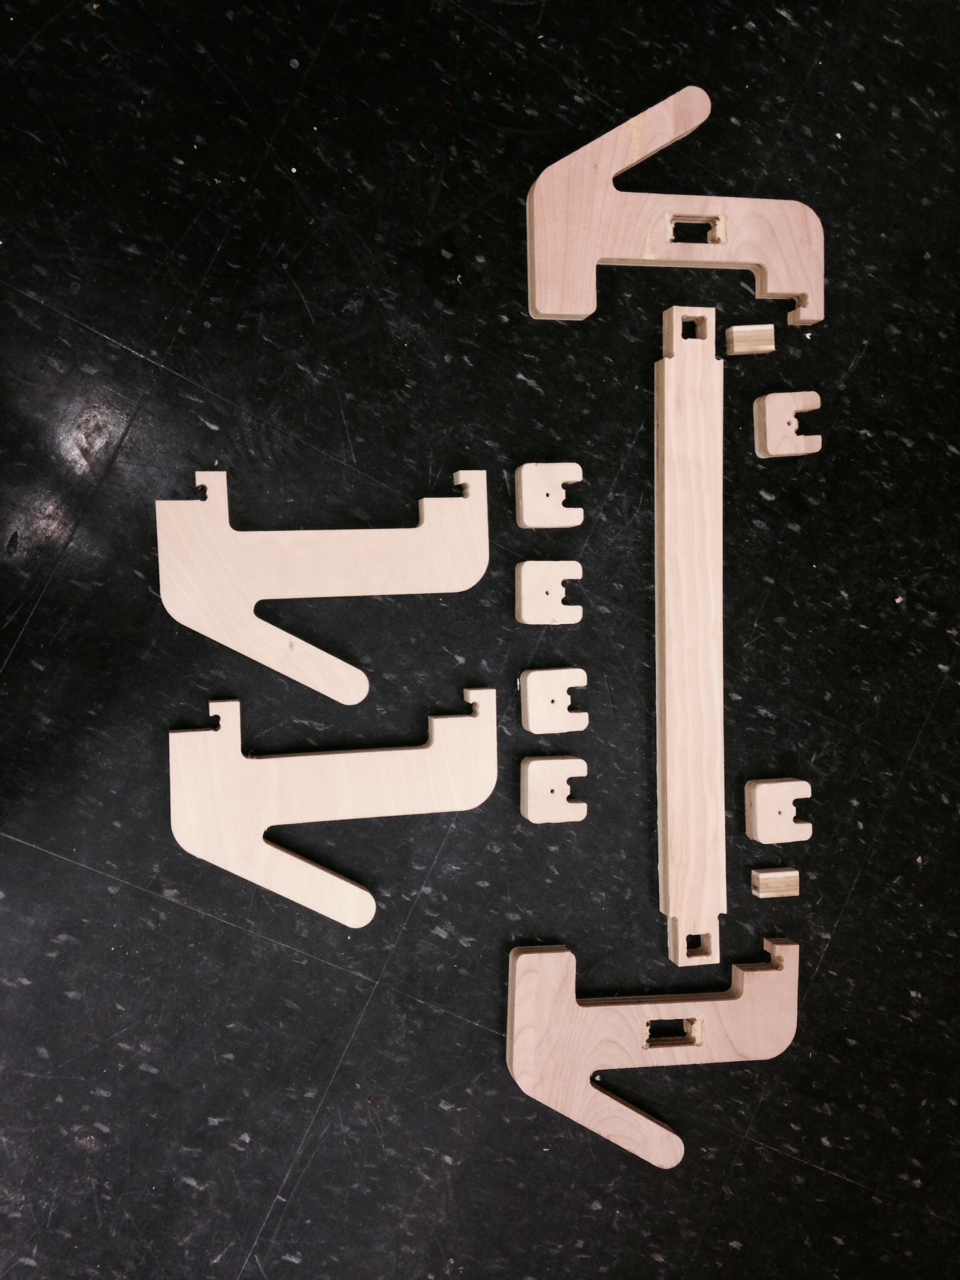
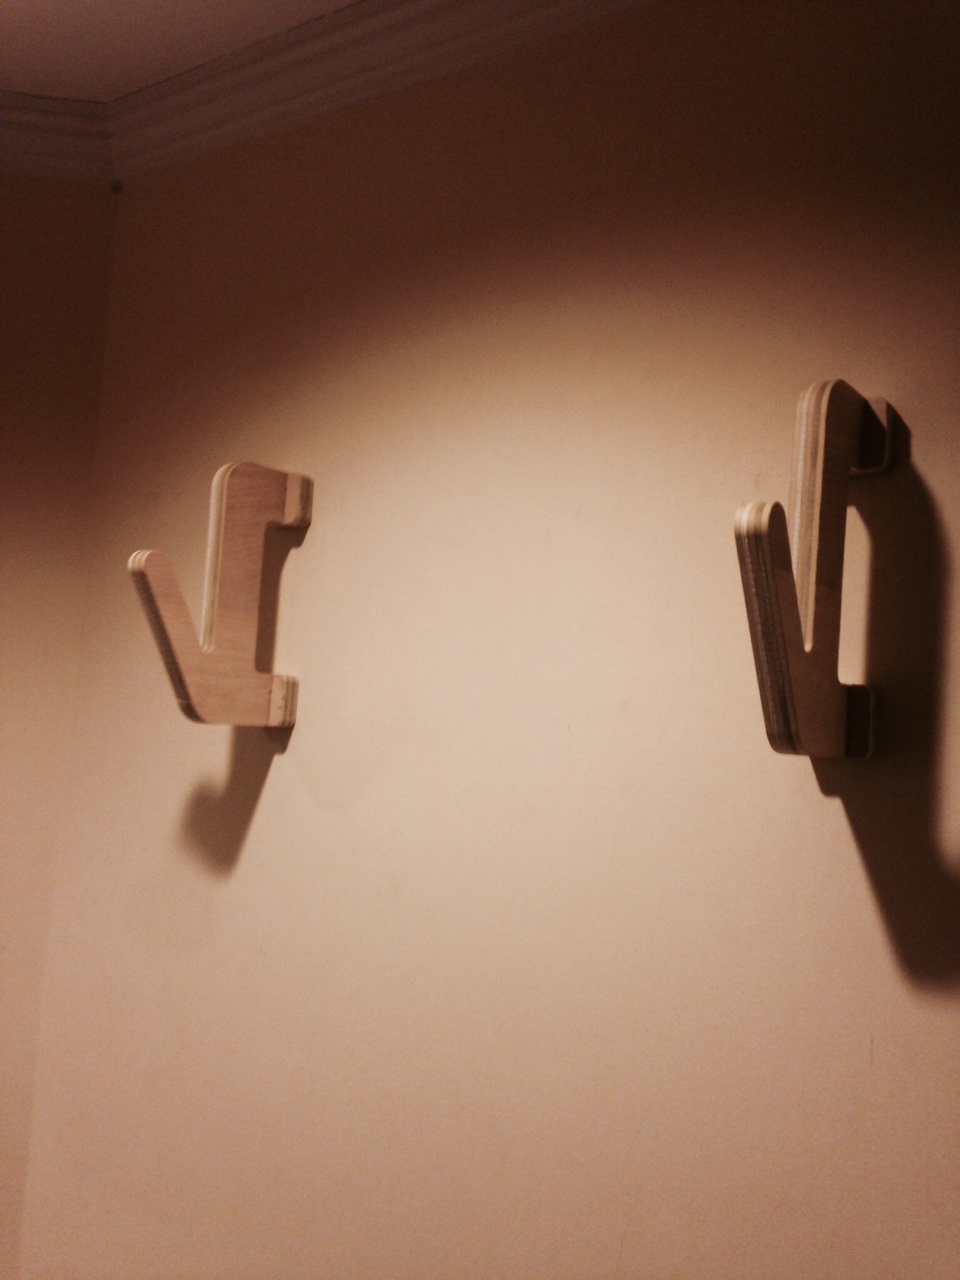
I found that my press fits for the shims that hold the crossbar to the two arms on the original design were too loose. So in the end I decided to not mount my snowboard and only use the alternative design for my longboard. I think it looks more sleek and minimalistic anyway. I used drywall anchors to attach the wall mounts and then snapped the two arms into place. It's very sturdy!