This week's assignment was to use the FabISP to program the echo board to do something with the button and the LED. The goal was to learn basic workflow for embedded programming and get familiar with some of the development environments that are available. I used a Windows computer running Windows 8.1, the FabISP, the standard echo board with added button and LED shown here, and successfully used WinAVR to load the echo_hello_world program and then Arduino IDE to load a program of my own.
Nothing will work until your hardware is in good shape. I thought I had done a fairly good job with soldering in the first place, but I still had problems with both boards when I first tried them. I good indication that you might have a hardware problem is if in the process of loading a program you get a warning saying that a device is not connected properly, or telling you to check your connections, or saying initialization has failed, or you get garbage output from the program.
When troubleshooting, I would suggest first taking a look at the microcontroller. Solder all of the pins, even if it looks like some are not in use. I had left some unsoldered, forgetting that they had traces connected to them from the back where I couldn't see them. If you have confirmed that all of the pins are soldered and you are still having problems, next I would suggest removing the MC with a solder reflow heat gun, soaking up all solder from the pads with solder braid, and attaching a new MC. I had to do this once, and voila, it started working. Maybe I had damaged the MC when attaching it the first time.
The next component to troubleshoot if you are having trouble programming is the crystal as this is a tricky component to attach and is essential for the MC to function properly. Check your joints and remove and replace if necessary.
In order to program your new FabISP, you need a working, already programmed FabISP (which raises an interesting chicken-egg question...). I followed the tutorial here and it worked well. The only thing I would add is remember to make sure you are in the right directory when you start trying to do stuff from the command prompt (C:\FilePathSpecificToYourComputer\Desktop, if you saved the firmware files to your Desktop). Use "cd.." to folder up in the directory and "cd FolderName" to folder down until you get to the right directory. IMPORTANT: if you are running Windows 8.1 and trying to use WinAVR as in the tutorial linked above, take a look at the "Special issues with Windows 8.1" section below, then finish reading this paragraph. If everything goes well, after running the make file (and also downloading the drivers mentioned in the tutorial linked above) you should be able to plug in your FabISP and have it be recognized by your computer (Note: it will show up as "FabISP" or "USBtiny" depending where you look). If you get errors and you have followed all of these instructions, you probably have a hardware problem with one of the FabISPs that you need to troubleshoot. Now remove the solder joint and 0 Ohm resistor from your newly programmed FabISP and you are ready to start programming with it.
Apparantly there are a couple little bugs you have to look out for (as of Nov 2014, when I did this). When downloading WinAVR, make sure to put it in Program Files, not Program Files (x86) because something about the () in the path name causes WinAVR to get confused. Also, if you get an error that says something like "child 4744(0x14C) died before initialization with status code 0xC0000142", you need to download and include a .dll file in the WinAVR folders. Follow sebastor's instructions here.
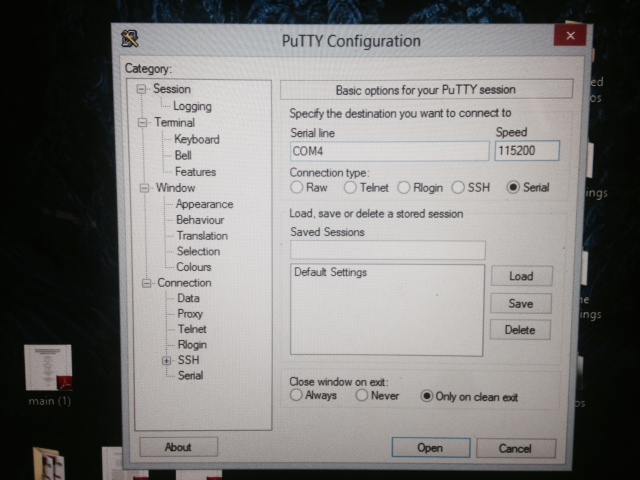
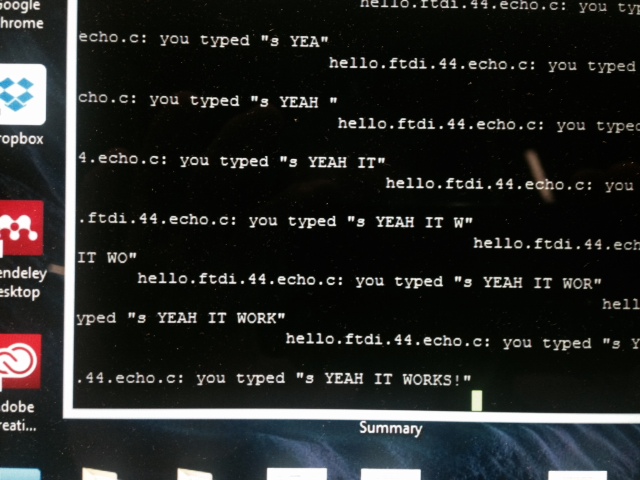
To put Neil's echo program on my echo hello world board, I downloaded the files called "hello.ftdi.44.echo.c" and "hello.ftdi.44.echo.c.make" from here, plugged the devices together (computer to FabISP with USB/USB mini, FabISP to Echo Board with six-pin connector, Echo Board to computer with FTDI), and then followed the instructions here. I did not type $ sudo at the beginning of my commands since I was using a Windows computer. Again, errors after following these instructions were either the result of faulty echo board or bad cables. I downloaded a program called Putty from herein order to test that it was working. I saw from my device manager that the the Echo Board was connected to COM4 so I changed the connection type in Putty to Serial, Serial Line to COM4, and Speed to 115200. Then I typed and the results are below.

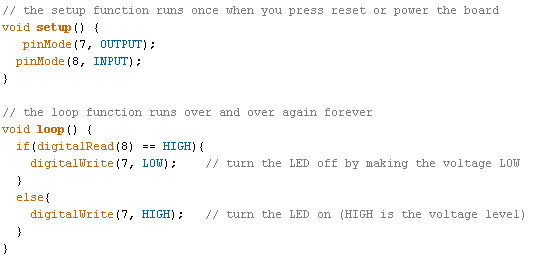
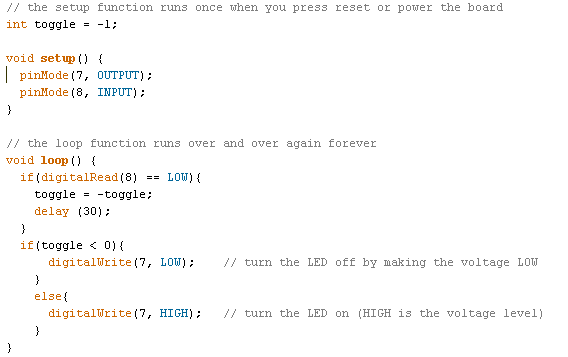
Now that I knew the board was working, I tried to make my own program using Arduino IDE. I first downloaded the Arduino software here and then followed this tutorial down to the section "Connecting the ATtiny". That tutorial was necessary to get the Arduino IDE to communicate properly with the FabISP and the ATtiny and only has to be set up once. I was able to get the button to come on when the button was pushed and separately to toggle on and off with button pushes.
That's the extent of what I accomplished this week. Hope this helps you as you try to do the same.
Home