This week I surveyed the various ways you can program an embedded device housing an AVR microcontroller. The AVR architecture
has programs written in a different address space than the execution memory, in our case the flash memory. In order to program
the microcontroller you need to download the program to the flash memory, using a programmer i.e. a chip designed to put a
microcontroller into programming mode and run the commands needed to write the program. We actually built such a chip in the first electronic's
week : the FabISP. My aim this week was to establish a smooth programming workflow, so that
I minimize the time between writing and testing a program.
Step 1: Exploring Tool Options
The language that the microcontroller understands is called the machine code, i.e. blocks of 0's and 1's corresponding to
different states of its internal ASM or memory addresses. To be able to write programs in more human-friendly languages
you have to use a compiler, which will translate it to machine code.
The choice of the language usually depends on the level of abstraction you want to work. If you are farther away from the
machine code (i.e. the more work your compiler does) you can have complex data types and commands but you sacrifice speed, as
if you use a languege that speaks directly to the microcontroller you can optimize the way a command is executed.
In the case of AVR's there a exists a very interesting and well documented C library,
avr-libc and given my expertise in C language, I decided to follow this path instead of using assembly language. If I ever need
more control, I can write assembly code snippets to execute them inbetween C code. As far as a workspace is concerned, I was using so far Eclipse Luna
which was happy with projects including big libraries like SDL, so I will give it a try with avr-libc. There exists also
an Eclipse AVR plugin to facilitate the generation of device specific makefiles, setting up the toolchain etc.
Step 2: Setting up a workflow
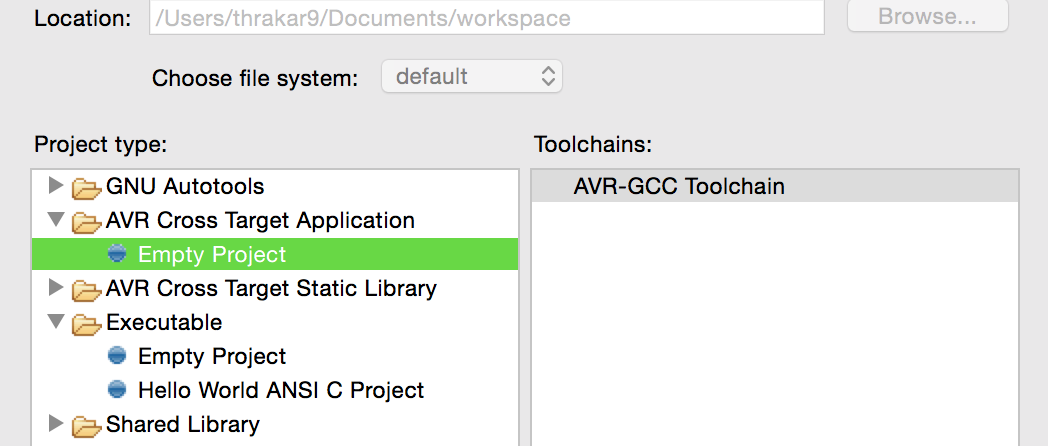
After installing the plugin, it was time to create my first project, with an aim to program the LED+button
board to blink the Morse code for "SOS". Creating an AVR project inside eclipse is quite straightforward. The plugin
has imported the options "Avr Cross target application" and "Avr Cross target static library" of which I choose the first
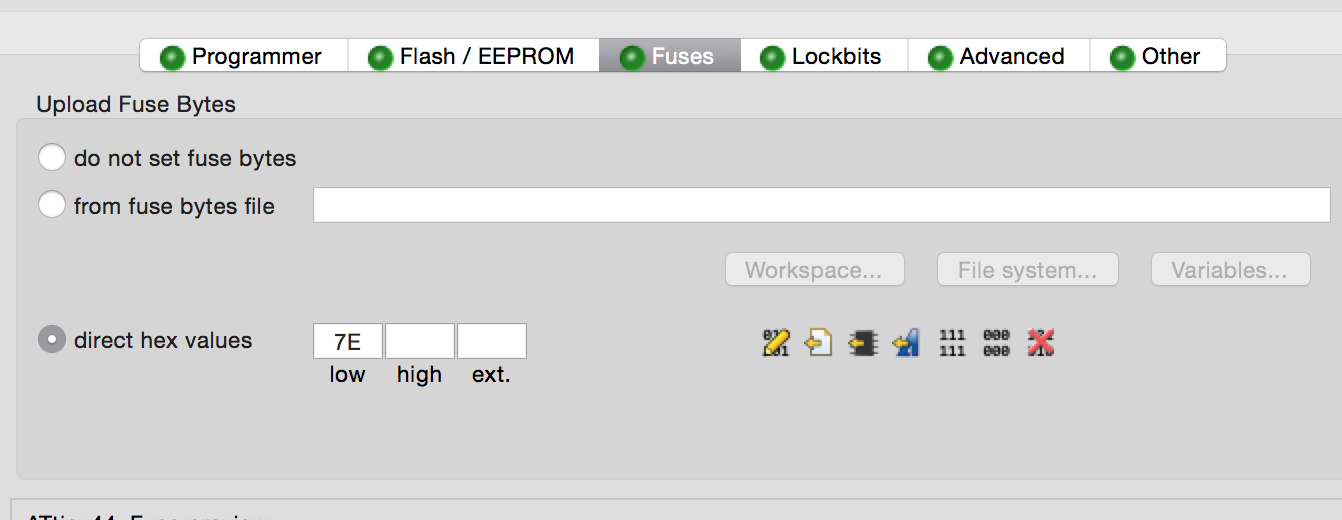
as I want to run the code in the device. There is a default toolchain included and I was prompted to select the type
of microcontroller I was using and the frequency I am running it. In my case it's an ATTiny44 with an external 20MHz
crystal. Eclipse will generate the correct make command to burn the fuses (switches inside the microcontroller used for core
settings such as the clock) for the indicated clock frequency.
Step 3: Programming LED_Morse
Once the project is created, the resulting workspace looks like the image on the right (without the Debug/Release folders, created
only after building it). Eclipse with the AVR plugin placed all the necessary libraries in the current workspace, so I can include
them directly in my code.
The window is split in 3 parts: a. the flat files of in the workspace in the left, the code in the middle and the elements section in the
right. In the element section, Eclipse parses the code and presents the different variables/classes/functions that were declared in the
current scope.
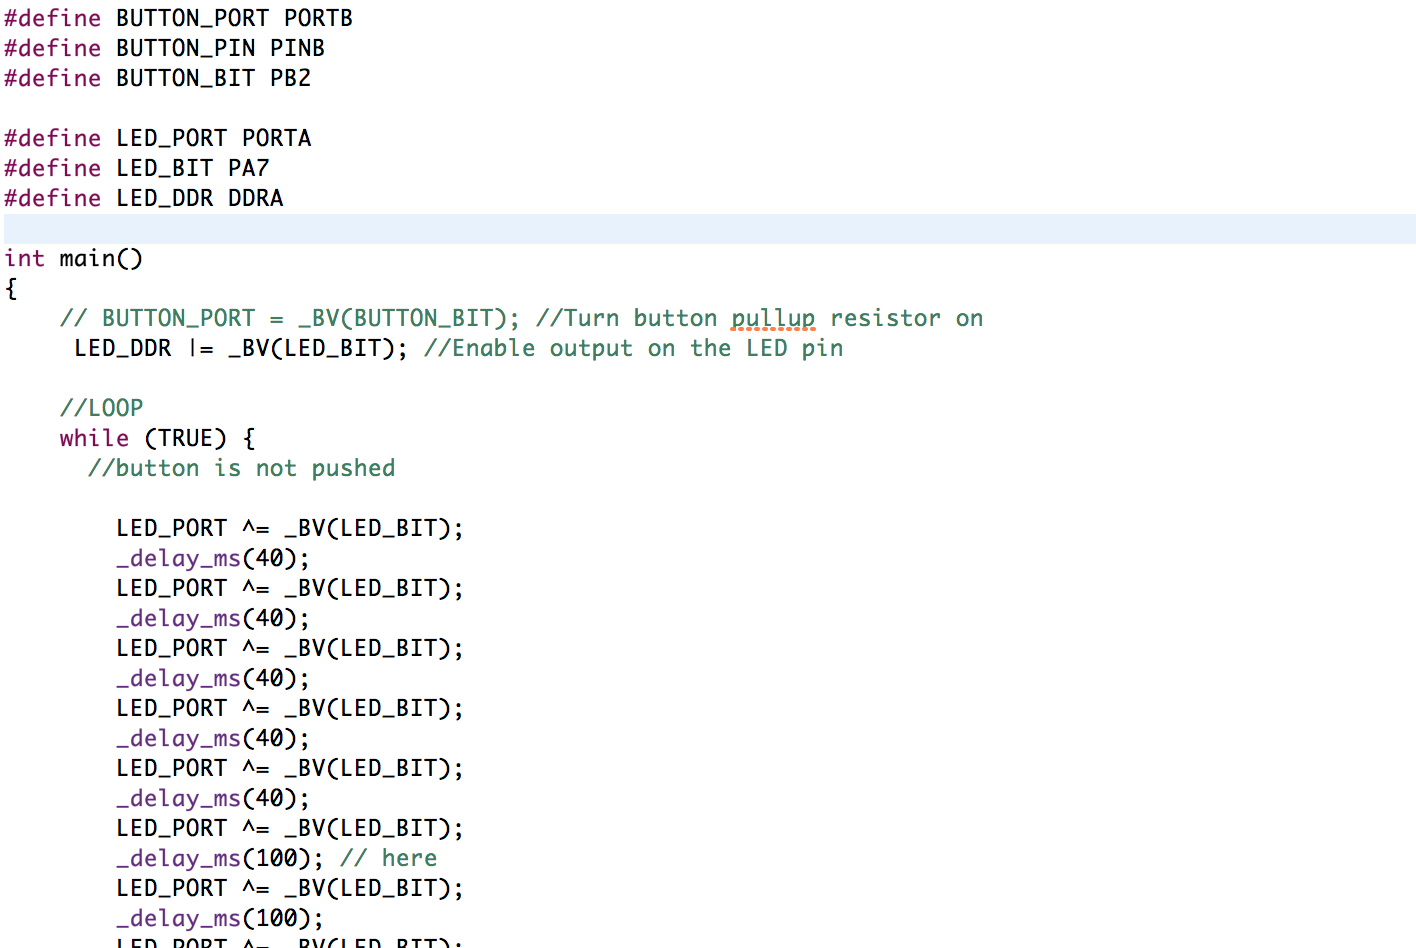
The LED blinking code is very simple. In the beginning I define names for the ports and pins that I have connected the LED
and the Button for easier reference. Then I set the state of the pins to input or output altering the content of the DDR (data direction
register) of the corresponding port.
The main program is a loop where I alternate the value of the output pin from 0 to 1 (0V -> 5V) with the correct
timing to produce the Morse code for "SOS", i.e. three long, followed by three short, in turn followed by three long blinks.
In each iteration I check the state of the button, and if it's pushed I generate a break to stop the loop.
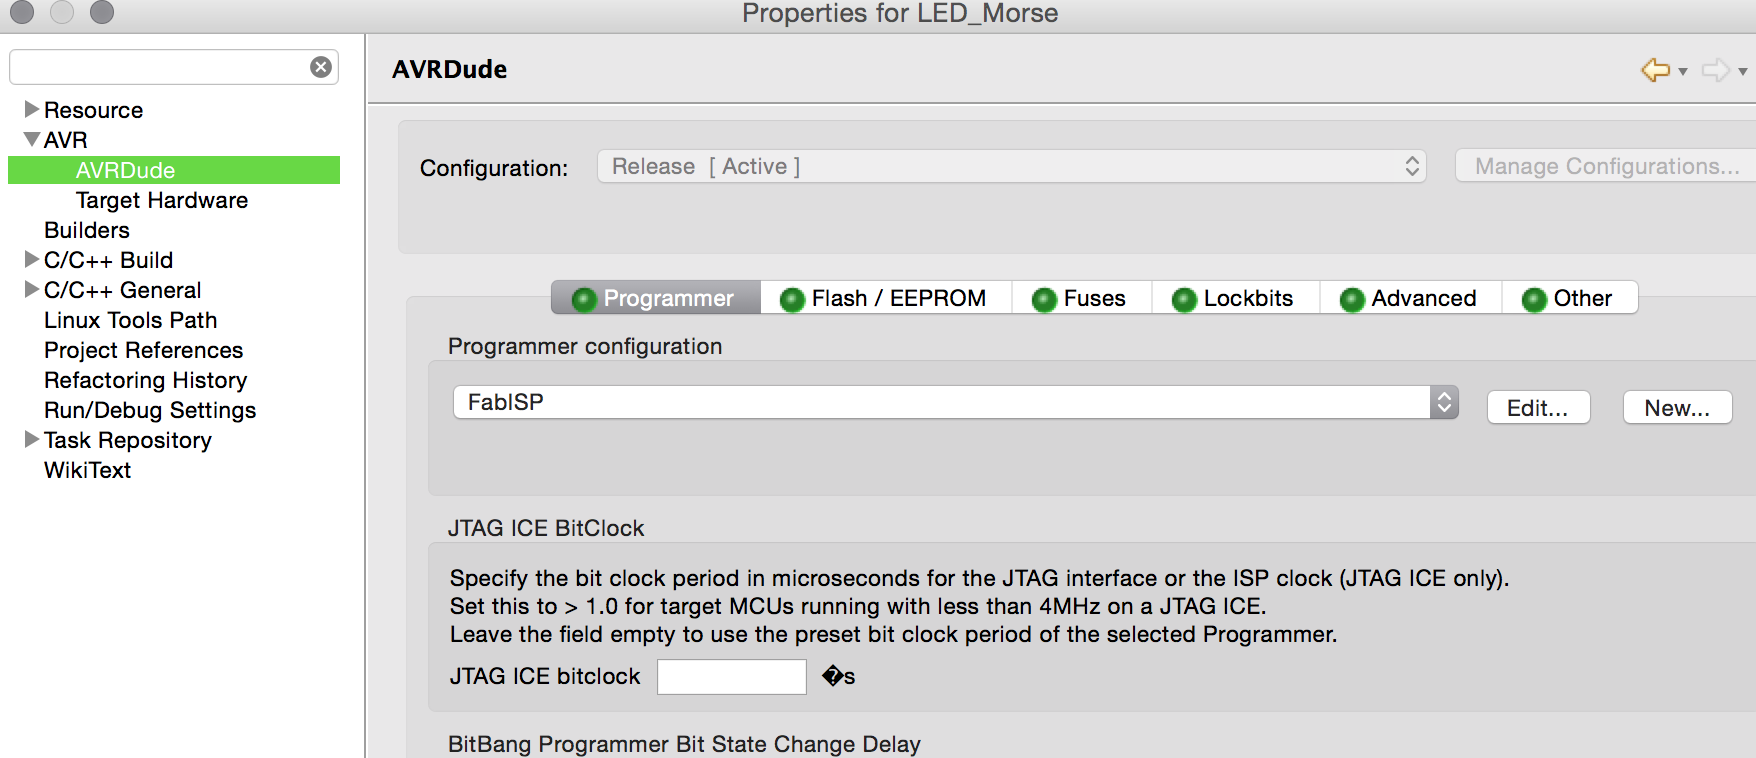
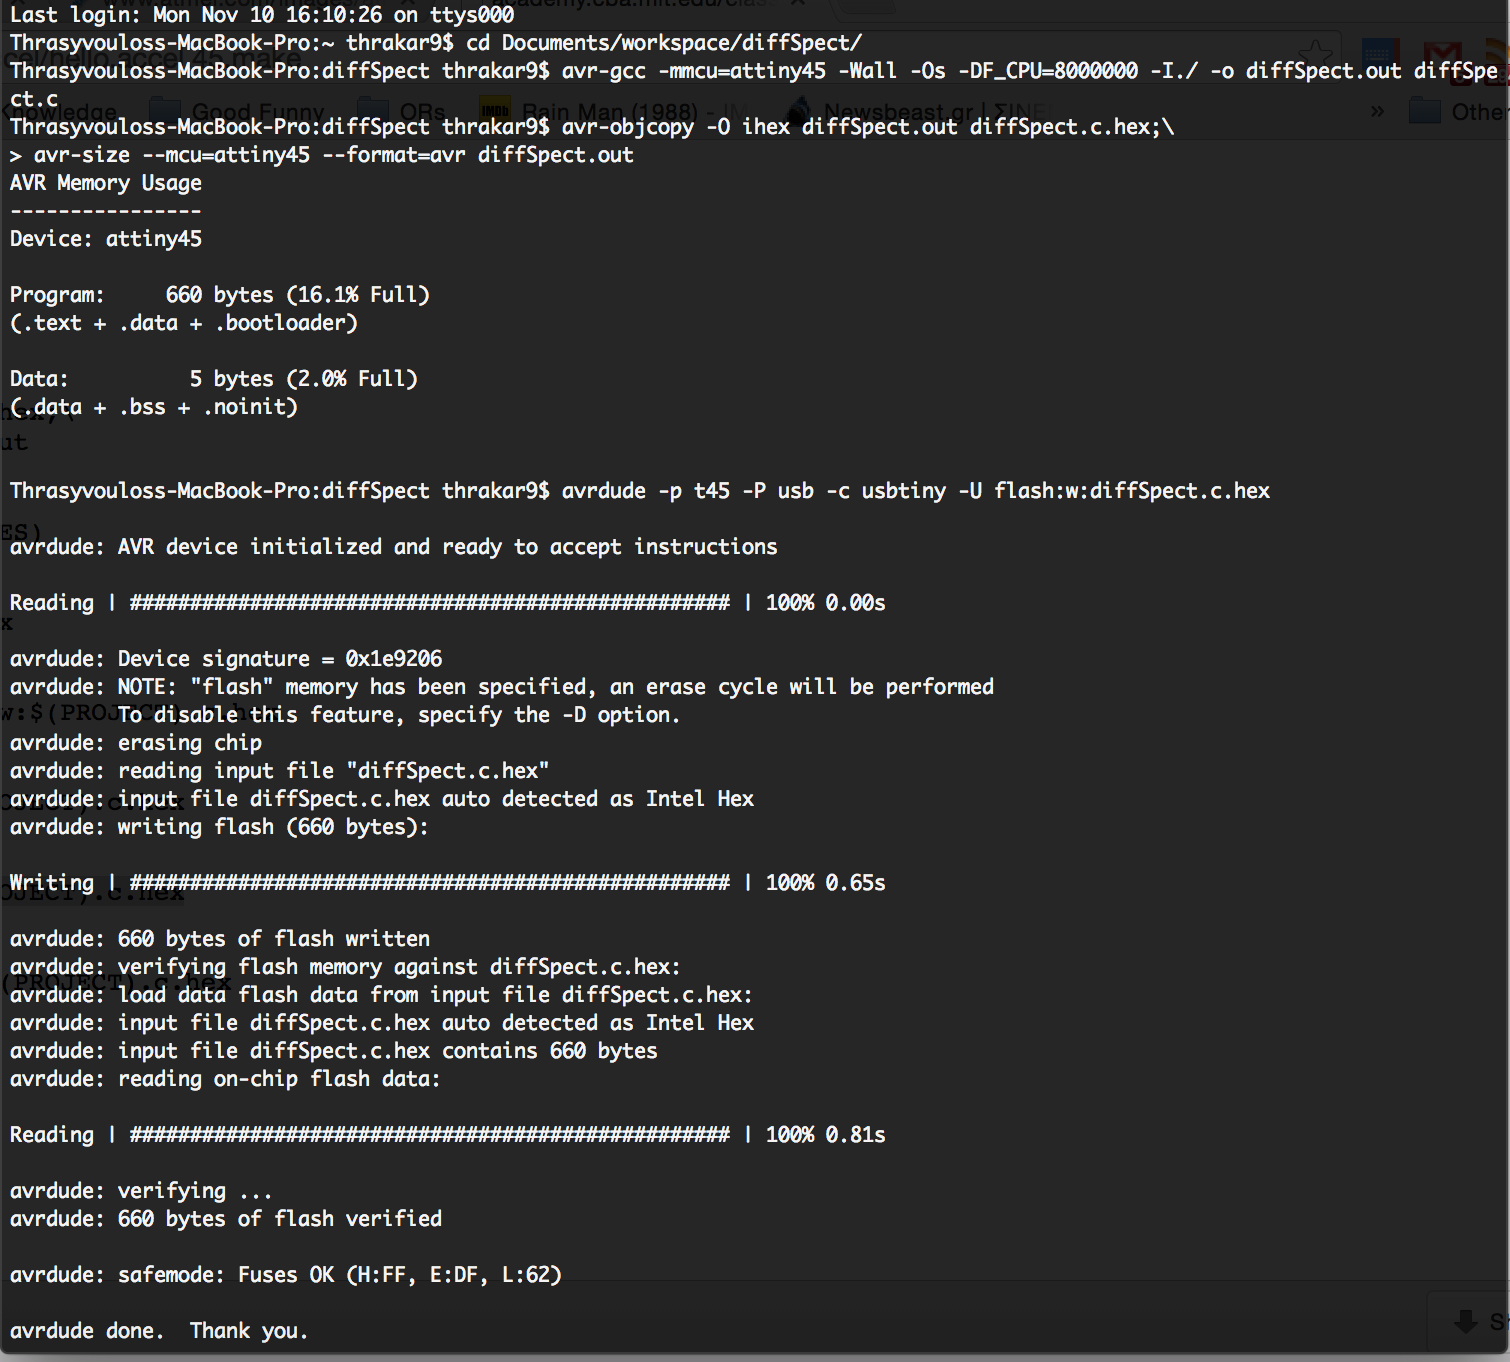
The interface that downloads the program to the microcontroller is avrdude
a command-line in-system programmer. The Eclipse plugin has integrated an interface for the various parameters of the downloading
commands. At first you select the programmer you want to use, which in my case is the FabISP. The profile for FabISP is "tinyusb", a generic
default for custom made usb programmers.
**UPDATE: In the pictures below you can see that for the LED_Morse program I used a different programmer, the AVRispMK2, as my FabISP was accidentally destroyed. Later created a new
FabISP with LED indicators (see week 10).
Step 4: Downloading the program
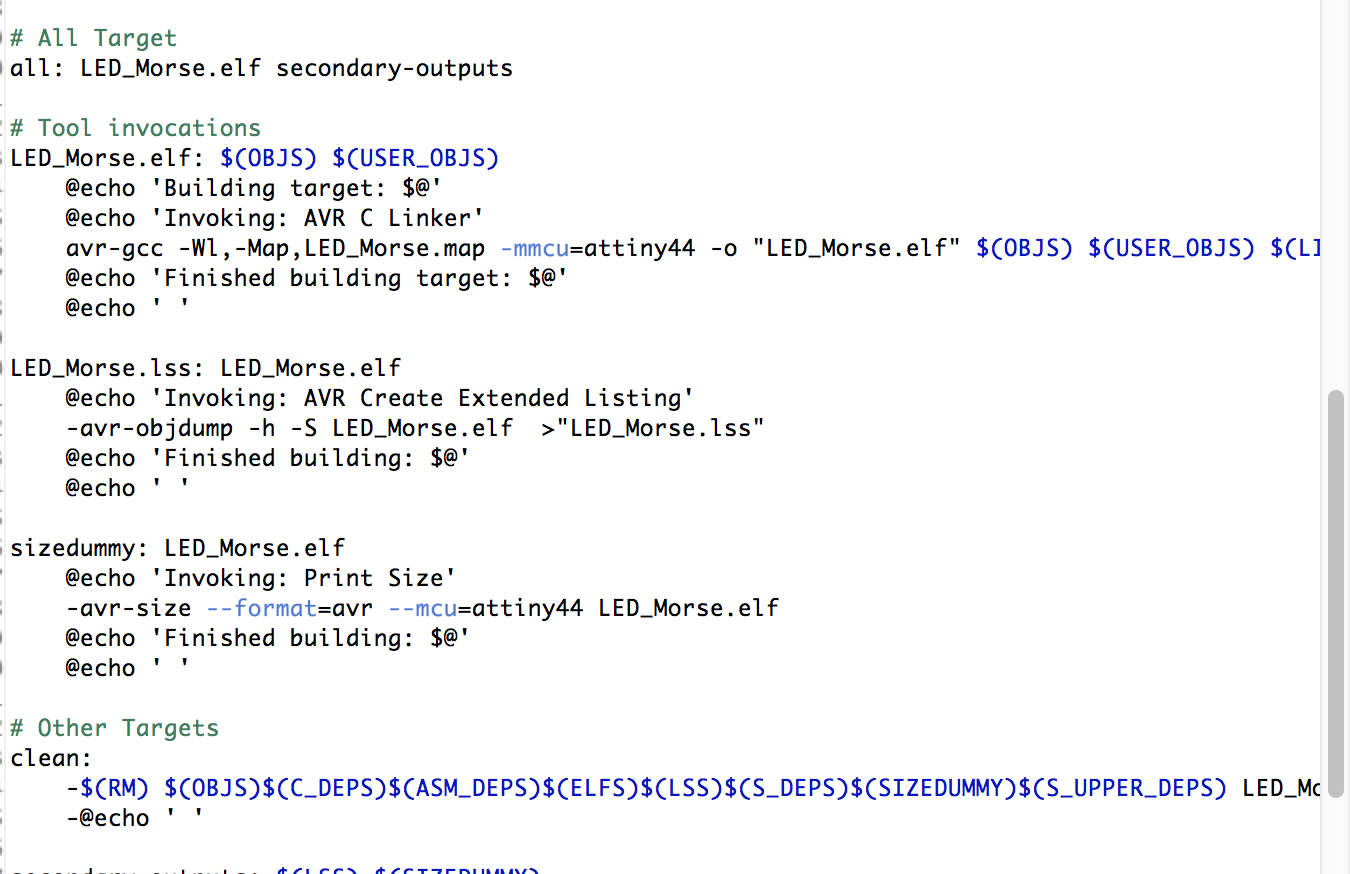
To generate the machine code from the C code, I had to "build" the program. To say to the compiler specifications about the building
procedure, like optimizations for speed or memory, you use a "makefile", i.e. a batch of commands and directives for the compiler.
In my makefile, (which you can see on the right) I included not only the commands for the compiler, but also for avrdude in order to
download the program. I found a nice overview of the avrdude commands
here.
Below you can see the LED blinking as well as my programmer setup.
UPDATE: Do I really need an IDE ?
Towards the end of the week, I realized that the IDE was more confusing, than actually writing your make and avrdude
commands in the commad line. Thus, I made a notepad archive with the different commands I used for reference, and since then started
to write my programs in Sublime text editor and then compile/download them using the commmand line. It certainly feels more
"hacker-ish" !

