Background
One of my final project idea is making a cost efficient occupancy sensor for study rooms in MIT Sloan buildings. People walk around to see whether rooms are open and often end up with finding all the room are occupied. I wanted to solve my/our problem there.
Using Pyro IR sensors, ESP8266 WiFi modules and microcontrollers, I thought that is a feasible project. This time I will try to make the wireless connection and data upload part with WiFi modules controlled by ATTiny.
Update 12.17.2014 - I changed my final project but am still working on this pyrosensor idea.
Testing ESP8266 using FTDI cable
Connecting the module to my laptop
First, I wanted to test basic commands and responses using my laptop (OS X). I followed the instruction Guy Z. put together here (https://github.com/guyz/pyesp8266) and Will’s advice (West section mentor this week) for basic do’s and don’ts'.
Here are things to remember:
- Supply 3.3V (no more than 3.6V) to VCC
- Connect VCC and CH_PD
- Connect RST with GND briefly when you want to reset the module
- Connect FTDI GND and ESP8266 GND *IMPORTANT*
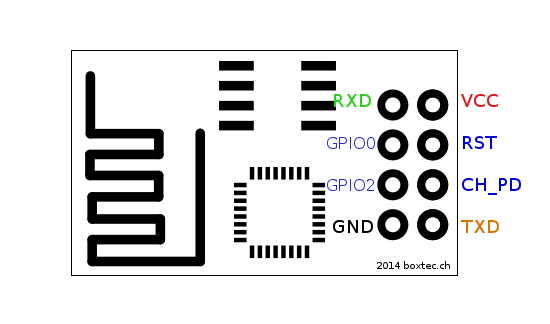
Pin Assignments on ESP8266
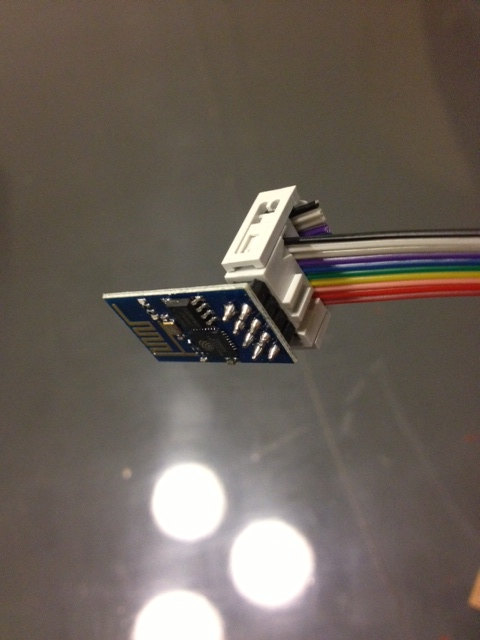
ESP8266 and the connector to FTDI
Here are colors of the ribbon cable in my case:
- black - GND
- white - TXD
- grey - GPIO2
- purple - CH_PD
- blue - GPIO0
- green - RST
- yellow - RXD
- pink - VCC
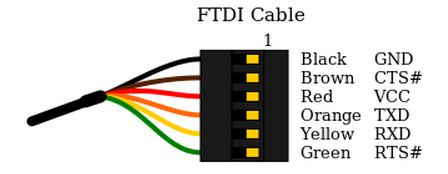
Pin Assignments of FTDI cable
I wired up the module's TX to FTDI's RX, RX to FTDI's TX, GND to GND. To connect these:
- black - GND - Power source GND 3.3v
- white - TXD - Pin 5 RXD of FTDI
- grey - GPIO2 - N/A
- purple - CH_PD - VCC - Power source VCC 3.3v
- blue - GPIO0 - N/A
- green - RST - GND occasionally
- yellow - RXD - Pin 4 TXD of FTDI
- pink - VCC - Power source VCC 3.3v
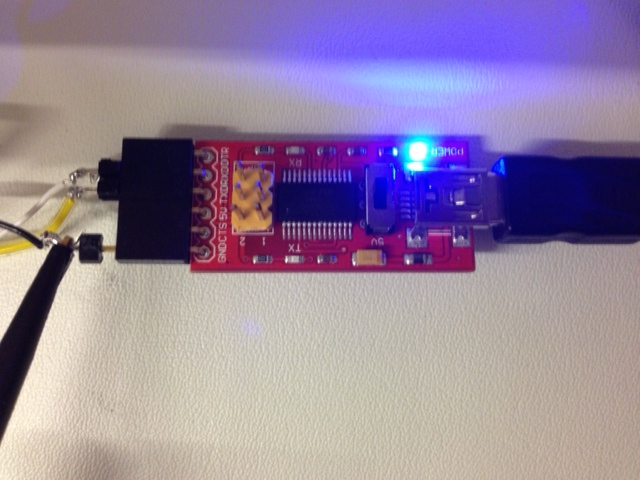
Connection to FTDI module
Installing pyserial
$ python esp8266test.py Traceback (most recent call last): File "esp8266test.py", line 9, inimport sys, serial
Got “import serial” error when I tried to run python esp8266test.py
You can follow the instructions here. I downloaded the package and run the install command below.
$ python setup.py install
Running esp8266.py - failed
Checked the serial port name.
$ cd /dev
$ ls tty.usb*
Tried to run esp8266.py with SSID, password, and the serial port name but had some error.
Connecting to esp8266 with serial terminal
I chnaged the way. I launched a serial terminal and decided to run AT commands line by line by hand. I set the baud rate as 9600bps. LEDs of FTDI module showed successful TX from the laptop to the module. However, I could not get OK response from the module. Finally, I figured out that I have not connected GND of the FTDI module and GND of the WiFi module. After connecting them, it started to work fine. Here are response examples.
[Vendor:www.ai-thinker.com Version:0.9.2.4]

ready
AT


OK
AT+CWMODE=1


OK
AT+CWLAP

+CWLAP:(0,"SSID",-77,"MAC ADDRESS",1)
+CWLAP:(4,"SSID2",-74,"MAC ADDRESS2",1)

OK
AT+CIPSTATUS

STATUS:5

OK
AT+CIFSR

XX.XX.XX.XX

OK

ready
Set up the server side
ThingSpeak
ThingSpeak is one of the easiest way to run the IoT data platform. I set up my channel listening to incoming traffic.

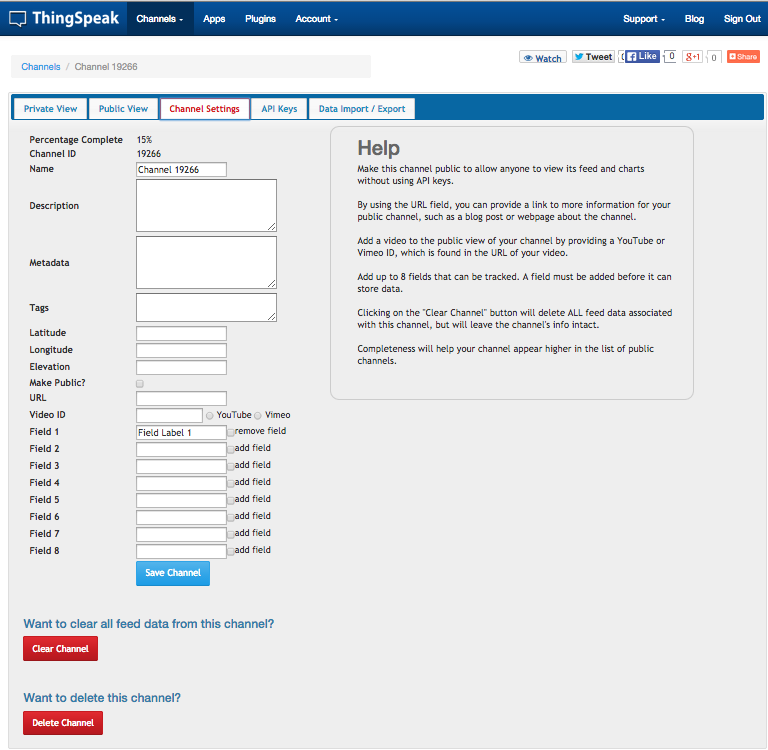
Example parameters to set up a channel
Node.js (as a backup)
I also installed and run tutorials of node.js on my laptop to tweak the data platform by myself in the future and also for a backup just in case ThingSpeak does not work. I am thinking of running node.js on Raspberry Pi.

Control esp8266 with ATtiny44
I milled a basic micro controller board (like echo board) and soldered the components. I followed the instruction to install ATTiny programming extensions for Arduino IDE. However, I have not successfully controlled ESP8266 from ATTiny44 yet. I am still struggling to write codes to communicate with the module with software serial.
Update 12.17.2014 - For follow up of Network week, I used Bluetooth module HC-05 for my final project. I could also figure out how to use SoftwareSerial.h on Arduino IDE. I will try esp8266 later.
