Week 2
Press-fit Construction Kit
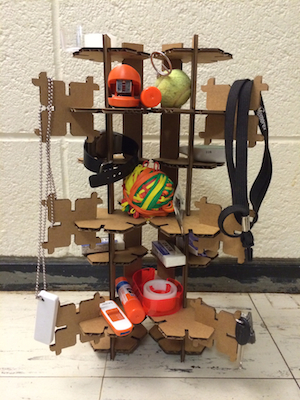
Desktop Organizer/Decorative Art Piece
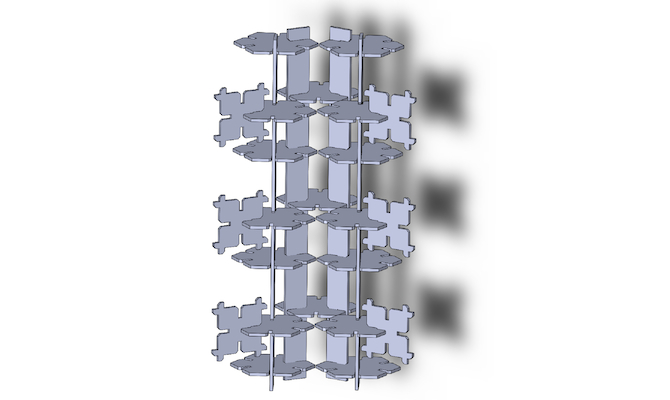
For this week, I designed a customizable press-fit organizer slash decorative art piece. The pieces were first designed in Solidworks, and then a dxf file was exported to other software in preparation for laser cutting.
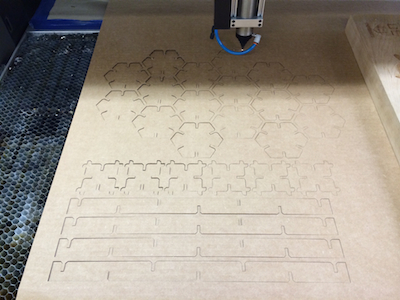
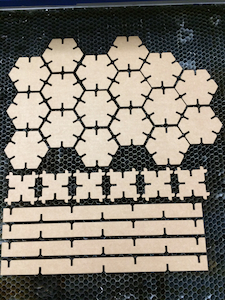
Here are the pieces being cut:
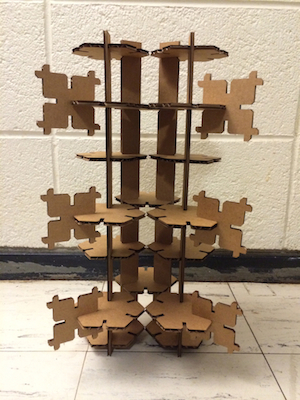
Here is the final product!
Here are some challenges I ran into while working on this project.
1) Test run without offset showed that the slots were too loose; adding a 0.005" offset adjusting for laser kerf allowed the joints to fit snugly together.
2) I had to figure out how to export files from SolidWorks for laser cutting. InkScape reformats dxf files. Fortunately, existing software on the laser cutter computer - CorelDraw - imports the files properly and allowed me to add offsets.
Important/interesting notes:
As Neil mentioned, cardboard thickness varies, and I was glad I used digital calipers to measure the thickness of the cardboard I used. The cardboard is listed as 3/16" or 0.1875", but the thickness came in at 0.164". I updated my model in SolidWorks to reflect this thickness reading.
For certain pieces, the orientation of the corrugation can affect the stability of the piece. Daniel, in my section, pointed out that the bridging pieces in my project would be more stable with the corrugation along the short axis of the piece.
Vinyl Cutter
I also took sometime to play with the vinyl cutter, making custom decals for my computer.
You'll notice that the edges of the lettering are a bit jagged - I imported a low quality png, which resulted in a poor tracing output by the fab module. However, in the end, I liked the look, and kept the decal.
Important note:
I made the mistake of weeding the decal before transferring the entire piece onto transfer paper. The optimal strategy is, if possible, to weed on the FINAL substrate. That is, I should place the decal on my laptop before weeding off the undesirable vinyl.
Thanks to Shaunta for teaching me a bit of illustrator!