Week 4
3D scanning and printing.
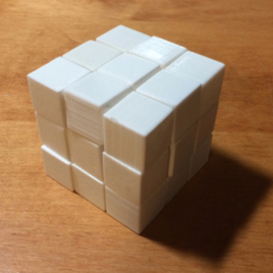
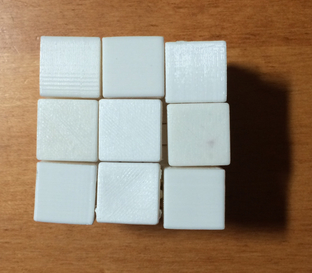
Maker Cube
Introduction
This week's assignment was to design and 3D print an object and 3D scan an object. I used a Makerbot Replicator 2, extruding PLA (polylactic acid). For 3D scanning, I used the Sense 3D Scanner.
Design
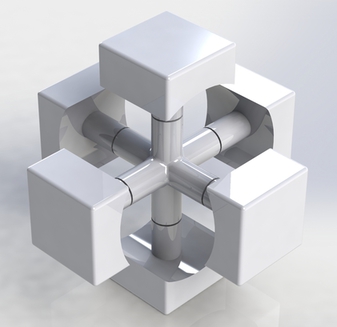
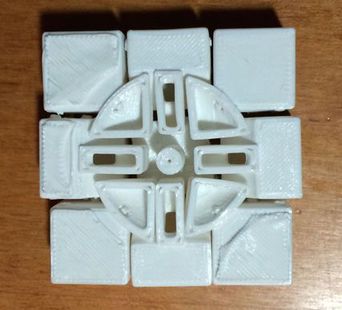
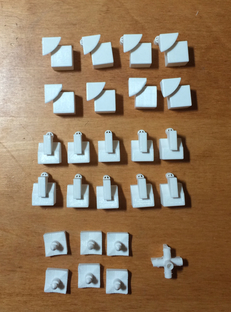
My goal was to 3D print a working Rubik's cube. I modeled the pieces in SolidWorks. The cube contains 27 parts: 1 core piece, 6 center face pieces, 8 corner pieces, and 12 edge pieces.

Make
First Iteration
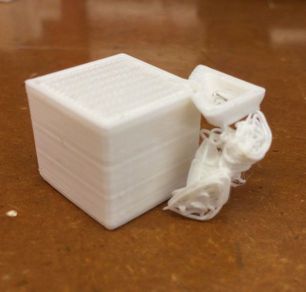
I attempted to print the cube in one go, but quickly realized that the 3D printer software does not automatically add supports. After printing one layer of the cube, the second layer began collapsing onto the first, so I canceled the job. I decided it would be best to print separate pieces, rather than printing an entire cube with supports between each layer of the cube (aka lots of exacto knifing).

Second Iteration
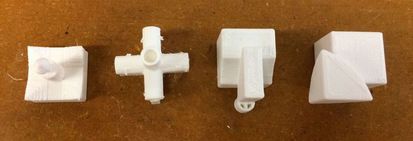
At this stage, I tried printing out individual pieces. MakerWare, Makerbot's software for preparing prints, has an option for adding supports, but these supports are not well-designed. When I printed several corner pieces, the supports all toppled over during printing, causing malformations in the pieces.
Third Iteration
I went back to SolidWorks and modeled in my own supports to the individual pieces. The single pieces came out much nicer with the better designed supports.
Settings on printed pieces:
Core piece -
- standard quality
- 10% infill
- 0.20 mm layer height
- 4 shells
All other pieces -
- low quality
- 10% infill
- 0.30 mm layer height
- 2 shells
The cube is not entirely functional at the moment - standard Rubik's cubes have center face pieces that are pulled into the core, ensuring that the pieces do not fall out. My center face pieces simply snap into the core, without forces pulling them inwards. Is there a way to obtain this feature with 3D printed plastic parts?
Lessons Learned
1) Test print pieces individually at different settings before moving on to print larger batches. This ensures that you're not wasting filament material as well as other people's time in the fab lab.
2) 3D Printing can be a frustrating process. Be patient and make sure all your designs are easily modified, b/c it is possible and likely that you will be making changes after first iterations of 3D printing.
3) Cleaning the extruder head from time to time will minimize the risk of the filament getting stuck. The Makerbot Replicator 2 especially has a tendency to become clogged. The pinch wheel that feeds in the filament will pickup filament particles, reducing its capacity to feed the extruder. I used a toothbrush to remove the particles, which seemed to do the job well.
4) To aid in removing supports from 3D printed parts, make use of a heat gun! Gently apply heat by directing the heat gun back and forth across the support - do this several centimeters away from the part and for several seconds. Then use an exacto knife to remove the supports, it should be much easier to remove material.
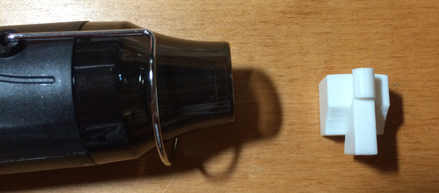
3D Scanned Multimeter
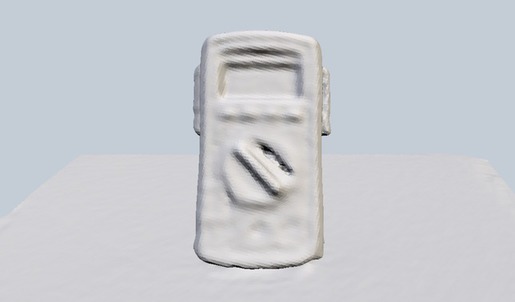
Here is a 3D scan of a multimeter. I had a lot of difficulty getting a full scan with several objects - the Sense3D Scanner often lost track of the object, and in many cases, I was unable to re-acquire the tracking.
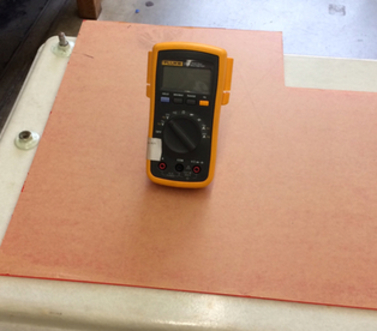
Above you can see the setup I used to track the object.
Lessons Learned
1) The scanner does not track rotationally symmetric objects well; the scanner will accidentally superimpose a feature in the wrong place (e.g. multiple placements of the handle of a cup). This is one reason why I chose the multimeter, which has unique faces and features.
2) Make sure the background of the object is not reflective. A reflecting material will make it more difficult for the scanner to track the object.
3) Make the target of the scanner the object as well as the surface below it. This seemed to make it easier to get a full scan without any undesired interruptions.