Week 5
Make something big.
Press-fit Papasan Chair
Introduction
This week's assignment was to design and build something big using a CNC router. I'm a big fan of papasan chairs - these are the big bowl chairs that are sold at Pier 1 Imports for outrageous prices (~$140 for cushion, bowl, and base). I decided to make a low-cost press-fit version using oriented strand board (OSB).
Design
CAD Modeling
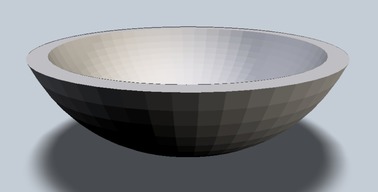
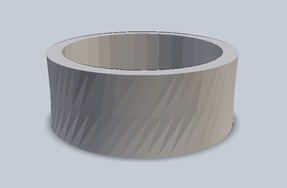
1) I modeled the bowl and base of the papasan chair in SolidWorks, saving these files in the STL format.
Press-fit Pieces
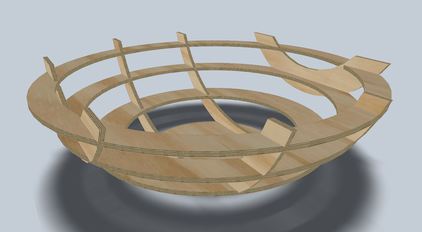
2) I then imported these STL files into 123D Make. I planned to use the ShopBot Buddy Alpha CNC router, which can cut up to 48" x 48" of material at one time (not accounting for the screws that fix wood to the sacrificial bed, yet!).
Thus, I set the manufacturing sheet size in 123D Make to 48" x 48", with a thickness of 0.43" (measure this beforehand, b/c this will determine the slot-sizes in the pieces). Using the interlocking slices construction technique, I created press-fit pieces from the STL solids.
Layouts
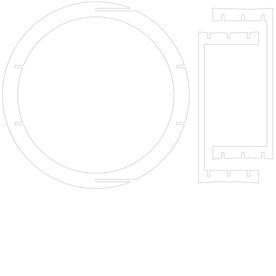
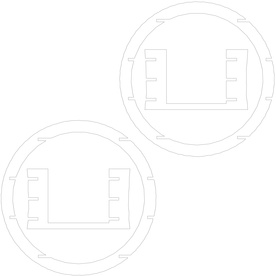
3) I found that 123D Make is not very efficient at making the layouts for cutting. As such, I exported the layouts in 123D Make as PDF files and imported them into Inkscape to manually optimize layout of the pieces. Fixing wood to the sacrificial bed requires placing screws along the perimeter of the wood. As such, the actual region cut is slightly smaller than 48" x 48". Keeping this in mind, I set the document size in Inkscape to 46" x 46", so the toolbit would not hit the screws and cause shrapnel to fly everywhere. In the end, I cut down the total number of sheets required from eight sheets to four sheets.


Make
Preparing the pieces with CAM Software
1) The ShopBot Buddy uses VCarve to prepare the toolpaths. I created a new file with dimensions 48"x 48"x 0.43". I then imported the PDF files created in Inkscape and created the relevant toolpaths, making sure to work inside out and add tabs. This ensures that the pieces will not move during cutting.
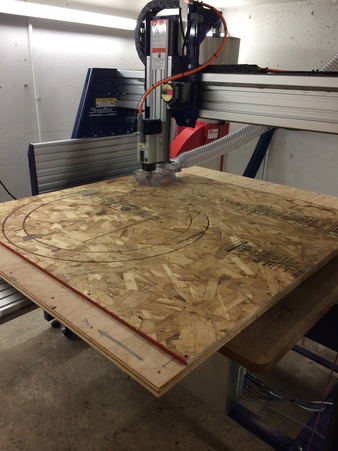
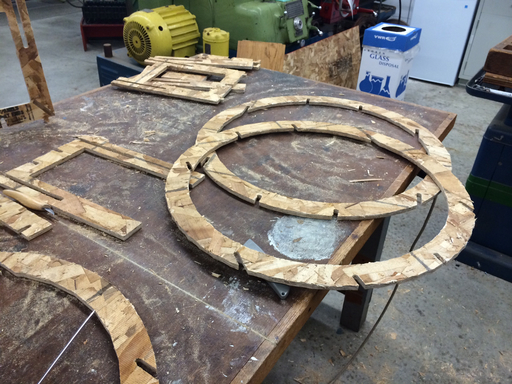
Cutting
2) The pieces were cut on a ShopBot Buddy Alpha CNC router. I used a 60 degree v-bit for engraving a Harvard "H" into one of my pieces. I then used a 1/4" downcut bit because it was being used at the time, and I was not concerned with the quality of any side of the pieces. Make sure to use the right bit depending on how you want your surfaces to come out.
Post-processing
2) Cutting required a lot of post-processing. I cut through the tabs with a utility knife and sanded the edges on all the pieces.
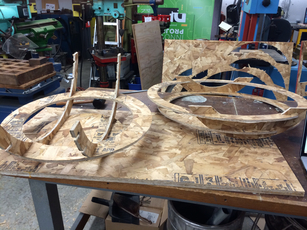
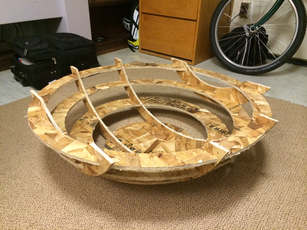
Assembly
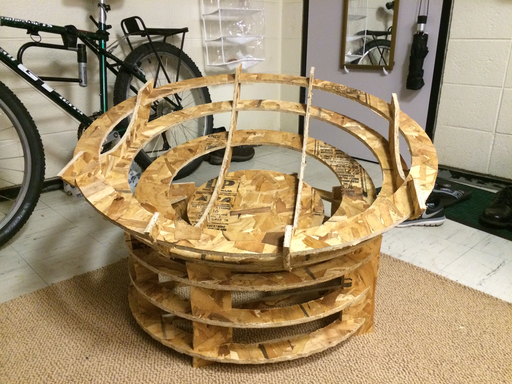
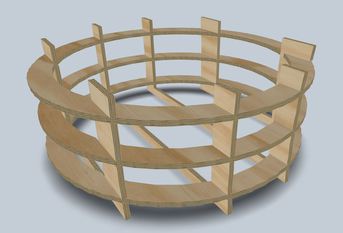
3) Last and most satisfying step - I put together all the pieces! There were 15 pieces in total.
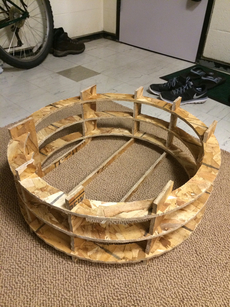
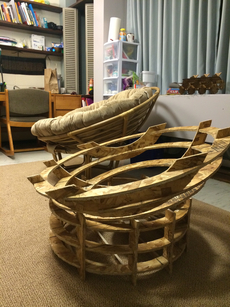
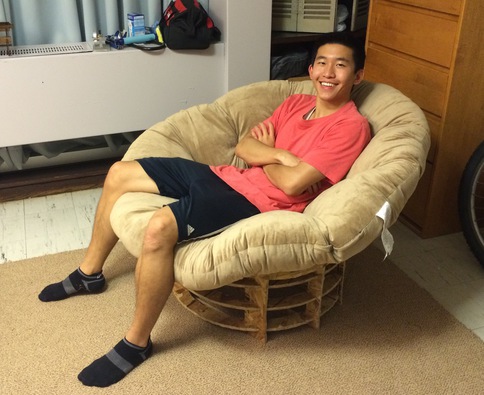
Even constructed from OSB, the chair appears to withstand my load! For future work, I plan to improve my design to remove protruding edges, add stability, increase the size of the bowl, and utilize better wood.
Lessons Learned
1) Accounting for screws - it is important to take into account how the machine works into your design. In this case, knowing that you will need to fixate your piece on the sacrificial bed with screws will allow you to design the layout of your pieces accordingly.
2) Preparing toolpaths - I found the optimal cut depth for OSB to be the thickness measured + 0.05". The toolbit cut completely through the OSB but did not ruin the sacrificial layer. Make sure to prioritize toolpaths from the inside out and use tabs. This ensures that pieces will not become loose while they are being cut.