Metal Casting Tutorial
Although not required for the class, there are options available if you would like to cast small metal parts. While many of the processes for mold-making are general and can be applied to rubber/plastic/metal casting, you will need to have an experienced TA help you through the metal-casting process if you are interested.
The material that we have successfully cast is called Babbitt. It has a low-ish melting point and can be cast relatively easily.
Mold Making
Most of the time you will want to produce a "two-part mold". This type of mold will allow you to cast an object, remove the mold, and reuse it for several (if not many) pours. There may be instances where the object you are trying to create will require a more complicated multi-part mold--see Matt's 5/6 part mold for an example of this.
While technically you could 3D print the final female mold and cast past, it is very difficult to get nice parts from them, and it becomes tricky to demold your cast object without having to break the mold apart. The following examples will walk through the process of going from digital model to rubber mold in several ways.
Quick links
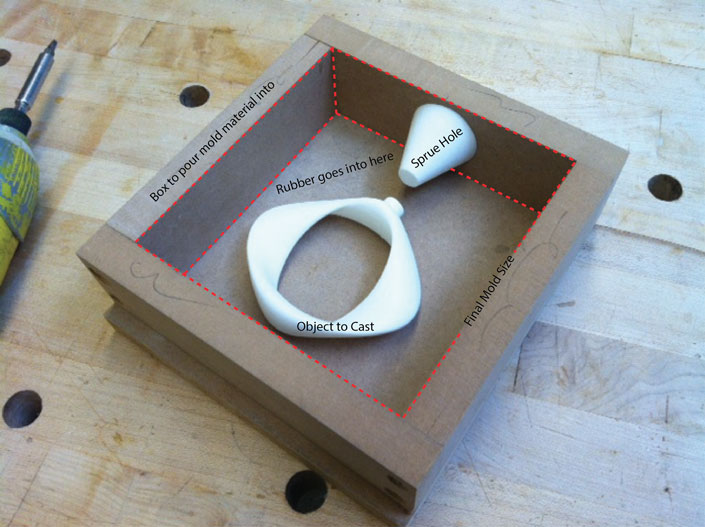
Starting with a 3D object, we need to build a box for it that will allow us to pour the mold making rubber. The parts you see here include the object that we want to make a cast from and a sprue hole to pour the final casting material into (in this case metal). Although the sprue and the object were made in two pieces, you could also do it as one connected piece.
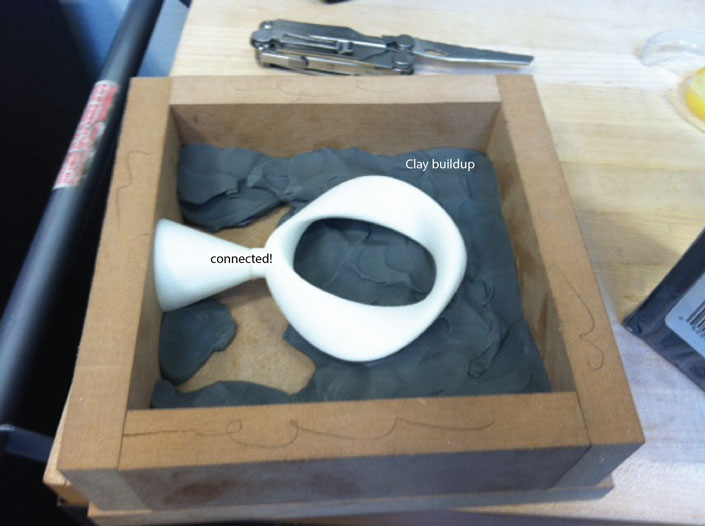
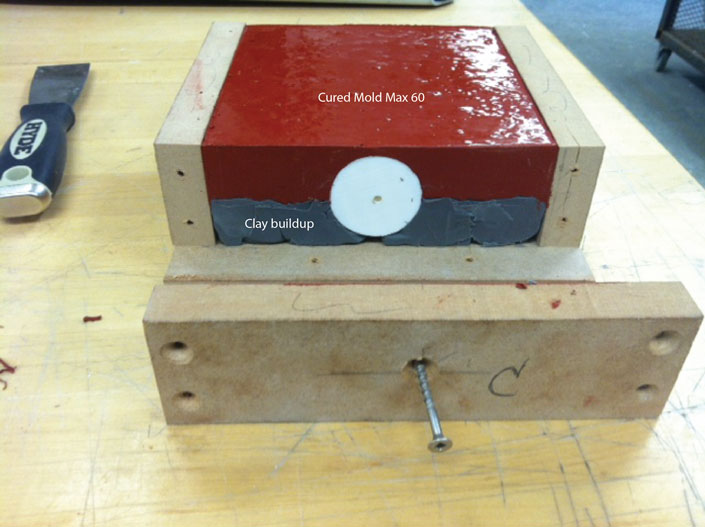
By filling one half of the box with clay, we create one half of the final mold. The clay allows us to manually define where we want the rubber to go and, if we think through the part carefully, we can minimize the amounts of undercuts which would otherwise make it difficult to separate the final mold from the cast object.
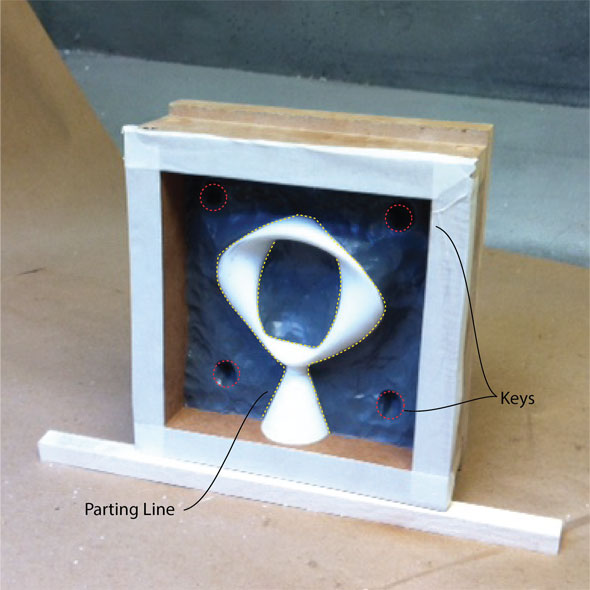
Note the Parting Line--This is the line that will define where the two halves of the molds separate. Usually, you'll want to make sure this generates the minimal number of undercuts. We'll have no undercuts on this mold.
Also, to make sure the two halves of the mold align nicely, we've included these 'keys'. One side gets the positive and the other gets the negative.
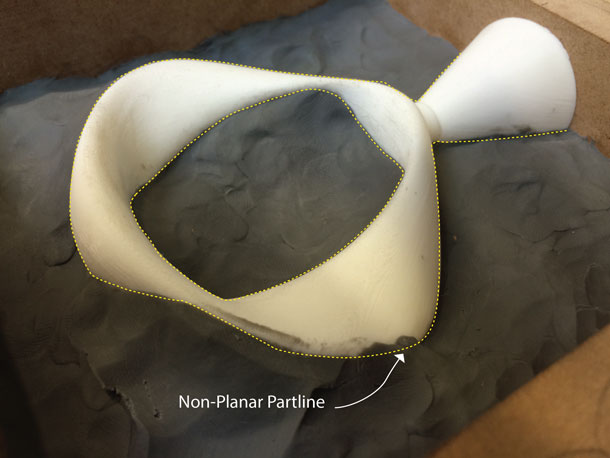
Close up of the parting line.

We used MoldMax 60 for this specific mold.
N.B. You absolutely need to apply an adequate amount of mold release to the clay for the first pour, as well as the rubber for the second pour!
After the rubber has successfully set, we can unscrew the mold box, flip the rubber and object, and remove the clay in preparation for our second pour.
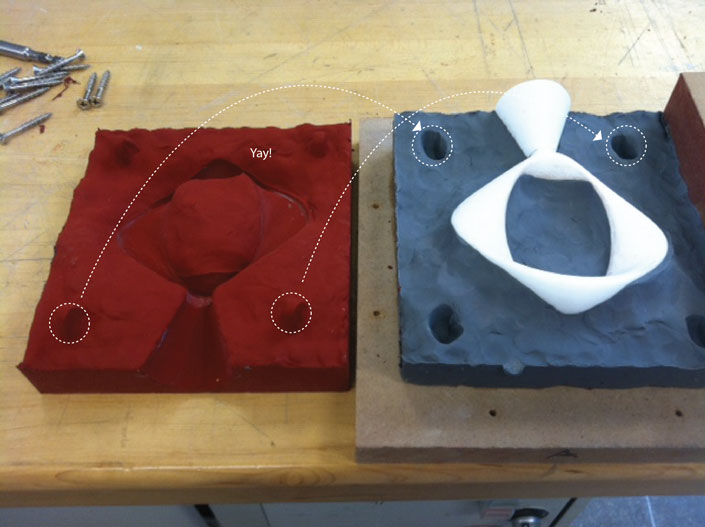
This is what it looks like after we've taken the mold box apart.
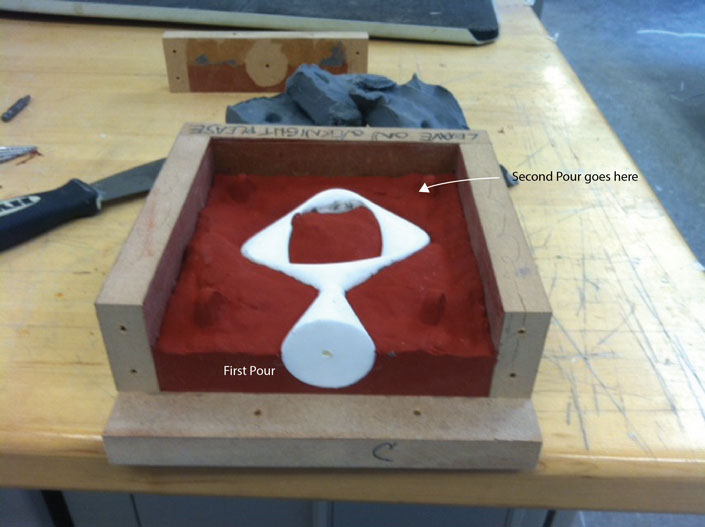
By removing the object and sprue from the clay and placing it into the first mold half, we can cast the second side of the mold.
N.B. You absolutely need to apply an adequate amount of mold release to the clay for the first pour, as well as the rubber for the second pour!
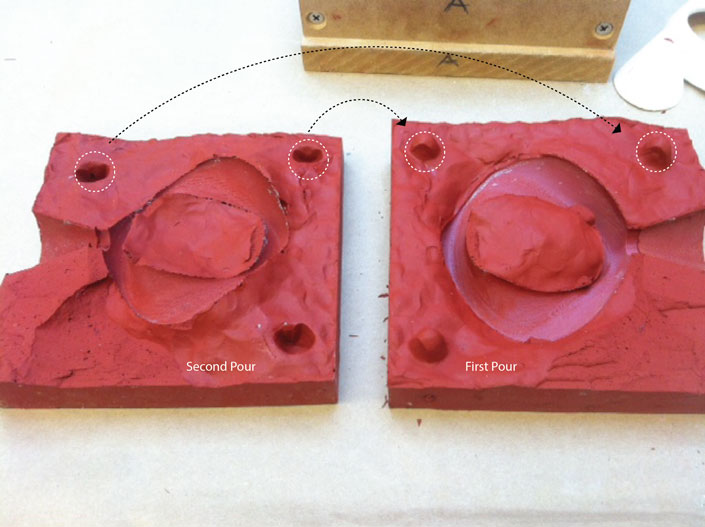
Here are the two halves of the mold!
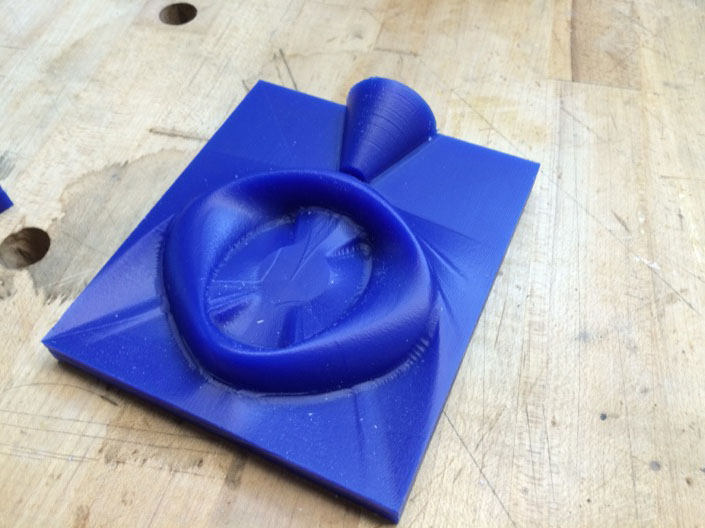
Another method to creating a two part mold is to directly mill wax (or foam, wood, etc.,) and cast both halves of the mold at the same time. The version below was milled on the architecture fablab robot. Since the robot has six DoF, we are able to mill undercuts without having to worry about a complex parting line. At least theoretically...In practice, the tool size limits the resolution we can acheive in some areas. Additionally, you might notice the machining pattens that are present in any milled job. All these bumps and divots will be reproduced in the final product. Just be aware that it may take a little to a lot of manual cleanup to get a desired finish.
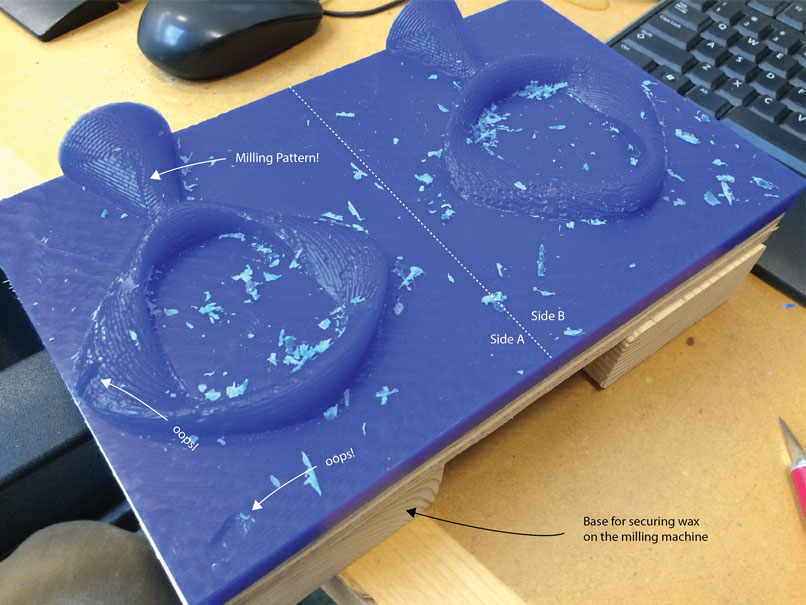
Here we have the milled wax straight from the machine. Again, note the visible patterning from the end mill.
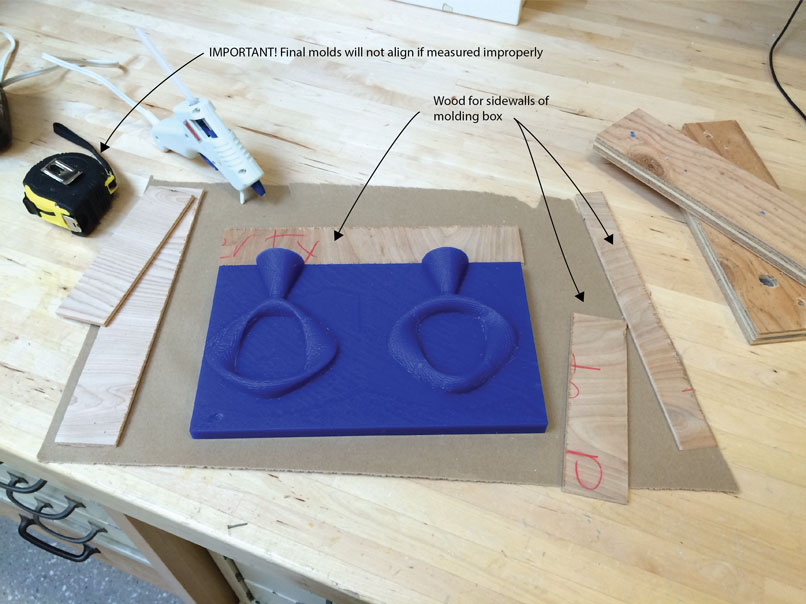
The nice thing about this method is that we can cast both halves of the mold at the same time. First we'll need to build a box around the wax to contain the molding rubber. We should have added some sort of registration dimples (like the keys seen here), because it could become difficult to align the halves of the mold when we are ready to pour.
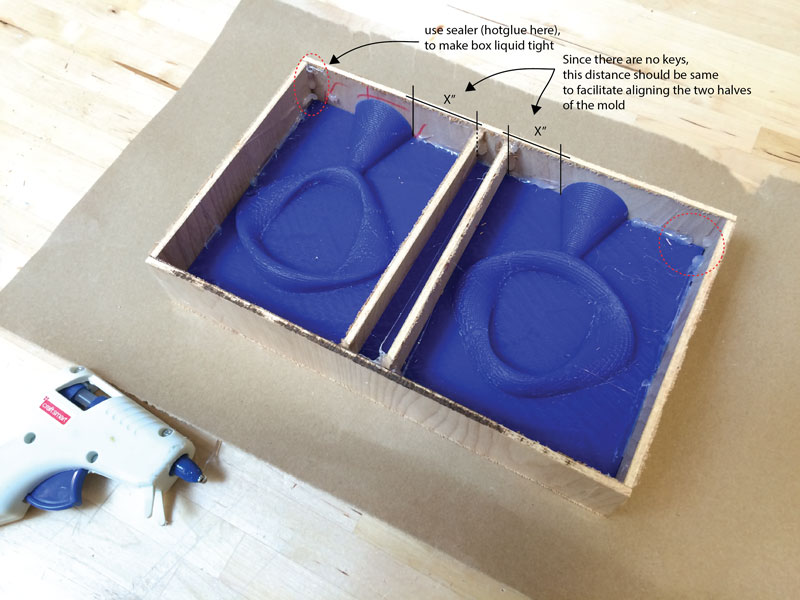
After we seal all the edges with hot glue or some sort of sealant, the box is ready to go. You can pour into both sides at the same time using the method shown in the 3D print example.
Here is the result you can get on the 3 axis mills. Quite a bit cleaner than the robot for several reasons. The important thing to note is that there can be no undercuts. You will have to figure out the correct partline so that all areas can be milled with a 3 axis machine.
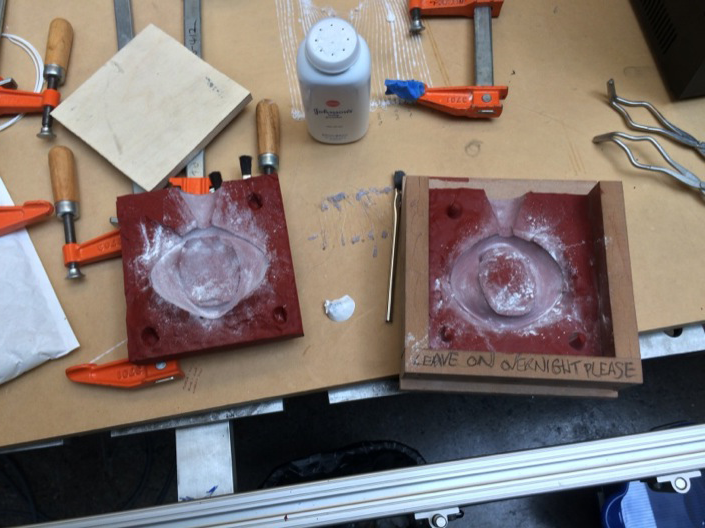
I can't think of a reusable mold that doesn't need some sort of mold release applied. Our metal casting is no different. A thorough dusting of talcum powder should be enough for this mold.
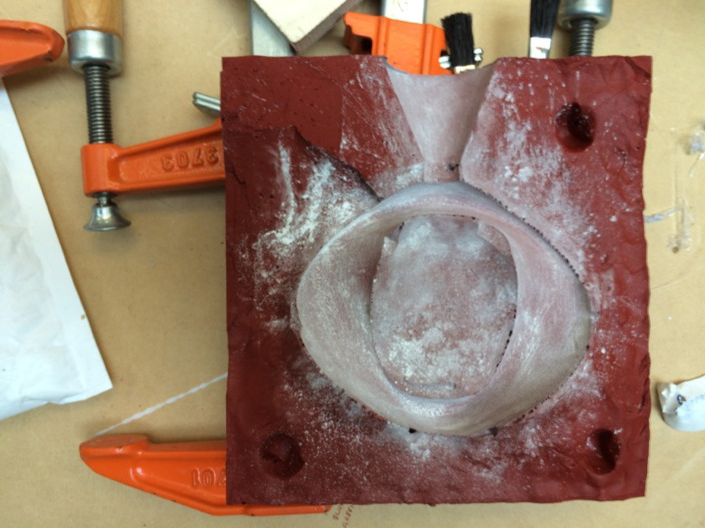
Another picture of mold release, because it's that important.
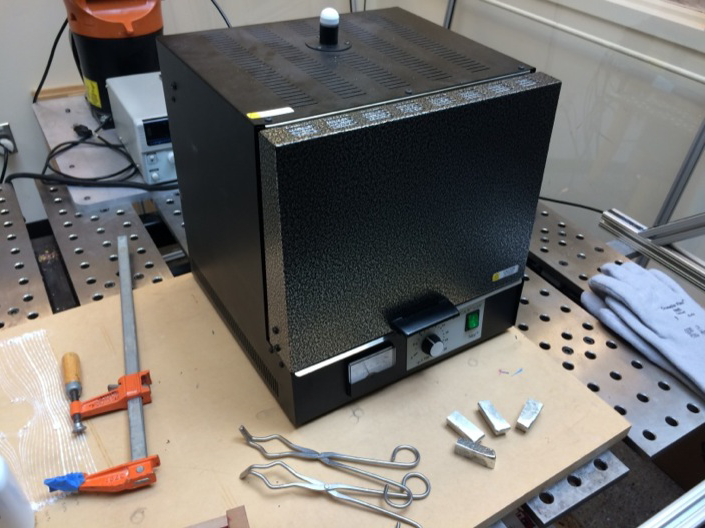
The furnace we use is a Vulcan A-550. It is located in 3-412, next to the robot table.

The temp and time in the oven depends on the material you are trying to cast. Babbitt has a pretty low melting point); for this test, we cooked it at about 600°F for (JEN?).
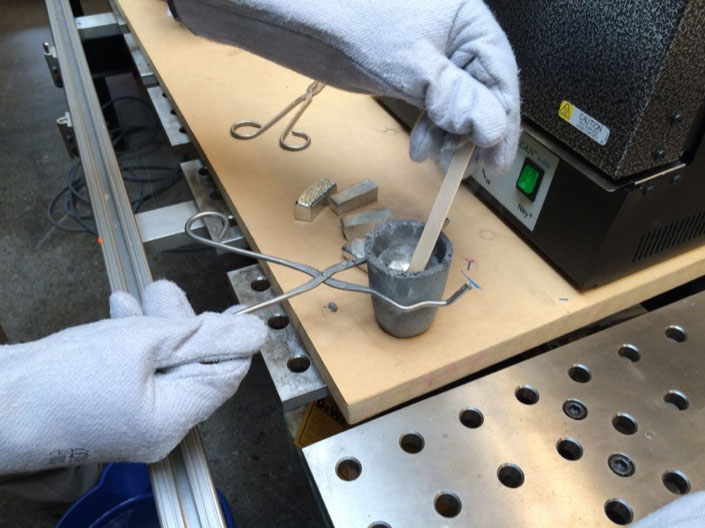
We stir it to mix up the different types that are in there so it's all distributed well, and the massive bits don't all separate by sinking to the bottom, and so on. We used a wooden stick but it starts to char pretty quickly - better to use a metal spoon. Then you scrap the oxidizing crust off the top quickly to pour before it cools off too much.
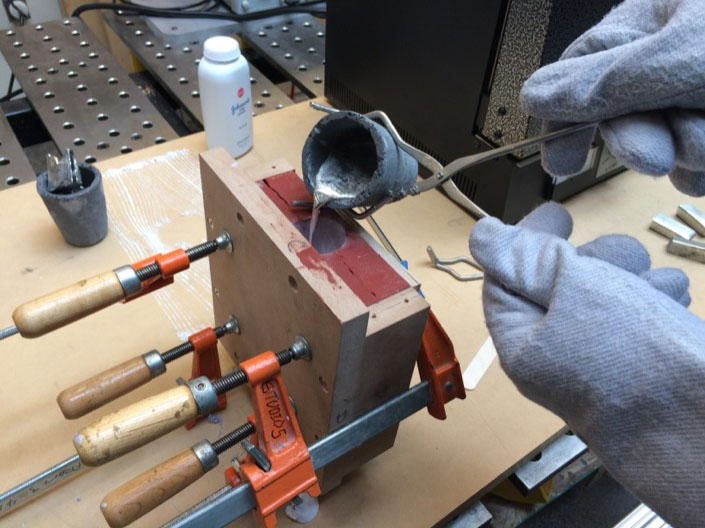
No tricks here, when pouring the metal be sure to go slowly and steadily.
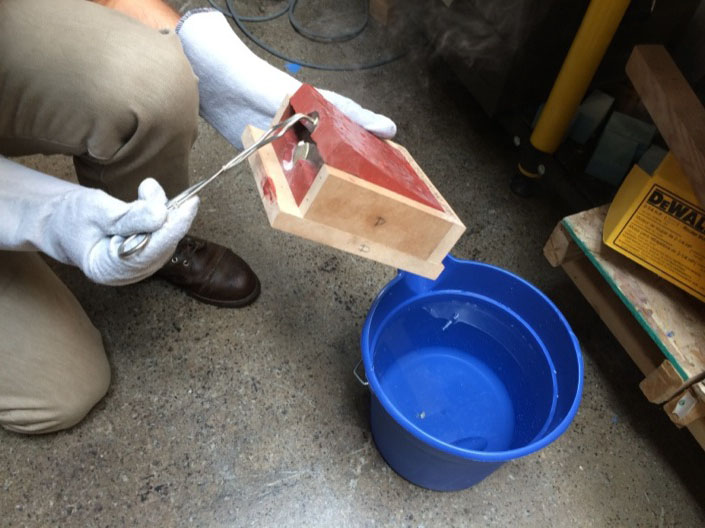
After the piece has cooled enough to set, you can start to remove it from the mold. IT WILL STILL BE SUPER HOT, BE CAREFUL
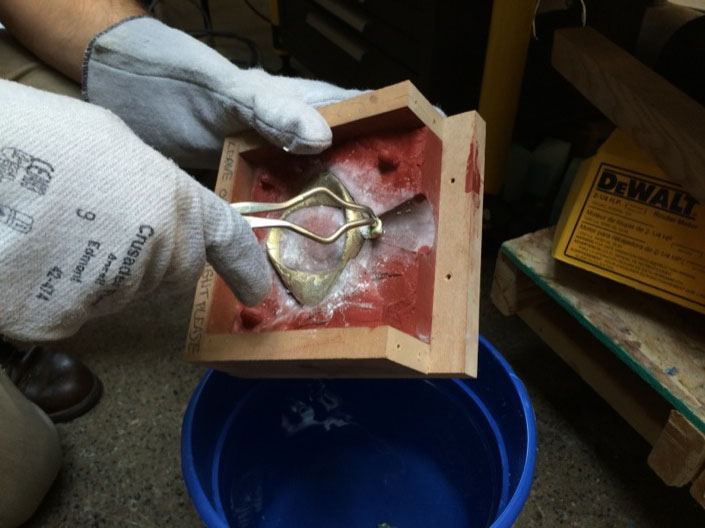
This is a nice technique to pop it out of the mold.
Quenching in a water bath! Quenching
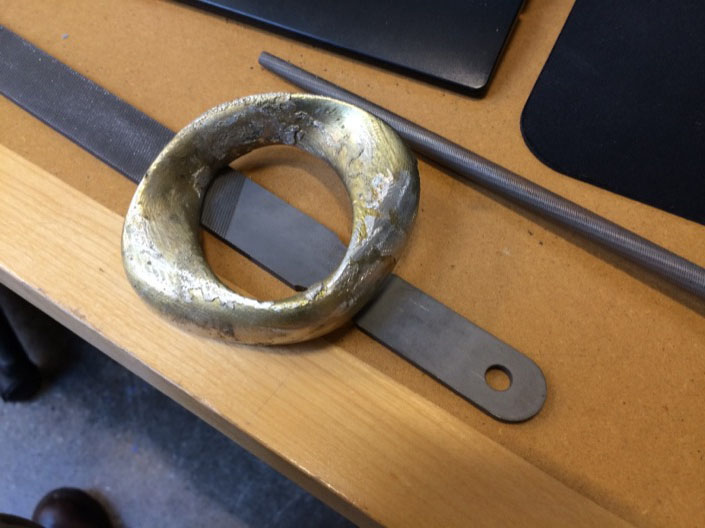
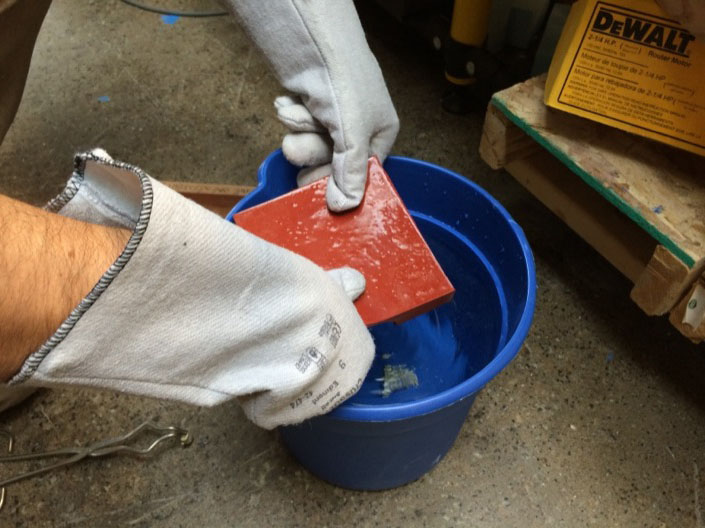
The final, cooled piece. Much of the reside on the surface (the silver on top of the gold) will flake off. Use a file for the stubborn stuff.
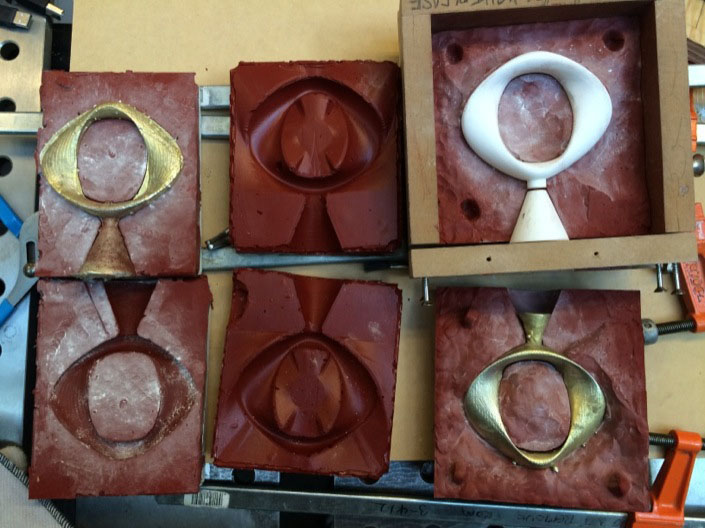
All of the molds and parts together!