Class webpage. Look under "Assignment".
How to Assemble and Program the FabISP
Henry Medina Rodriguez's instructions
Need more info? Read below and browse through the Previous Years pages.
You just milled your FabISP following this tutorial.
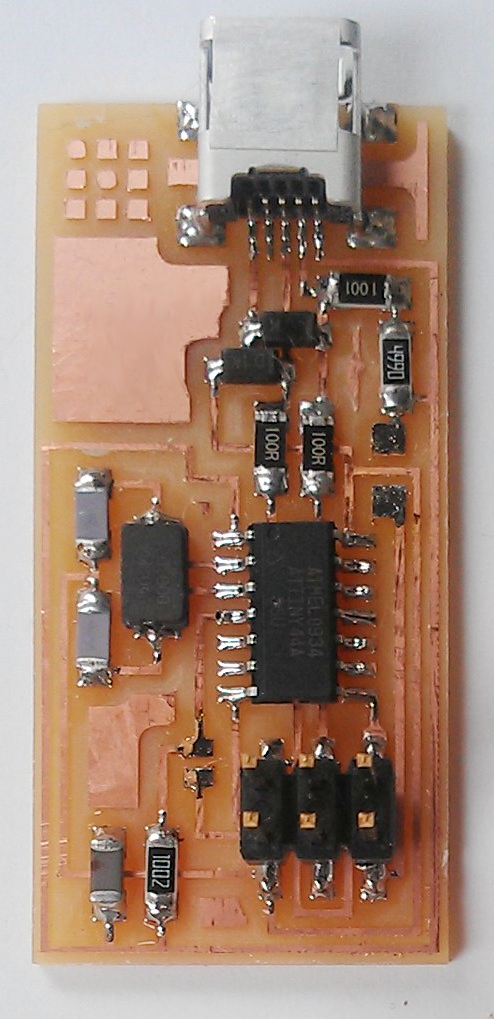
Make sure to clean it with a scotch-brite. Stop when it's shiny and free of floating "copper hair". At this point you can use these two images
(CAD, Assembled PCB) as a reference.
The class webpage also has multiple links related to assembling this board.
Tips:
- D1 & D2: A = Anode, C = Cathode. The cathode is indicated on the package (line). Look closely, it's hard to see but it's there.
- IC1: one of the pads has a different shape: it's pin #1. On the IC it's a little dot.
- R2: 499 ohms ~= 500 ohms. You can also solder two 1k on top of each other
- By default use the 20MHz crystal, not the 20MHz resonator (it could be used with a slight hack)
- If you have ANY doubt about the value of a part measure it with a multimeter
When you are done soldering it's important to clean your board. If you used No-Clean or Water-Clean flux you can use water to remove the flux. If you used the flux that's in the IDC shop then you need to use a special solvent or rubbing alcohol. I used
91% and I brushed hard with an old toothbrush. Clean it as soon as possible - it's MUCH easier to clean it right after than two days later.
The FabISP is based on the USBtinyISP design. An excellent source of information is Adafruit.
0) Make sure that SJ1 is soldered on the board you want to program. Make sure that your target board is powered (if you don't have SJ2 on any board use 2 USB cables. Otherwise use 1 USB cable (on the FabISP that's already programmed) and a jumper per board.). Connect the 2 boards together.
1) Install the USB driver
2) Install WinAVR
3) Get the FabISP Firmware. I used that version.
4) Open the Makefile with a text editor. Make sure that your oscillator frequency is 20MHz (F_CPU = 20000000 # in Hz). If your makefile has options for different programmes make sure to enable the one with "usbtiny". Save it.
5) Open a terminal. Go to the directory where you saved the firmware (ex.: ..\MIT\MAS.863 Teaching How to Make Almost Anything\Electronics Production\firmware)
6) Follow the programming steps from the How to Assemble and Program the FabISP page (make clean, make hex, make fuse, make program).
7) If something is wrong refer to Adafruit's HELP!!! page.
Feel free to contact me at jfduval (at) mit (dot) edu if you have any questions or comments!