
Yet again, this week I started all this as a COMPLETE beginner. I've obviously interacted with interfaces before but I never knew all how much coding was behind it! I decided to use Processing this week as I felt that it would be a nice introduction, also there are plenty of tutorials online to follow along with and to develop as I saw fit.
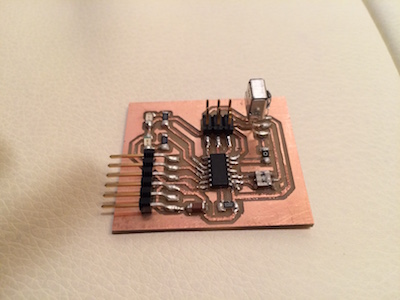
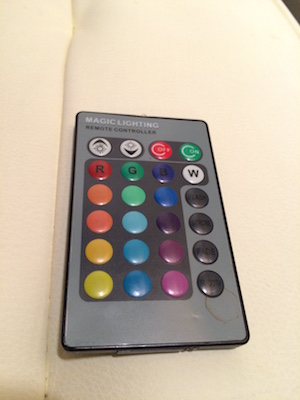
I used my input devices board so I could work with the IR receiver as well as some LEDs. I also continued to use a small remote control courtesy of my dearest Calvin Zhong, what a super star!


I wanted to make an interface that maybe at some point in the future could be implemented with my final project. This may not be within the scope of the last few weeks of the semester but would be something I'd like to develop eventually. If, for example, a cat is in the vicinity of the food bowl, I would receive a notification either on my computer or on my phone. The bowl would detect the IR output code from the cat's collar and the notification would show the mug shot of the greedy feline. I would then have the option to accept or deny access to the food bowl. Instead of being completely controlled by the cat (as is the current plan), I would be able to monitor eating behavior and ultimately decide if the cat should have food whether it's the wrong cat or it's a silly time of day to eat.
IR Receiver
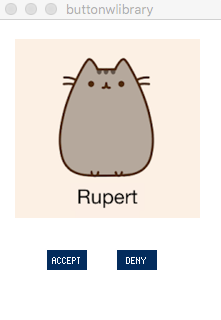
I firstly wanted to use the IR Receiver to have an interface that would pop up a cat picture based on which cat it was. Using most of the code from input devices in Arduino and a little learning curve of how to make Processing and Arduino talk to each other, plus some fiddling around with sizes etc. this interface worked very well. With a quick button press, a cartoon of Evie the old lady black cat comes up, if it was a long button press a cartoon of the mischeviously handsome hungry hungry Rupert.
Arduino
////////////////////////////////////////////////
// HTM(A)A Interface Week 11
// Camille Henrot
// IR RECEIVER ARDUINO CODE
///////////////////////////////////////////////

// Software Serial Setup
#include <SoftwareSerial.h>
SoftwareSerial mySerial(0, 1); // RX, TX
// Define workspace
int counter=0;
int val ;
//int timer=1000;
unsigned long timer2 = millis();
unsigned long timer = millis();
void setup() {
  pinMode(2, OUTPUT);
  pinMode(3, OUTPUT);
  mySerial.begin(9600);
}

void loop() {
  if (mySerial.available()){
    val=mySerial.read();
  }
  unsigned long current_time2 = millis();
  if (digitalRead(A7) ==0){
      counter++;
      while (current_time2 - timer2 < 100){
        delay(1);
        current_time2 = millis();
      }
      //mySerial.println(counter);
      timer2 = current_time2;
  }

  // remeasure
 unsigned long current_time = millis();
  if (current_time-timer > 1000){

  if (counter>1 && counter< 4){
   val = 2;
   mySerial.print(val);
   //return;

  }
  else if (counter>4){
    val = 3;
    mySerial.print(val);
    //return;
  }
  else{

  }
        timer = current_time;
        counter=0;
  }


}
Processing
////////////////////////////////////////////////
// HTM(A)A Interface Week 11
// Camille Henrot
// IR RECEIVER PROCESSING CODE
///////////////////////////////////////////////
import processing.serial.*;

Serial mySerial;
int val;
PImage rupert;
PImage evie;

void setup() {
  size(600, 600);
  noStroke();
  frameRate(10);
  printArray(Serial.list());
  mySerial = new Serial(this,Serial.list()[1], 9600);
  rupert = loadImage("rupert.jpg");
  evie = loadImage("evie.jpg");
}

  void draw(){
    background(255);
    if (0 < mySerial.available()){
      val= mySerial.read();
      println(val);
    }
    if(val == 51){
      image(rupert, 0, 0);
      return;
    }
    else if (val == 50){
      image(evie, 0, 0);
      return;
    }
    else {
    }
  }
LEDs & Buttons
Next I wanted to play with button functionality. I learned about functions for mouseovers, color change in hover and mouse clicks to make things happen. I also found a really handy controllers library that has different kinds of buttons and knobs for interaction. This was an even simpler code than the previous one as it was just a riff off of blinking LEDs. When I press accept, the green led blinks, when I press deny the red led blinks, sweet and simple. I think I've finally mastered the blinking LED, YES MASTERY! (I'm totally going to regret saying that)
Arduino
////////////////////////////////////////////////
// HTM(A)A Interface Week 11
// Camille Henrot
// LEDs AND BUTTONS ARDUINO
///////////////////////////////////////////////

// SOFTWARE SERIAL STUFF
#include <SoftwareSerial.h>
SoftwareSerial mySerial(0, 1); // RX, TX
int counter=0;
int val ;
//int timer=1000;
unsigned long timer2 = millis();
unsigned long timer = millis();
void setup() {
  pinMode(2, OUTPUT);
  pinMode(3, OUTPUT);
  mySerial.begin(9600);
}

void loop() {
  if (mySerial.available()){
    val=mySerial.read();
  }
  unsigned long current_time2 = millis();
  if (digitalRead(A7) ==0){
      counter++;
      while (current_time2 - timer2 < 100){
        delay(1);
        current_time2 = millis();
      }
      //mySerial.println(counter);
      timer2 = current_time2;
  }

  // remeasure
 unsigned long current_time = millis();
  if (current_time-timer > 1000){

  if (counter>1 && counter< 4){
   val = 2;
   mySerial.println(val);
   // return;

  }
  else if (counter>4){
    val = 3;
    mySerial.println(val);
   // return;
  }
  else{

  }
        timer = current_time;
        counter=0;
  }


}
Processing
////////////////////////////////////////////////
// HTM(A)A Interface Week 11
// Camille Henrot
// LEDs AND BUTTONS PROCESSING
///////////////////////////////////////////////

import processing.serial.*;
import controlP5.*;

ControlP5 cp5;
Serial mySerial;
int val;
int c1,c2;
float n,n1;
int myColor = color(255);

void setup() {
  size(550, 300);
  noStroke();
  frameRate(10);
  printArray(Serial.list());
  mySerial = new Serial(this, Serial.list()[1], 9600);
  cp5 = new ControlP5(this);

  // create accept button
  cp5.addButton("accept")
     .setValue(0)
     .setPosition(50, 40)
     .setSize(200,100)
     ;

  //create deny button
  cp5.addButton("deny")
     .setValue(100)
     .setPosition(300, 40)
     .setSize(200,100)
     ;
}

  void draw(){
    background(myColor);
    myColor = lerpColor(c1,c2,n);
    n += (1-n)* 0.1;
}

  public void controlEvent(ControlEvent theEvent){
    println(theEvent.getController().getName());
    n=0;
  }

  public void accept(int theValue) {
   // println("a button even from accept: "+theValue);
    mySerial.write('A');
    println(mySerial.read());
    c1 = c2;
    c2 = color(0,160,100);

  }

  public void deny(int theValue) {
   // println("a button event from deny: "+theValue);
   mySerial.write('D');
    println(mySerial.read());
    c1=c2;
    c2=color(150,0,0);
  }
Of course, the logical next step would be to combine these two functionalities. Silly naive Camille thought I could literally just put the code together, but unfortunately that's not how serial communication works. I did some research and the best method I found was the handshaking method. Basically Arduino sends a message to Processing, Processing accepts and sends a message back. This way both Arduino and Processing can read and write to serial. Unfortunately, the code was too big for the ATTiny44 memory (or I just did some silly stuff) , and requires more decoding than I am currently capable of doing. However, below is an image of what the Processing interface looked like, though the handshaking part in Processing does also need some debugging.
All in all, this week was very successful and it has sparked my interest in making some sort of networking connection between this food bowl and a user interface to be able to have greater control. I could even have a redundancy where I had a kitty cam that tracks motion, if for example the IR stopped working, I would still be notified if the cat was around and could open or close the bowl accordingly. IDEAS SO MANY IDEAS!