FAB ISP in circut programmer

A in-circut programmer
This weeks assignment was to make a in circut programmer.
Milling the board
The following is the memo for milling the board.
- Restart the computer and unpug, replug the modela.
- Log-in to ubuntu operating system.
- Double click the Icon in the desktop to initiate server connection of computer - modela.
- Start firefox to open fabmodules
- Load settings, import using file on Desktop.
- Load the png image. Output Format -> Roland mill(.rml), process -> PCB traces(1/64).
- Press VIEW button and change the end mill to 1/64. Make sure the mill is inserted all the way up. Lightly tighten !!
- Press VIEW button again to return the mill position. Calibrate the origin position by "Golf-ing" the minX and minY position. Lowen the drill leaving 5-7mm machine space for z-length.
- Adjust the end mil height it should touch the copper surface.
- Cut depth should be 0.1-0.15. I tried 5 for number of offsets.
- Hit 'Calculate' if your satisfied with your settings, and hit send to start milling.
- Repeat form 6 to mill the board edge using a 1/32 endmill. Remember to calculate before sending. You can press VIEW to see the progress and revert by pressing again.
- Reburr using a scraper, and wash with water and soap.

Fig1. Fab modules setting
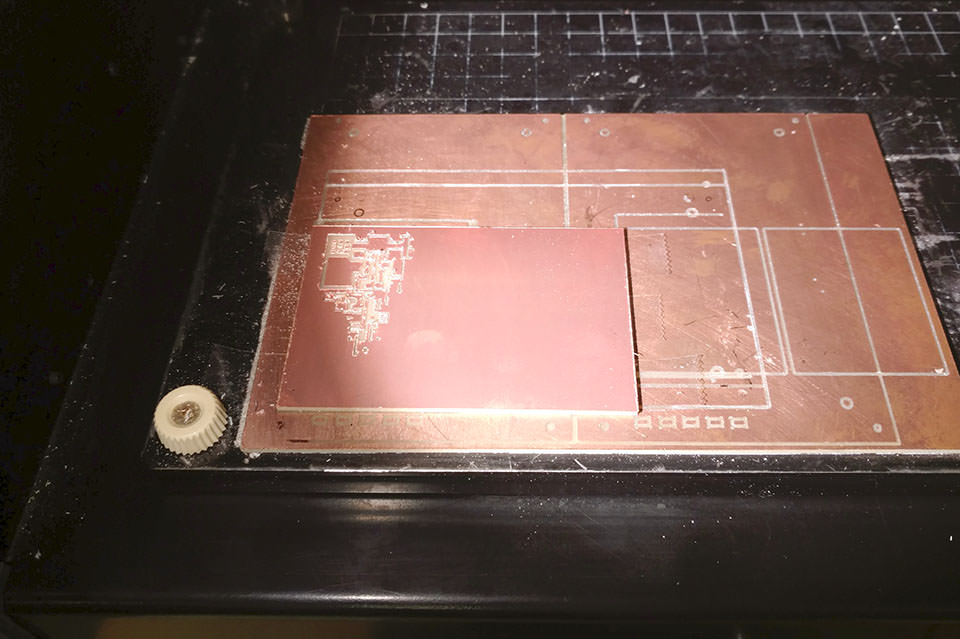
Fig2. Halfway milling.

Fig3. Done milling.
Soldering and testing
Fig.4 shows list of components.
- SJ's are 0Ω registers.
- The Diodes has direction. the bared(|) side should face the 'cathode'.
- Soldering the USB connections (not just the legs) is necessary! (I bridged it)
- Sometimes extra solder and flux saves the day!
After doing the soldering, with the help from Will, I tested the board. Following the procedures below.
- Connect to the computer with USB.
- Connect to (Will's) Programmer with ISP cable. The led will turn green if everything is soldered ok.
-
Unzip and
cdto firmware directorty. -
make clean,make hex -
gedit Makefileand make sure its targeted to avrdude. comment out if necessary. -
sudo make fuse,sudo make program - This should make the board a programmer. De-solder the two SJ's (0Ω registers)
- Connect to Will's random program.
-
cdto the directory of the program (in this case hello.button.44.make) -
sudo make -f hello.button.44.make program-usbtiny - If no errors, everything is ok...
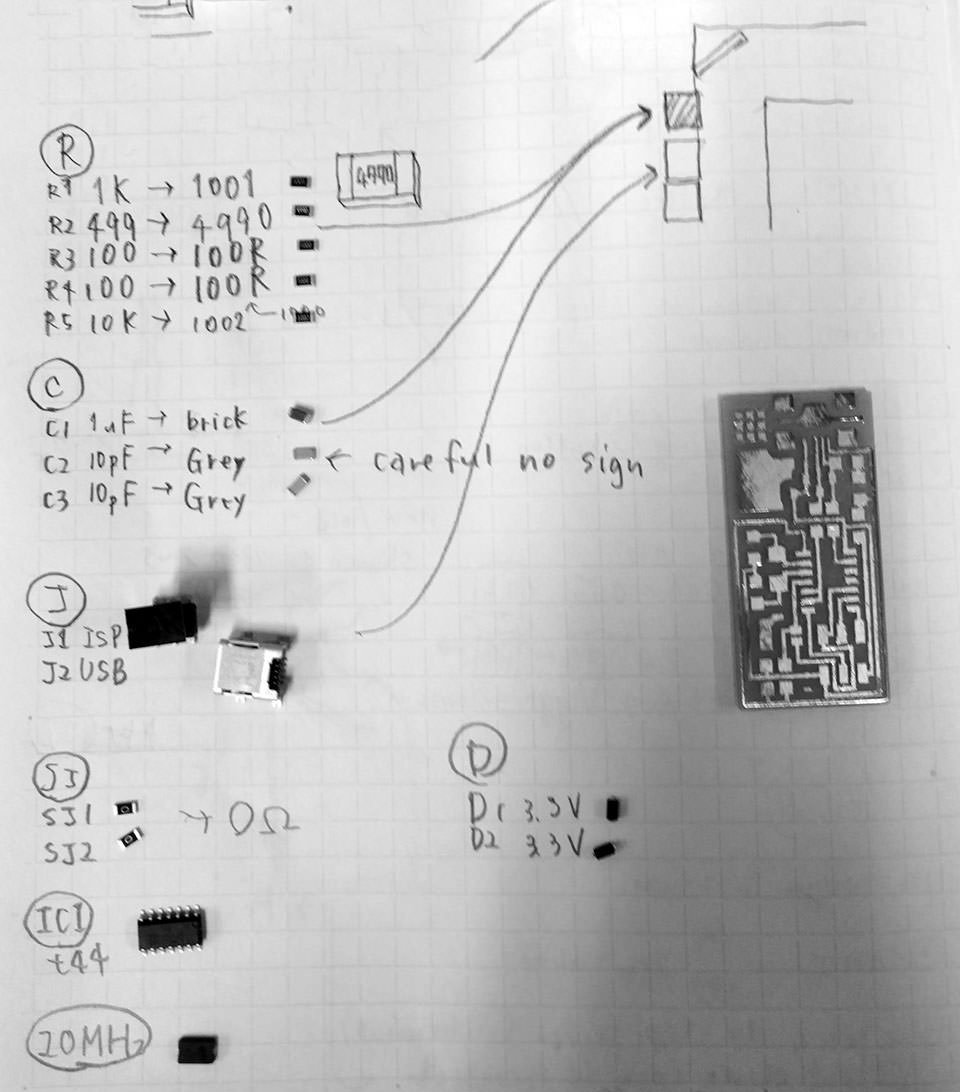
Fig4. List of components and their allocation of the working desk.