Week 7: Embedded Programming
Microcontroller Data Sheet Bedtime Reading and Arduino IDE Spelunking
Fall 2015
This week, the goal was to read a microcontroller data sheet (in this case, the attiny 24a, attiny44a, and the attiny 84a from Atmel), program my board to do something, and do it in as many languages and programming environments as possible. The original lecture notes and assignment page are here
SECTION II: Now, for the actual assignment...embedded programming!
In order to tell a board to blink its led or do any of a number of fun things, it needs to be instructed to do so. In class, we ran through the ways that the microcontroller actually interprets and executes instructions sent to it.
Here's a movie of my LED blinking below. Interestingly, it is programmed to blink for 1 second and then stay off for 1 second, but each period is much longer than that. Gabriel mentioned that he ran into this problem, too.
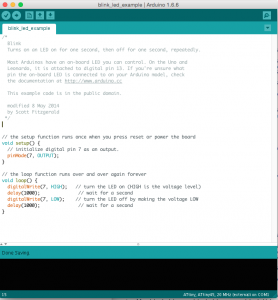
Here's the Arduino IDE to tell pin 7 (found this in the data sheet) off the attiny44a to blink the LED:

The code I used came from the Arduino library. It is as follows:
/* Blink Turns on an LED on for one second, then off for one second, repeatedly.
Most Arduinos have an on-board LED you can control. On the Uno and Leonardo, it is attached to digital pin 13. If you're unsure what pin the on-board LED is connected to on your Arduino model, check the documentation at http://www.arduino.cc
This example code is in the public domain. modified 8 May 2014 by Scott Fitzgerald */
// the setup function runs once when you press reset or power the board void setup() { // initialize digital pin 7 as an output. pinMode(7, OUTPUT); }
// the loop function runs over and over again forever void loop() { digitalWrite(7, HIGH); // turn the LED on (HIGH is the voltage level) delay(1000); // wait for a second digitalWrite(7, LOW); // turn the LED off by making the voltage LOW delay(1000); // wait for a second }