Radial Strain Measurement Device
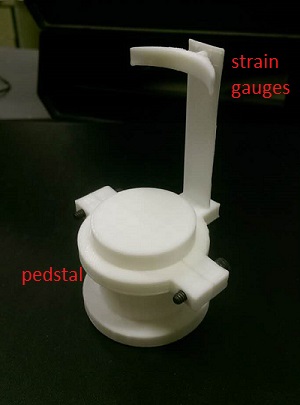
The 3d printed radial strain measurement device.
It is a prototype, the geometry will be like this, but later with strain gauge
attached. I had tested strain gauge on a cantilever metal bar, the relationship
normalized voltage and displacement is linear and repeatable.
What does it do?
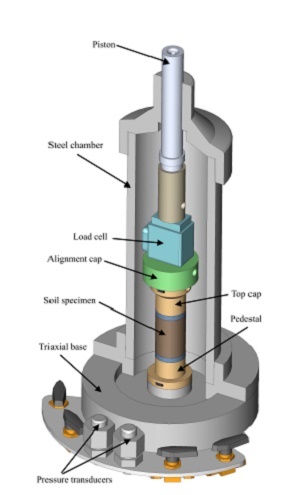
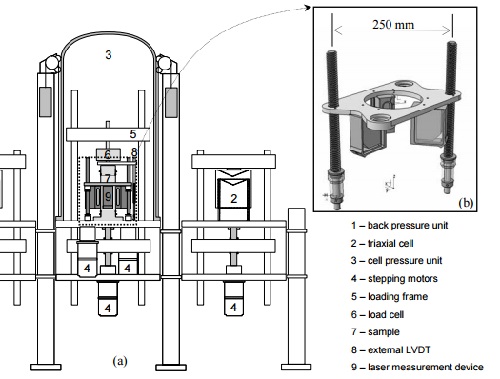
Measure the radial displacement of a clay sample inside the triaxial cell during
K0 consolidation stage. During K0 consolidation, the diameter of sample is constrained
by cell pressure so that it remains constant cross section area.
K0 consolidation is achieved by measureing the volume of water drained from sample,
there is no direct measure of the radial strain. To proof that K0 consolidation, the sample
remains constant cross section area, I am designing this decive to directly measure the radial strain.
who's done what beforehand?
1. On Specimen Clamp
2. Laser Measurement
Those are examples I found on the paper or online. but they are not suitable for my application.
Designing Process
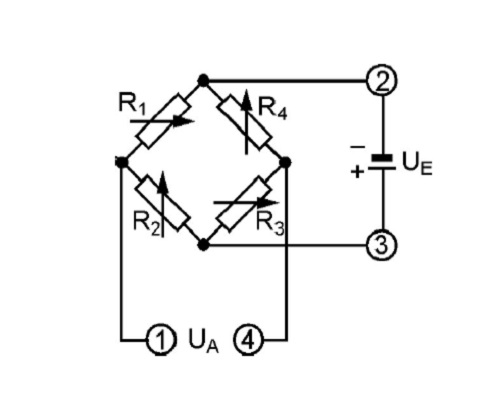
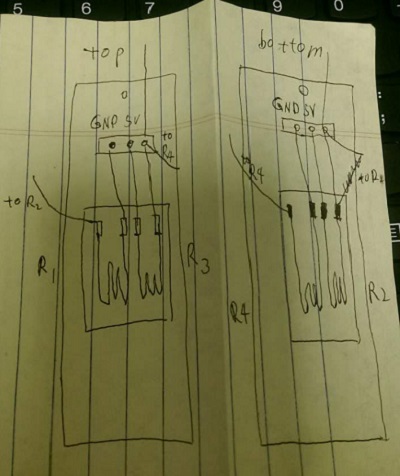
wheatstone bridge circuit
for detail process of installing strain gauge and material used, check Week 9 Input Device.
------------------------------------------------------------------------
------------------------------------------------------------------------
------------------------------------------------------------------------
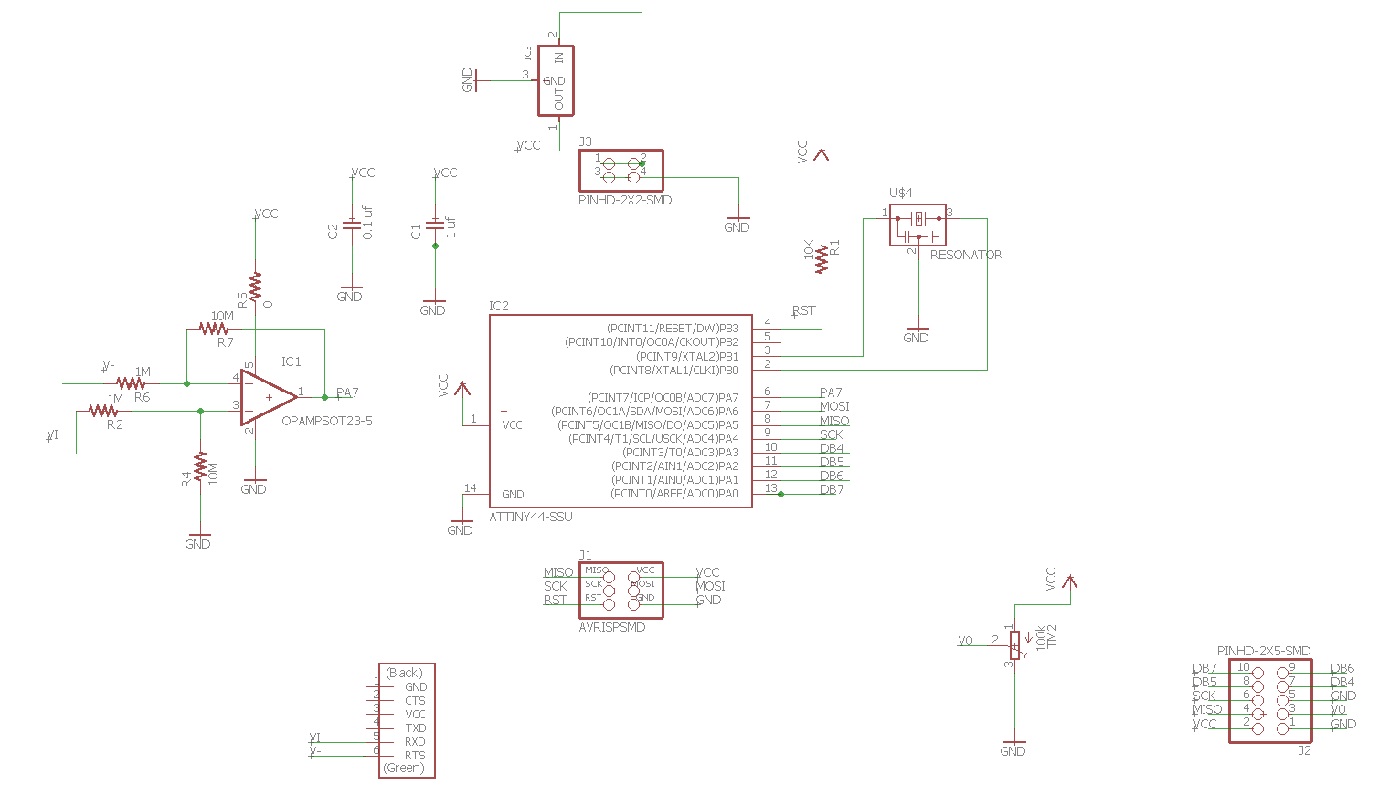
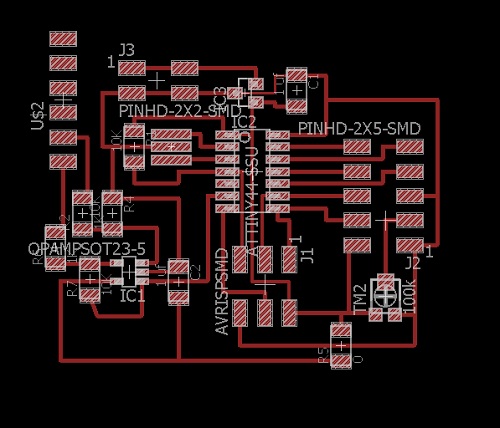
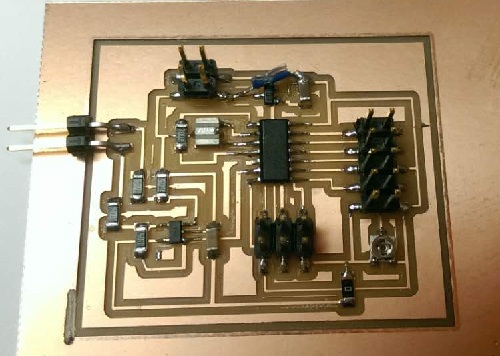
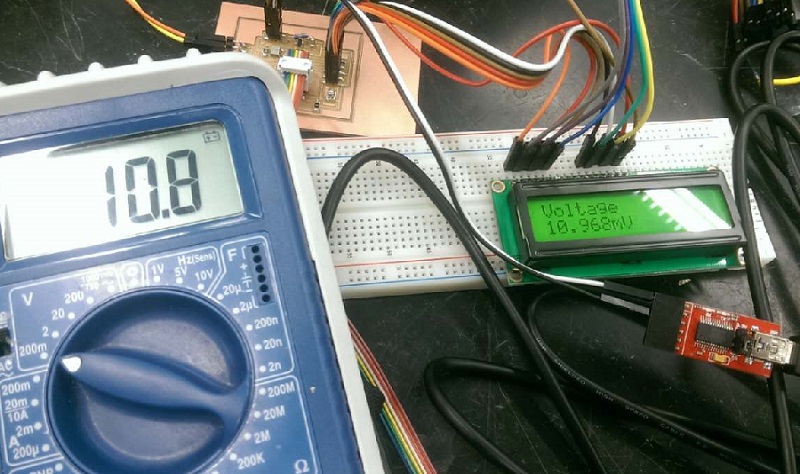
ADC Device
------------------------------------------------------------------------
------------------------------------------------------------------------
Two pins at the left side of board takes in singal, and amplify by 10 times, using a opamp. The voltage is
output to a LCD screen
------------------------------------------------------------------------
Electronics Enclosure

Model using Solidworks.
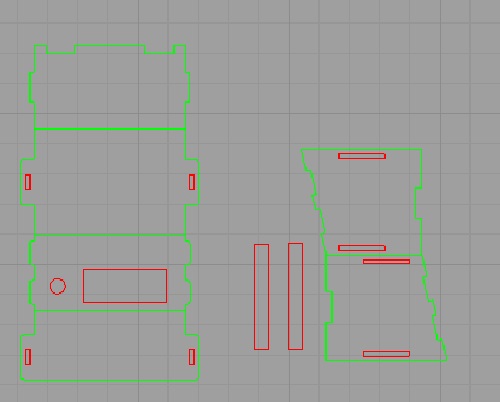
Laser Cutting Layerout using Rhino

Assembled box with electronics
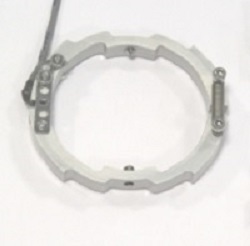
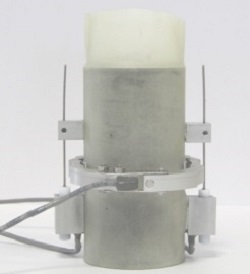
Geometry Design
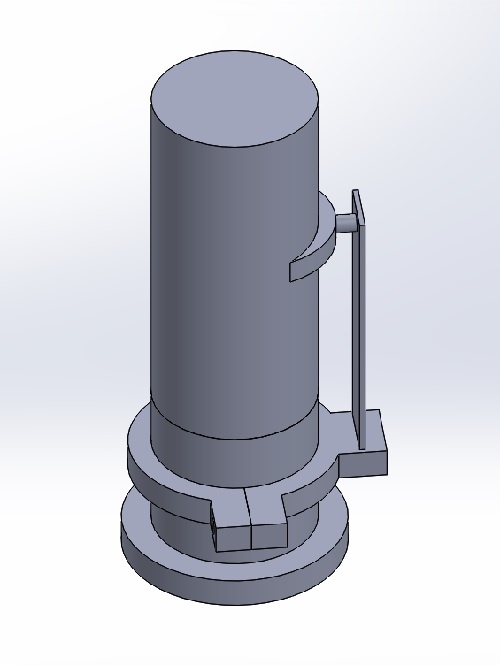
Geometry Design for the cantilever beam
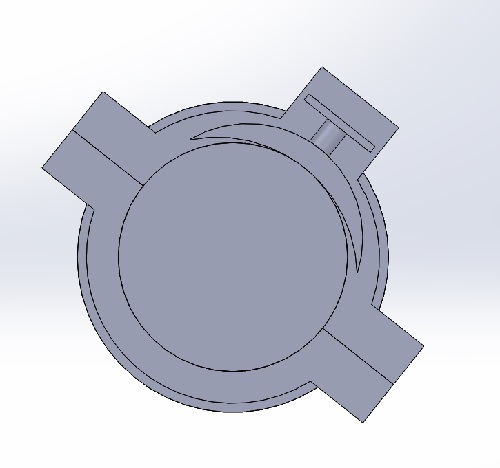
The round part touching the sample should have a bigger radius to compensate for expansion of sample.
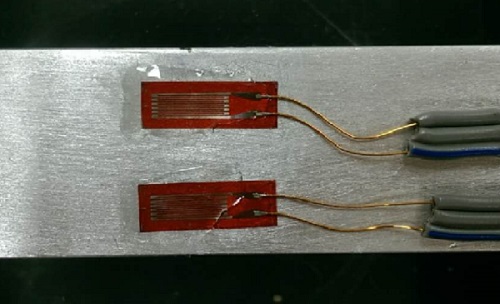
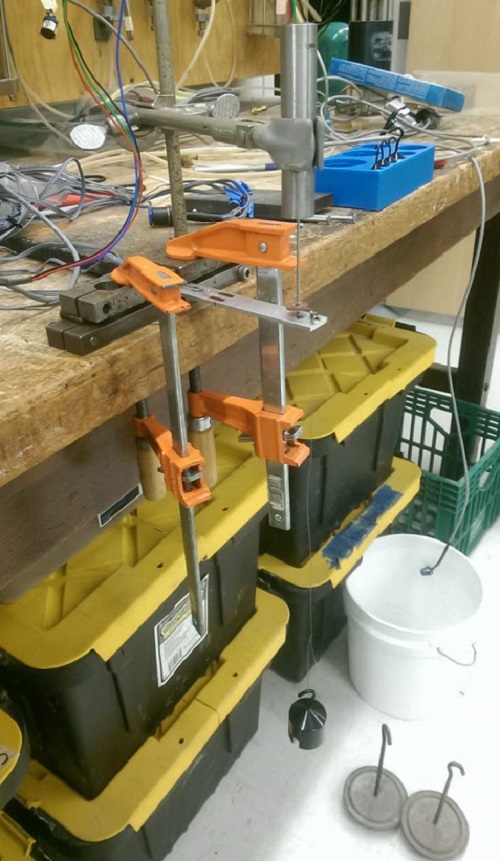
Calibrate Strain Gauge
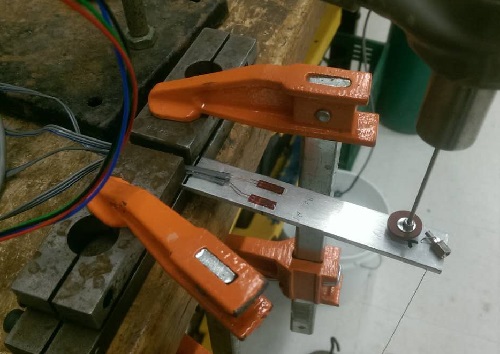
Metal bar is clamped, and weight is hang on the tip of the bar, with a displacement transducer attached.
------------------------------------------------------------------------
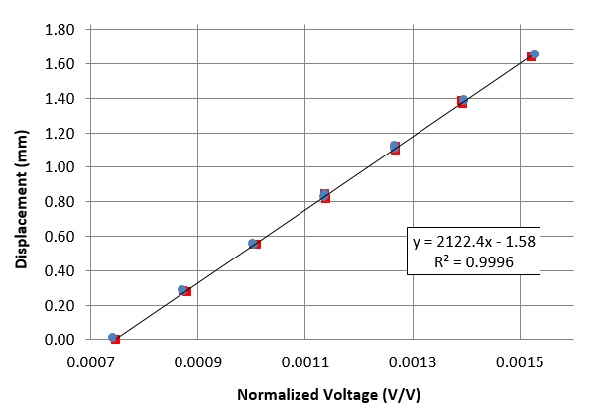
The bar has gone through two cycle of loading and unloading, the displacment vs. normalized voltage is linear.
The result is very repeatalbe, and R square valus is 0.9996, very close to 1. This chart demonstrates that strain
gauge is suitable for measureing radial strain of a sample.
------------------------------------------------------------------------
Material List
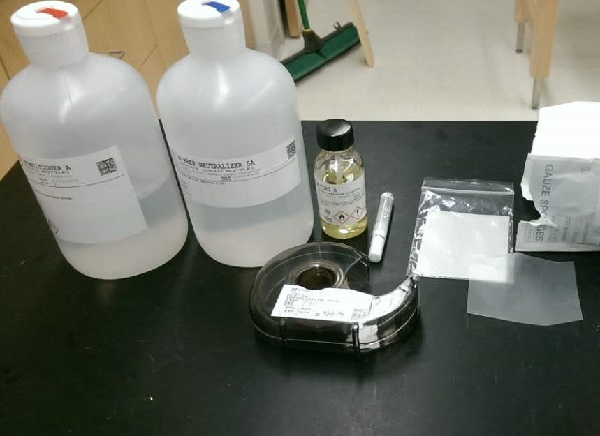
Micro Measurement Product
1.M-Prep Neutralizer 5A $15 x1
2.M-Prep Conditioner 5A $15 x1
3.PCT-2M Installation Tape $15 x1
4.Vishay WK-06-250PD-10C/W $10 x2
-------------
Tokyo Sokki Kenkyujo Product
1.CN-E adhesive $8 x1
2.FLA-6-11-3LT $6 x4
McMaster
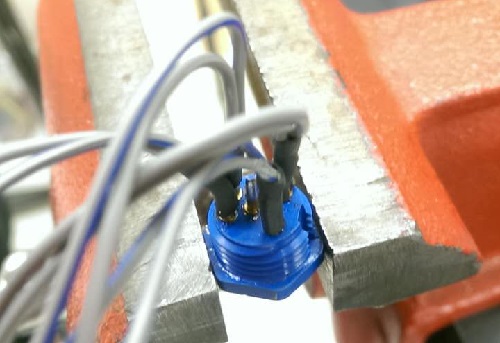
1.5 pin connector $1 x1
Difficulty
Because the output of strain gauge is really small, just several milivolts in my case
It becomes challenging to record the singal accurately.
I use a differential opamp to amplify the singal, and use the internal 1.1 V as
reference voltage. I also oversample the singal by 200 times and output the average number.
I also find I need to good DC power supply, otherwise it introduces a lot of noise to reading.
I learned a lot about opamp and voltage measurement from opamp pdf, opamp video and website.
Finally, I am able to reduce the error within 0.5 mV.
Future Works
The strain gauge cantilever beam I develop is very big, I have to make a smaller version of it to fit into the triaxial cell.
I also need to carefully choose the material of the beam, so that it has good linear deformation and does not apply a lot force to the sample.
								 /*
								  The circuit:
								 * LCD RS pin to digital pin 12
								 * LCD Enable pin to digital pin 11
								 * LCD D4 pin to digital pin 5
								 * LCD D5 pin to digital pin 4
								 * LCD D6 pin to digital pin 3
								 * LCD D7 pin to digital pin 2
								 * LCD R/W pin to ground
								 * LCD VSS pin to ground
								 * LCD VCC pin to 5V
								 * ends to +5V and ground
								 * wiper to LCD VO pin (pin 3)
								 */

									 // include the library code:
									#include <LiquidCrystal.h>
									//#include <EEPROM.h>
									int ADC_Pin = 7;
									int nsamples = 200;
									unsigned long int sensorValue = 0;

								//Varibales for writing to EEPROM
								//int hiByte;
								//int loByte;

								    float Volt = 0;


									// initialize the library with the numbers of the interface pins
									LiquidCrystal lcd(5,4,3,2,1,0);

									void setup() {
									  // set up the LCD's number of columns and rows:
									  lcd.begin(16, 2);
									  // Print a message to the LCD.
									  lcd.print("Voltage");
									  analogReference(INTERNAL); //1.1V interal

									}


									void loop() {
										//hiByte= EEPROM.read(126);
										//loByte = EEPROM.read(127);
										//sensorValue = (hiByte < <8) + loByte; //get value
										//delay(200);
									   for (int i = 0; i< nsamples; i++) {
										sensorValue = sensorValue + analogRead(ADC_Pin);
										delay(2);
									   }
									   sensorValue = sensorValue/nsamples; //average
									   Volt = sensorValue * 0.107526882;
									  // set the cursor to column 0, line 1
									  // (note: line 1 is the second row, since counting begins with 0):
									  lcd.setCursor(0, 1);
									  // print the number of seconds since reset:
									// lcd.print("V=");
									 lcd.print(Volt,3);
									 lcd.print("mV");
									 delay(2);
									}
------------------------------------------------------------------------
------------------------------------------------------------------------
------------------------------------------------------------------------