This session of the course is focused on molding and casting and we are asked to:
For this week's assignment, I thought it would be nice to create a mold to make trasnaprent jewelry that could contain bits inside, like flowers or little coloured balls. I got the idea from some sites in pinterest.
Inspiration:


I then designed my little molds with Rhino. I did 4 different shapes: a circle, a star, a square and a pentagon. I extruded the shapes with the Extrude command in Rhino and I closed them with the command to Cap planar holes.

I tried to adjust the size of the pieces to the size of the piece of wax that we would use. I later would find out that that was a bad idea as they ended up being bigger than what I was expecting. I finally exported my design in stl format.
I then went to the shopbot machine to make my mold. The steps to make the mold are:
So I followed all these steps and I machined the mold with the help from Tom and John. One important thing to have in account is the axis. You have to make sure the axis on the software match the axis on the machine when you place the material. I did it wrong first time and I hade to unscrew the material to rotate it 90 degrees and srew it again.


I realized then that the size of the pieces was wrong as it was too big to use it for jewelry. But I thought it was a nice mold to create little pieces with shapes.

I then went to make the positive of the mold. For that, I used silicone rubber from Smooth-on. I first laid out the materials and tools on the table to make sure I had everything.

I used 100 g of part A and 130 g of part B.


I mixed for a good amount of time and then I used the degassifier. Once all the gas was out and I beleived there were no more bubbles left, I poured the mix in the mold and I ended up doing a massive mess.


I cleaned all my mess and left the silicone to solidify. I came back the next day and I was able to get the mold out. I was a bit worried that it would break as the shapes were long. But it ended up being fine. I then did the same process with the resin.


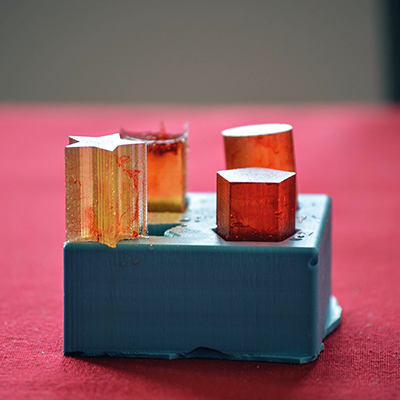
I wanted to put stuff inside of the shapes, like dry flowers or coloured balls but I didn't have anything and I didn't have time to go buy some. So I decided to use nail paint to create rips of colours inside the material. I used red nail paint and I mixed a little bit with the resin. I thought the nail polish wouldn't affect the solification of the mix as it gets solid when wet.

And here is the result!


