A key feature of a confocal microscope is an aperture placed at a plane confocal with the image plane, so the aperture rejects out of focus light.
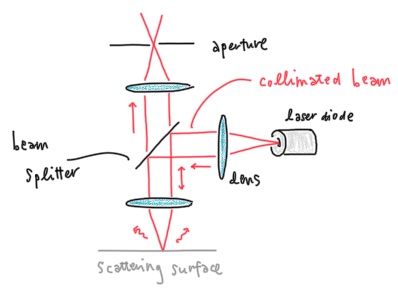
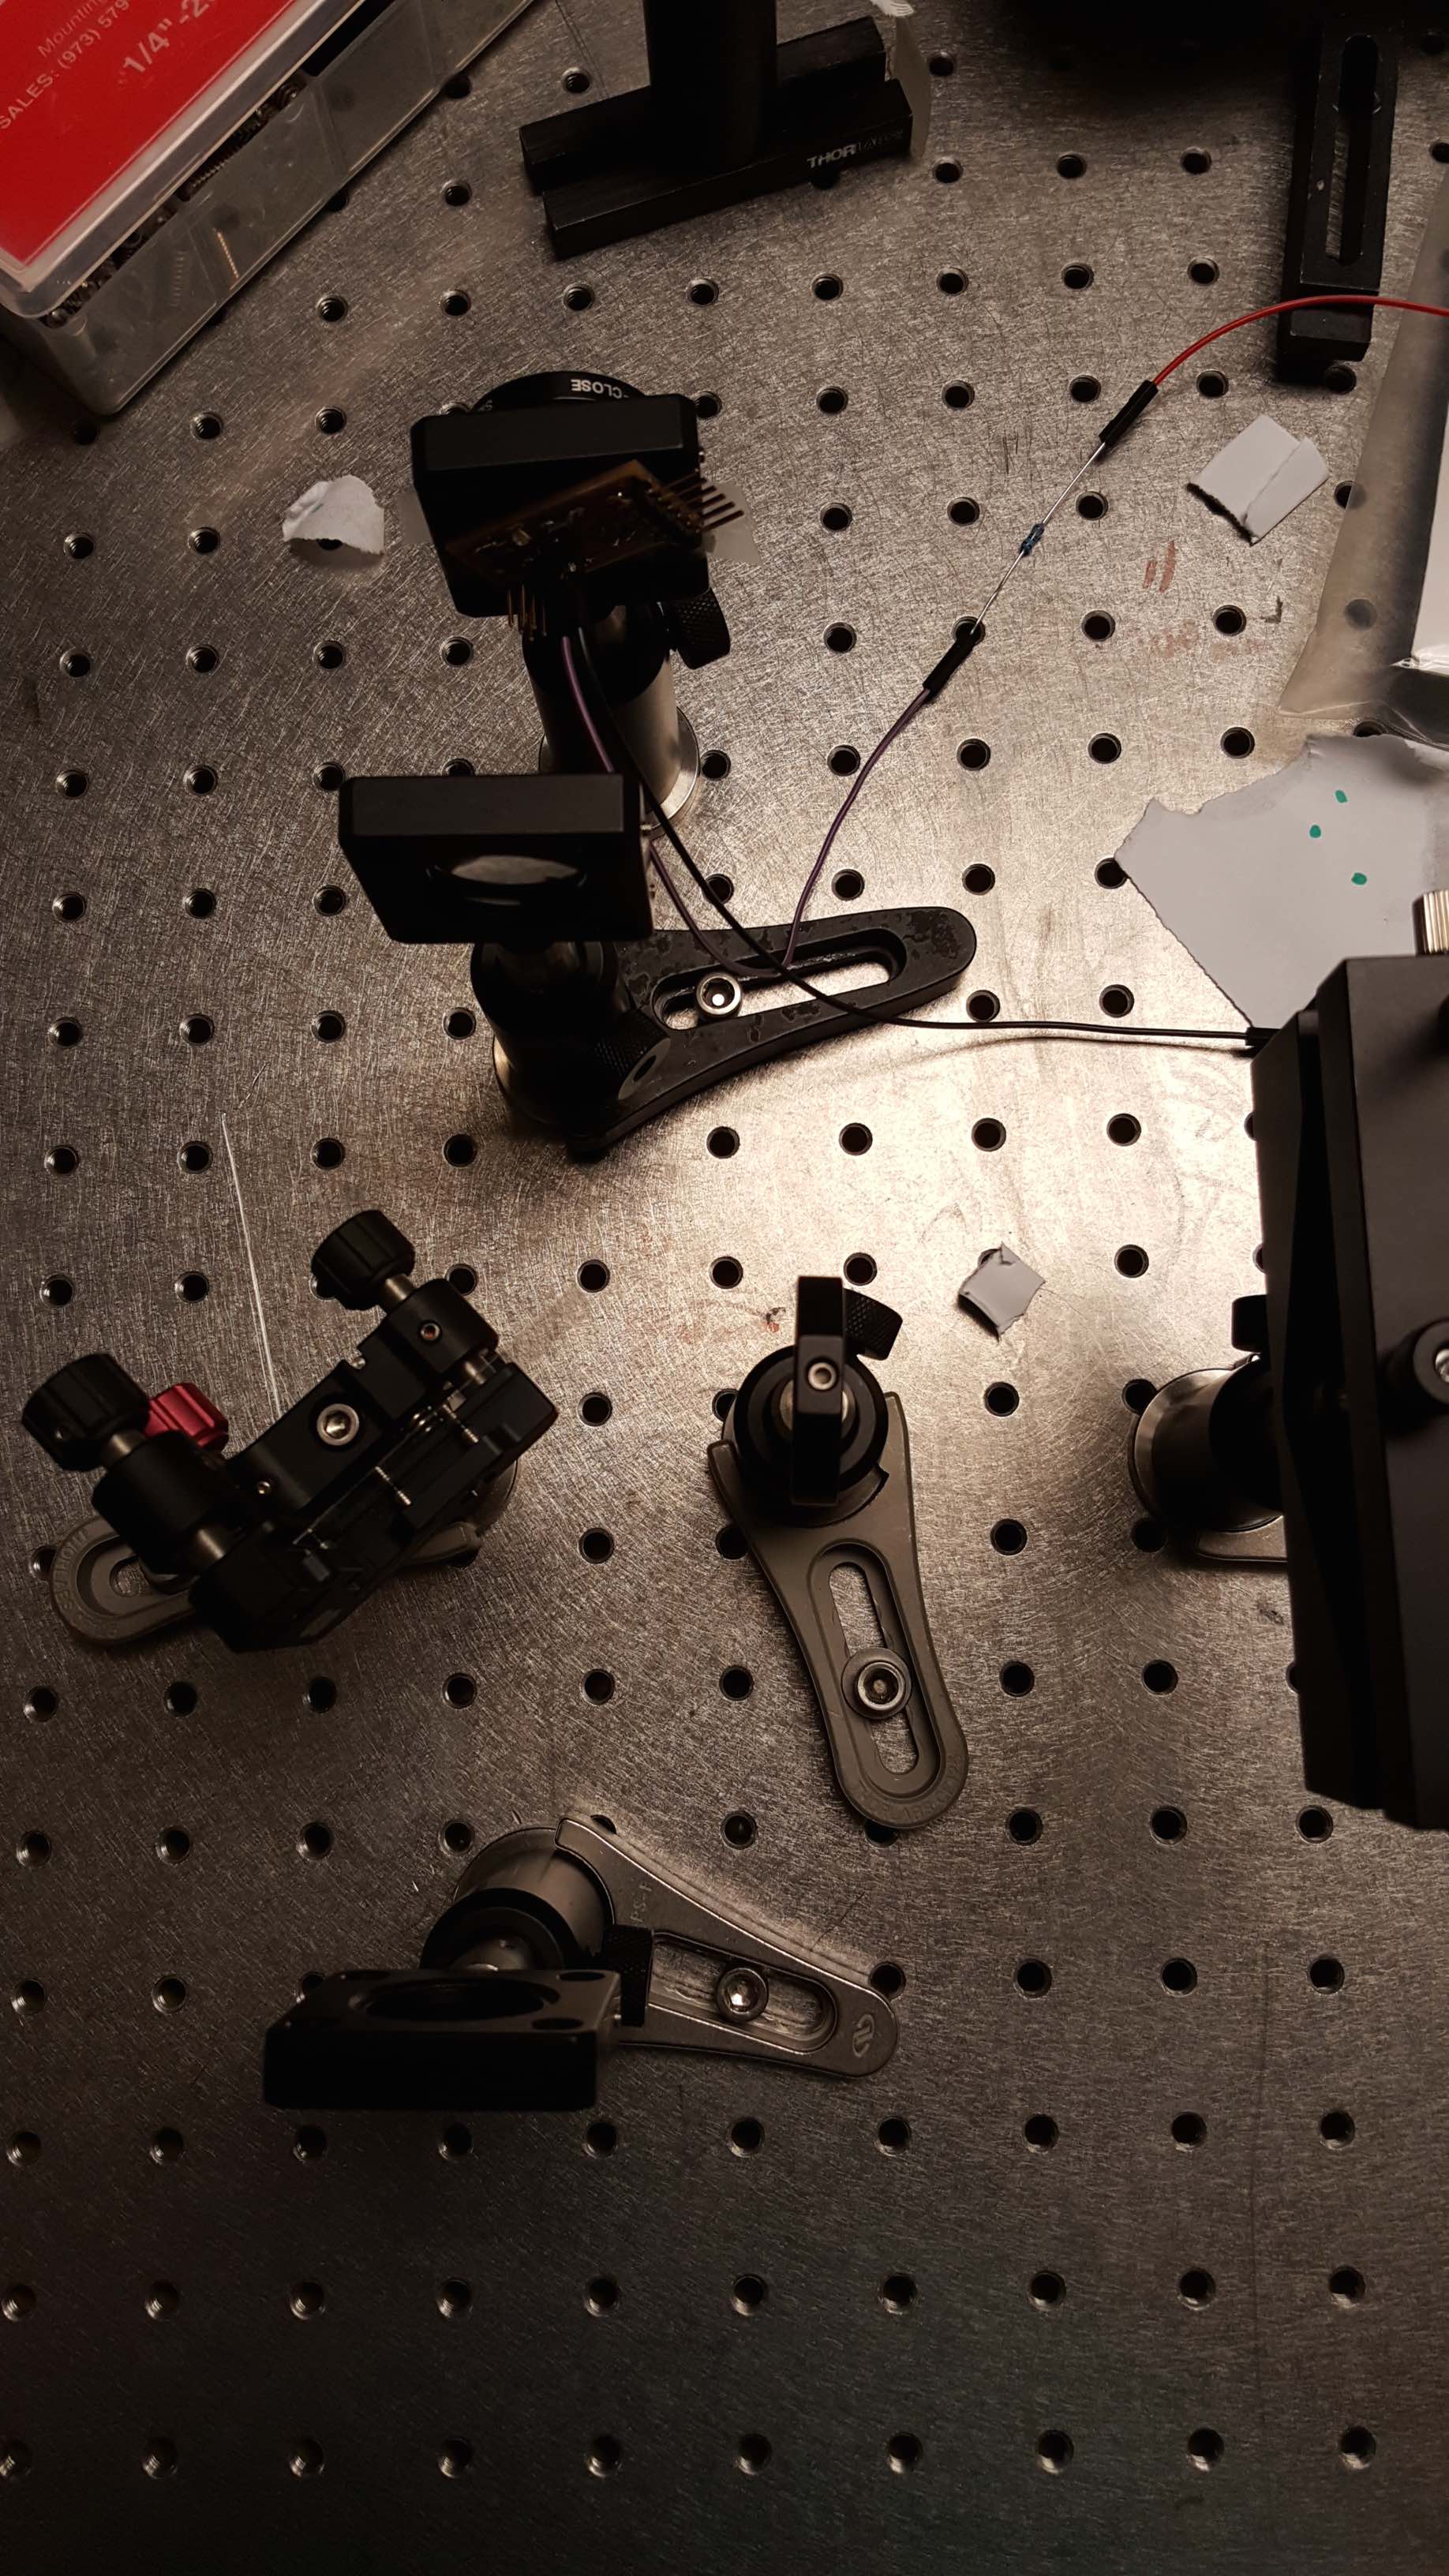
I started with an optical table and Thorlabs components. I used three 50 mm convex lenses, and I used a simple borosilicate cover slip as a beam splitter. The considerations when choosing lenses are the focal length and antireflection dielectric coatings. For a Gaussian beam, the focal length of the lens is related to the beam diameter at the focal spot and the depth of focus, as described here. These in turn influence the resolution of the machine. In our case, for 50 mm lenses the beam diameter should be about 40 microns. Note that the output of our laser diode is not Gaussian, rather, the shape is quite elongated and has an aspect ratio of about 3. Though qualitatively, the function of the machine is the same.
I first tried with a pinhole, but the signal on the other side of the detector was too weak. Since I am not imaging with the confocal, but rather just measuring a scalar amplitude, I put the phototransistor detector at the confocal location, effectively using the small area of the phototransistor as its own pinhole.
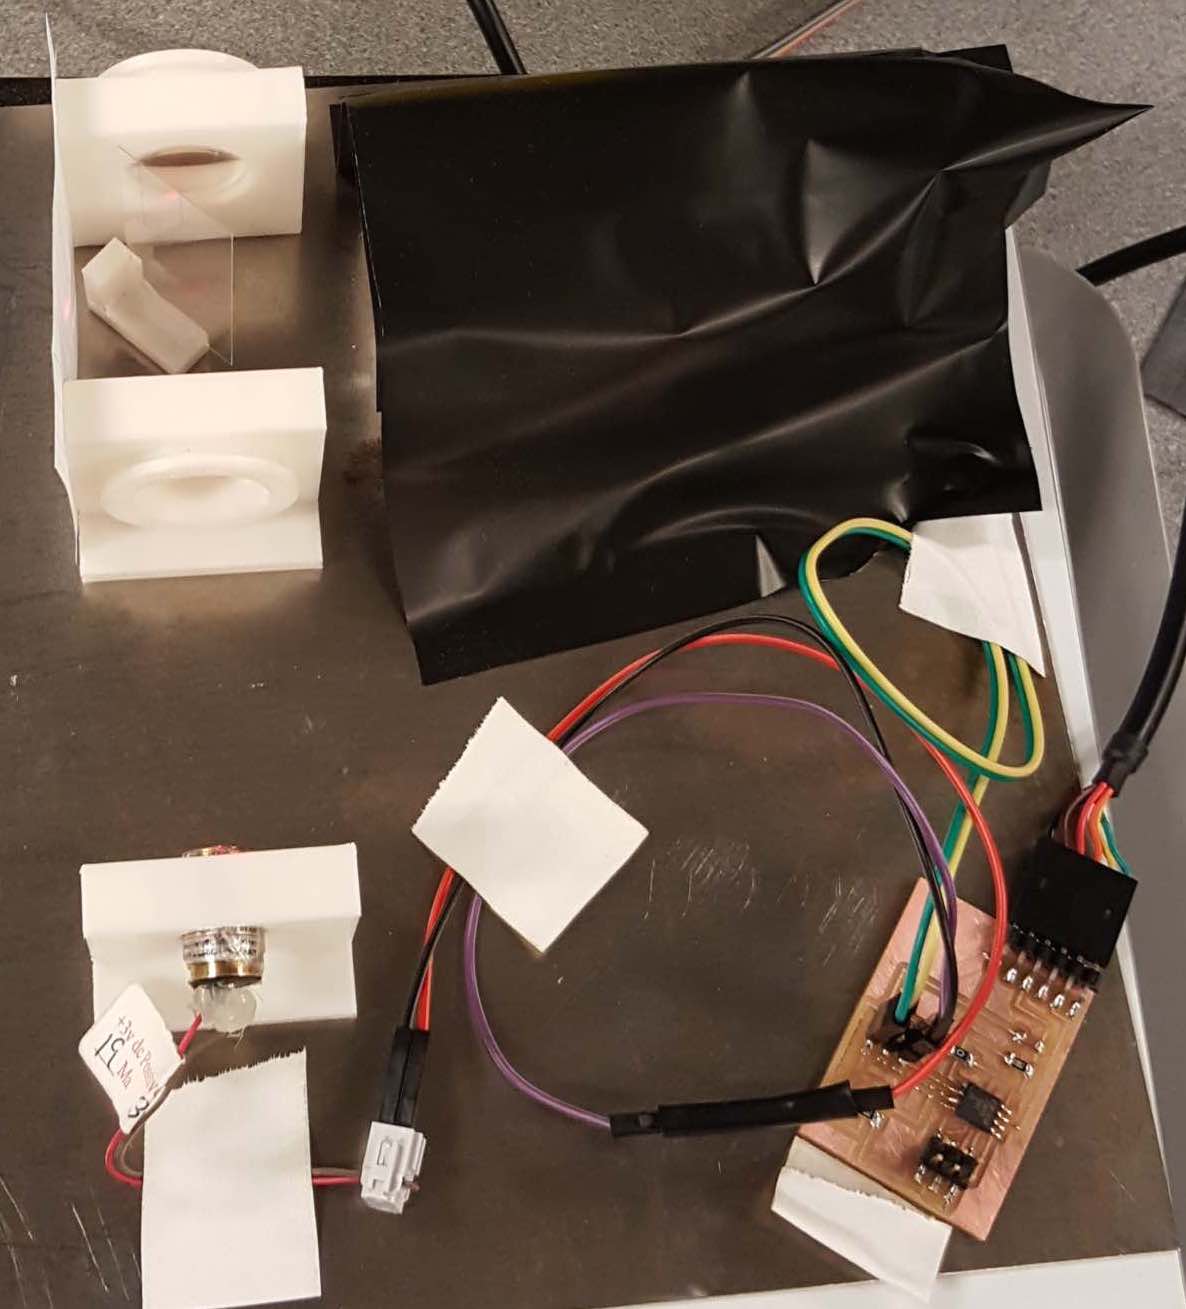
The Thorlabs components are quite expensive since they are used for precise professional applications. Our application requires some precision, but the system does not have so many degrees of freedom. Also portability is quite important for our application. Thus I designed some optics mounts with magnetic bases to substitute the Thorlabs parts, for a portable version of the scanner.
Alignment procedure involves placing the first lens to collimate the beam, by putting a surface at a far distance and minimizing divergence of the beam. Then add the beam splitter, then the lens that focuses the beam onto the sample, then the last lens, and then the pinhole. Whenever placing a lens into the beampath, mark the position of the beam without the lens, and then place the lens so the back reflection coincides with the incoming beam and so the transmitted beam is centered on the original mark.
I made several modifications to Neil's synchronous detector board, as described here. In brief, I substituted a 2x3 pin header for the phototransistor and LED, so I could adjust the current to the LED bu plugging in different external resistors, and so I could move the phototransistor on its own breakout board.

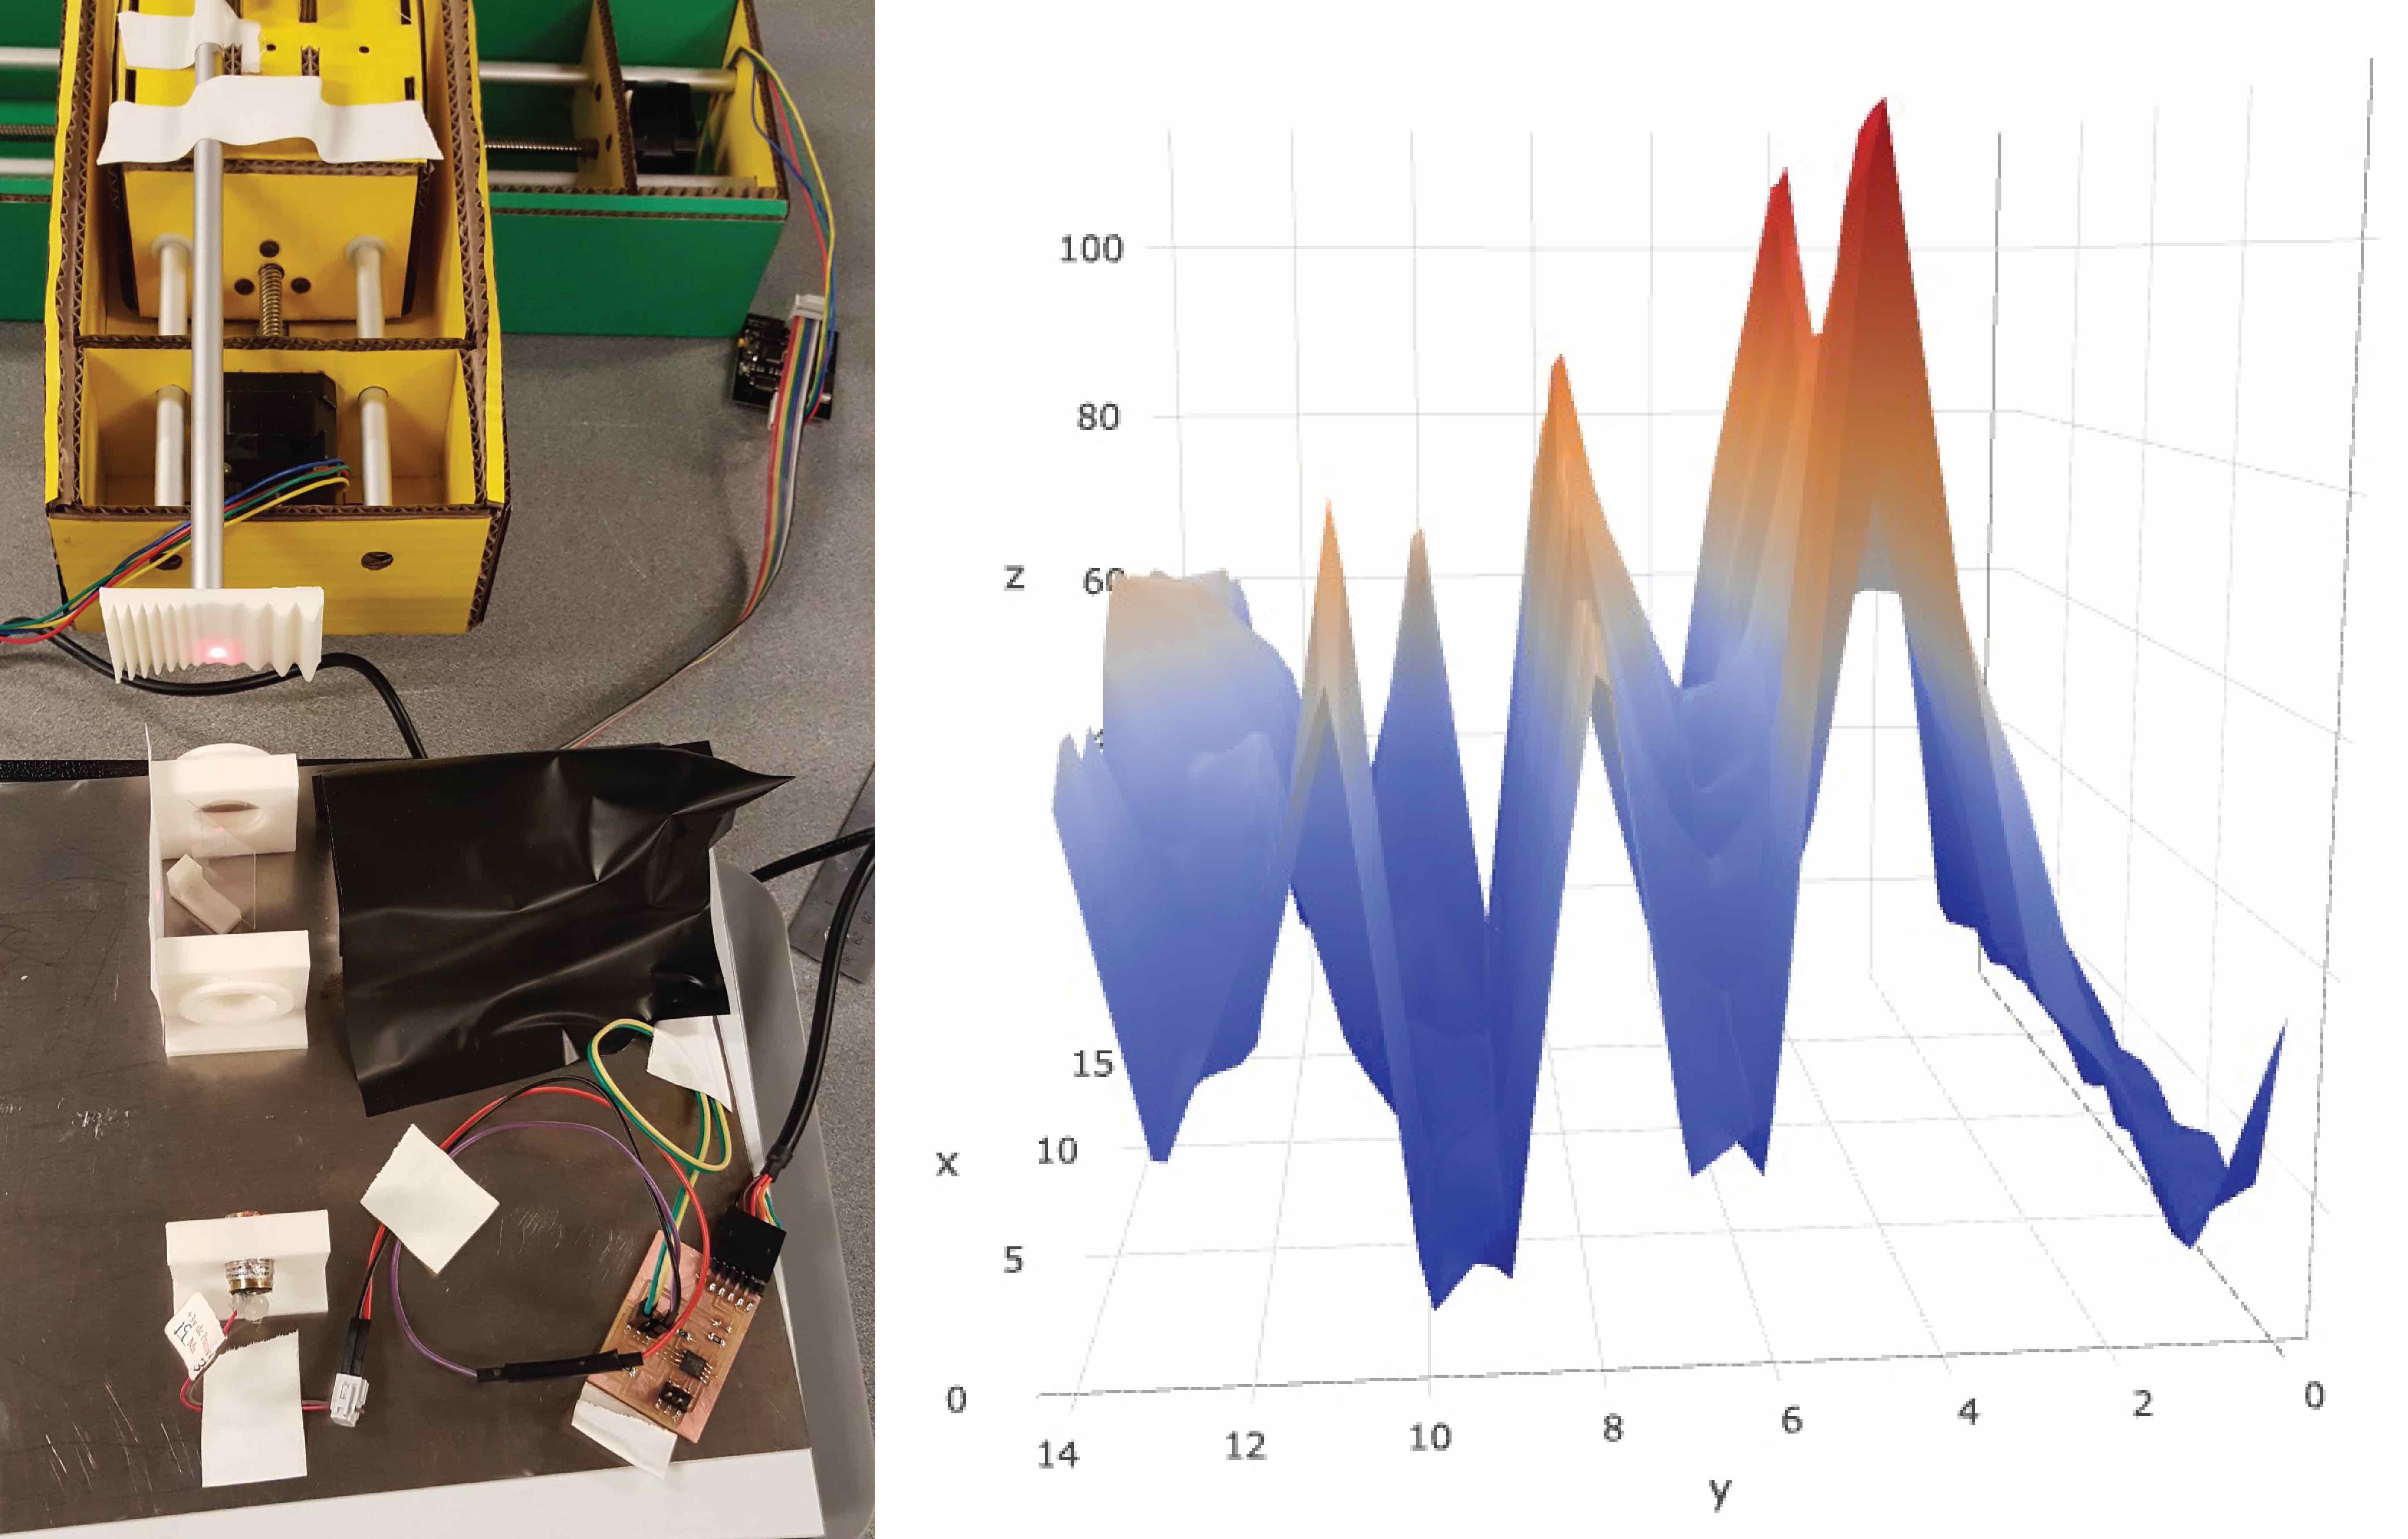
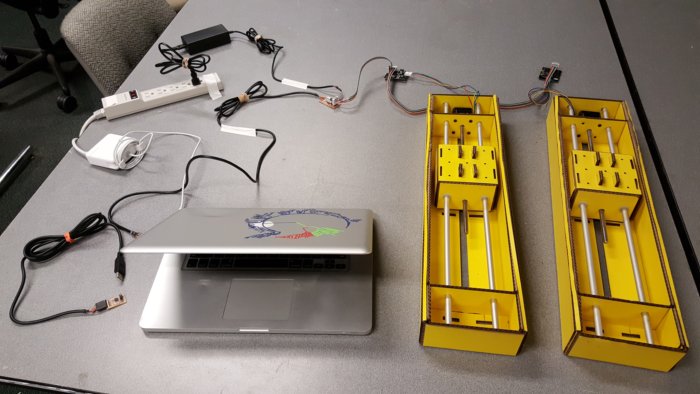
I arranged the axes from the modular machines assignment, and incorporated code to read the serial port between stage motions and then plot the result.
The first spiral had synchronous detection with Neil's Tkinter application.
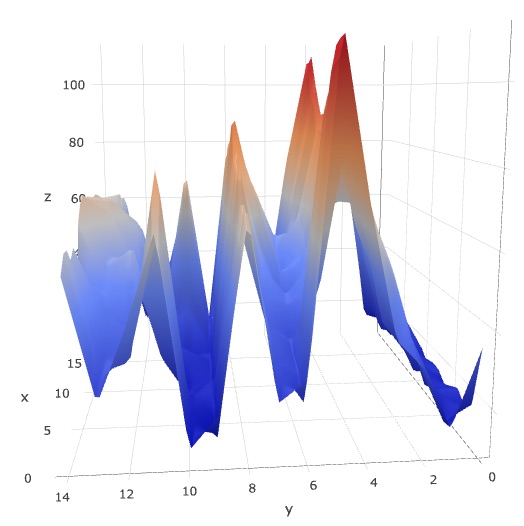
Then in the next spiral I incorporated the serial code into a Python file, and exported the scattering amplitudes as a .json file, then read the .json into a web browser using a JavaScript and the library Plotly.js. resulting in surfaces like this.
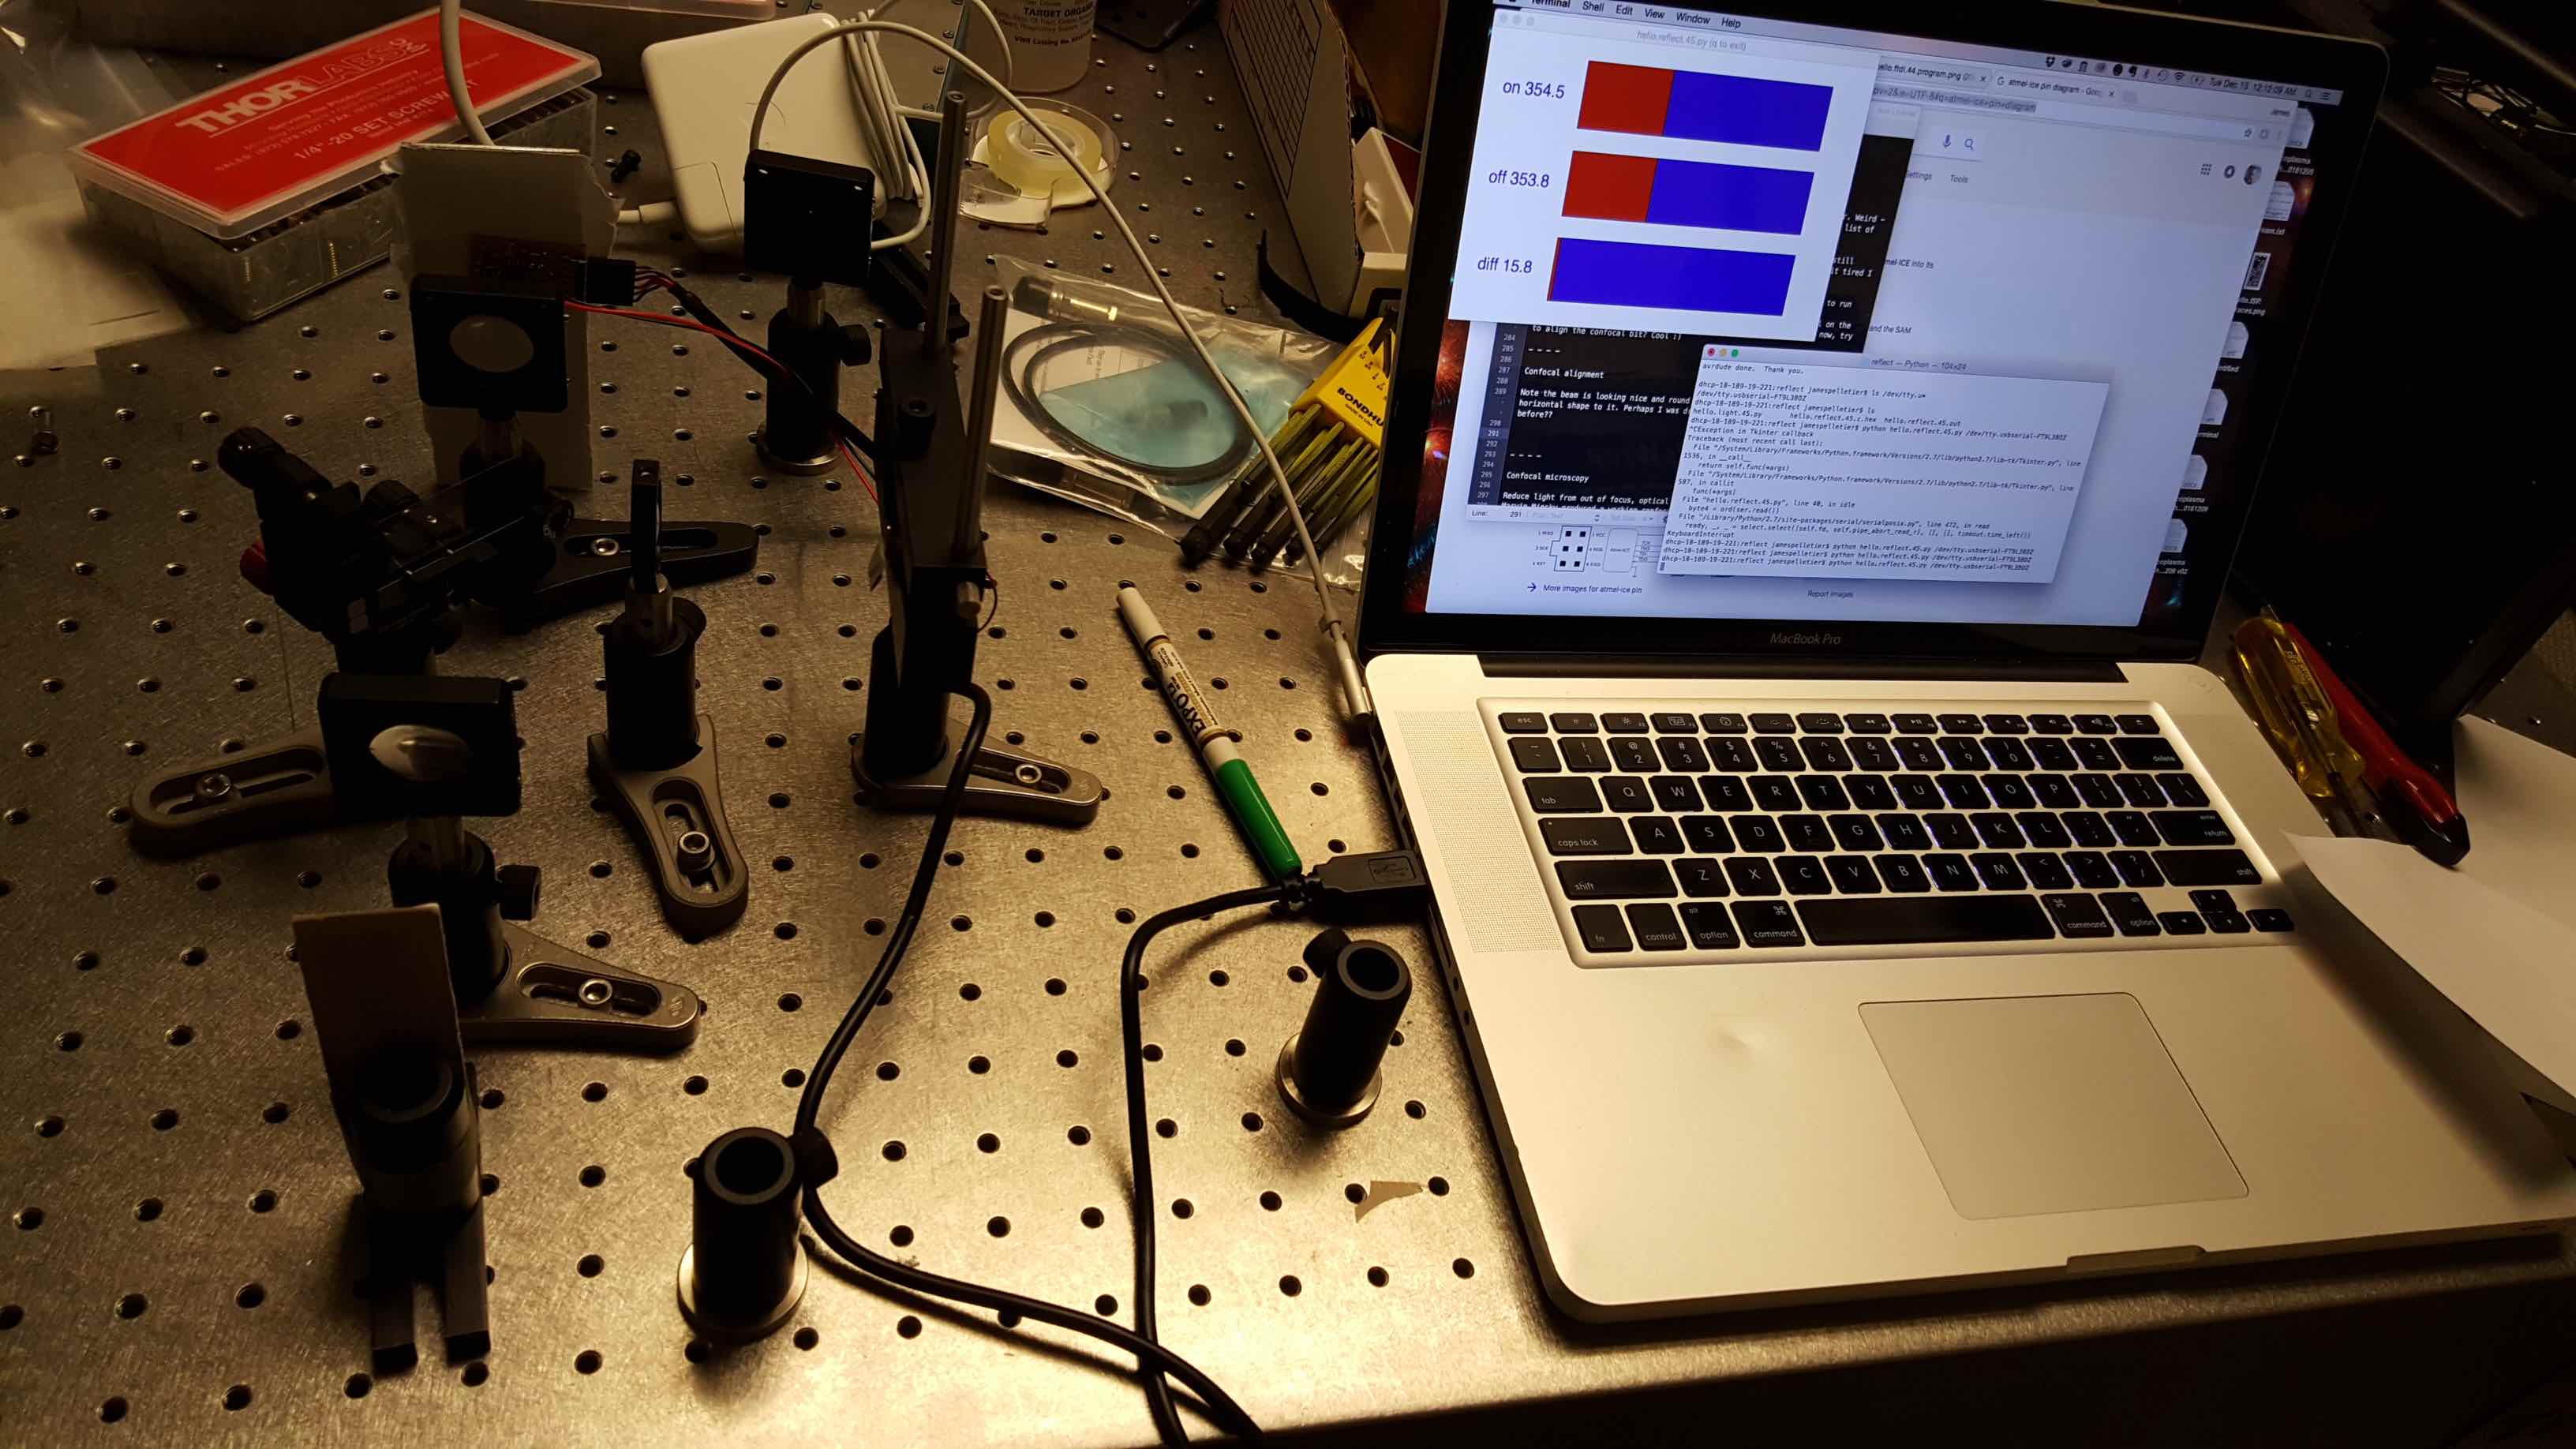
As usual, I plugged in the synchronous detection board and found its name with ls /dev/tty.u* then tested the board once more with Neil's program python hello.reflect.45.py /dev/tty.usbserial-FT9L3BOZ
I plugged in the pyGestalt axes, found the network name using python fabnet_xyaxes.py [[[10,10],[0,0]]]
I spent several hours on an application to display the scattering amplitude with respect to position, see notes here. I allocated 1.5 hours to this task but spent 3 hours, tantalized by the hope of success around each next corner. To enforce supply-side time management better late than never, for now I decided to print values to the Terminal and plot in separate graphing software, rather than plot directly.
I installed Anaconda at one point while trying to use Matplotlib. With that installation of Python, I was not able to connect to the modular axes. I uninstalled Anaconda and I was again able to connect to the axes.
I incorporated code to read from the serial port into the ser.reset_input_buffer() before the framing section solved the issue, but perhaps slowed the machine down a bit, which is fine.
I asked Nadya how I might interface a button with the modular axes. She noted I could declare the virtual machine in another program loop, rather than running directly from the terminal each time.
Important to have minimal global deflection. In the next iteration, I will design stages that are planar and balanced, so motion of the sample does not tilt the stage.
Marvin Minsky made the first confocal microscope in 1955, with the goal to image neural networks in live brains.

He “translated into an image on the screen of a military surplus long persistence oscilloscope that had no provision for recording” (MicroscopyU) and for illumination, instead of a laser used a pinhole in front of zirconium arc source.
Lower cost microscopes in active development have a number of exciting applications, such as in education, health, and ecological conservation.
Foldscope is from Manu Prakash's lab at Stanford. They just had an incredibly successful Kickstarter campaign. Last summer, Manu sent me several Foldscopes to share with students at the Children's School of Science in Woods Hole, Massachusetts. The students had a wonderful time with them. The Foldscope community posts their findings on a blog called Microcosmos for people to share what they find.
CellScope from Dan Fletcher's lab at Berkeley is now being used for health and ecology, low enough cost and portable enough to have automated microscopes in the field. In clinical trials in less developed regions of the world, for example in Cameroon to detect the parasite Loa Loa in blood samples. Dan gave a talk at MIT on Wednesday, December 14th. I asked him how they struck compromises between cost and functionality, for example they have an automated axis to translate blood samples to image multiple positions. For the clinical applications, he noted that the automation is crucial, otherwise the data is not standardized enough. Key point: Automation crucial.
Huge thanks to Neil, all the TAs, and the other students for making this such an incredible experience!
This morning I continued the assignment on modular machine axes and the Gestalt framework. In short, our goal was real-time control of the axes, to make a profilometer.
In lecture today, Neil taught us about project management. With system integration in mind, we discussed
Unexpected problems may emerge during system integration, so integration cannot happen at the last minute, though tempting to postpone! ☺ Likewise, Neil encouraged us we have to document our work continuously, rather than at the last minute.
The idea of spiral development is to pass through functional intermediates en route to the final product.

Here are some thoughts on spiral development applied to each aspect of the confocal scanner.
Though the aspects are modular, I do anticipate system integration challenges. For example, vibrations from the motion system could perturb the optical measurements in an unpredictable way. So I will start with the first of each, then spiral. Since the aspects are modular, I can increment each aspect separately then reintegrate. In this case, I think the motion system makes the most difference in terms of machine functionality, so I will first spiral the motion system, then the application, then the optics, time permitting. I would like to attempt the 3D printed mounts and PDMS lenses, but I may not finish them before Tuesday.
The idea of supply-side time management is to allocate time to all tasks, then triage in order to finish each task within the time allocated. This is in contrast to demand-side time management, spending as long as it takes to finish a task before continuing to the next.
As an exercise in supply-side time management, I will finish the first spiral tomorrow. In particular, I will
Another consideration is to leave enough time to seek feedback from experts. In particular, I hope to discuss user control of axes with Nadya, and user interfaces and algorithms with Amanda; however those tasks are on later spirals, so I should not let them distract me from finishing the first spiral.
Here is a schedule. Will be interesting to see whether these are time requirements or desirements. ☺
| 9:30 to 11:00 am | 1D system with Tkinter application |
| 11:00 am to 12:30 pm | Interface button with pyGestalt |
| 1:00 to 2:30 pm | Revise board for more sensitive detection |
| 2:30 to 4:00 pm | Design carboard stages |
| 4:00 to 5:30 pm | Dynamic UI |
Brief reflection. Though it took time to reflect on spiral development and supply-side time management, I now really do feel much more organized, less stressed, and even more enthusiastic! Also though it took time to document, the process of recording and revising my documentation helped remind me of necessary but forgotten tasks, and helped prune and prioritize the sprawl of ideas.