Hello Javascript aka this page changes
Given my CS background I have written a bunch of code in the various languages described for today. I immediately wrote of C/Java/Bash due to code bloat in getting a simple UI going and I have less experience in Haskell/Processing. Therefore it came down to Python or Javascript. Given that for my final project the only interface that may be useful would be to interface with the web (through Javascript), I decided to take that approach. Also, I've been hearing about this node.js thing for years and wanted to explore it (I got out of webdev when Django was new so I'm a bit behind the times)! Therefore, I made this page a live page which will interact with my board described below with instructions also described below!
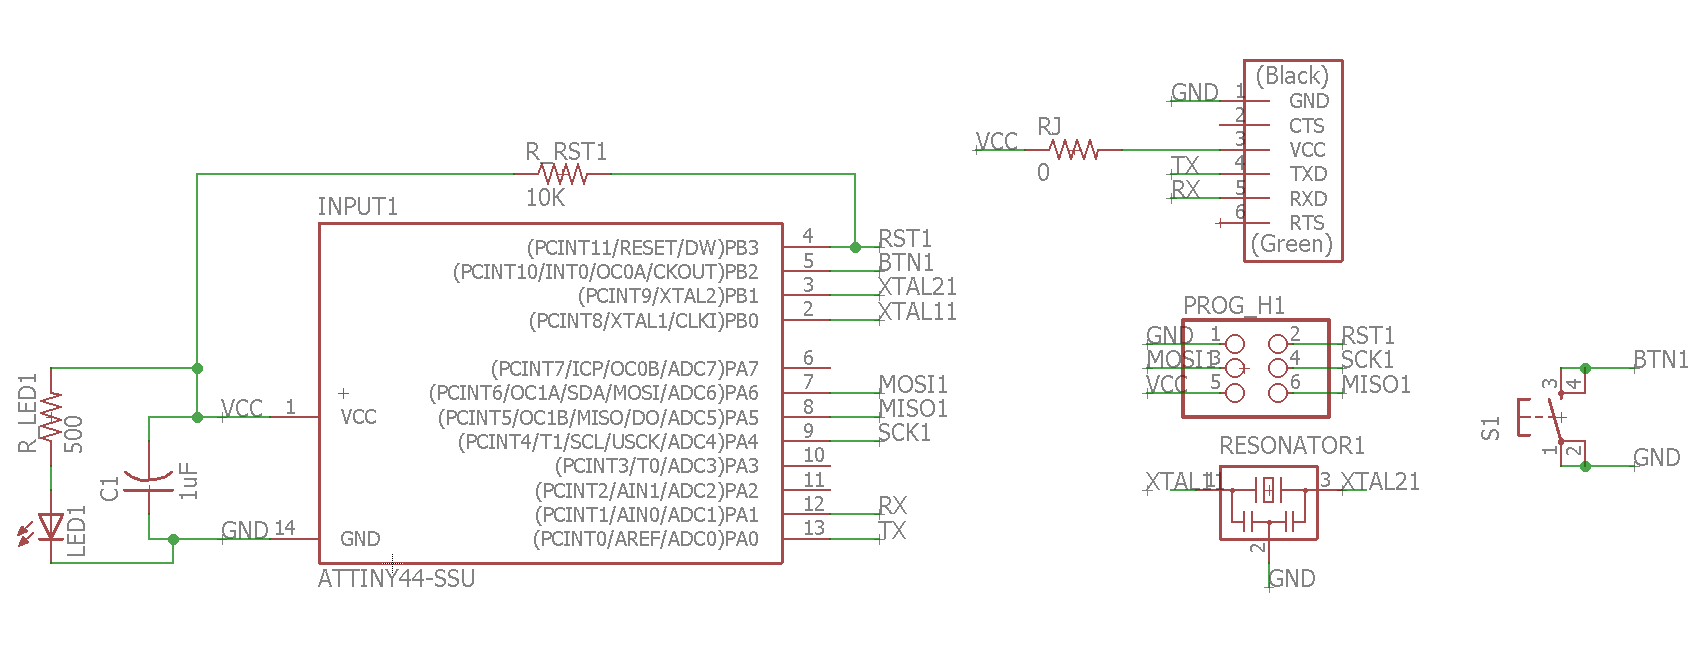
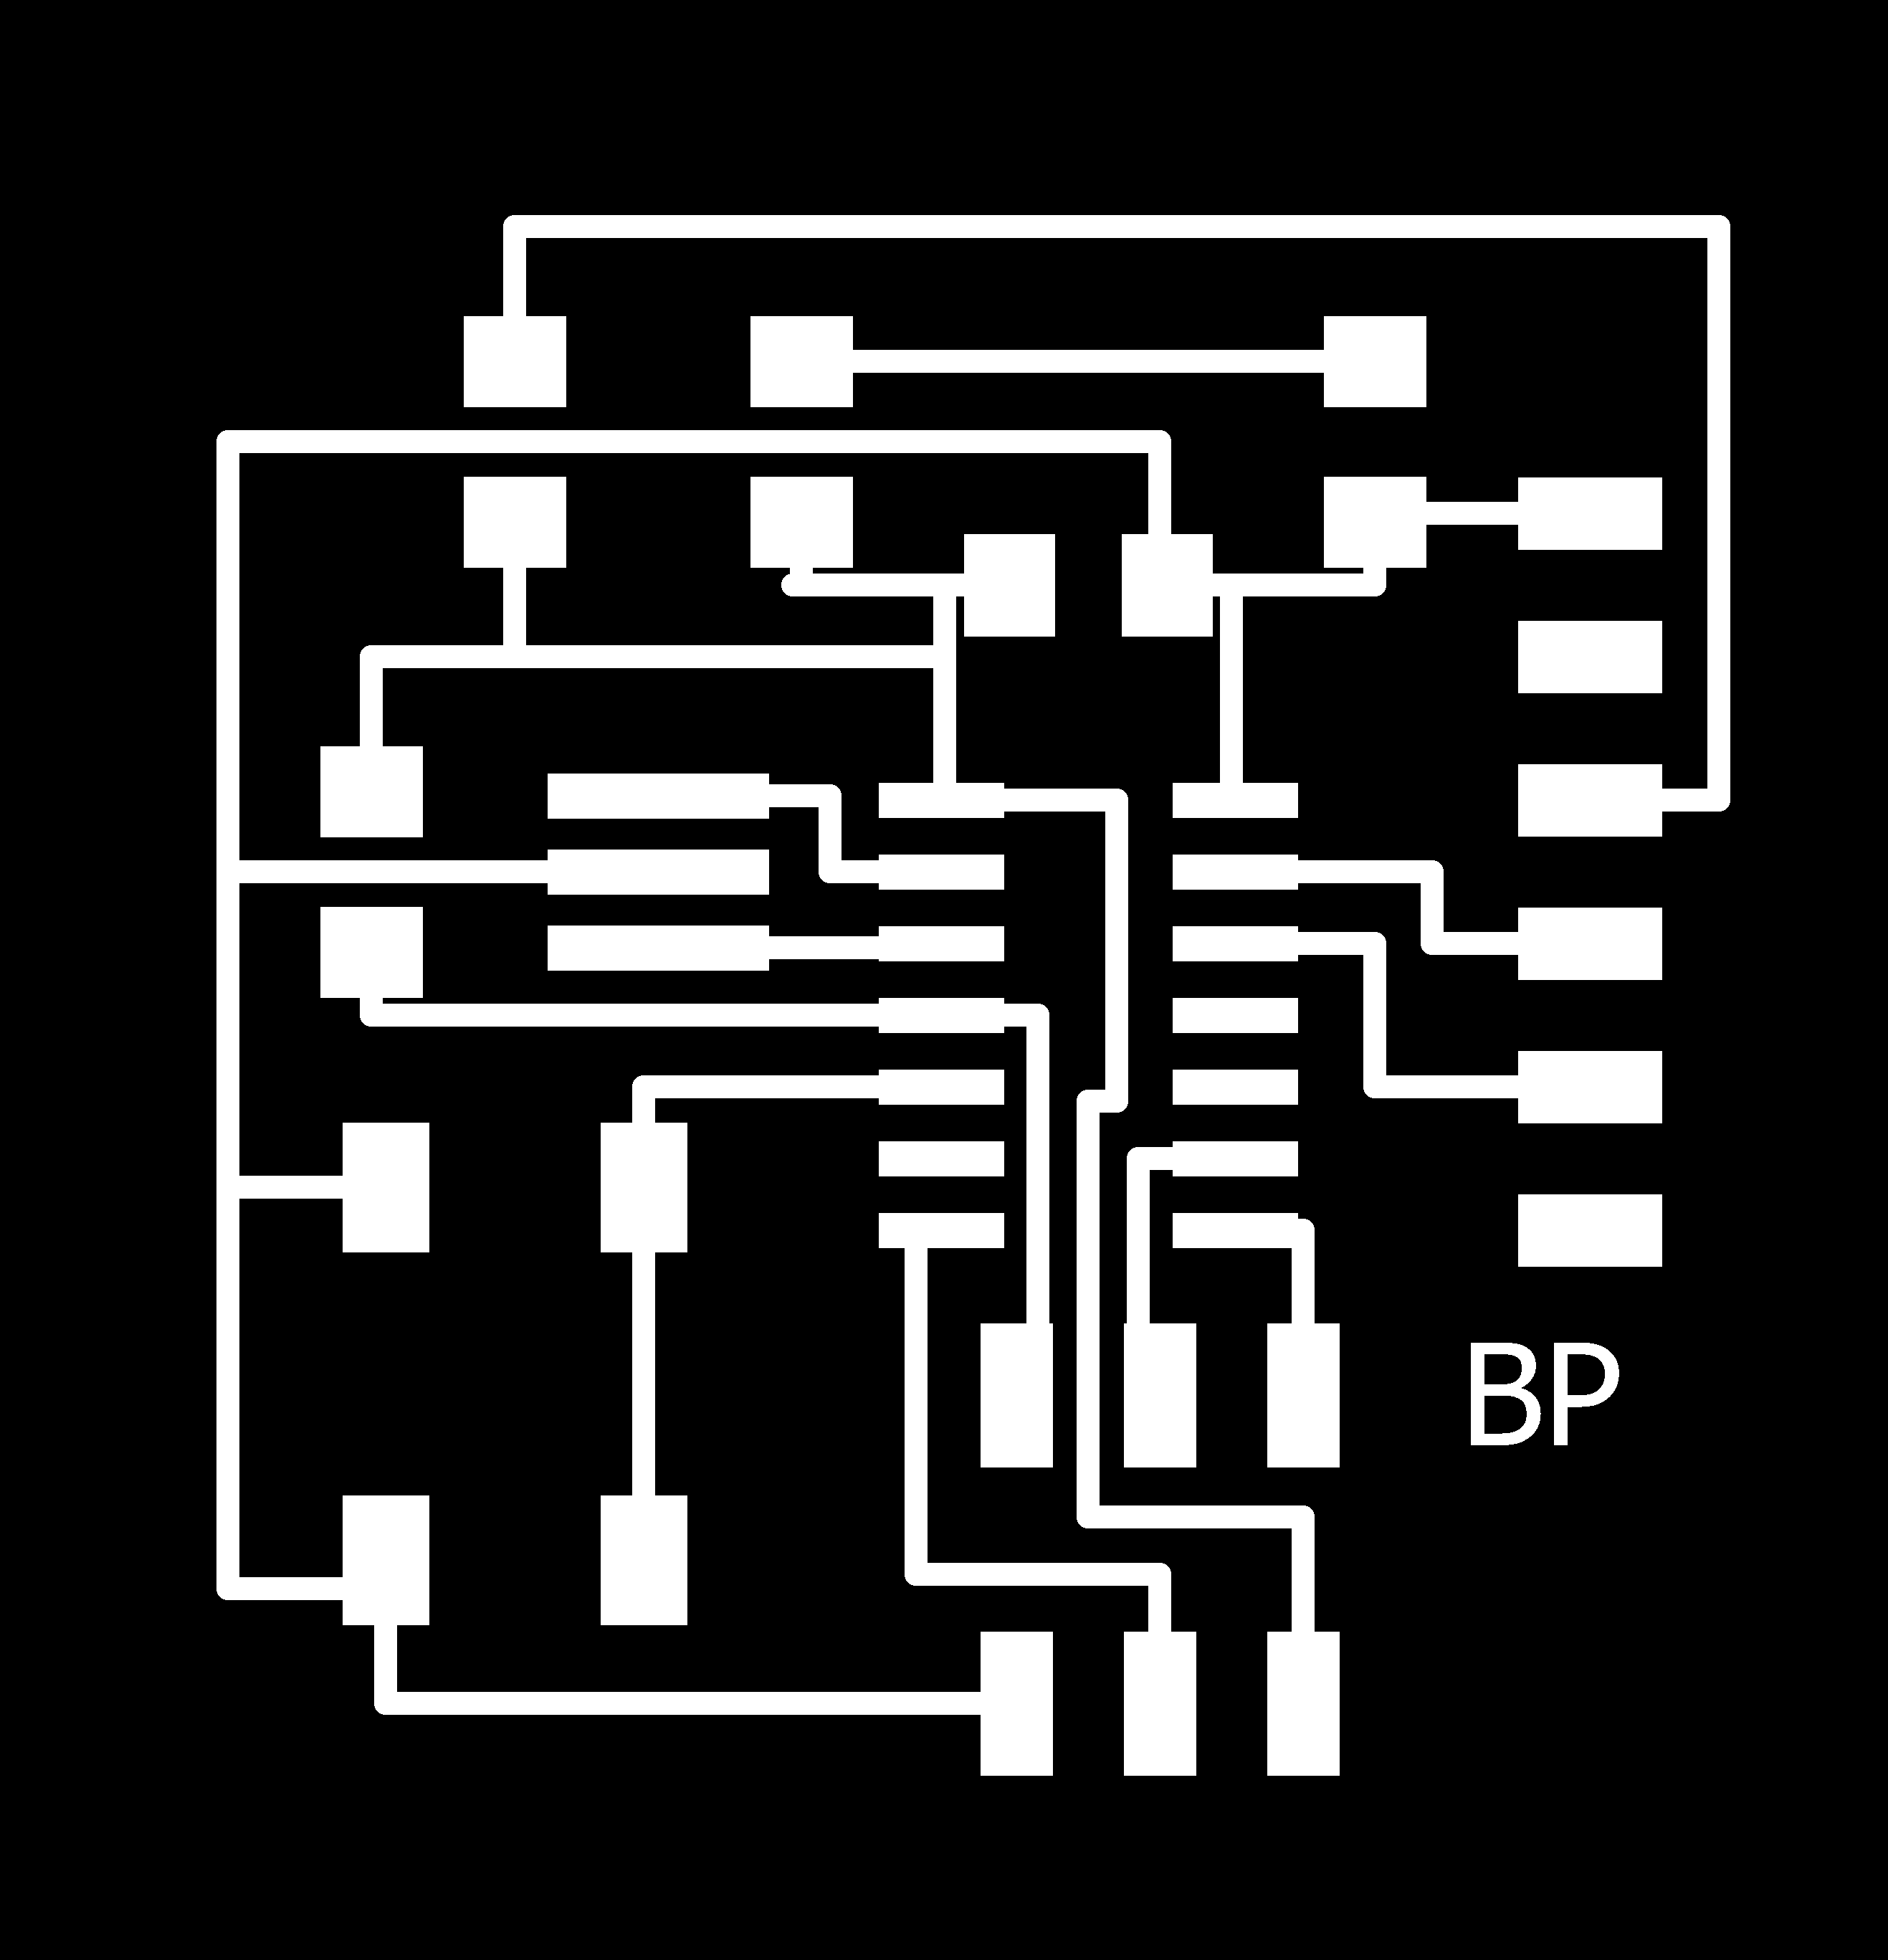
To start I decided to use simple inputs of buttons which will talk of FTDI serial to the computer. I took this approach because my final project would communicate in that way sending info over the serial port via characters to encode commands. Therefore I decided to make a simple board that will take buttons as inputs and be able to communicate over FTDI via serial. Here is the schematic and board file. Images below:


When I went to mill the board this was the first time using the new fab modules and I made a one big mistake and leared a few things. First, there is no more z0 it is the zjog so setting that to 0 is a BAD IDEA as the bit will scrape across the board ruinging your traces :(. After that mistake I learned that you have to re-calculate your file every time you move to a new x0,y0 for some reason (safety). So if make sure to click calculate and then the send file button will appear. Other than that I just had to get used to the new UI but once I figured that all out it was a breeze to mill the board and it came out great. I stuffed it no problem and then plugged it into my computer at home to test.
Testing turned out to be a total disaster as I could not get Neil's term.py to work for the life of me. The last time I had used it I was using a linux machine in the lab and I just could not get a linux VM or windows to play nice with the GUI. Data would send but it appeared that nothing was coming back. I assumed maybe something was wrong with my code and tried some old boards and other boards that I know worked and nothing was working. I was at this all night. Finally, I sent a request for help to the class and a classmate responded that he had also had a hard time with term.py and simply running the python-serial from the command line and skipping the GUI worked like magic for him. I tried it and it did work like magic! :) Thank you Harnek! So then finally I was able to tell that my board was working and ready to serially communicate with node.js (once I got that figured out). To run python-serial from the command line with its built in miniterm you simply need to type: python -m serial.tools.miniterm [PORT] [BAUD] replacing PORT and BAUD with the appropriate port and baud rate. For Neil's example code the baud is 115200. On linux the port is usualyl /dev/ttyUSB0 if you have used a USB to FTDI adapter and on windows you can run 'wmic path Win32_SerialPort' to find the port (credit to the internet for that one). They are usually COM# where # is the number of your port. Mine happend to be COM7. If you pick the wrong port the miniterm will simply fail so you'll know you got it right if it doens't throw an error. To double check if you unplug the USB you will get an error that the port was forcibly closed. For the boards using Neil's default code like mine the BAUD is 115200. Here is my final c code for the button and makefile.
I found a wonderful tutorial on serial processing and node.JS here. Working off of that tutorial (which I will walk through at a high level below) I set up a simple node.JS server to read the serial data from the board and then send it via a web socket to this page so I can display the data on this page! To get started you need to install node.JS on your computer. Then you will use NPM (the node.JS package manager) to install the nodeserialport library and the websocket library. With all of that installed we can begin to write code.
First we want to create a simple node.JS script that will read data from the serial port and then publish it to the websocket. That way we can simply run that file and our serial data will automatically be sent to a websocket which can be read by our browser! To do this we open up a serial and a websocket connection and simply string together some handlers to pass messages around. I added a bunch of console.log()s along the way to allow for easy and quick debugging by revealing the data that is being sent around and the status of connections. Take a look at index.js to see the commented code! You can find index.js inside of this tar file which will provide you with a directory which is set up to run the node.JS server and talk to serial.
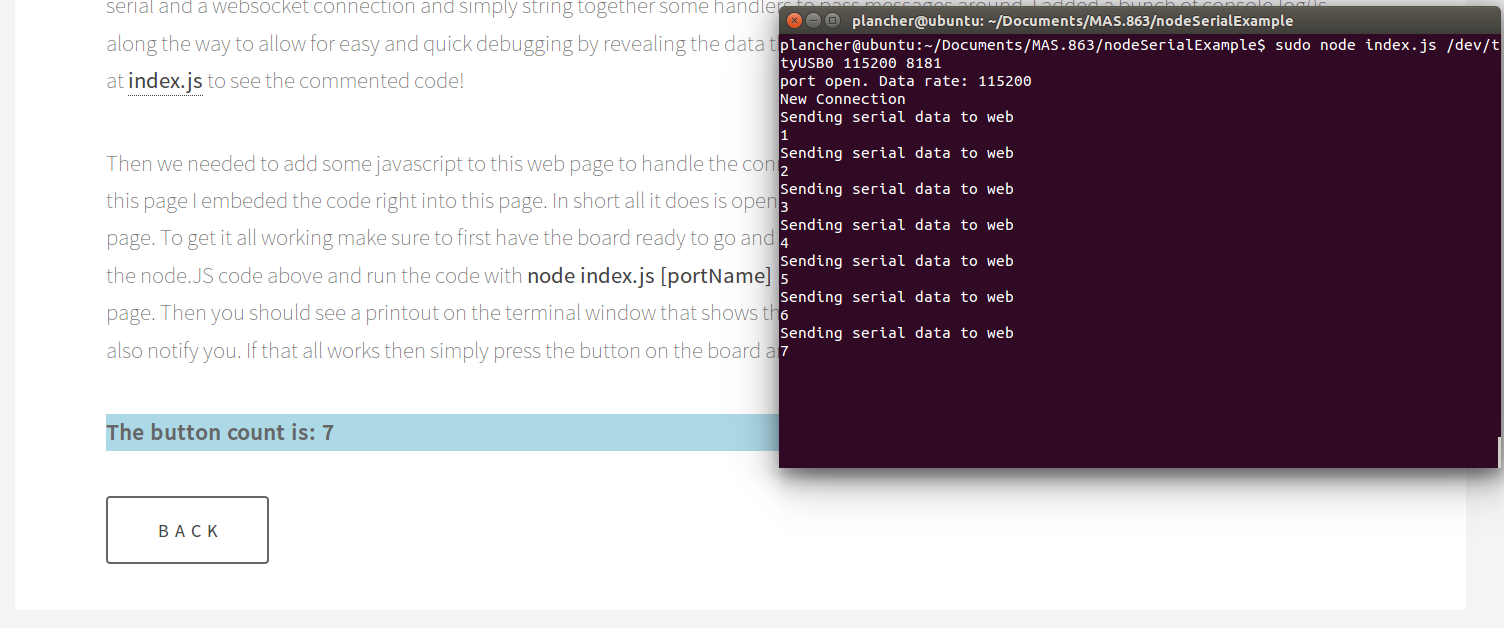
Then we needed to add some javascript to this web page to handle the connections and display the data. If you inspect the source code for this page I embeded the code right into this page. In short all it does is open a websocket and listen for data and then display the count on this page. To get it all working make sure to first have the board ready to go and plugged in. Find the port that it is running on and then download the node.JS code above and run the code with node index.js [portName] 115200 8181. Once that is running you need to reload this web page. Then you should see a printout on the terminal window that shows that there was a websocket connection and the div below should also notify you. If that all works then simply press the button on the board and you will see the count update below!
Below you can see a screenshot of mine working in action:
I was working on this week at the same time as I was working on week 13 due to its importance for my final proejct. You can see what I was figuring out for that week here. One of the things I learned how to do was have a non-blocking listening call over serial. Therefore I made some adjustments to my c code and to the node server and the javascript code on the page to allow for the page to interact with the board and double the number at the touch of a button! Same procedure as before just use this tar file and this c code and the input and output box below! That said, weirdly I always got data back on the device but it never noticed it as the letter 'D' which node.JS says it is sending and instead if was simply an empty byte. This is pretty weird and I'm not sure if the timing is funky or what. Anyway the above sort of works because it executes the -1 path but it doesn't actually ever do the double. No time to fix it but I don't need this type of interaction for my final project so all good!