Week 4: 3D Printing and Scanning
Introduction
This week, I made a 3D printed object and a 3D scan. The main focus this week included two goals:
- Design and 3D print an object (small, few cm) that could not be made subtractively (a subtractive process is one that can make an object by removing parts, as opposed to an additive process which makes an object by adding parts).
- 3D scan an object
3D Scanning an Object
There were two different options I had to 3D scan an object: (1) Using PhotoScan (2) Using 123D Catch. I decided to go with 123D catch because it is a mobile application, which means I can use it anytime and anywhere!
- Download 123D Catch by Autodesk from the App Store and set up an account
- Place the object on a non-cluttered surface. I was scanning my MIT Ring.
- Start a new capture and take a lot of photos from all angles of the object! I took over 70 photos
- Enjoy your 3D scan – (that was pretty easy ☺ )
3D Printing an Object
Phase 1: Designing the 3D Object
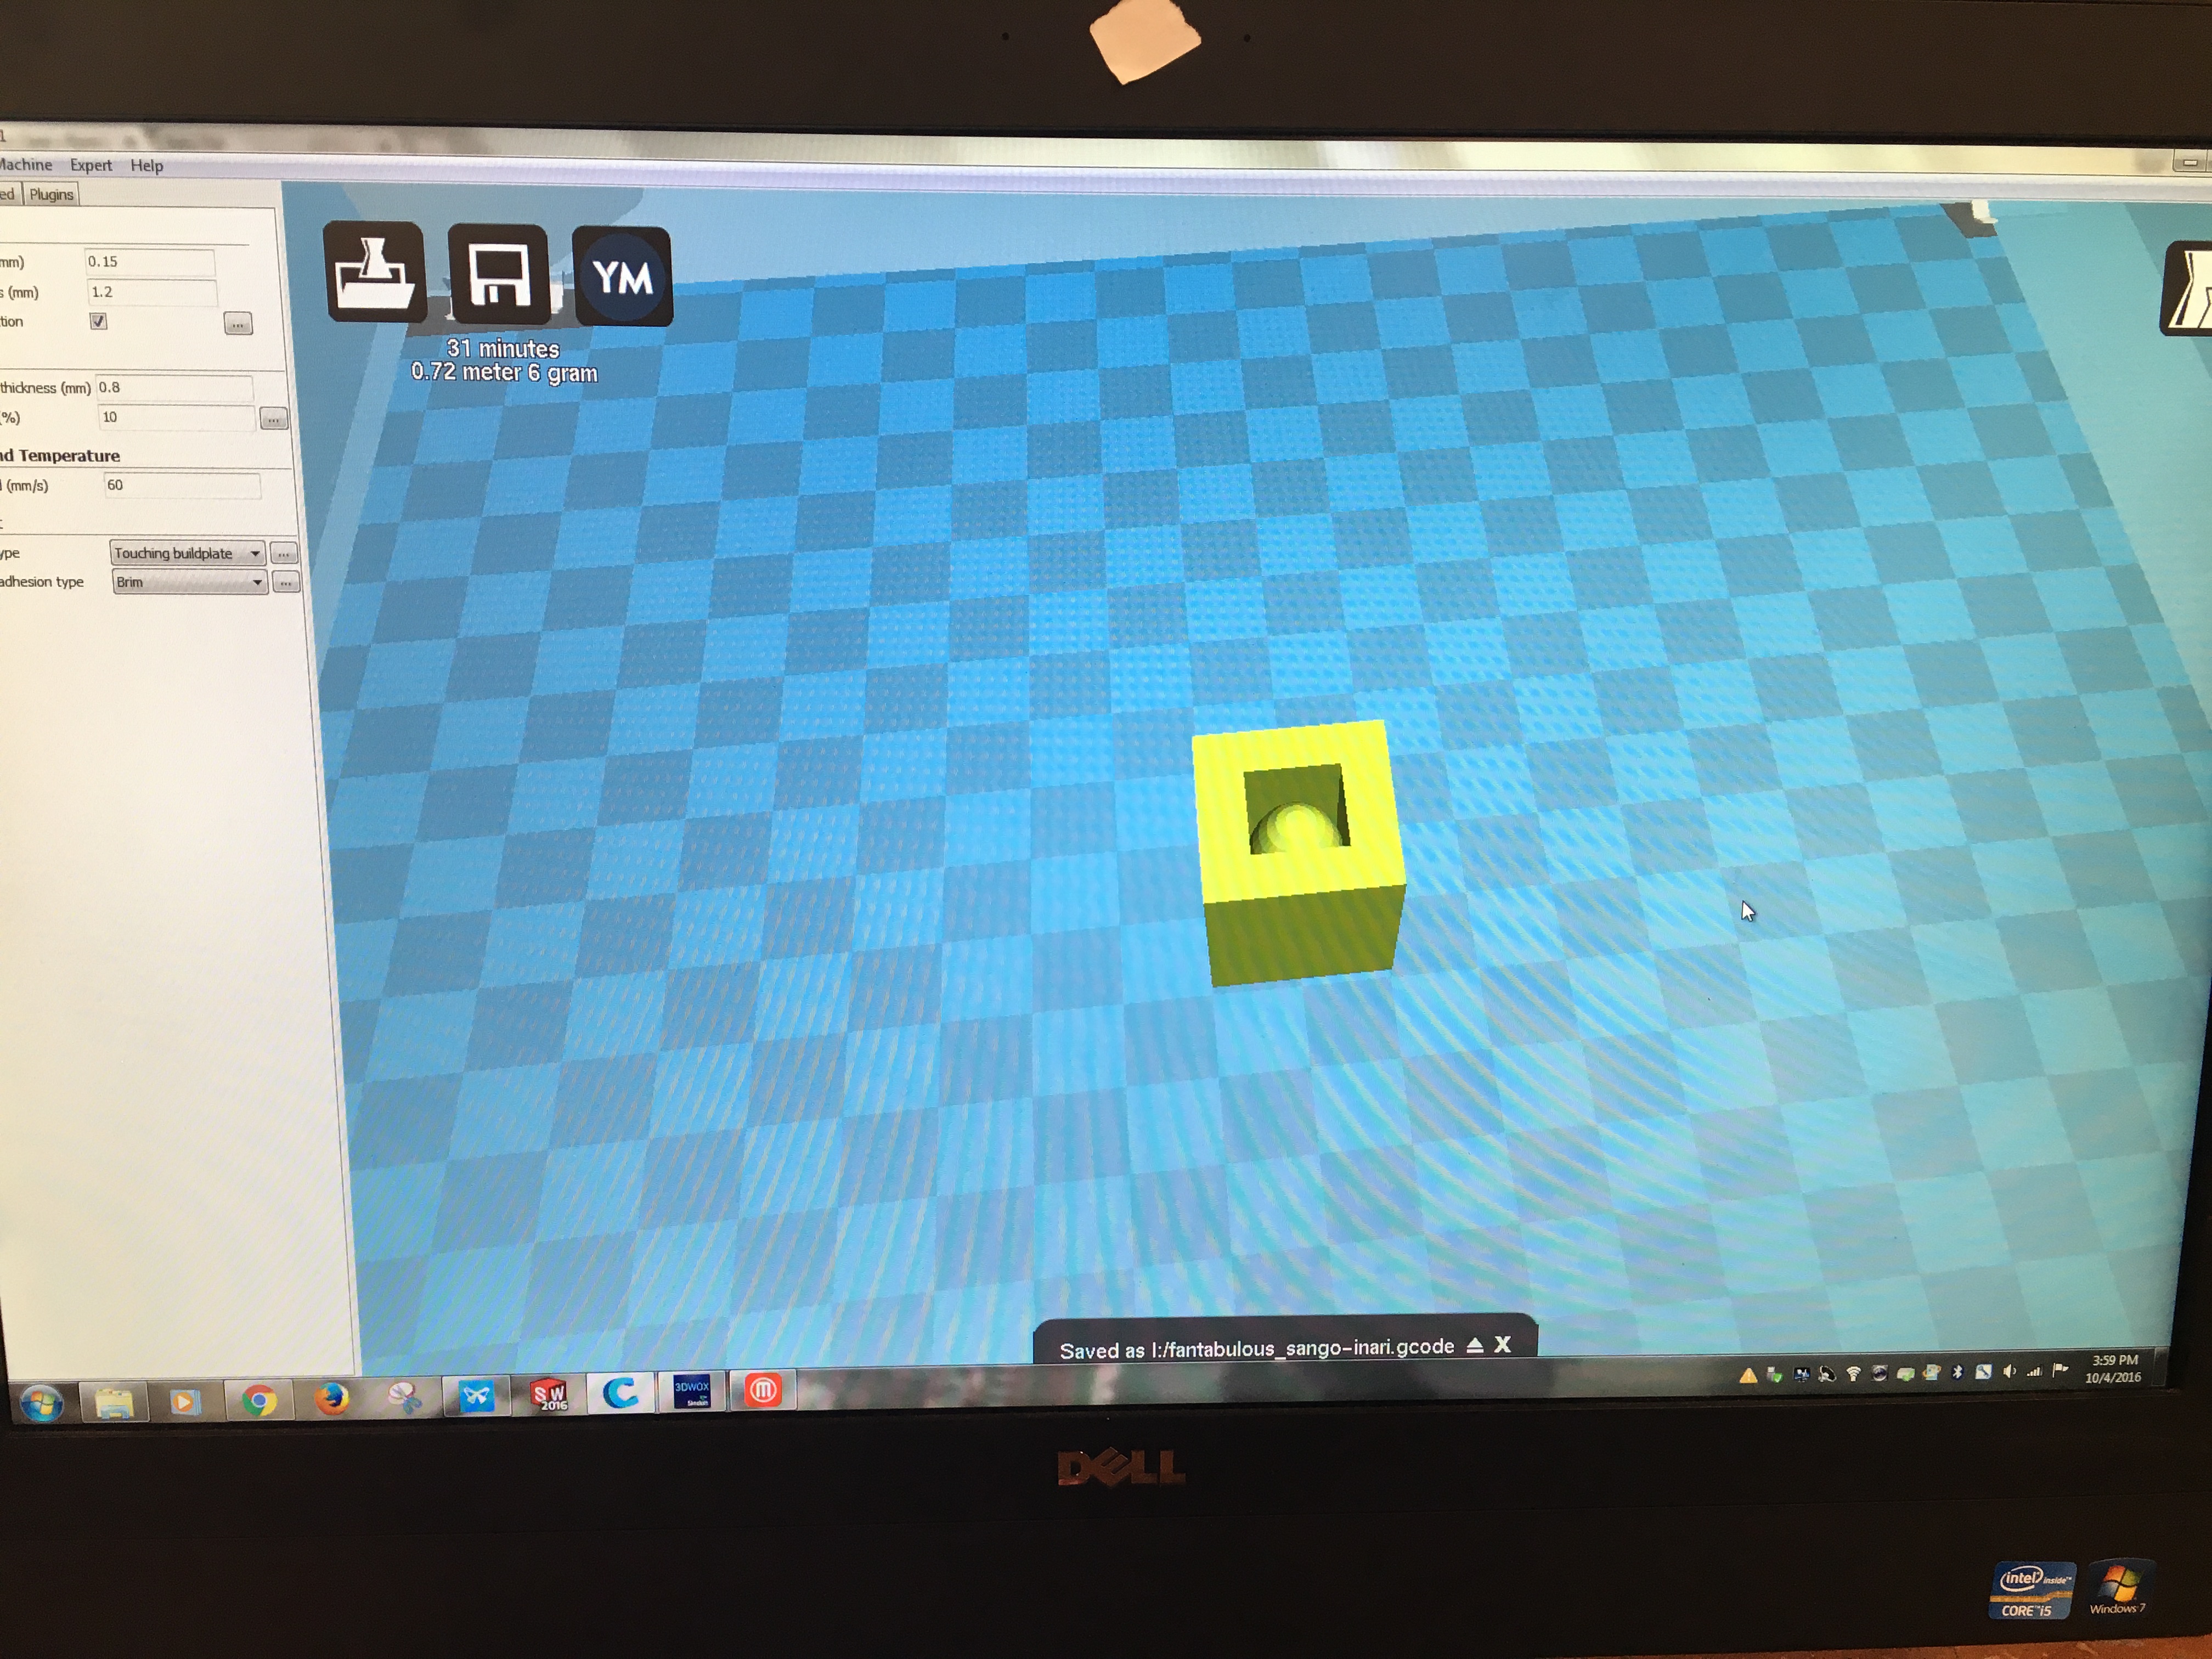
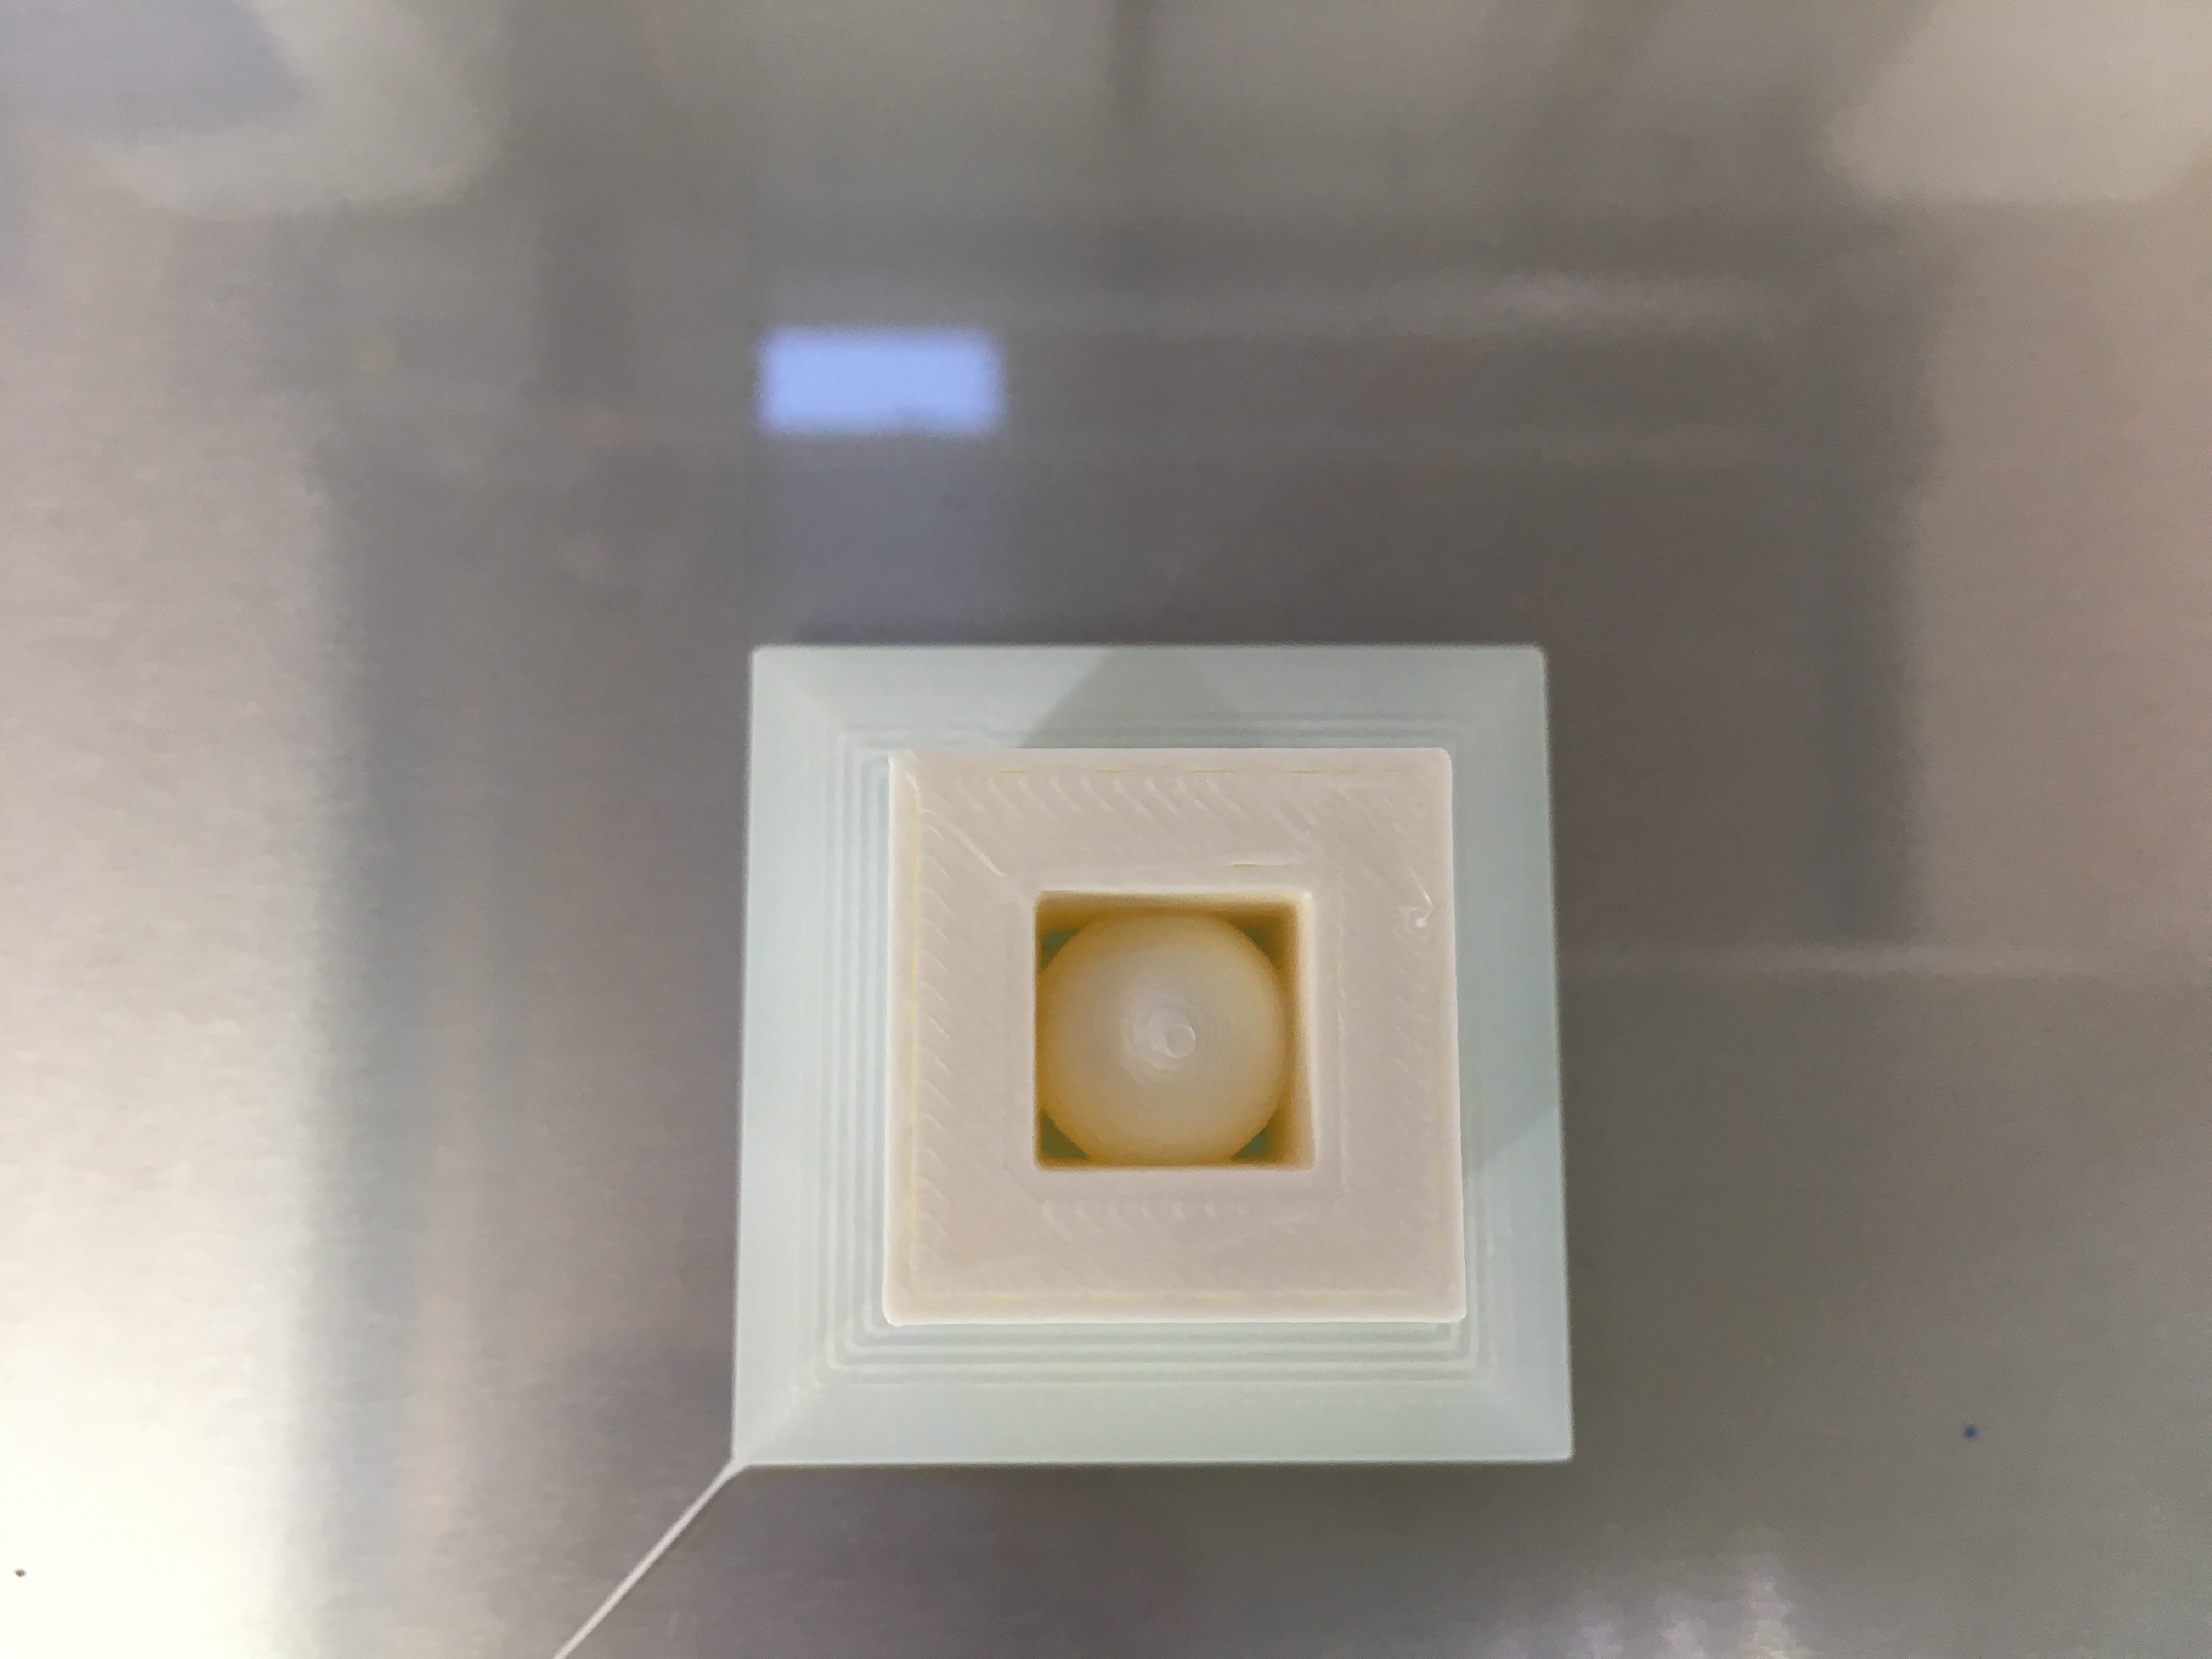
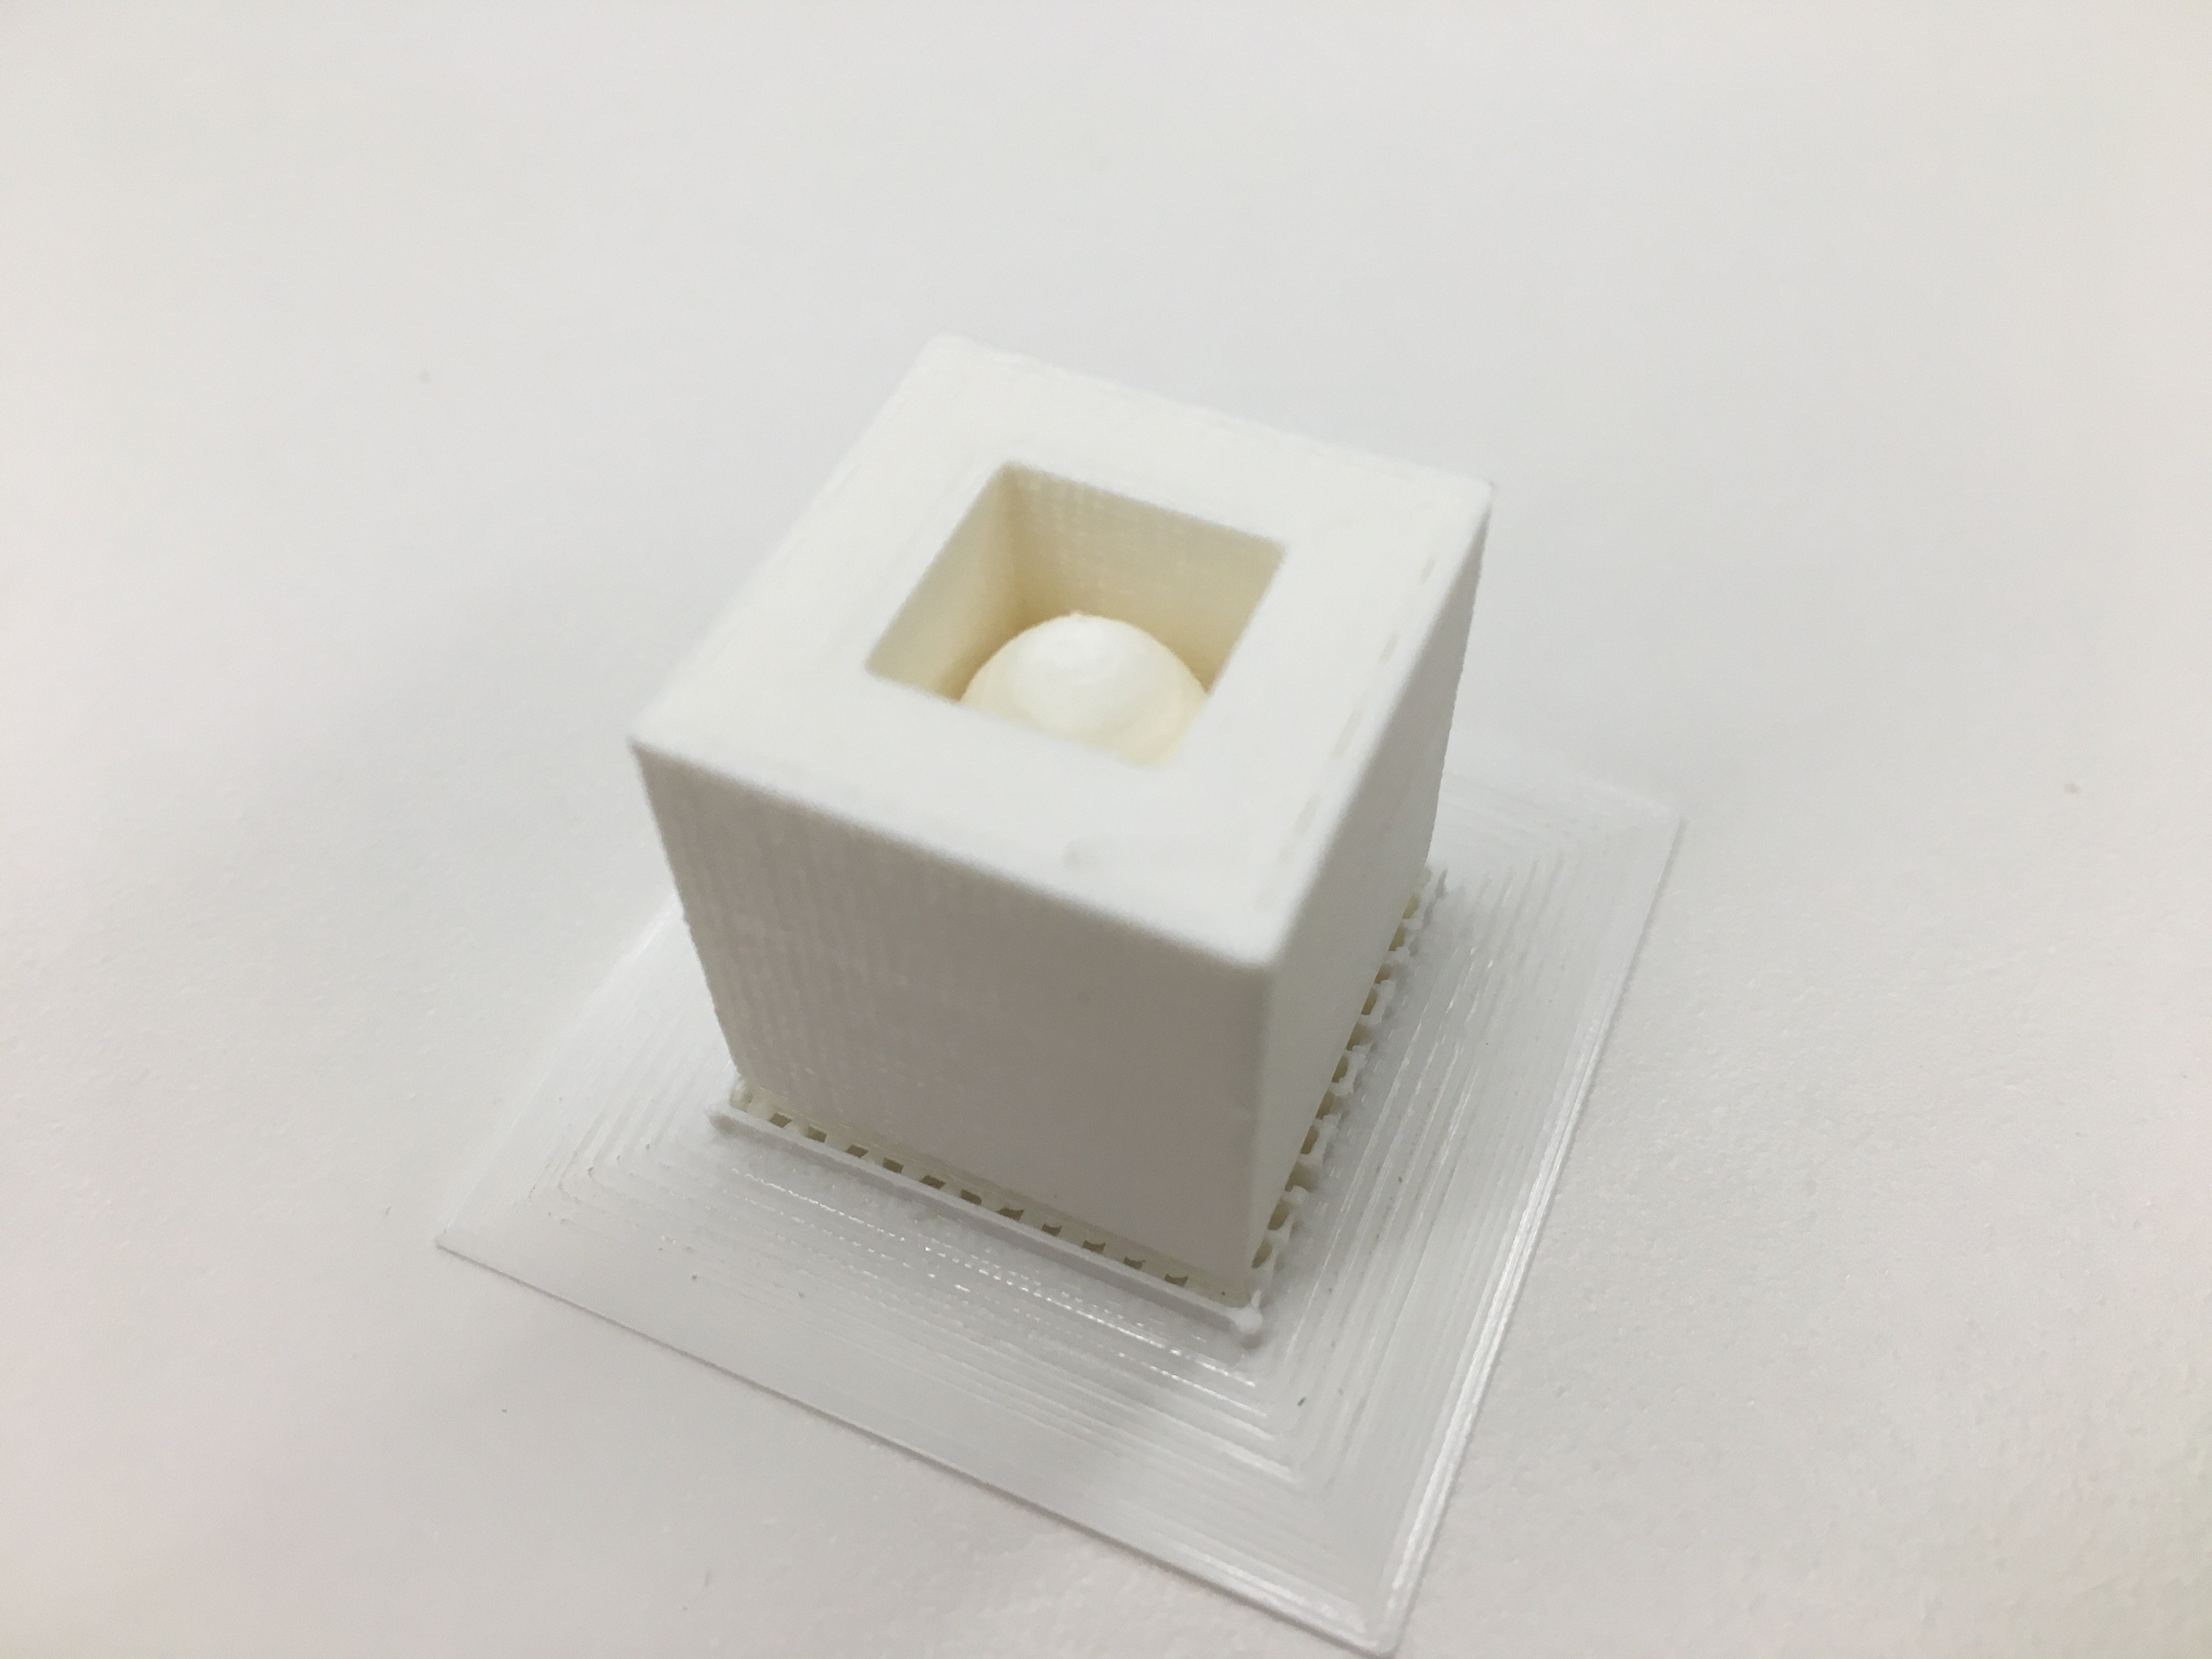
I used TinkerCAD to design the 3D object. The nice thing about TinkerCAD is that you can design on the web so no need to download a bunch of software. I wanted to make a cube with a sphere inside (this object can’t be made subtractively). In TinkerCAD, it was fairly simple to create this object, because they had pre-made common shapes, such as cubes and spheres.
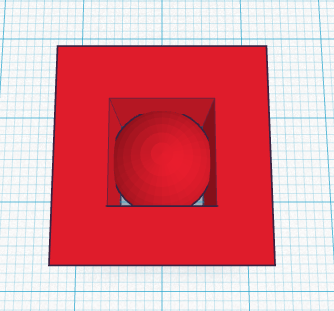
I added a cube to the workspace, and then another cube that was smaller. I could choose the smaller cube to be a hole. Then, inside the hole, I placed a sphere and made sure that the sphere’s surface touched the surface of the square (so that it was one object and not two!)
After that, I could save the file as an .stl (a stereolithography file which creates a mesh of the object).
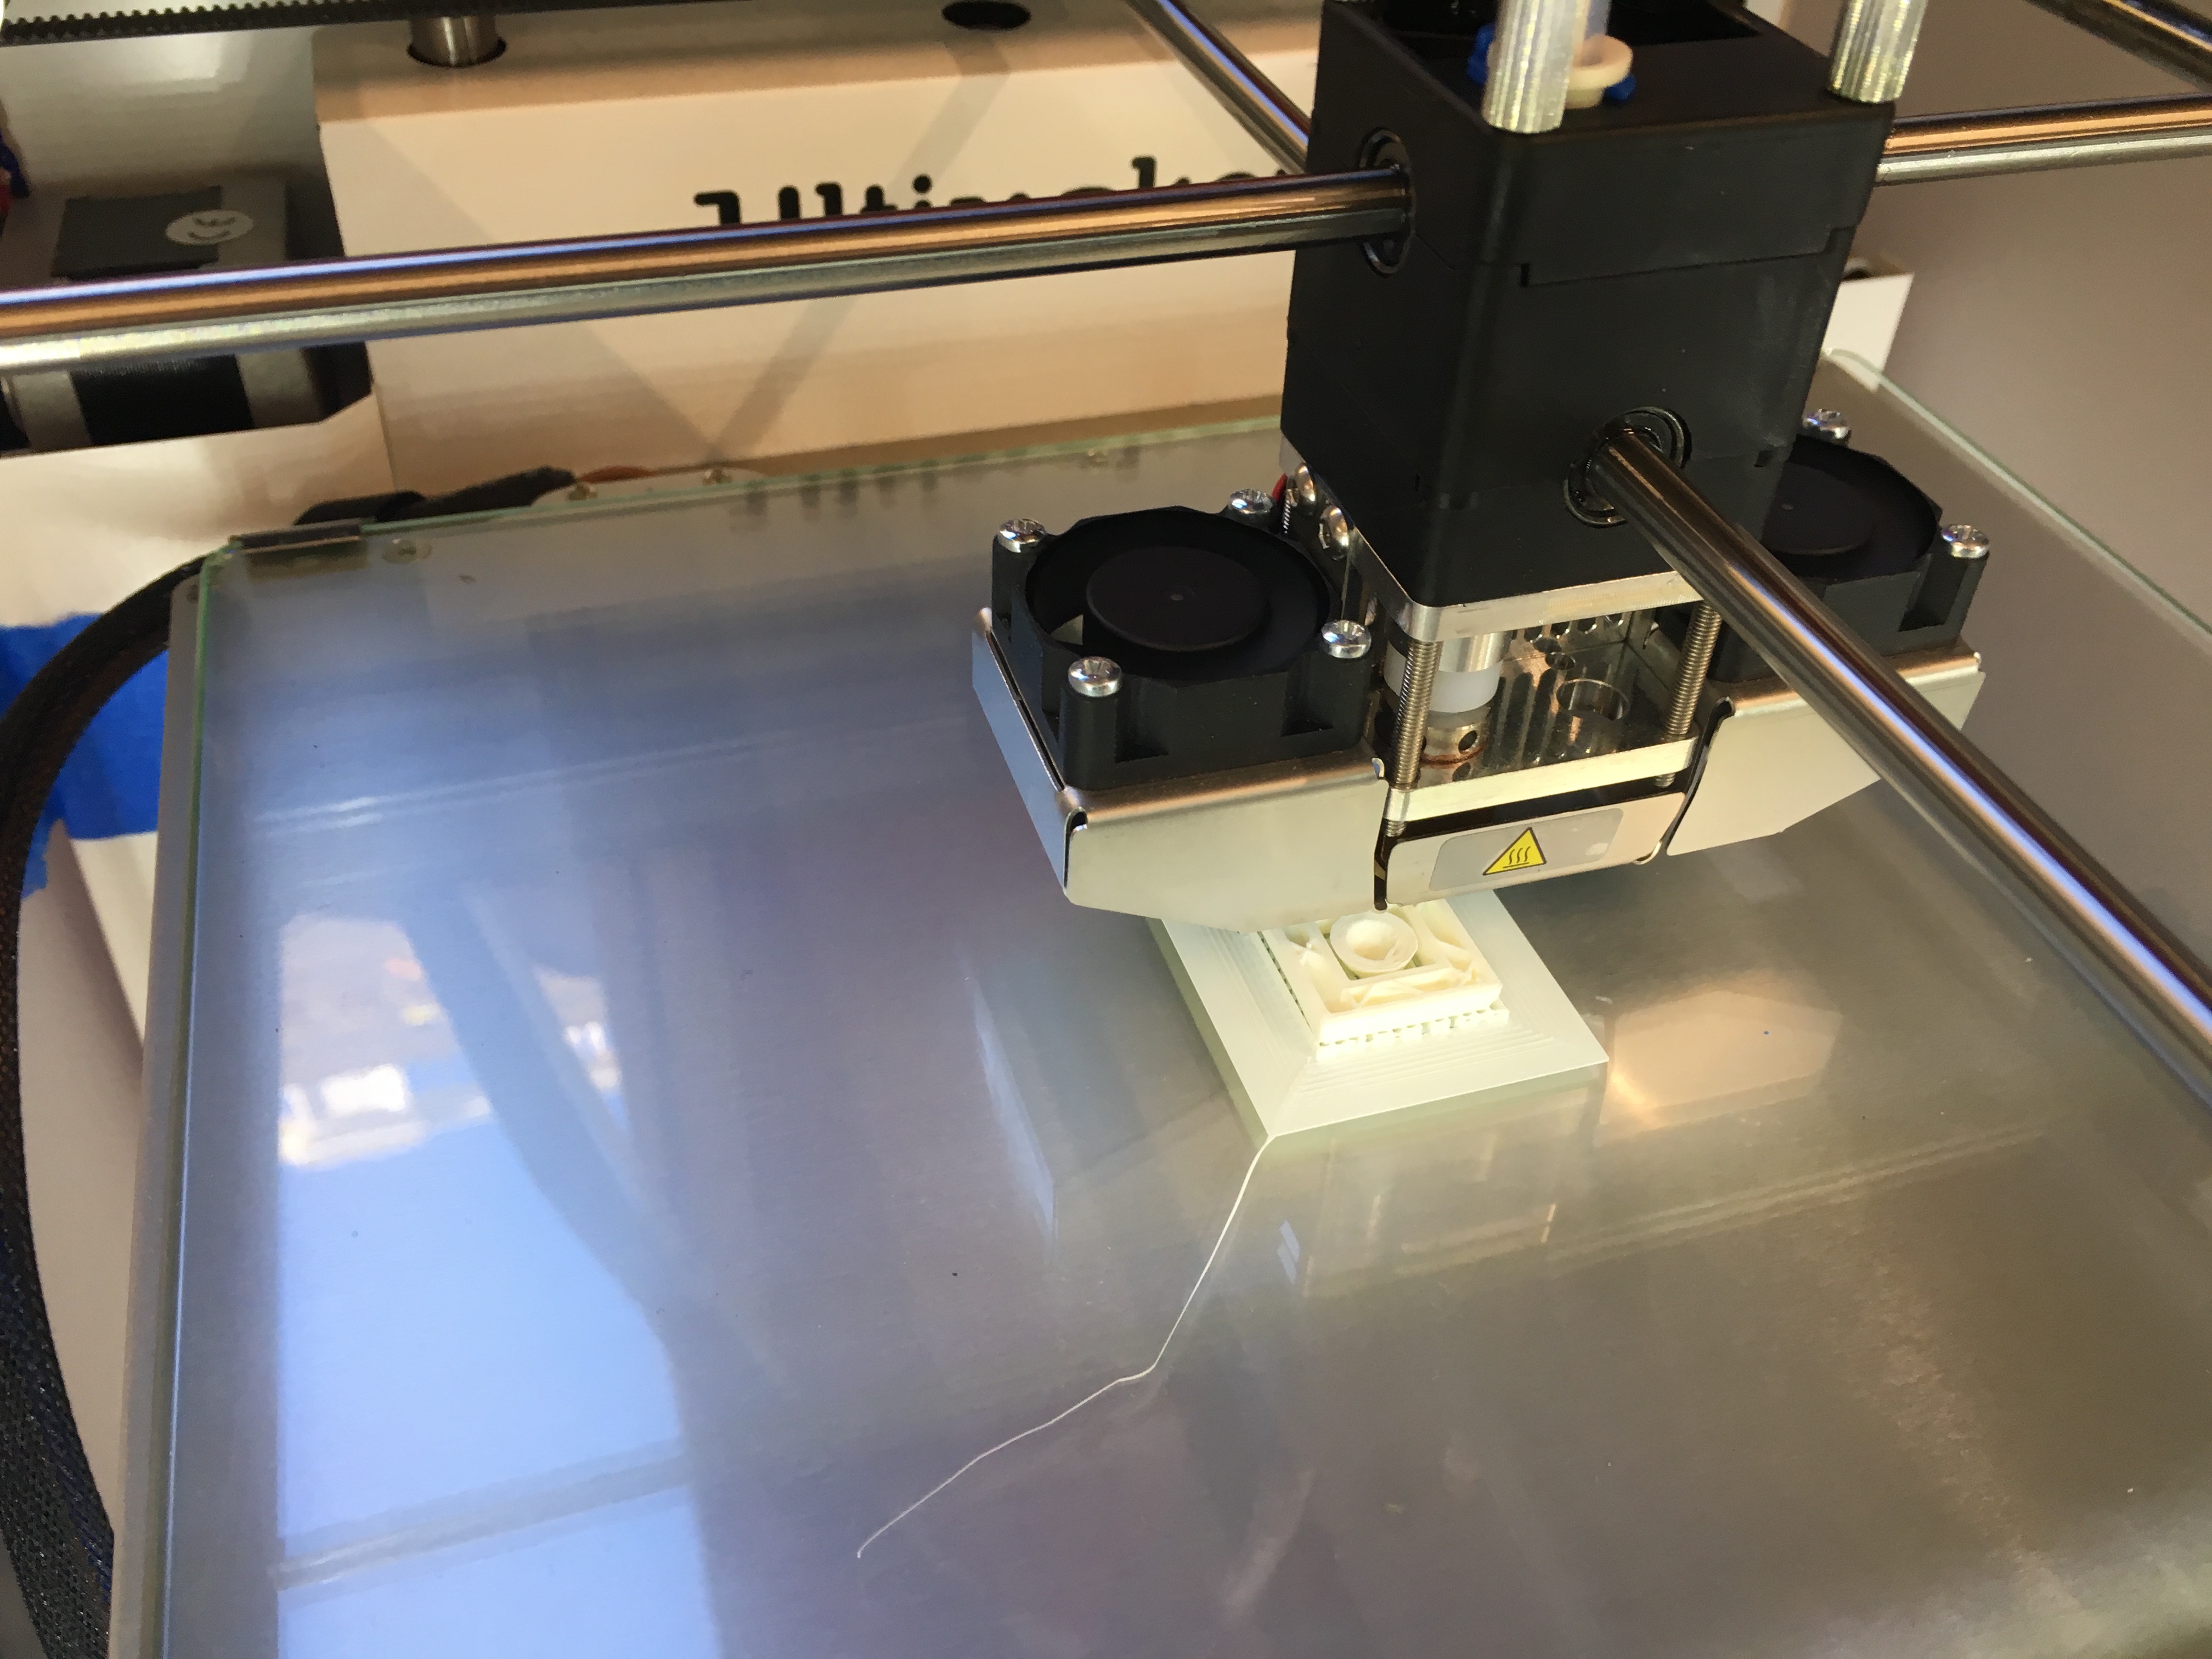
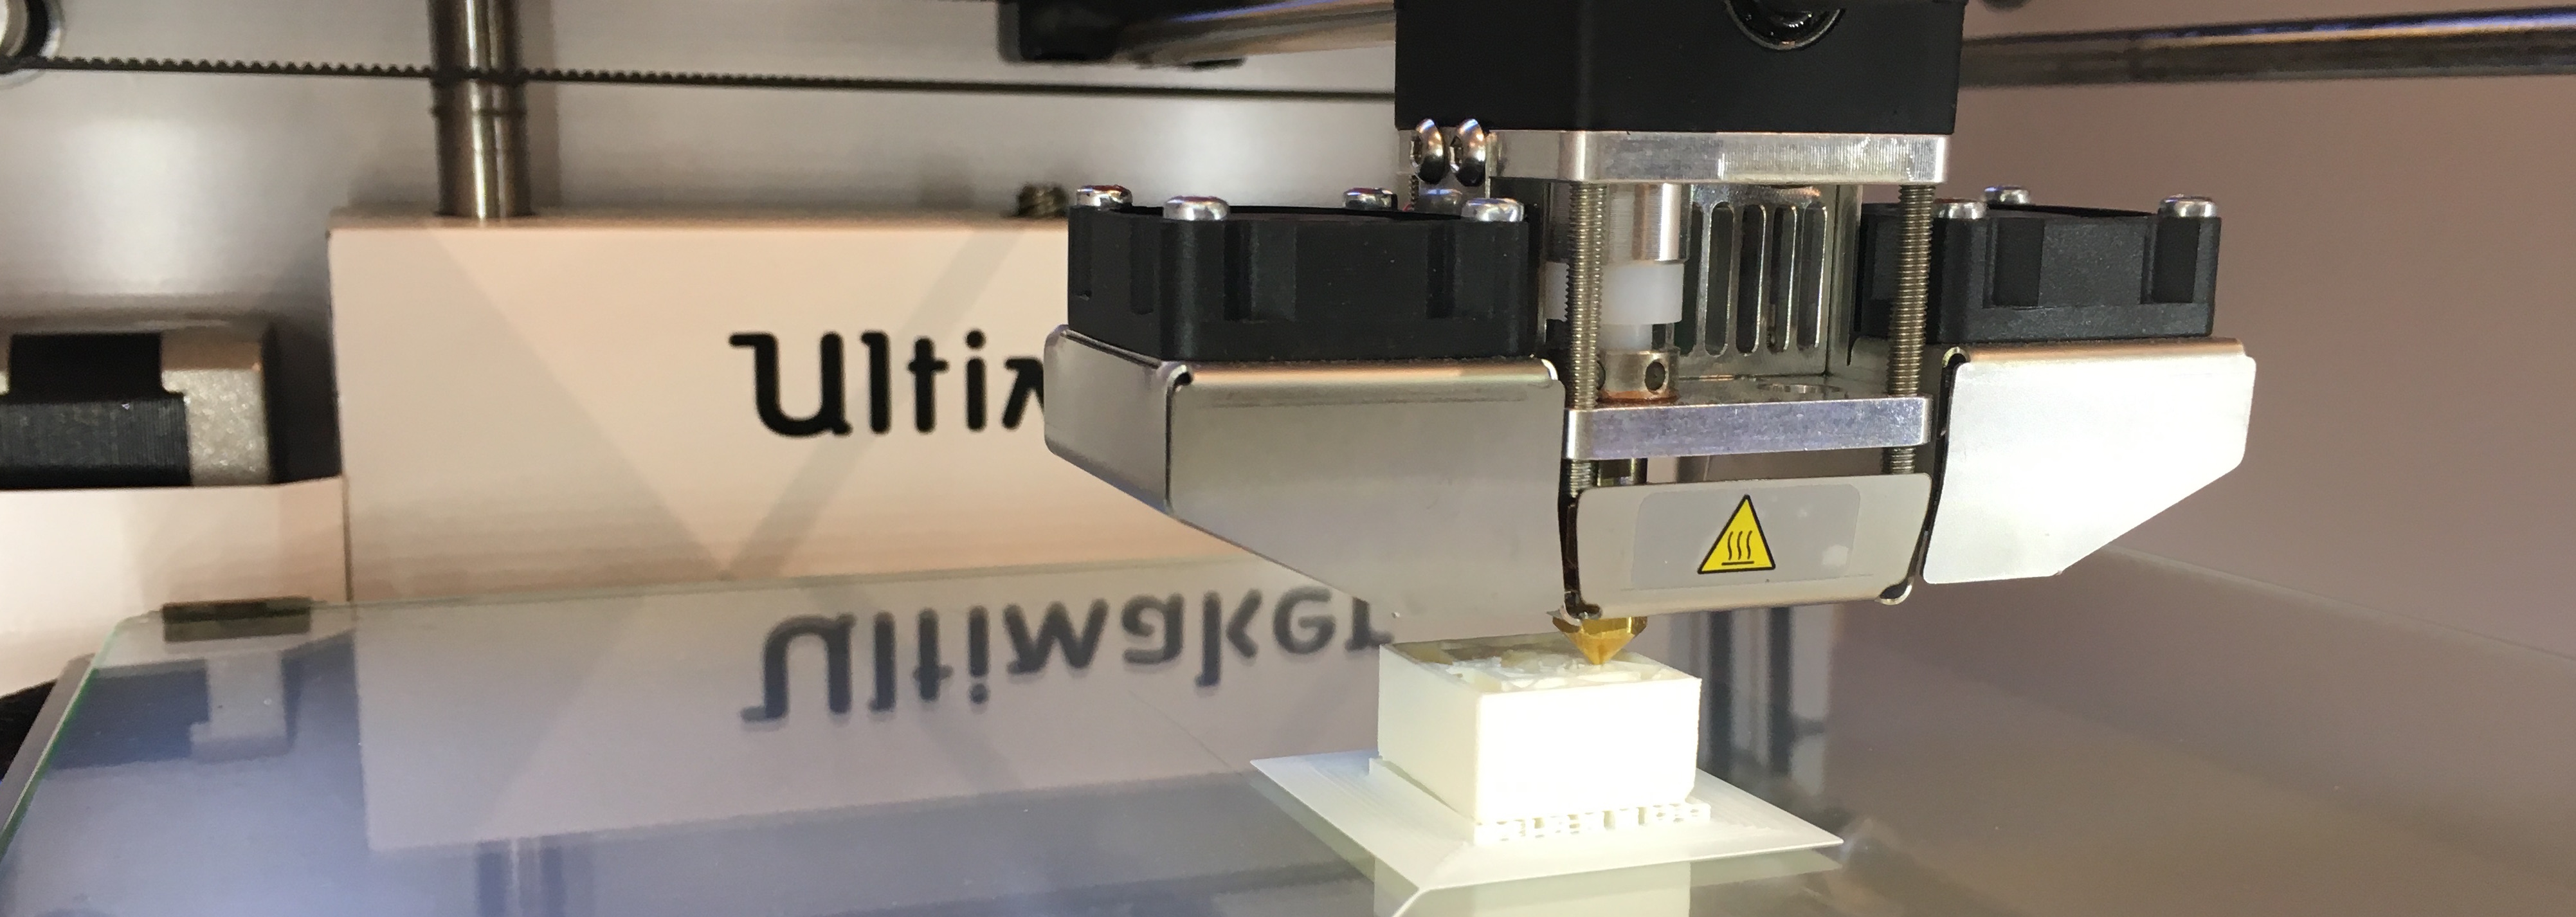
Phase 2: Printing the 3D object
So many 3D printers in the lab! I used Ultimaker to 3D print the sphere-inside-cube object. Initially, there were some problems with the printer - some of the material was getting stuck in the nozzle, so it had to be cleaned out before it finally worked. The object took about 30 minutes to print.