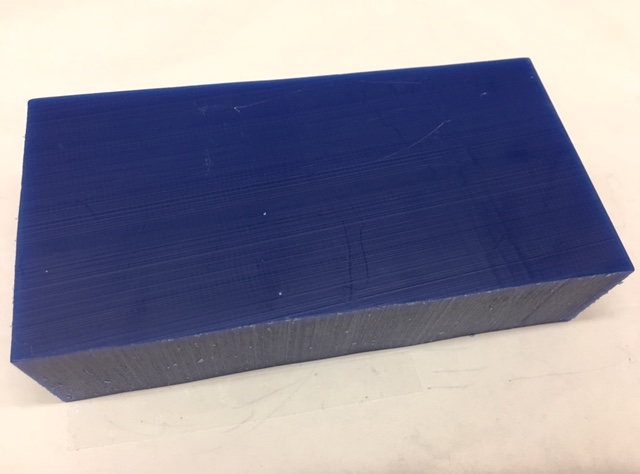
I decided to make a trinket with curved surfaces for this week to test the capabilities of the Shopbot and molding and casting techniques.
2D Drawing using Rhino
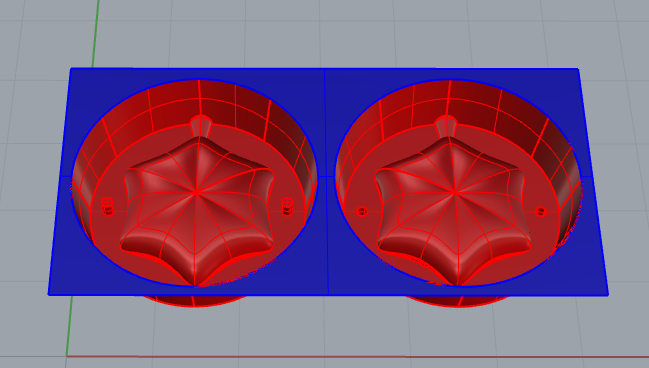
I started with modeling the positive (final product) in Rhino for machining with the Shopbot. There was learning curve to using Rhino to model 3D objects. Paloma helped me with the process of designing curved surfaces to make sure that the surfaces can be machined.
Some tips for modeling for easy machining and molding:
Add draft angles to the edges to make it easier for Mastercam to detect the surface because vertical edges don’t work very well. The draft angles also help with easy demolding.
Add a pour hole that is big enough and along a straight surface rather than a curved one. Adding an additional hole would help remove air from one pocket while we pour from the other.
The pour hole should preferably be at the highest point, so that there are no areas to which the cast material won’t flow into.
Using a combination of positive and negative surfaces to help with matching the two molds is better than adding the impression points that help match the two molds.
Measure the tools that you will be using, so you know what is the maximum depth possible with the tool without collisions. I used a cut depth of about an inch, so it worked well with both the ¼” flat end mill and the 1/8” in ball end mill. The bigger tool is used for the roughing pass and a scallop pass is used for the finer passes.
Generating Mastercam file
I imported the Rhino file into Mastercam as a .3dm file.I picked the Shopbot as the machine. And, added the stock dimensions. I then added toolpaths for one roughing pass, and one scallop pass.
Jenn helped with making sure that I had the right tolerances, tool dimensions, cut depth for the initial pass, and maximum stepover. She also helped with setting up the file for Shopbot, and machining the mold.
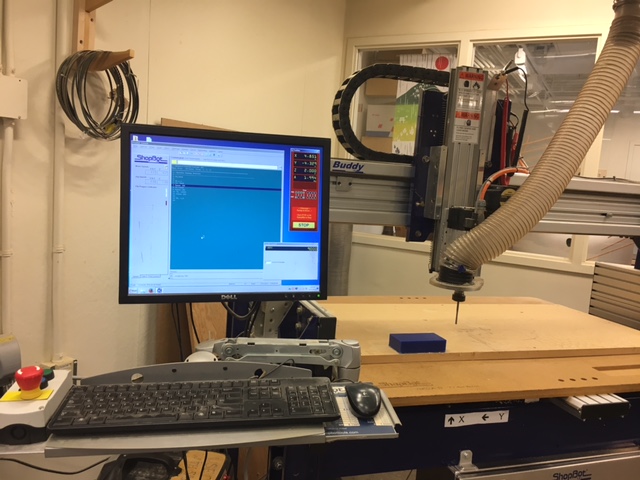
We first starting with initilizing the spindle by running the warm spindle gcode. This took about 10 minutes.
Machining the mold itself took about 35 minutes with the tool change in between. I ran the roughpass with the 1/4 inch flat endmill and then the scallop pass with the 1/8 inch ball end mill.
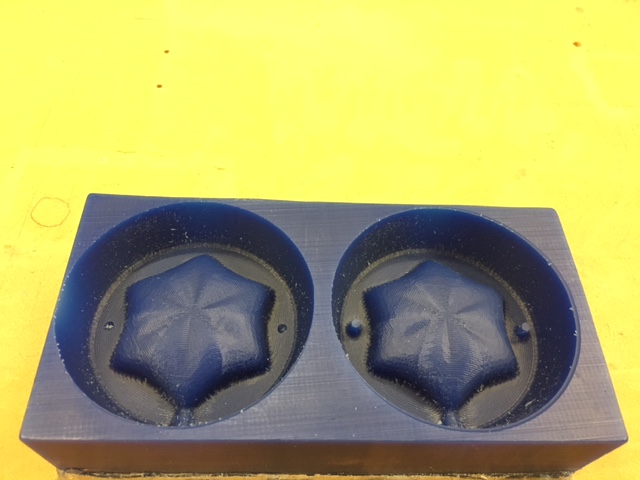
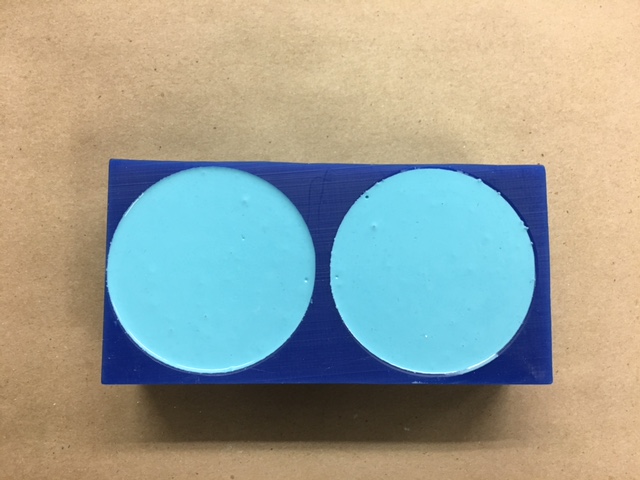
The finished mold looked great.
I then proceeded to measure and pour the Smooth-on Silicone Rubber mixture of the two liquids provided in a 1:1 ratio. I then tapped the mold for about 2-3 minutes to make sure all the trapped air rose to the top.
It took about 4 hours for the mold to cure. Once it cured, it took me less than a minute to get the mold out.

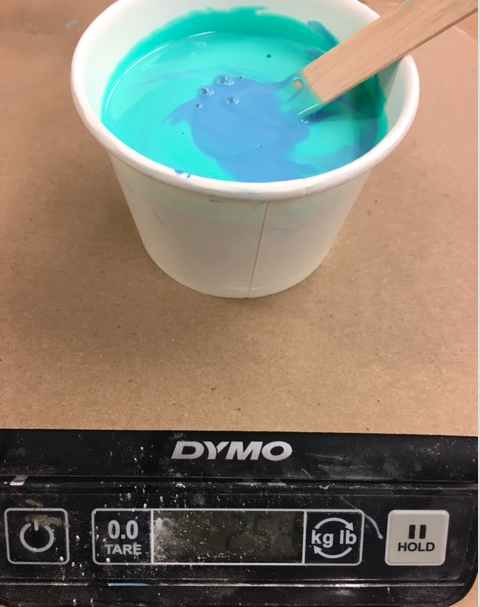
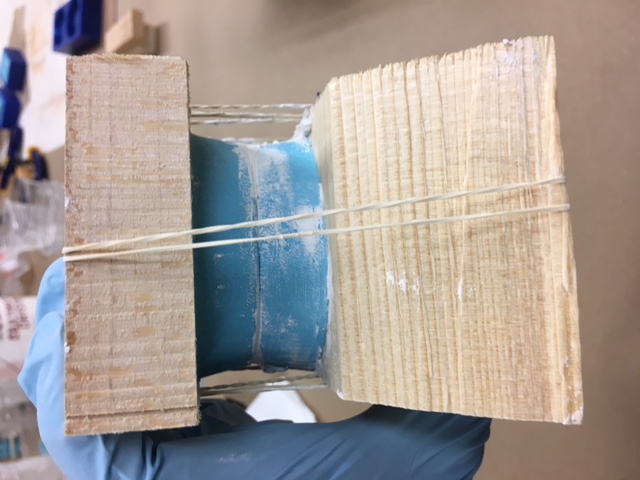
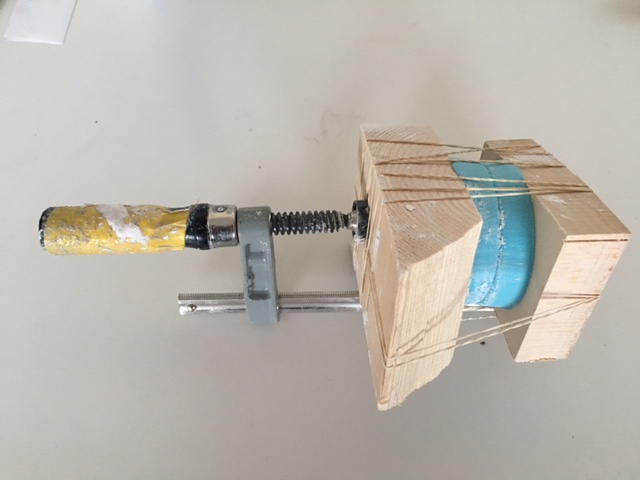
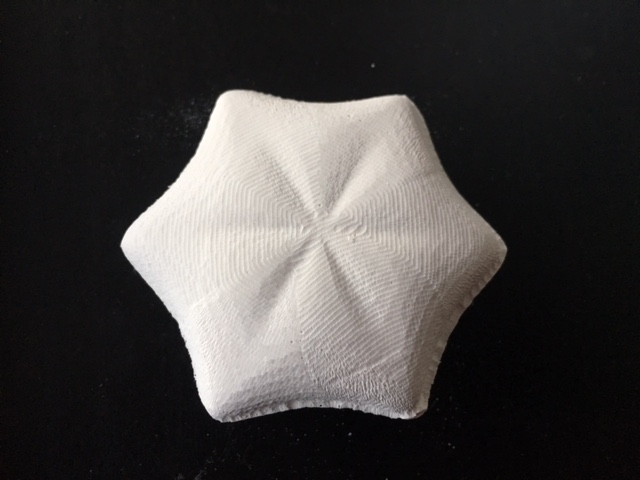
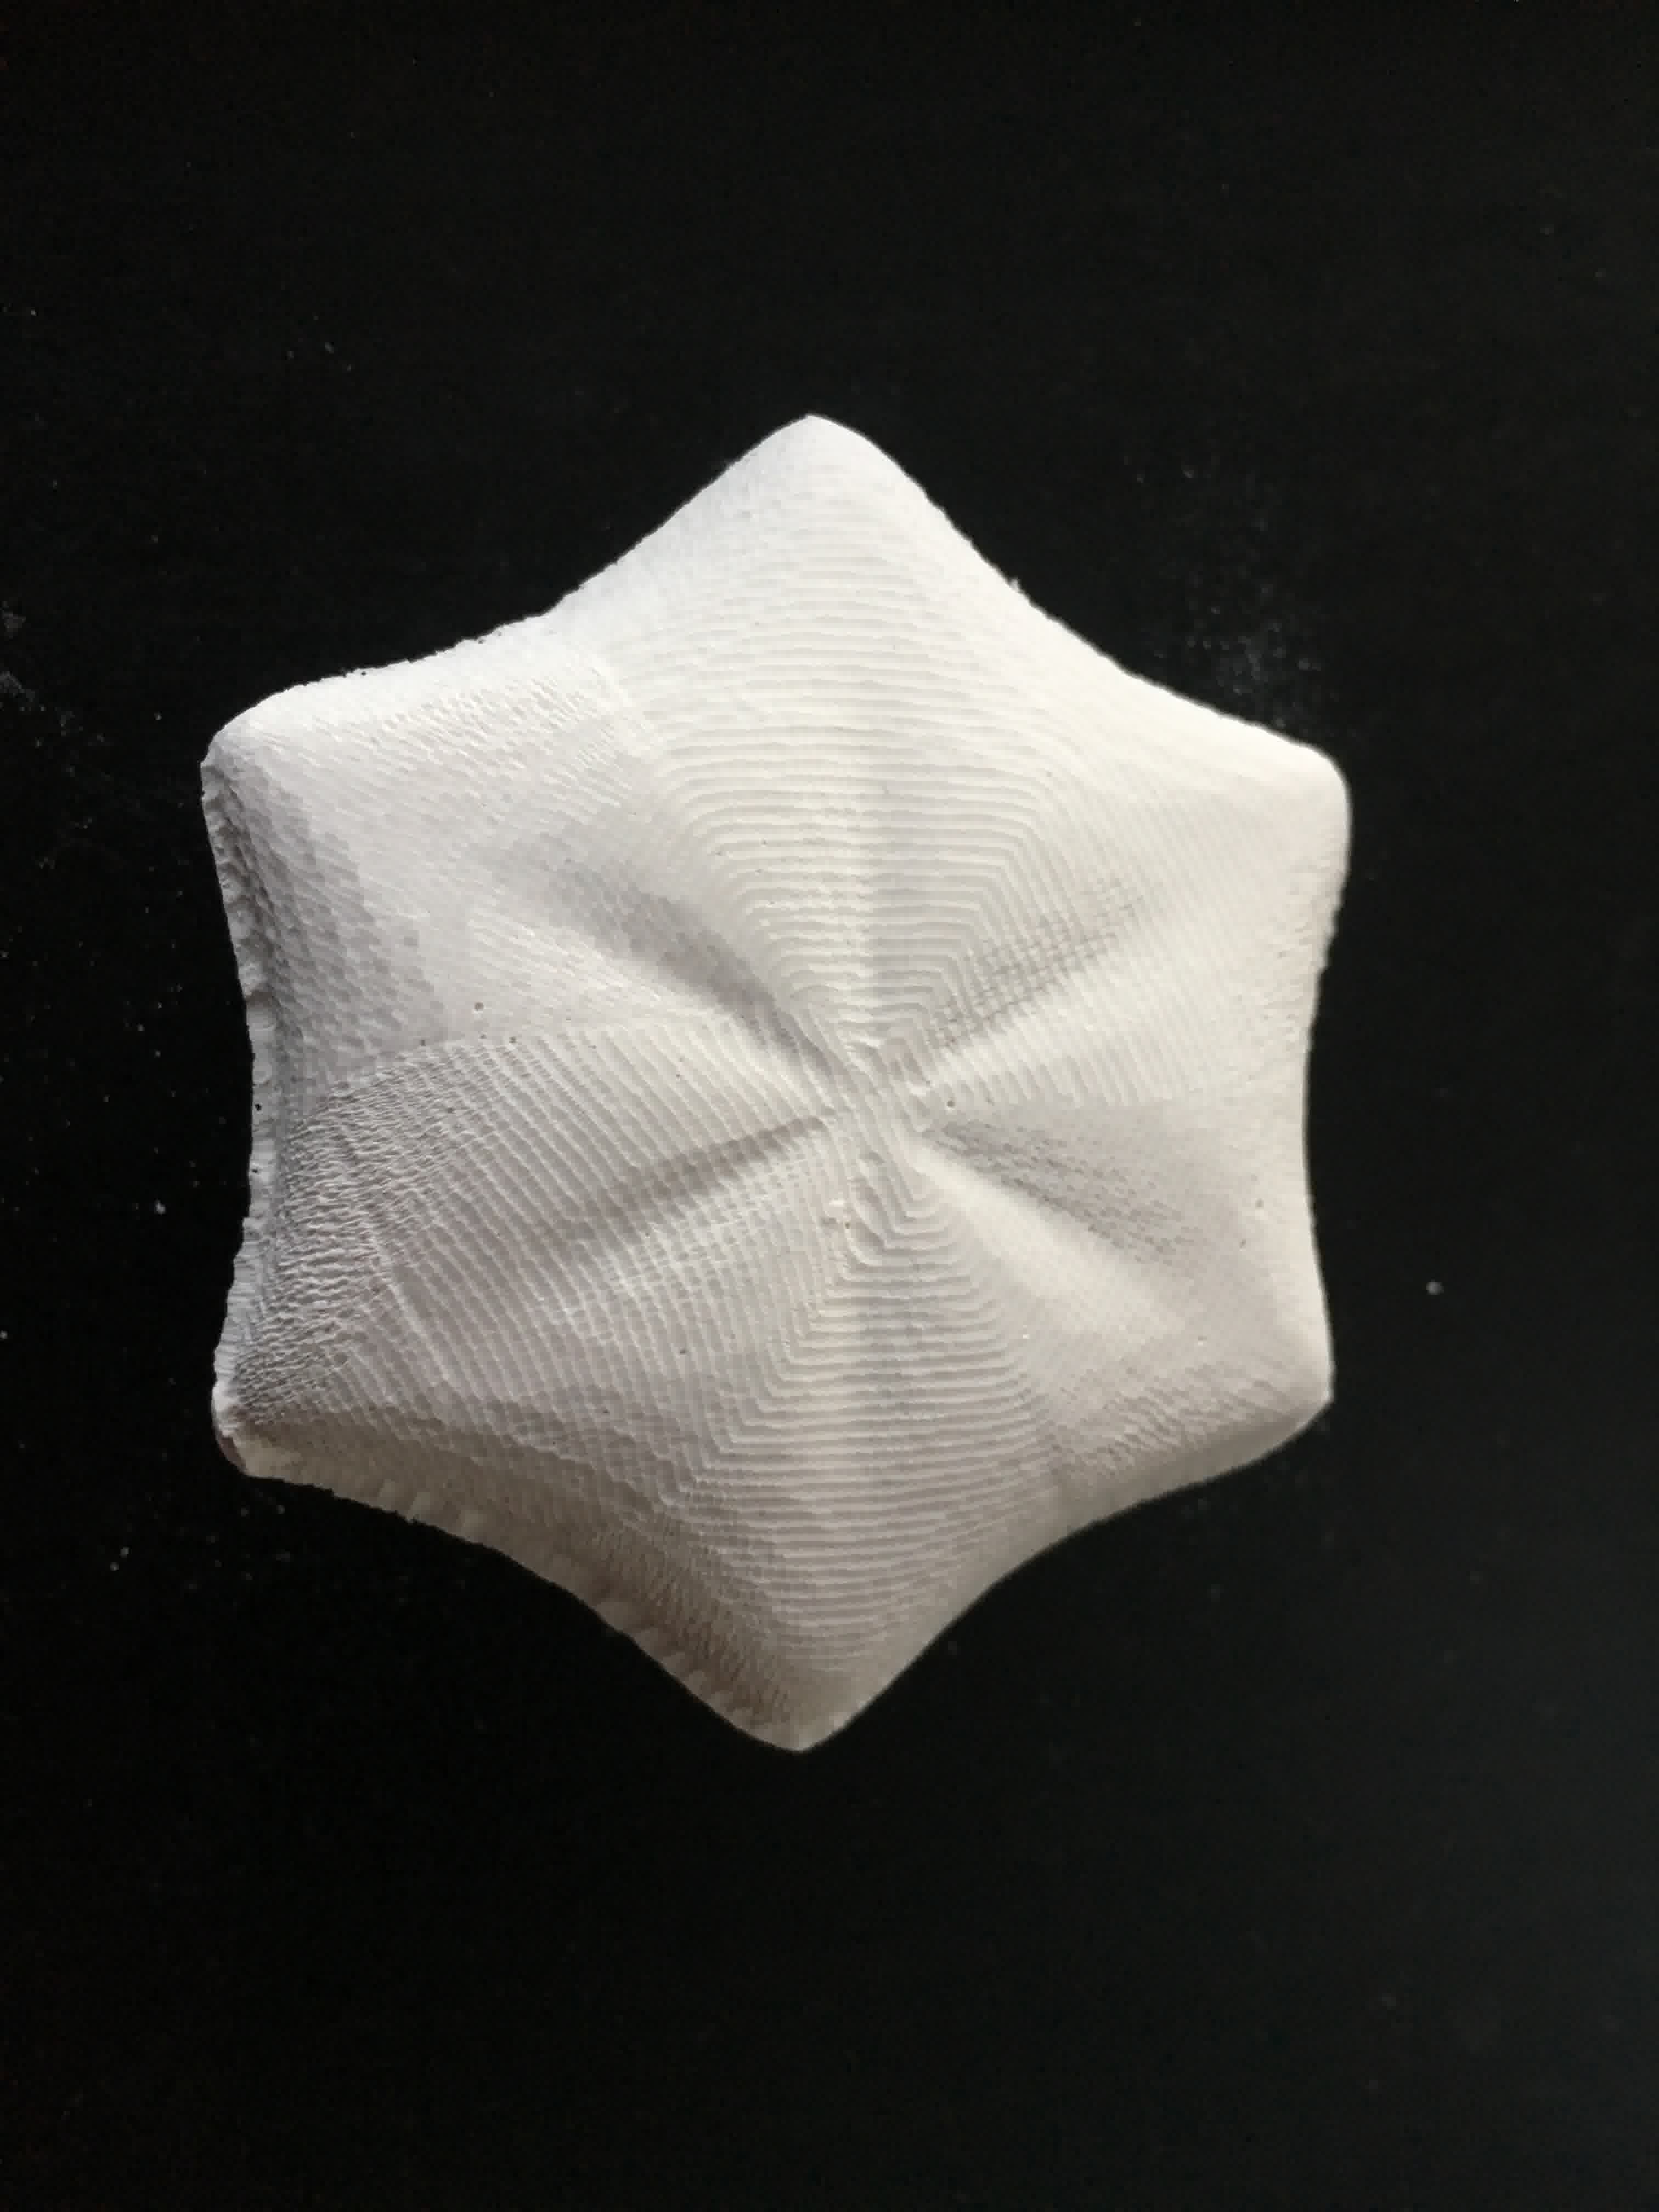
My biggest challenge was being able to pour through the small pour hole that I had designed. I soon realized that it was not going to work. I then filled both the halves separately and then snapped them together. I poured a little more drystone mixture through the pour hole to make sure there were enough to fill the mold. I then clamped the two halves using some scrap wood and rubber bands. The mold didn’t seem to hold together very well. So, I used a C-clamp to hold more tightly. I then mixed drystone with water in a 5:1 ratio and mixed rigorously as mentioned in the instructions. It was a nice thick but pourable mixture.
The final product turned out pretty good, and came right out of the mold.
The final product turned out pretty good, and came right out of the mold.
How to Make (Almost) Anything | Fall 2017