This week we were supposed to program our boards from the electronics design week, so of course I needed to make a non-burnt board before I could get to programming. I decided to take another shot at making a vinyl cut board, so I redesigned my traces in eagle, cut the copper, and stuck the traces onto a rather unconventional medium for a pcb: a binder clip. Soldering it was not too bad, although I probably took a year off of my life by clipping it onto the base of some helping hands. It naturally waited until I was intensely focused on soldering before launching itself past my head and onto the floor. Eventually however, I managed to solder everything.

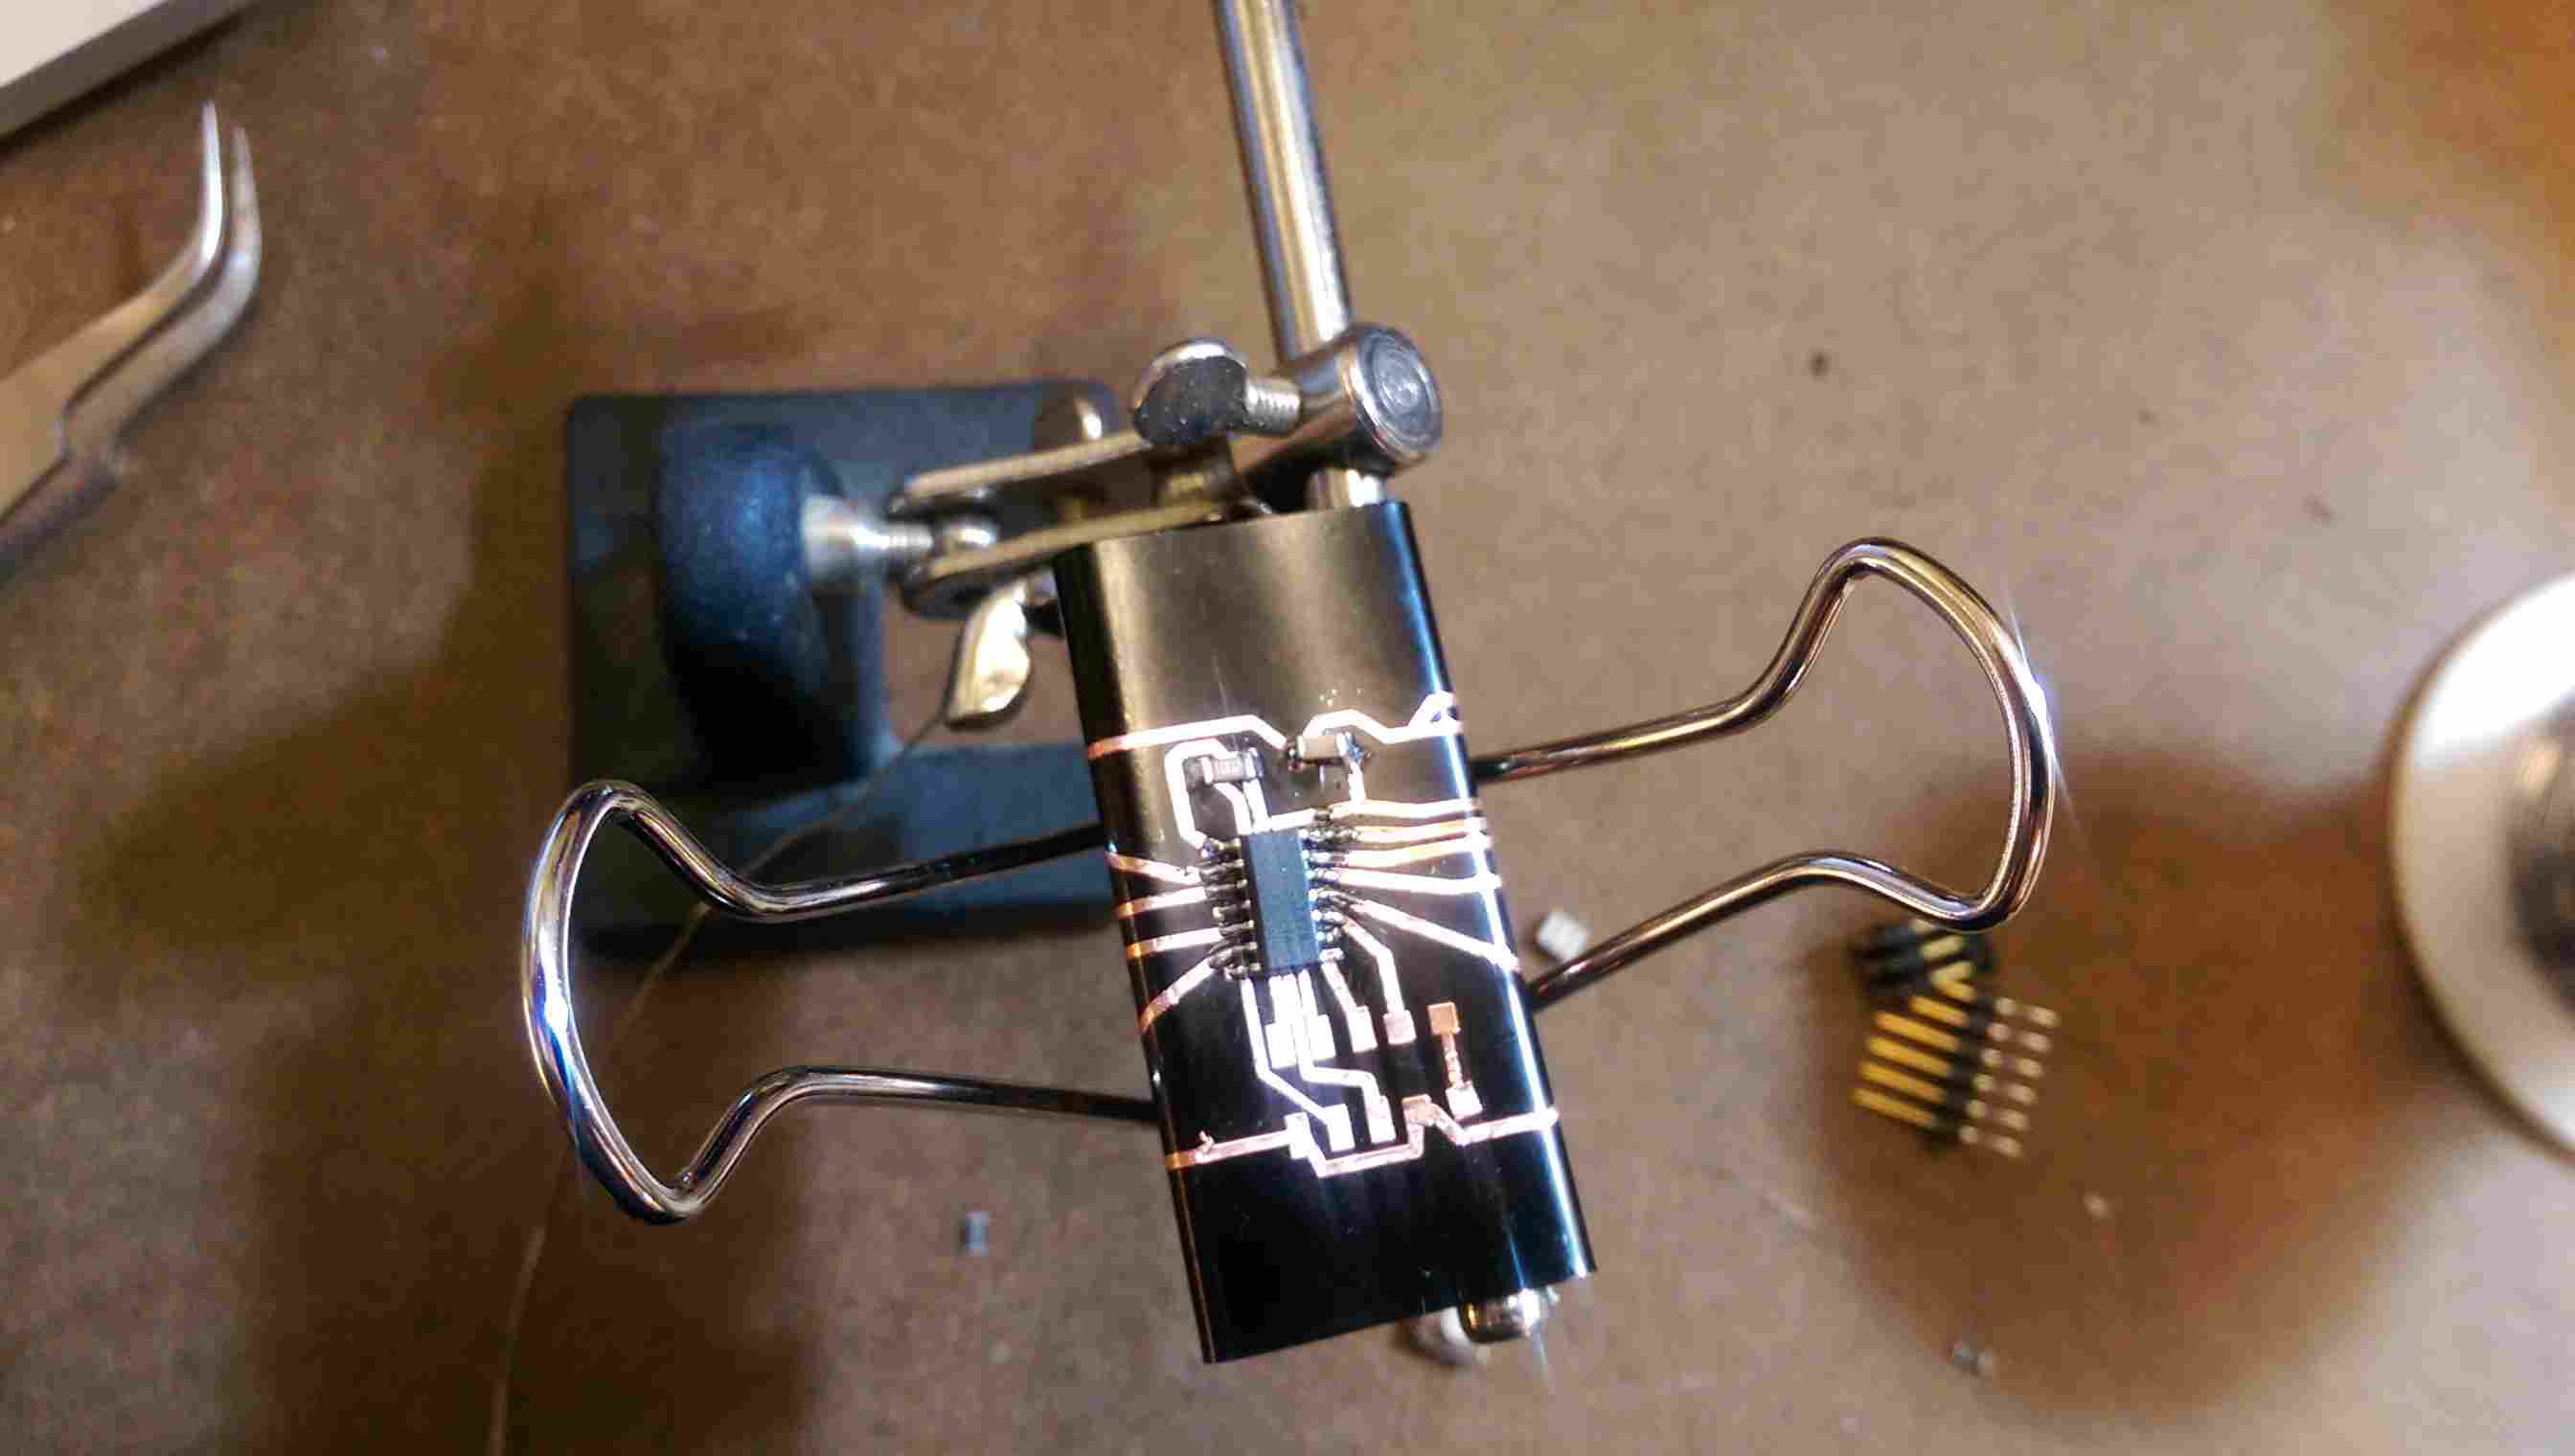
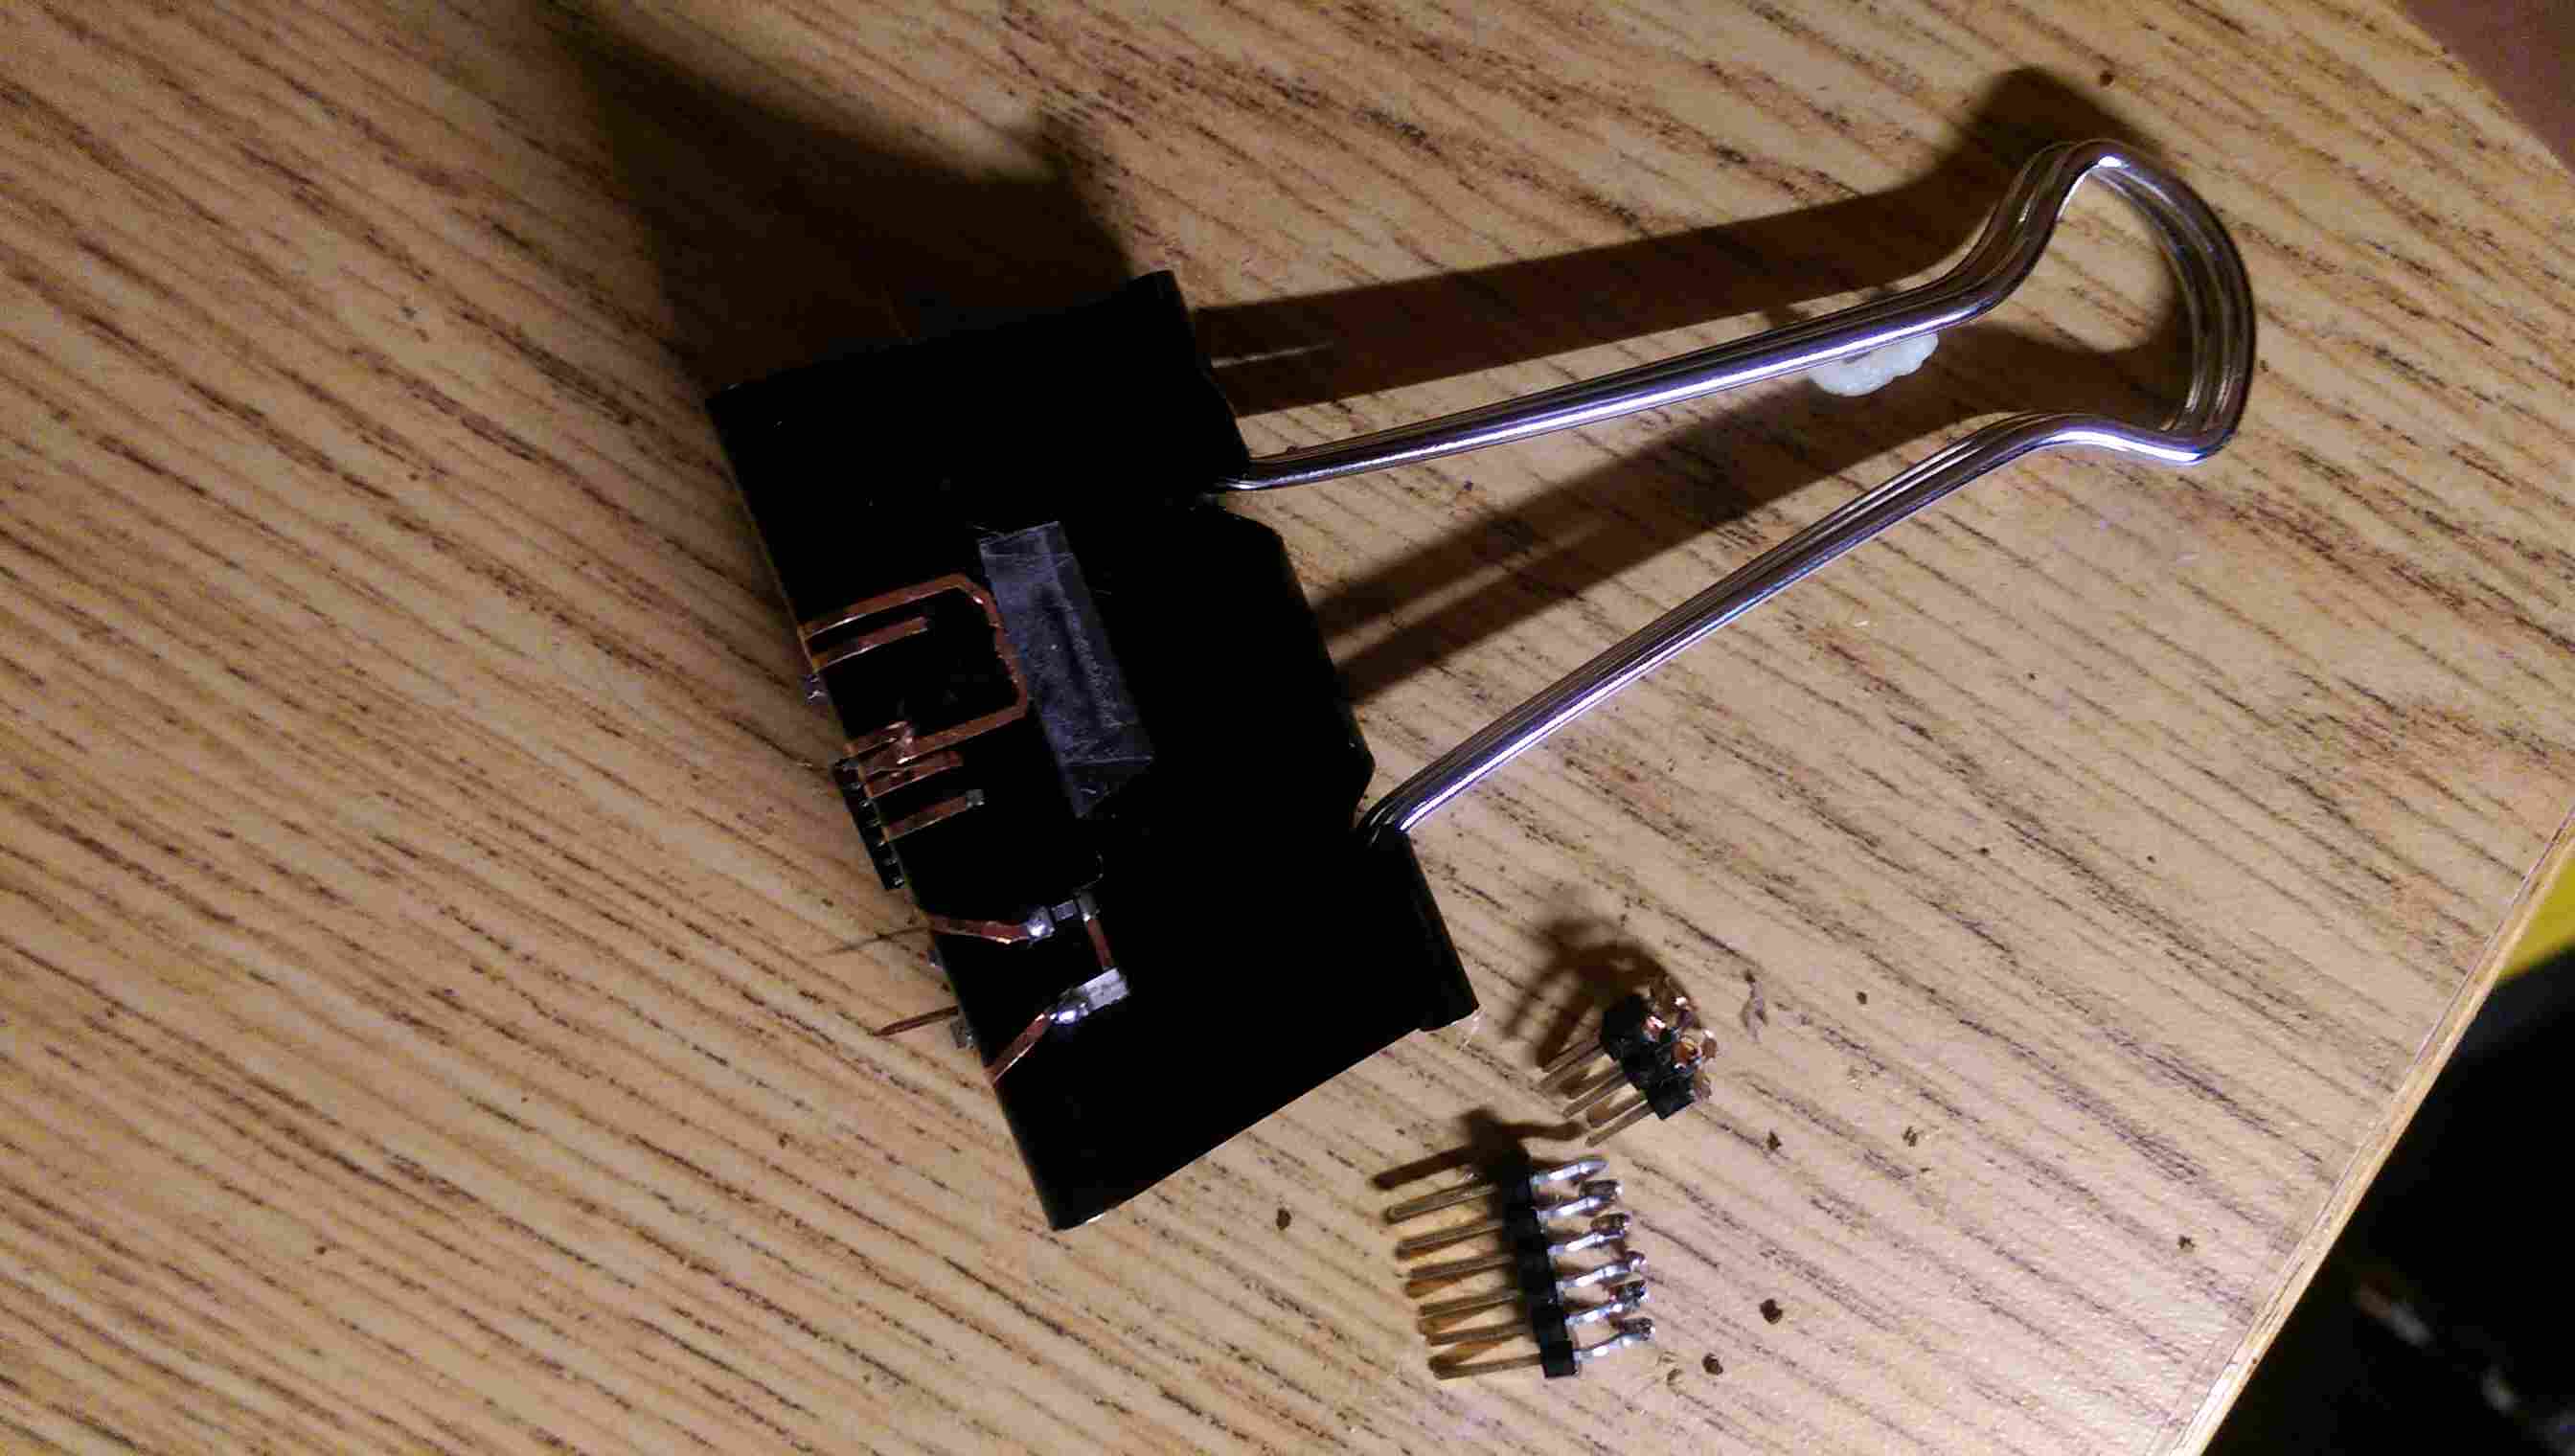
When I tried to program it however, I hooked it up to the cords, tried to run the program, got an error, and tried to pull off one of the cords to switch the orientation. Naturally, the header ripped off as well, taking a chunk of the traces with it. So much for that board...
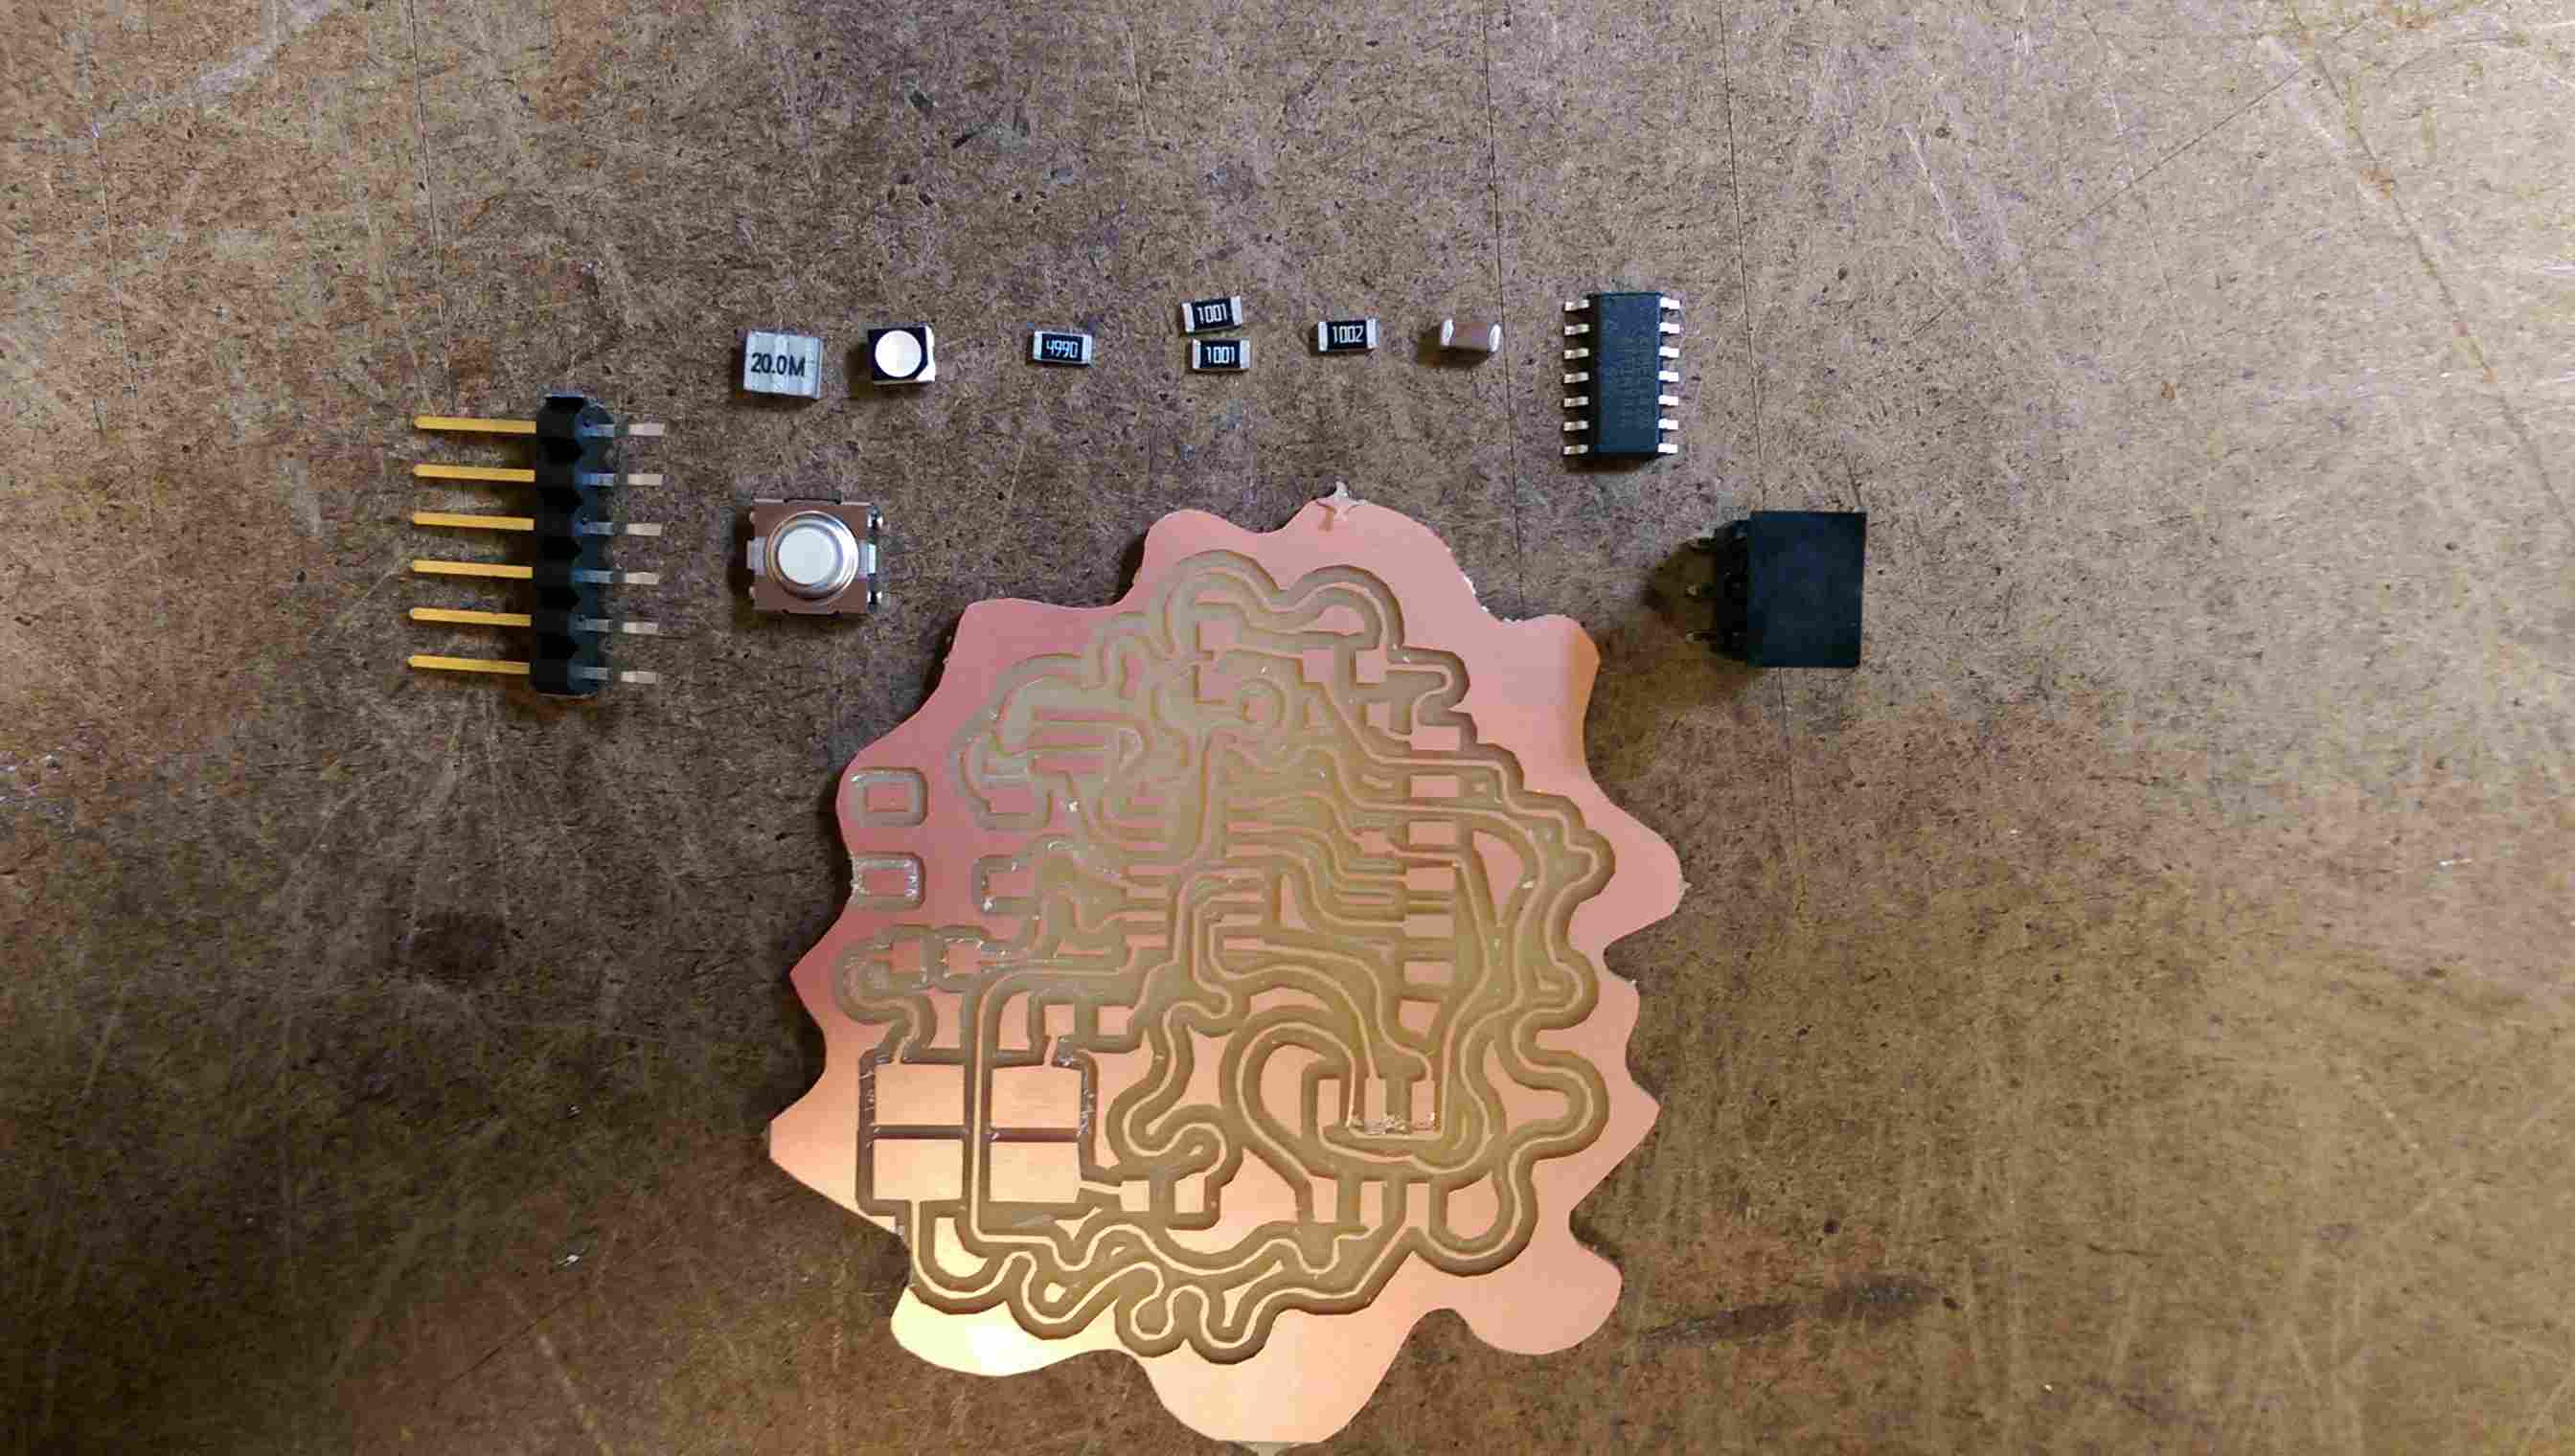
For my next attempt, I decided to be less ambitious with machining and stick to milling, but I wanted to test out a design for the remote control for my final project, using four buttons instead of one. I then spent a couple days digging deep into brogrammer-laden corners of the internet trying to find some explanation of how to use an Attiny pin for both programming and output, as Neil said was possible. Most of what I found confirmed that it was indeed possible, but my findings were inconsistent about how to do it, both in terms of programming and what resistors to use. I also tried reading the data sheet, which, other than a few diagrams, was basically like reading a foreign language for me. Eventually, I gave up and decided to postpone that challenge for a future week. I instead simplified my board a bit to use a variation of my previous one with an rgb led instead of three white ones. At this point, I was feeling pretty sick of electronics, so I jazzed it up a bit with wavy traces instead of straight ones.
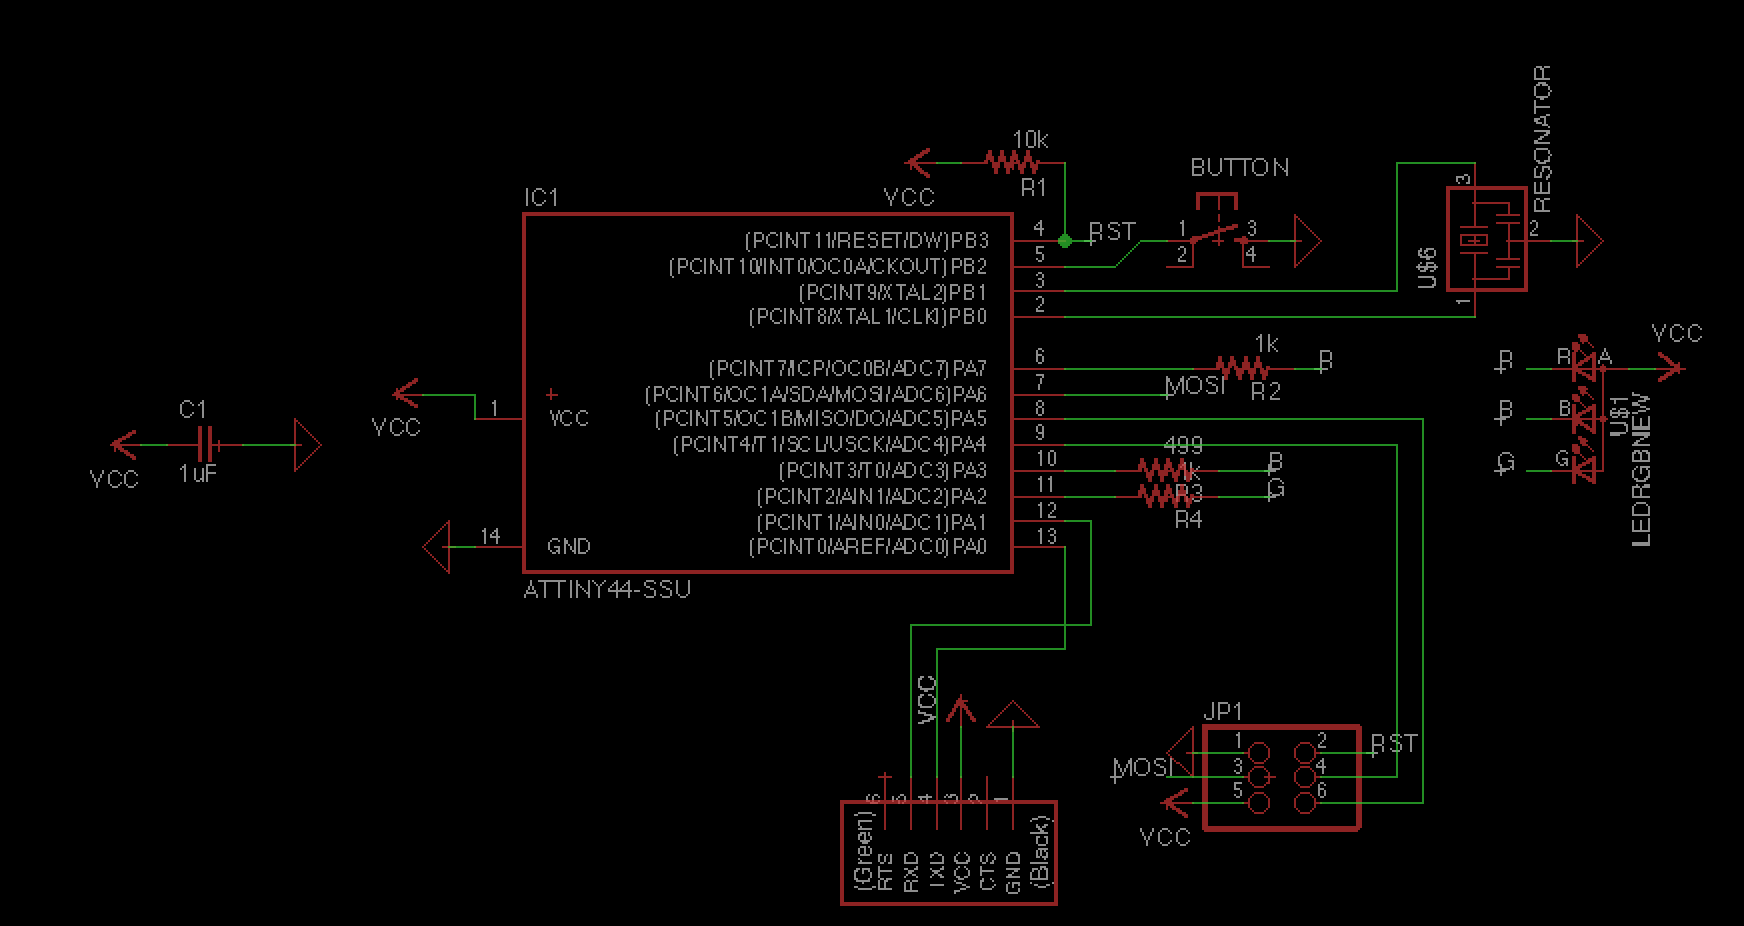
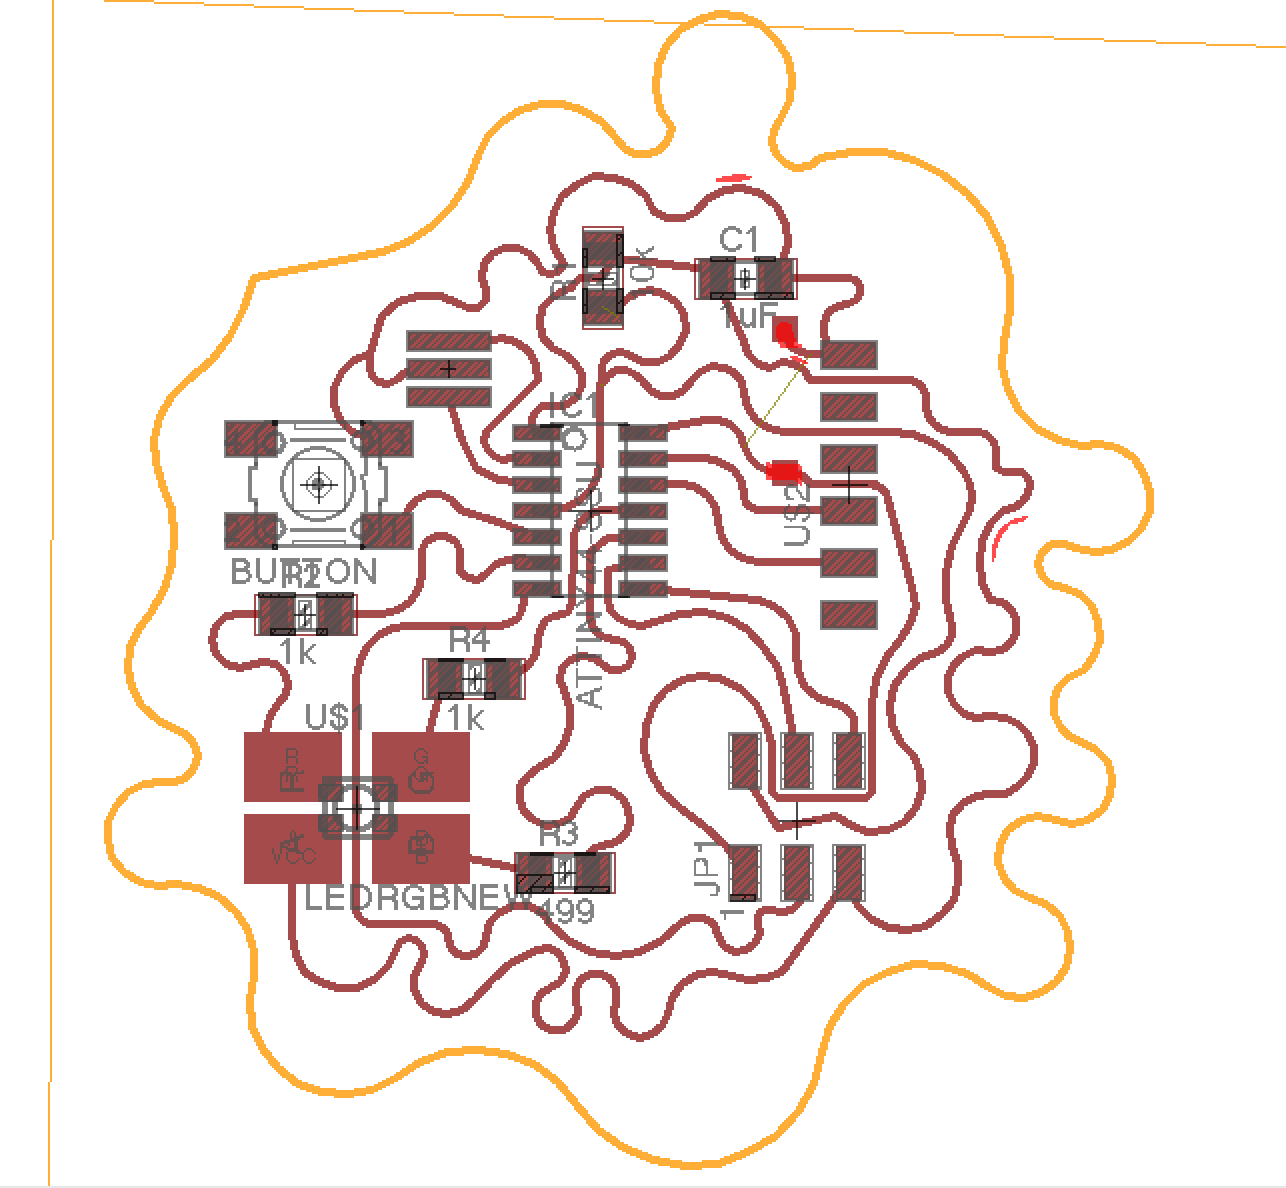
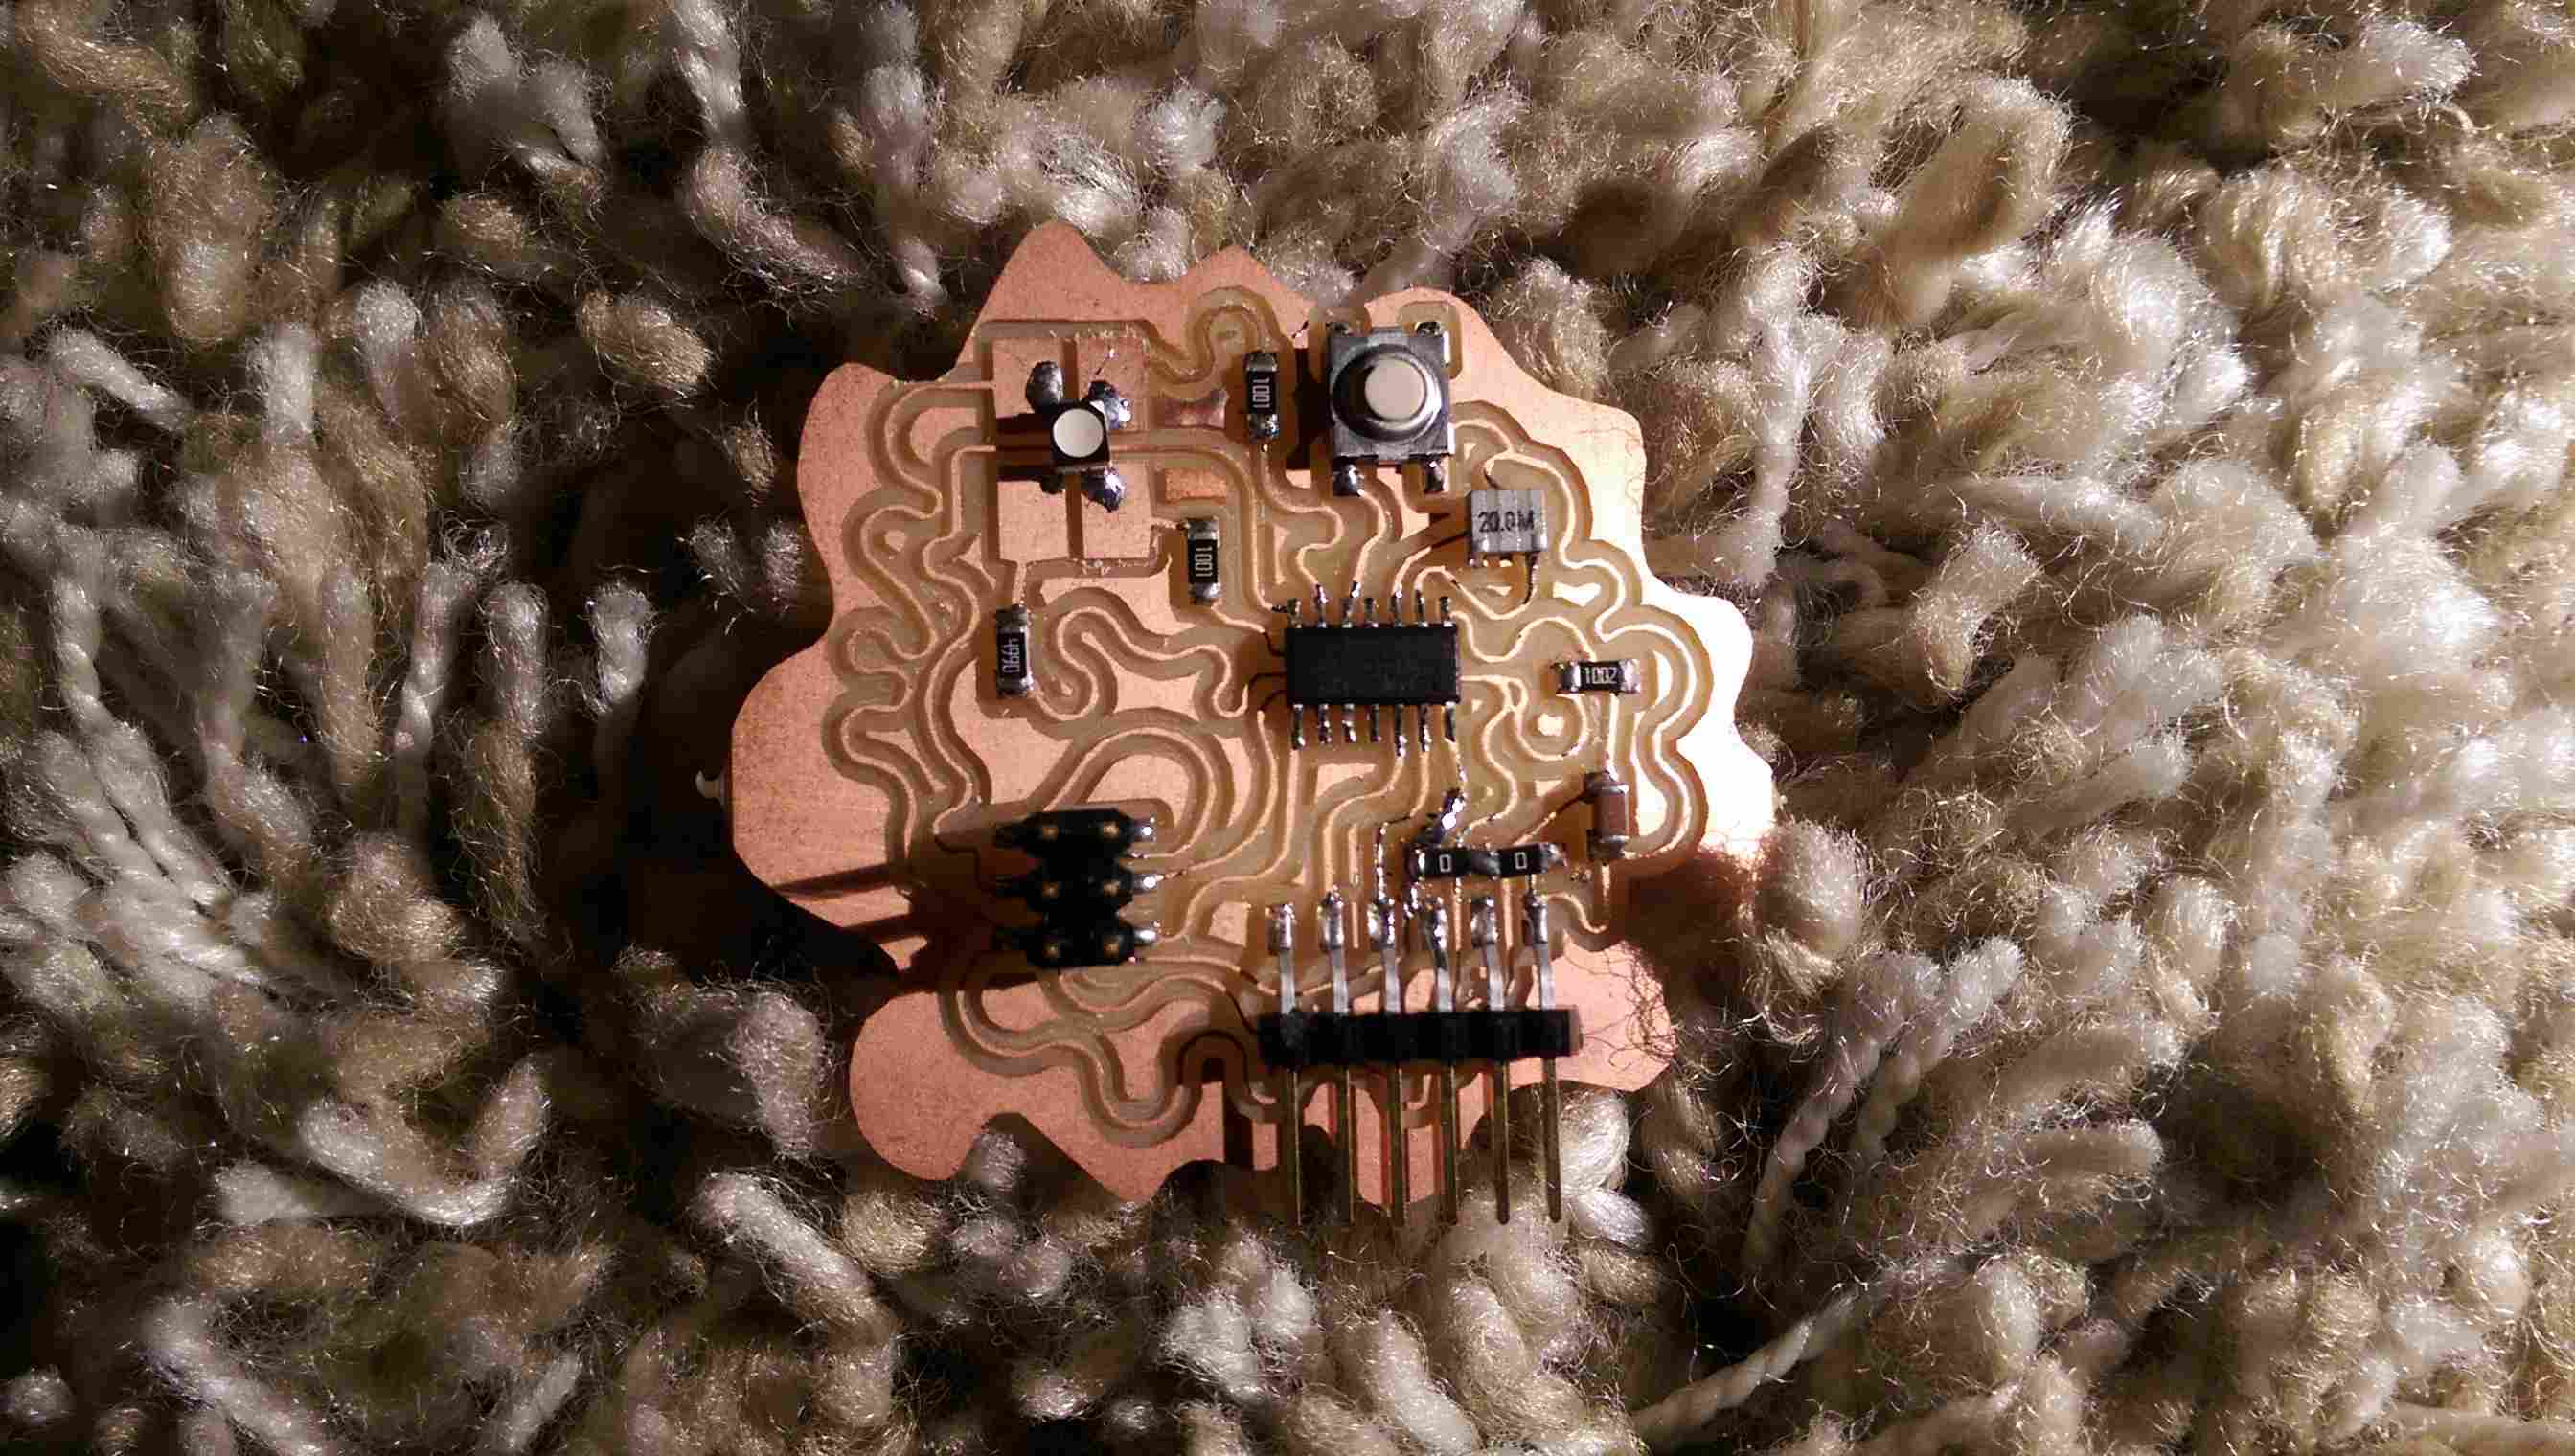
Of course, there was one trace that wouldn't fit in a single-sided pcb, so I left extra pads to add a jumper. I then milled and stuffed the board. The only major setback then was figuring out the orientation of the rgb led, but I found the part in the fab inventory and found an excellent diagram online. I used Dan Chen's C code as a test, and it seemed to work reasonably well, because my board began flashing rainbow colors.

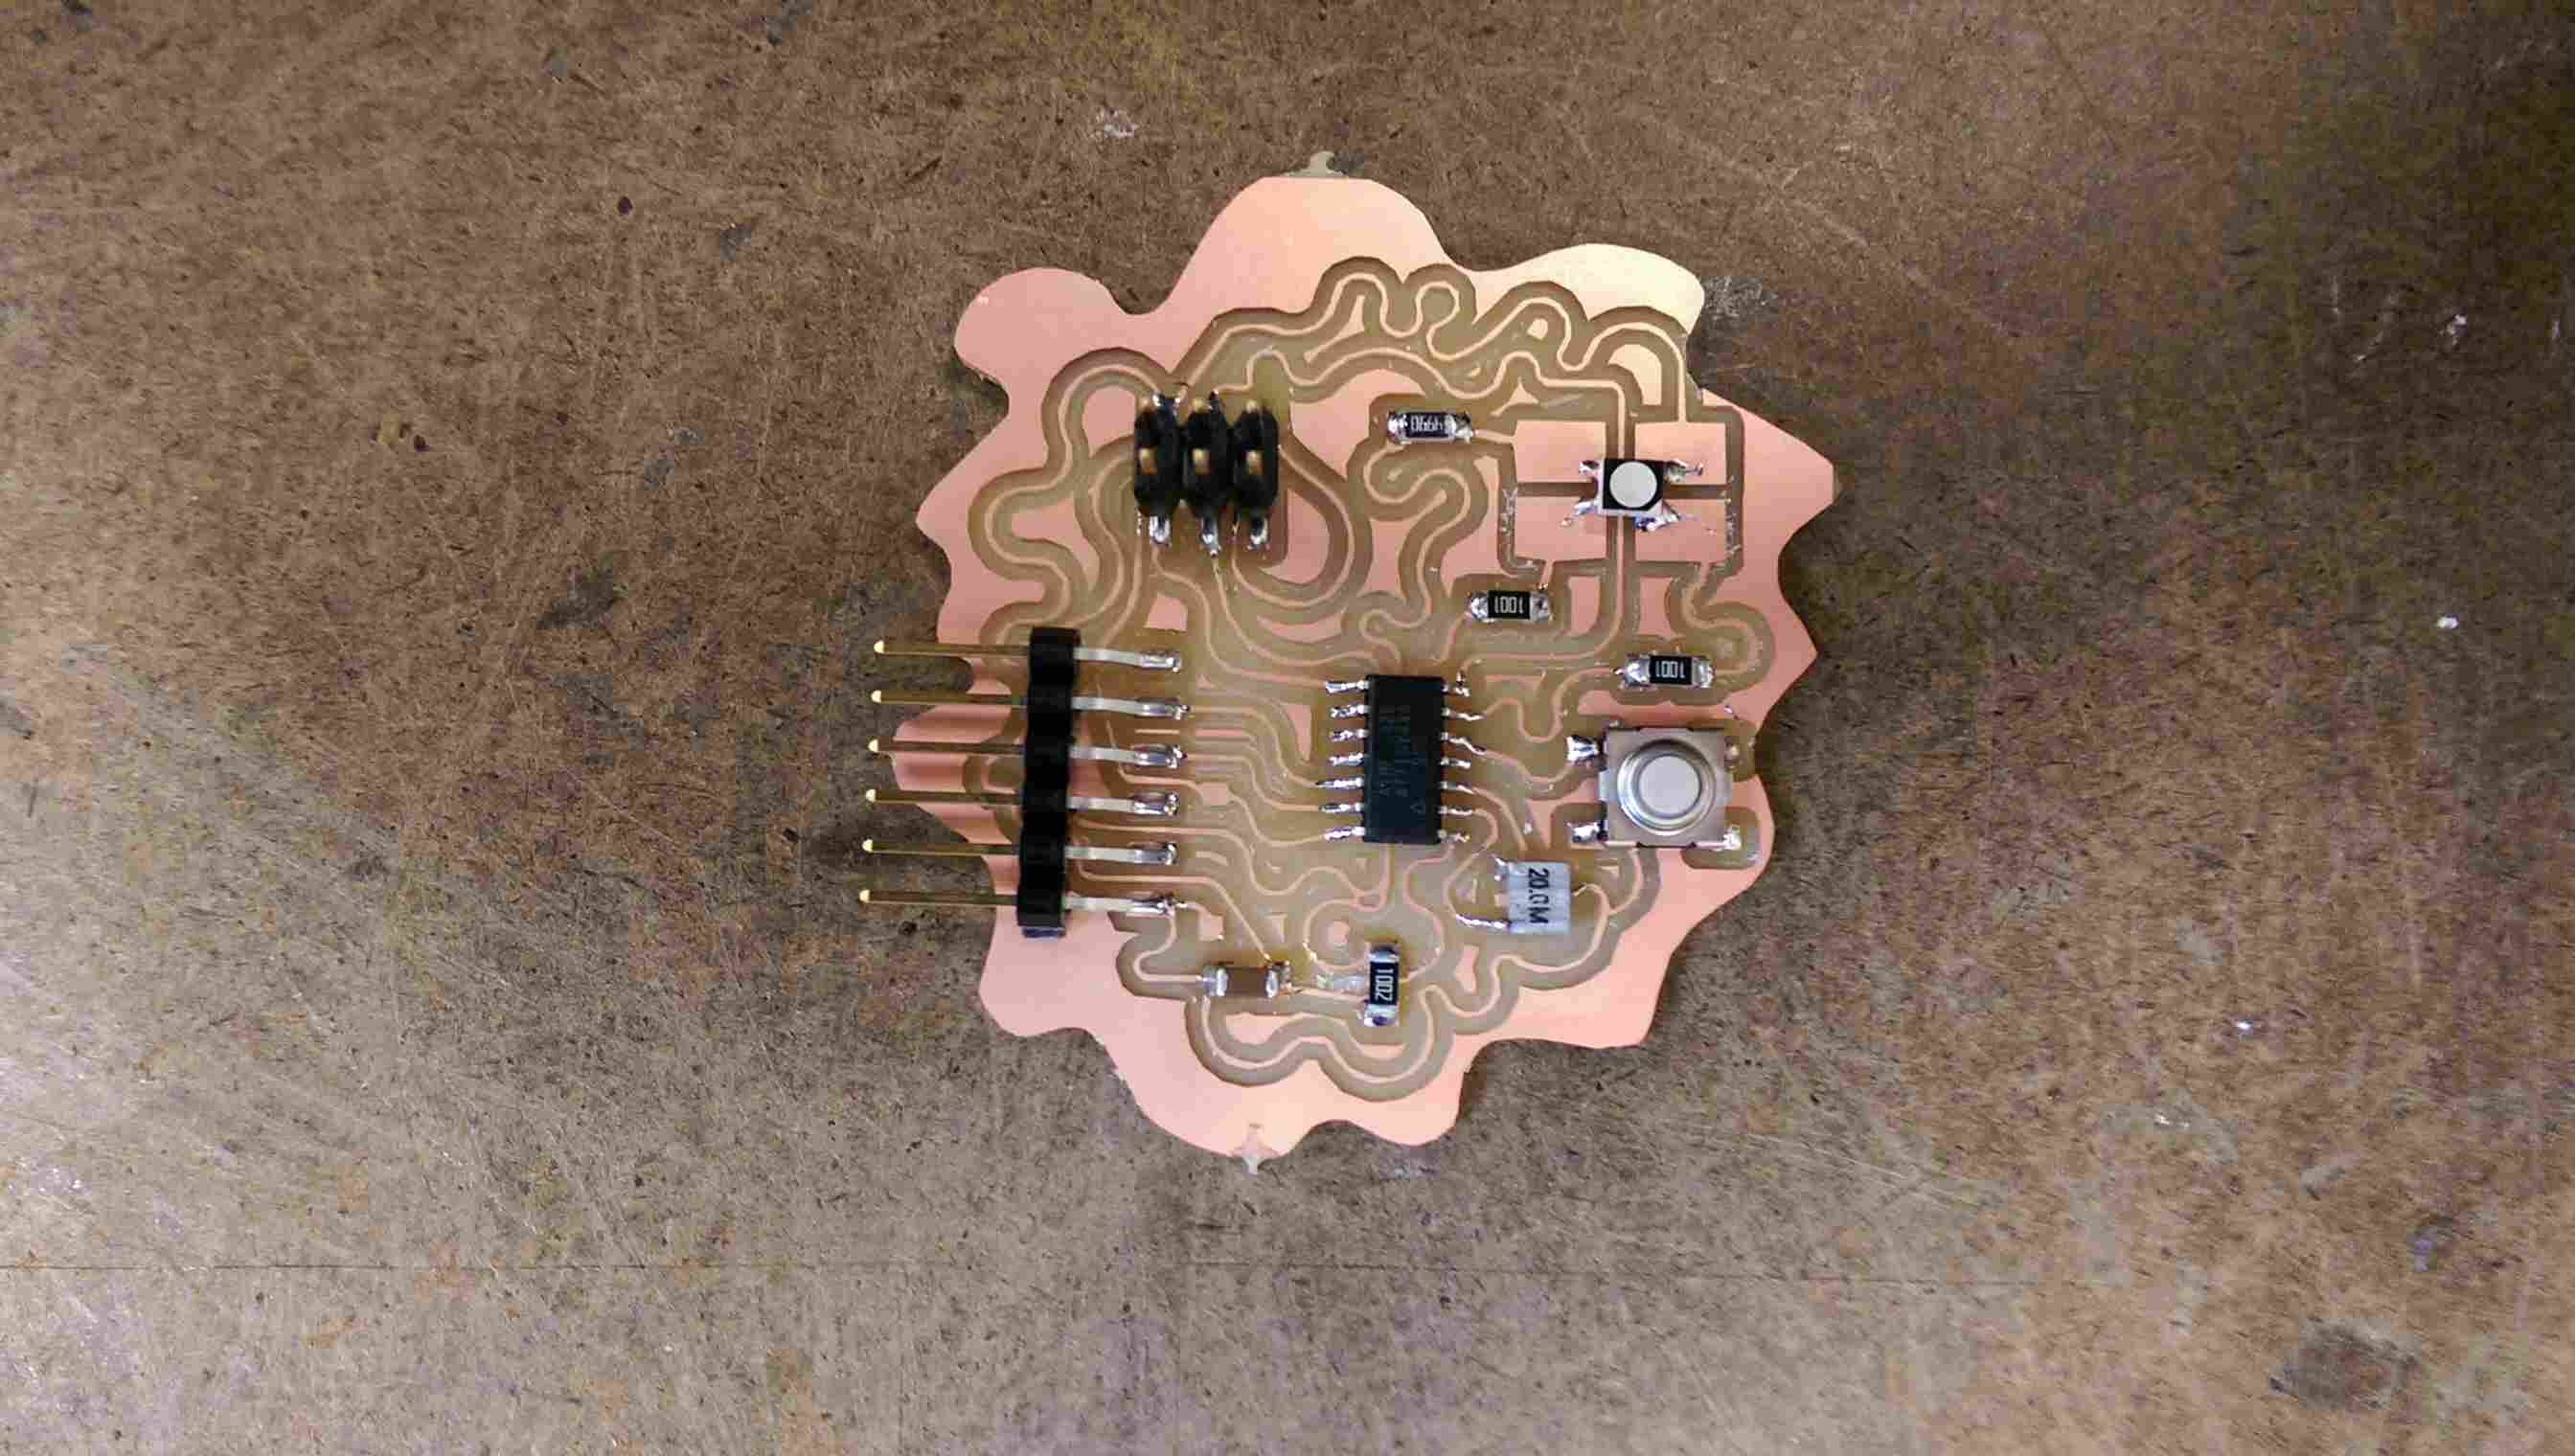
But when I got home and tested it with my own code, first in the arduino IDE, I realized that I had forgotten to solder the jumper, so I had to wait until the next day to return to the shop and fix it. That proved more challenging than expected. I ended up using two 0.0 ohm resistors, but I think I messed them up somehow, because I ran into more problems later when I brought it home to program.
For my actual program, I started in the arduino ide because the libraries make more sense to a non-coder like myself. I wrote up a code that I was fairly confident about. It would use the button to switch from cool mode to warm mode. Cool mode would be a quickly flashing blue designed to energize the user. Warm mode would be a slow fade to yellow to calm the user down. I would need to test it and adjust the timing, but unfortunately the arduino ide had problems communicating with the programmer, so I switched to C instead.
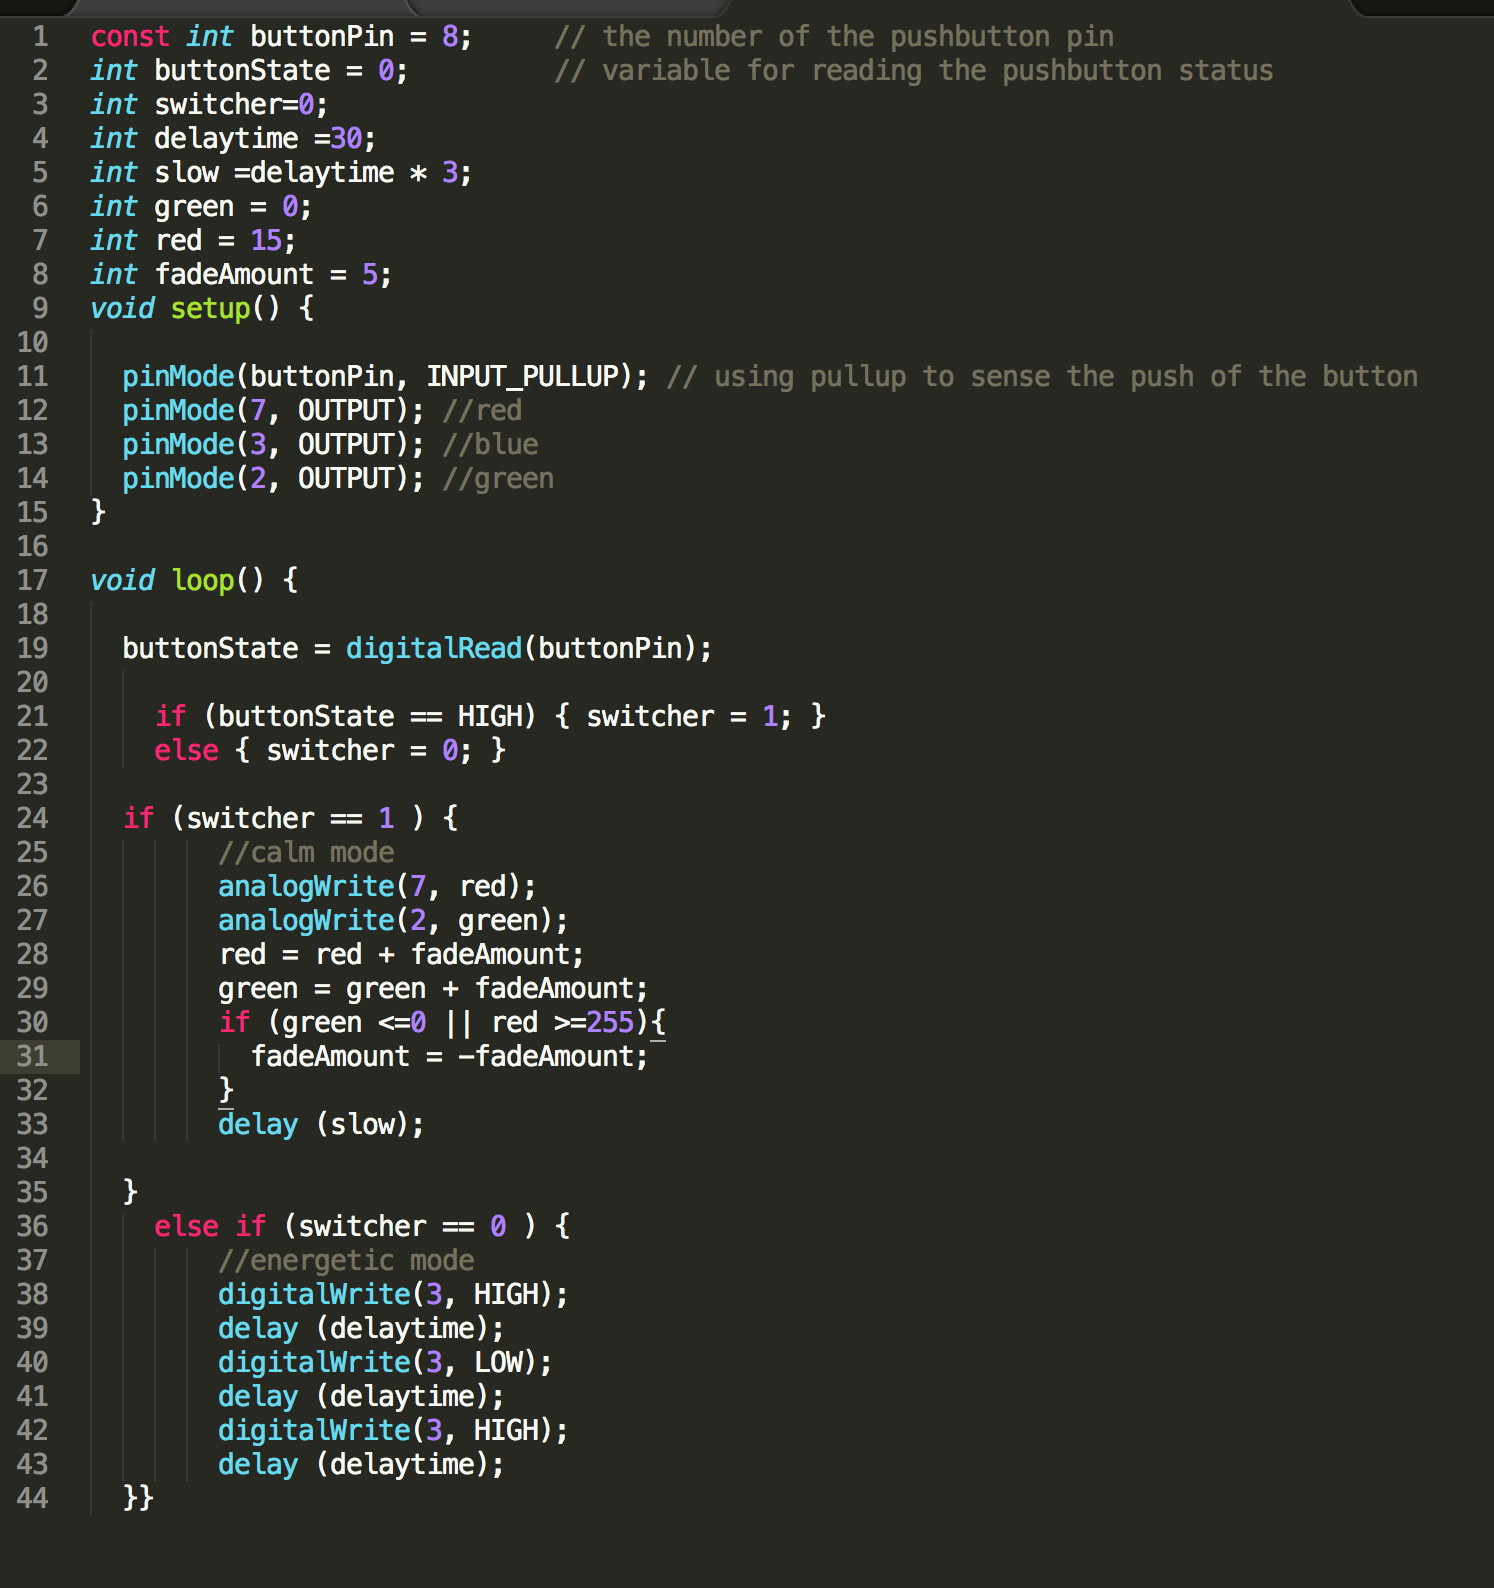

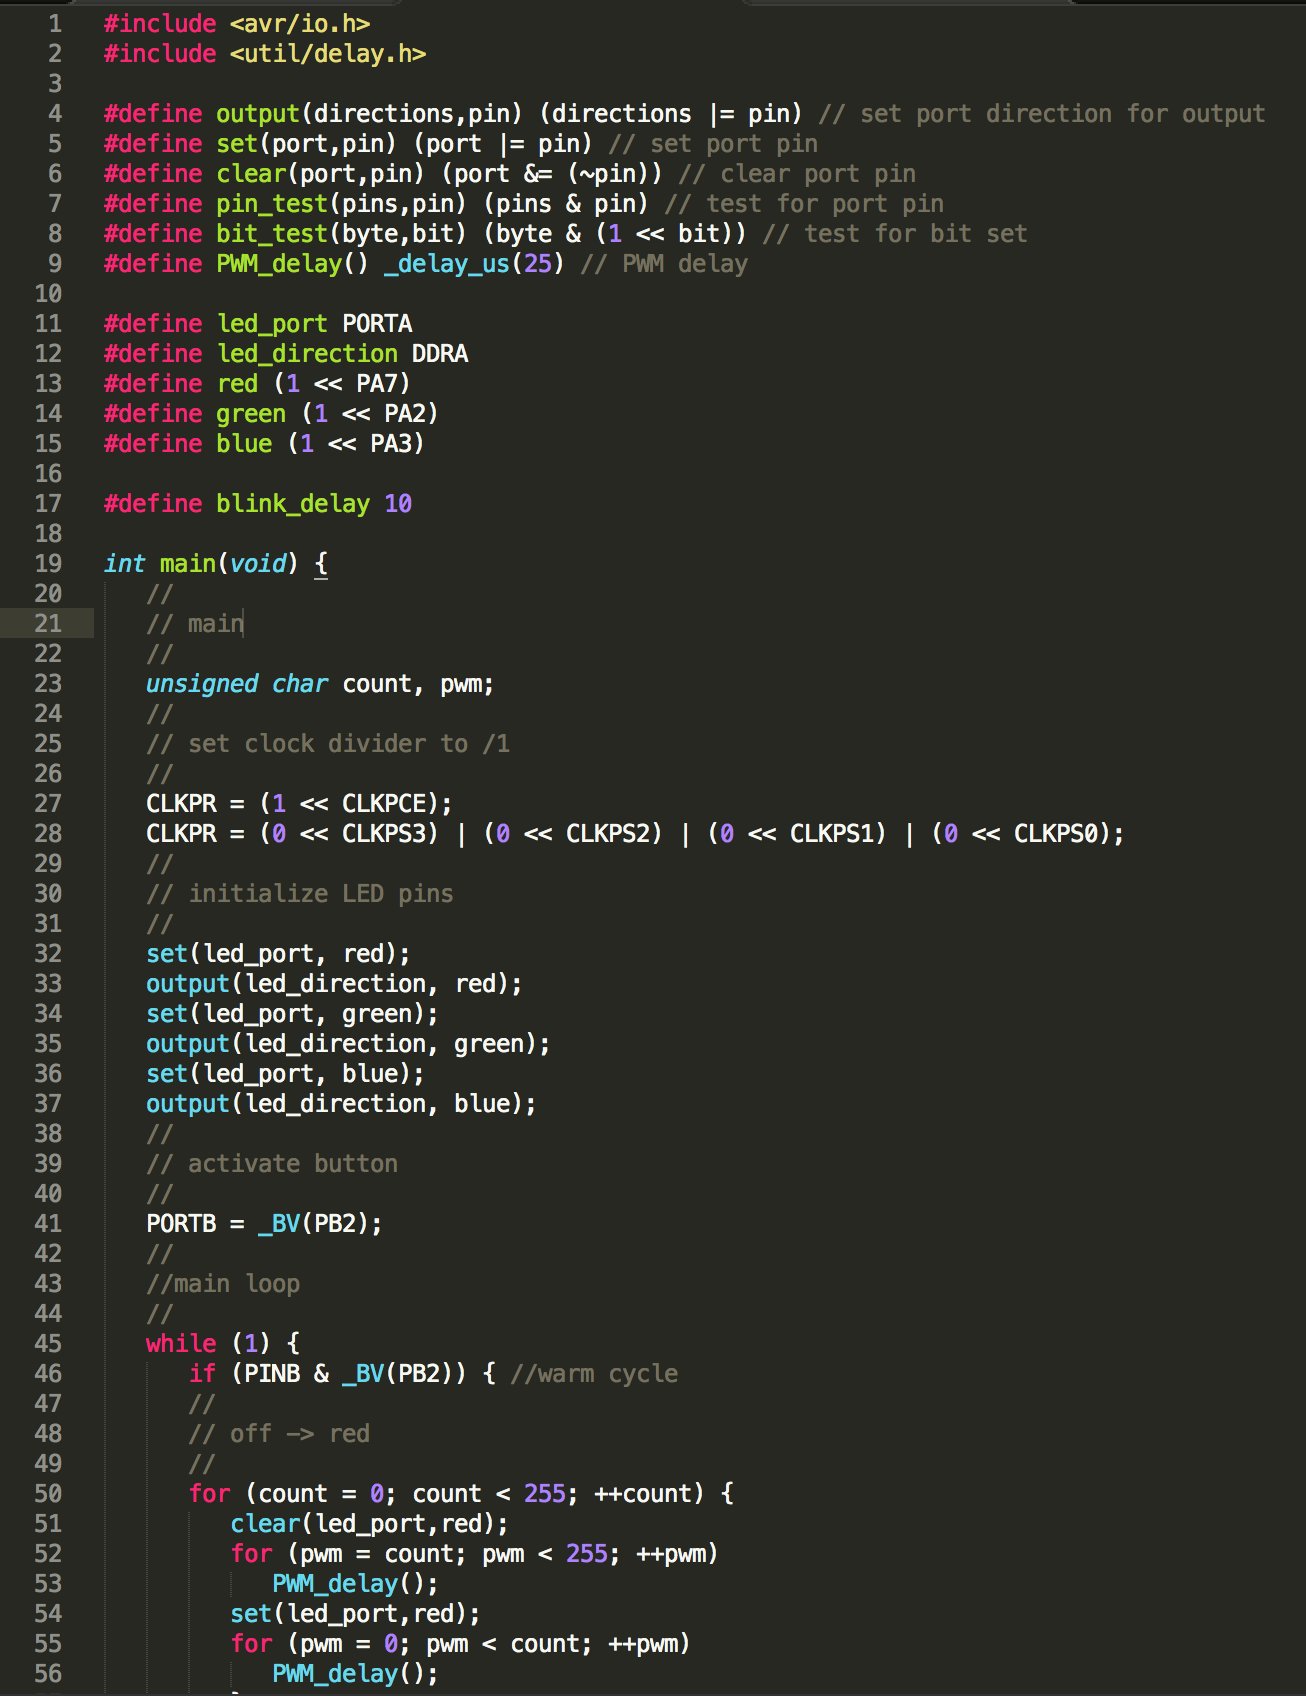
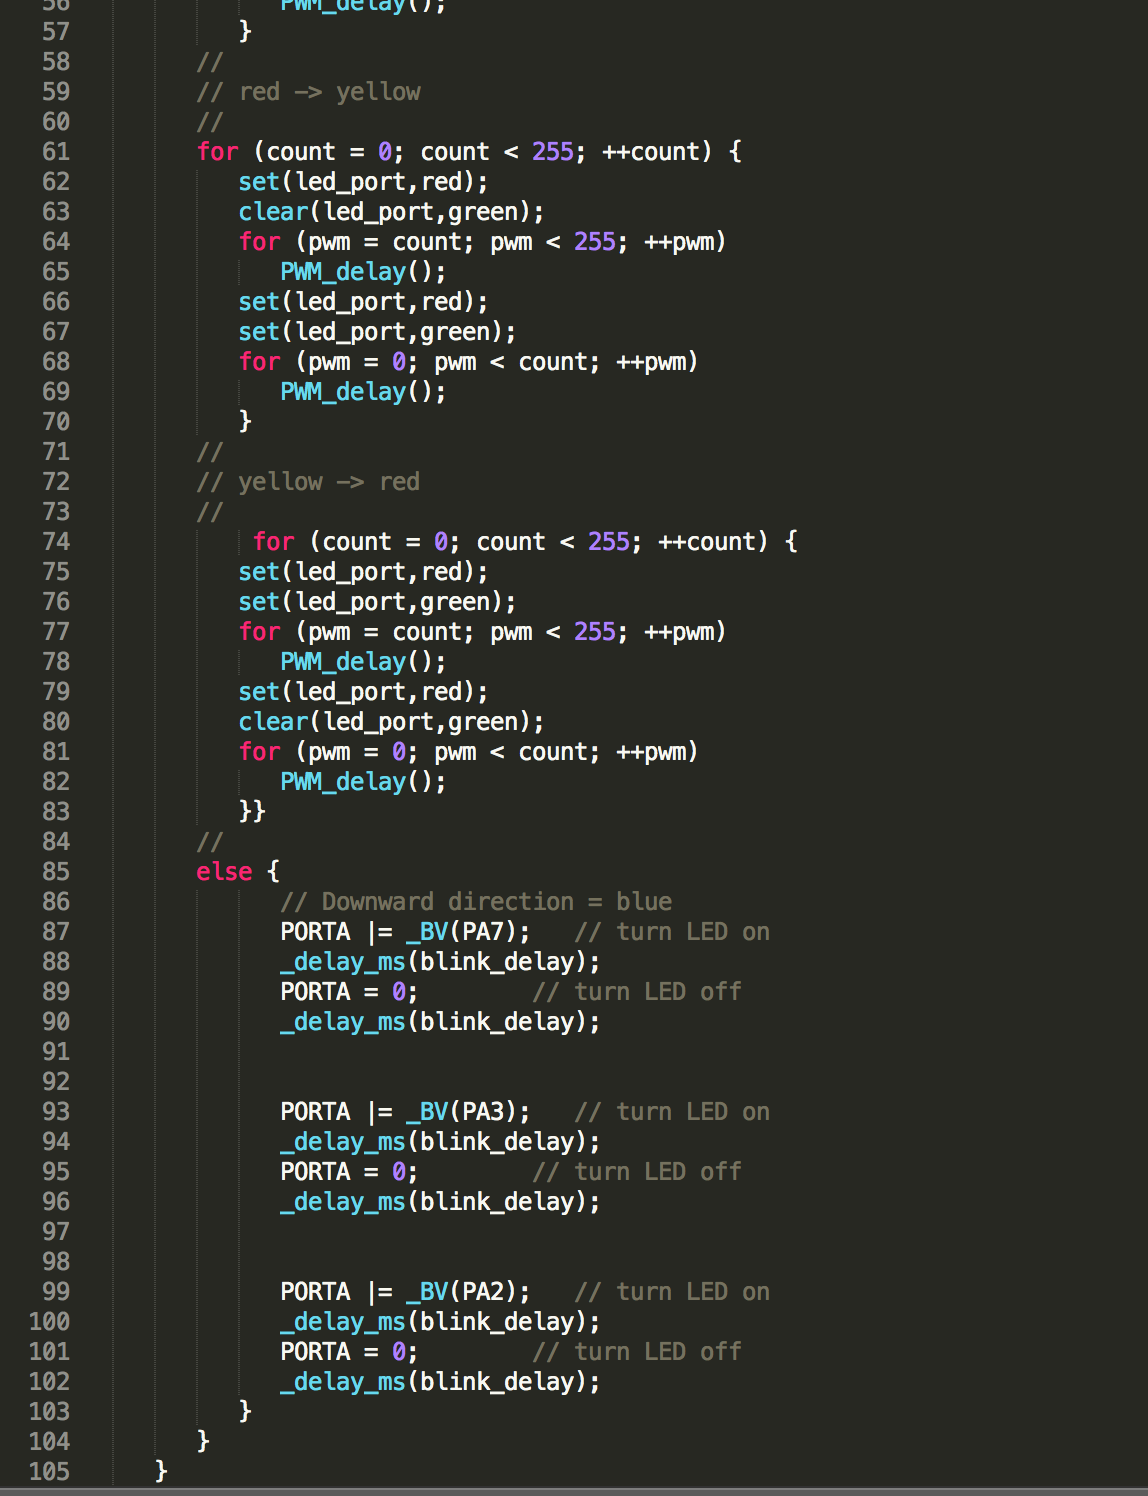
My attempts to write code in C were pretty pathetic and painful, but after browsing dozens of examples online, I ended up creating a mixture of Neil's hello world rgb code and Dan Chen's blink code. I had the code fade from red to yellow for the warm mode and flash blue for the cool mode. Unfortunately, I ran into errors communicating with the programmer, which I hadn't had before soldering the jumper, so I think there was a hardware problem. I did manage to use the terminal to debug my C code though, so I know that it does something, I would just need the hardware to function to make sure it did what I want.


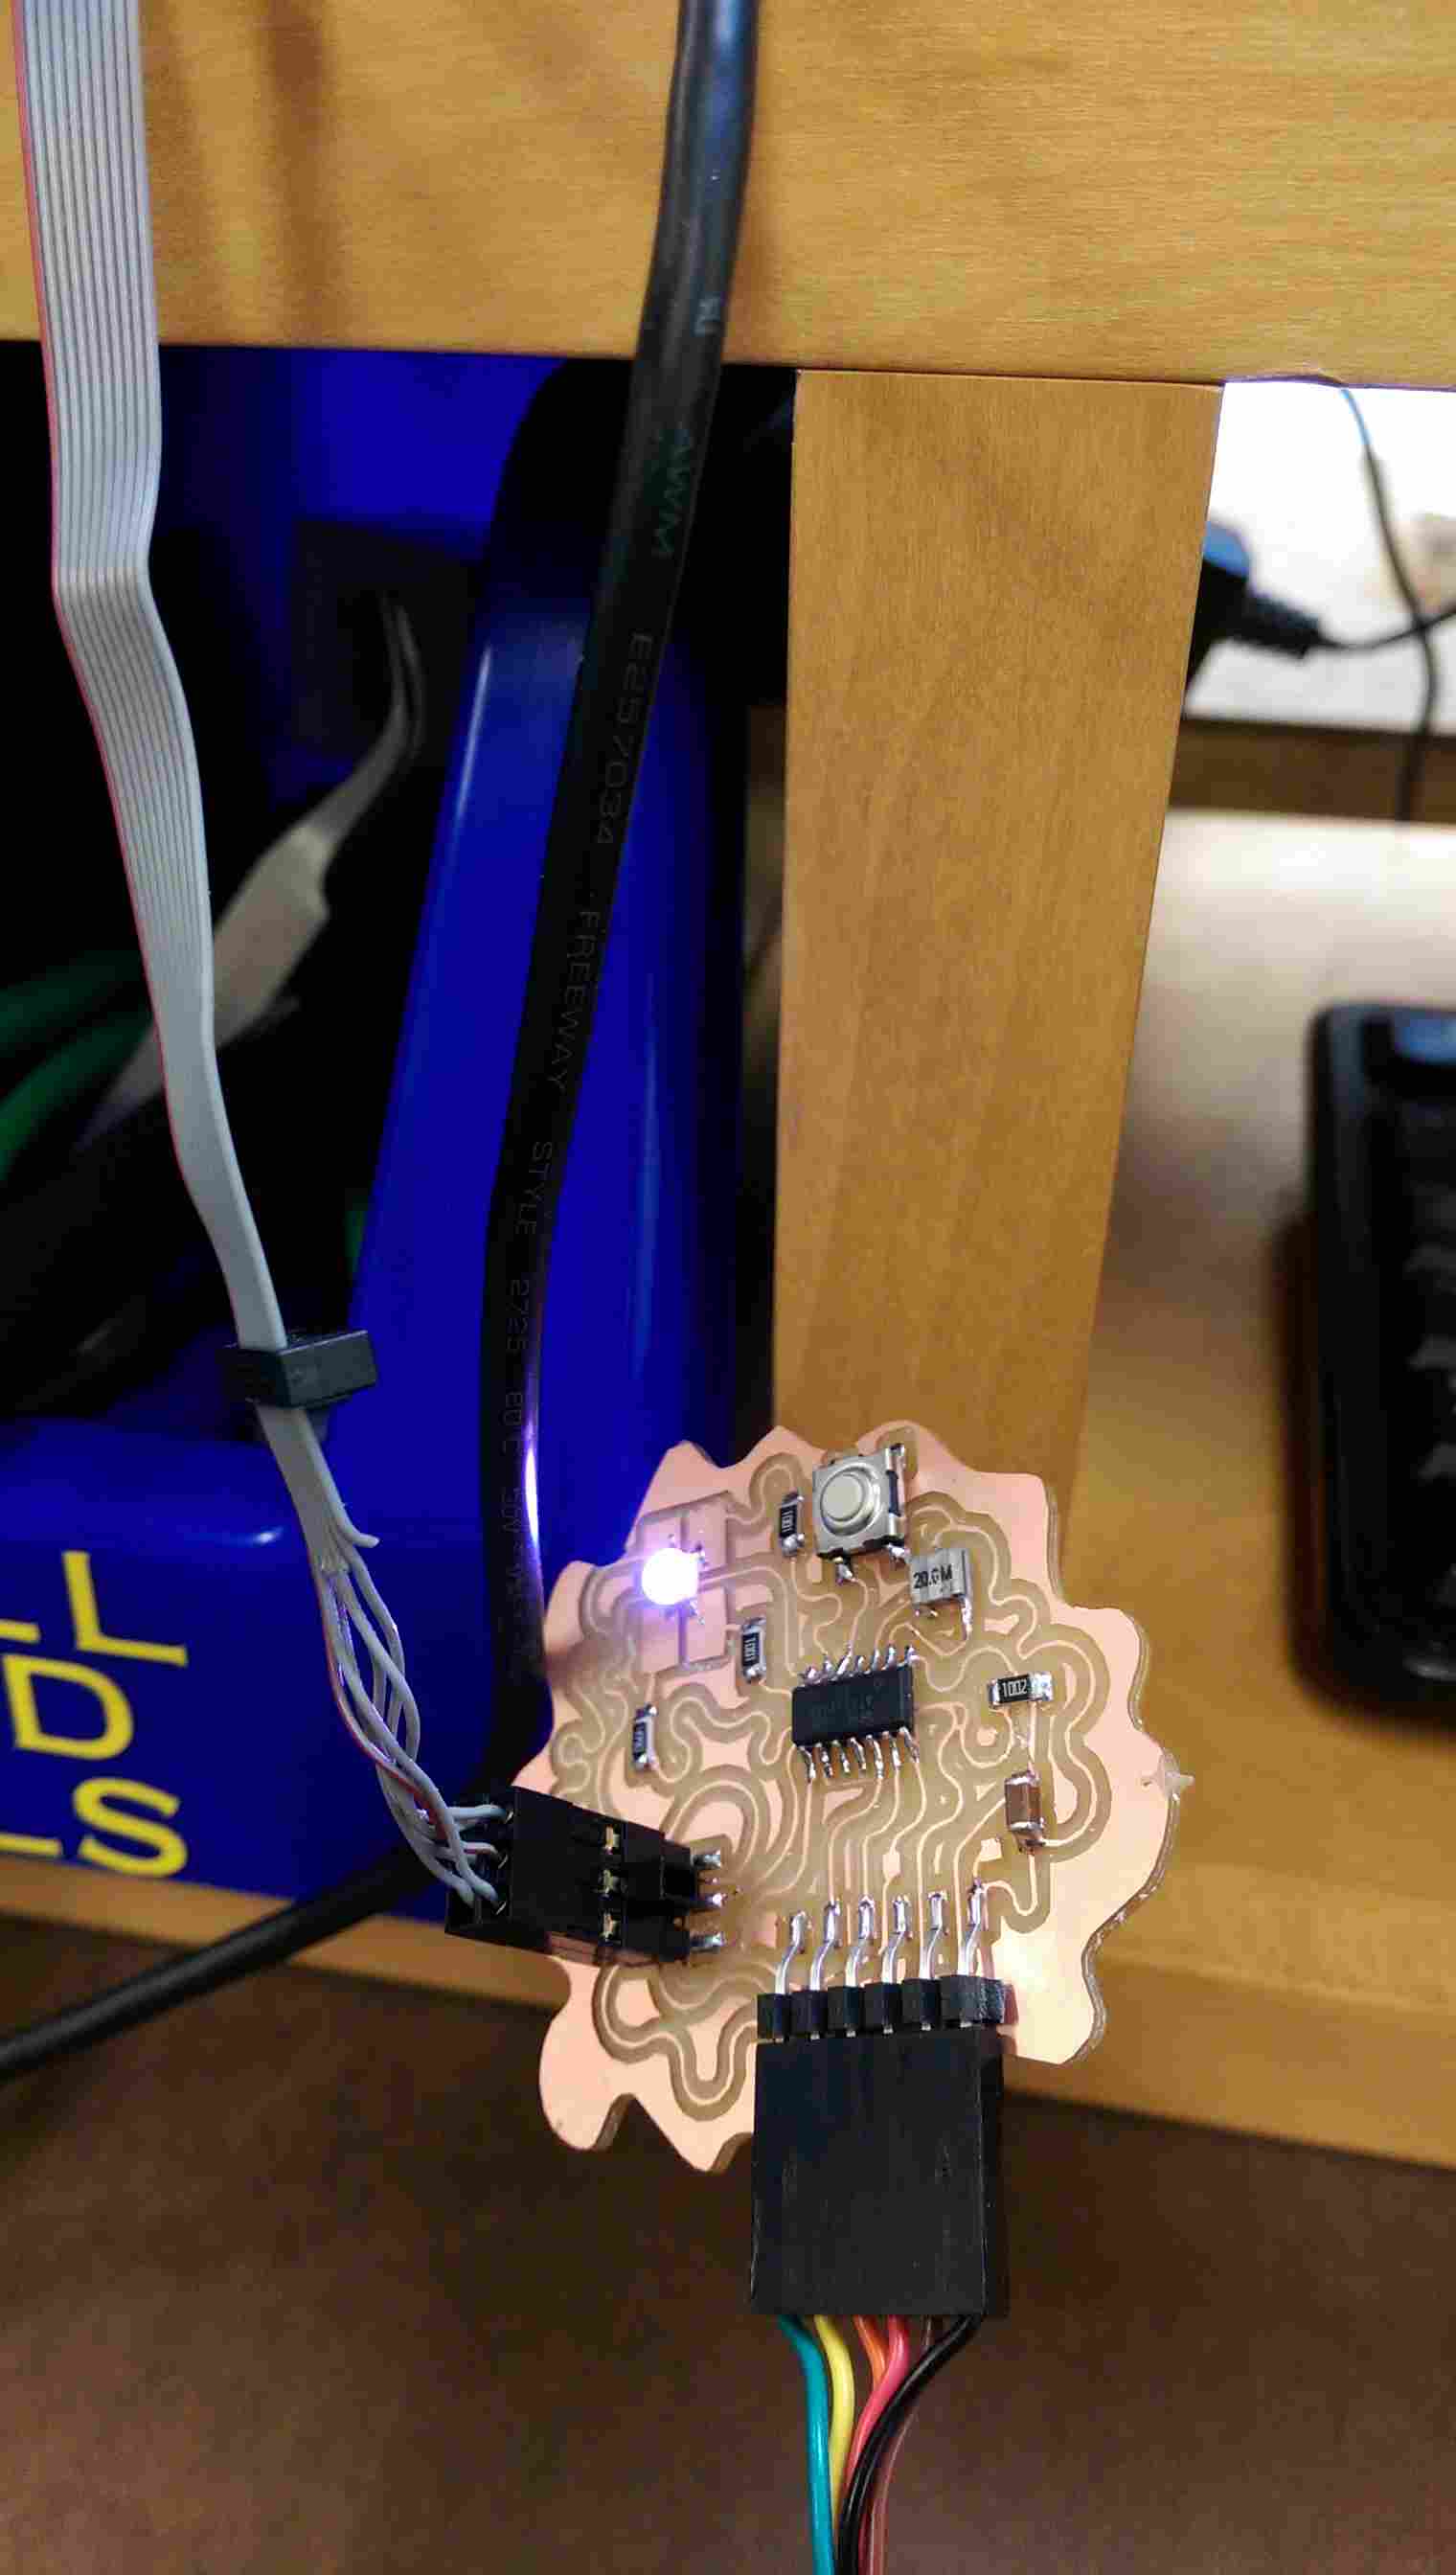
Update 11/18: I managed to get a similar board working properly. You can check out that shockingly cooperative RGB LED in Input Devices Week.
When I tried to program it however, I hooked it up to the cords, tried to run the program, got an error, and tried to pull off one of the cords to switch the orientation. Naturally, the header ripped off as well, taking a chunk of the traces with it. So much for that board...
For my next attempt, I decided to be less ambitious with machining and stick to milling, but I wanted to test out a design for the remote control for my final project, using four buttons instead of one. I then spent a couple days digging deep into brogrammer-laden corners of the internet trying to find some explanation of how to use an Attiny pin for both programming and output, as Neil said was possible. Most of what I found confirmed that it was indeed possible, but my findings were inconsistent about how to do it, both in terms of programming and what resistors to use. I also tried reading the data sheet, which, other than a few diagrams, was basically like reading a foreign language for me. Eventually, I gave up and decided to postpone that challenge for a future week. I instead simplified my board a bit to use a variation of my previous one with an rgb led instead of three white ones. At this point, I was feeling pretty sick of electronics, so I jazzed it up a bit with wavy traces instead of straight ones.
Of course, there was one trace that wouldn't fit in a single-sided pcb, so I left extra pads to add a jumper. I then milled and stuffed the board. The only major setback then was figuring out the orientation of the rgb led, but I found the part in the fab inventory and found an excellent diagram online. I used Dan Chen's C code as a test, and it seemed to work reasonably well, because my board began flashing rainbow colors.
But when I got home and tested it with my own code, first in the arduino IDE, I realized that I had forgotten to solder the jumper, so I had to wait until the next day to return to the shop and fix it. That proved more challenging than expected. I ended up using two 0.0 ohm resistors, but I think I messed them up somehow, because I ran into more problems later when I brought it home to program.
For my actual program, I started in the arduino ide because the libraries make more sense to a non-coder like myself. I wrote up a code that I was fairly confident about. It would use the button to switch from cool mode to warm mode. Cool mode would be a quickly flashing blue designed to energize the user. Warm mode would be a slow fade to yellow to calm the user down. I would need to test it and adjust the timing, but unfortunately the arduino ide had problems communicating with the programmer, so I switched to C instead.
My attempts to write code in C were pretty pathetic and painful, but after browsing dozens of examples online, I ended up creating a mixture of Neil's hello world rgb code and Dan Chen's blink code. I had the code fade from red to yellow for the warm mode and flash blue for the cool mode. Unfortunately, I ran into errors communicating with the programmer, which I hadn't had before soldering the jumper, so I think there was a hardware problem. I did manage to use the terminal to debug my C code though, so I know that it does something, I would just need the hardware to function to make sure it did what I want.
Update 11/18: I managed to get a similar board working properly. You can check out that shockingly cooperative RGB LED in Input Devices Week.