This week, we learned how to 3D scan and print.
The 3DSense scanners
Using the 3D Sense scanners was fun and easy. We had two versions of the scanner itself, but only the older one had Os X software for the Mac, which is what I have, available. The scans from this older version were slightly lower resolution, but it was still so easy to use. I went to the Sense website and easily downloaded the appropriate software. Then, I plugged in the scanner, chose person or object, and then pointed and hit play!
There was a little cartoon dude hanging out around our table, so I tried to scan him. I placed him on a table and moved the scanner around him. While this produced a decent image, it was hard to physically move around him because of the length of the cord and the size of the table. Plus, the scanner would lose the image.
At Gavin's suggestion, I tried to make the object move instead. I took the back of a spinning chair off and placed him in the middle. I made sure he wouldn't wobble. Then I set up the scanner on a tripod, pointed at the figureine. Then I rotated the chair and the scanner picked up the image.
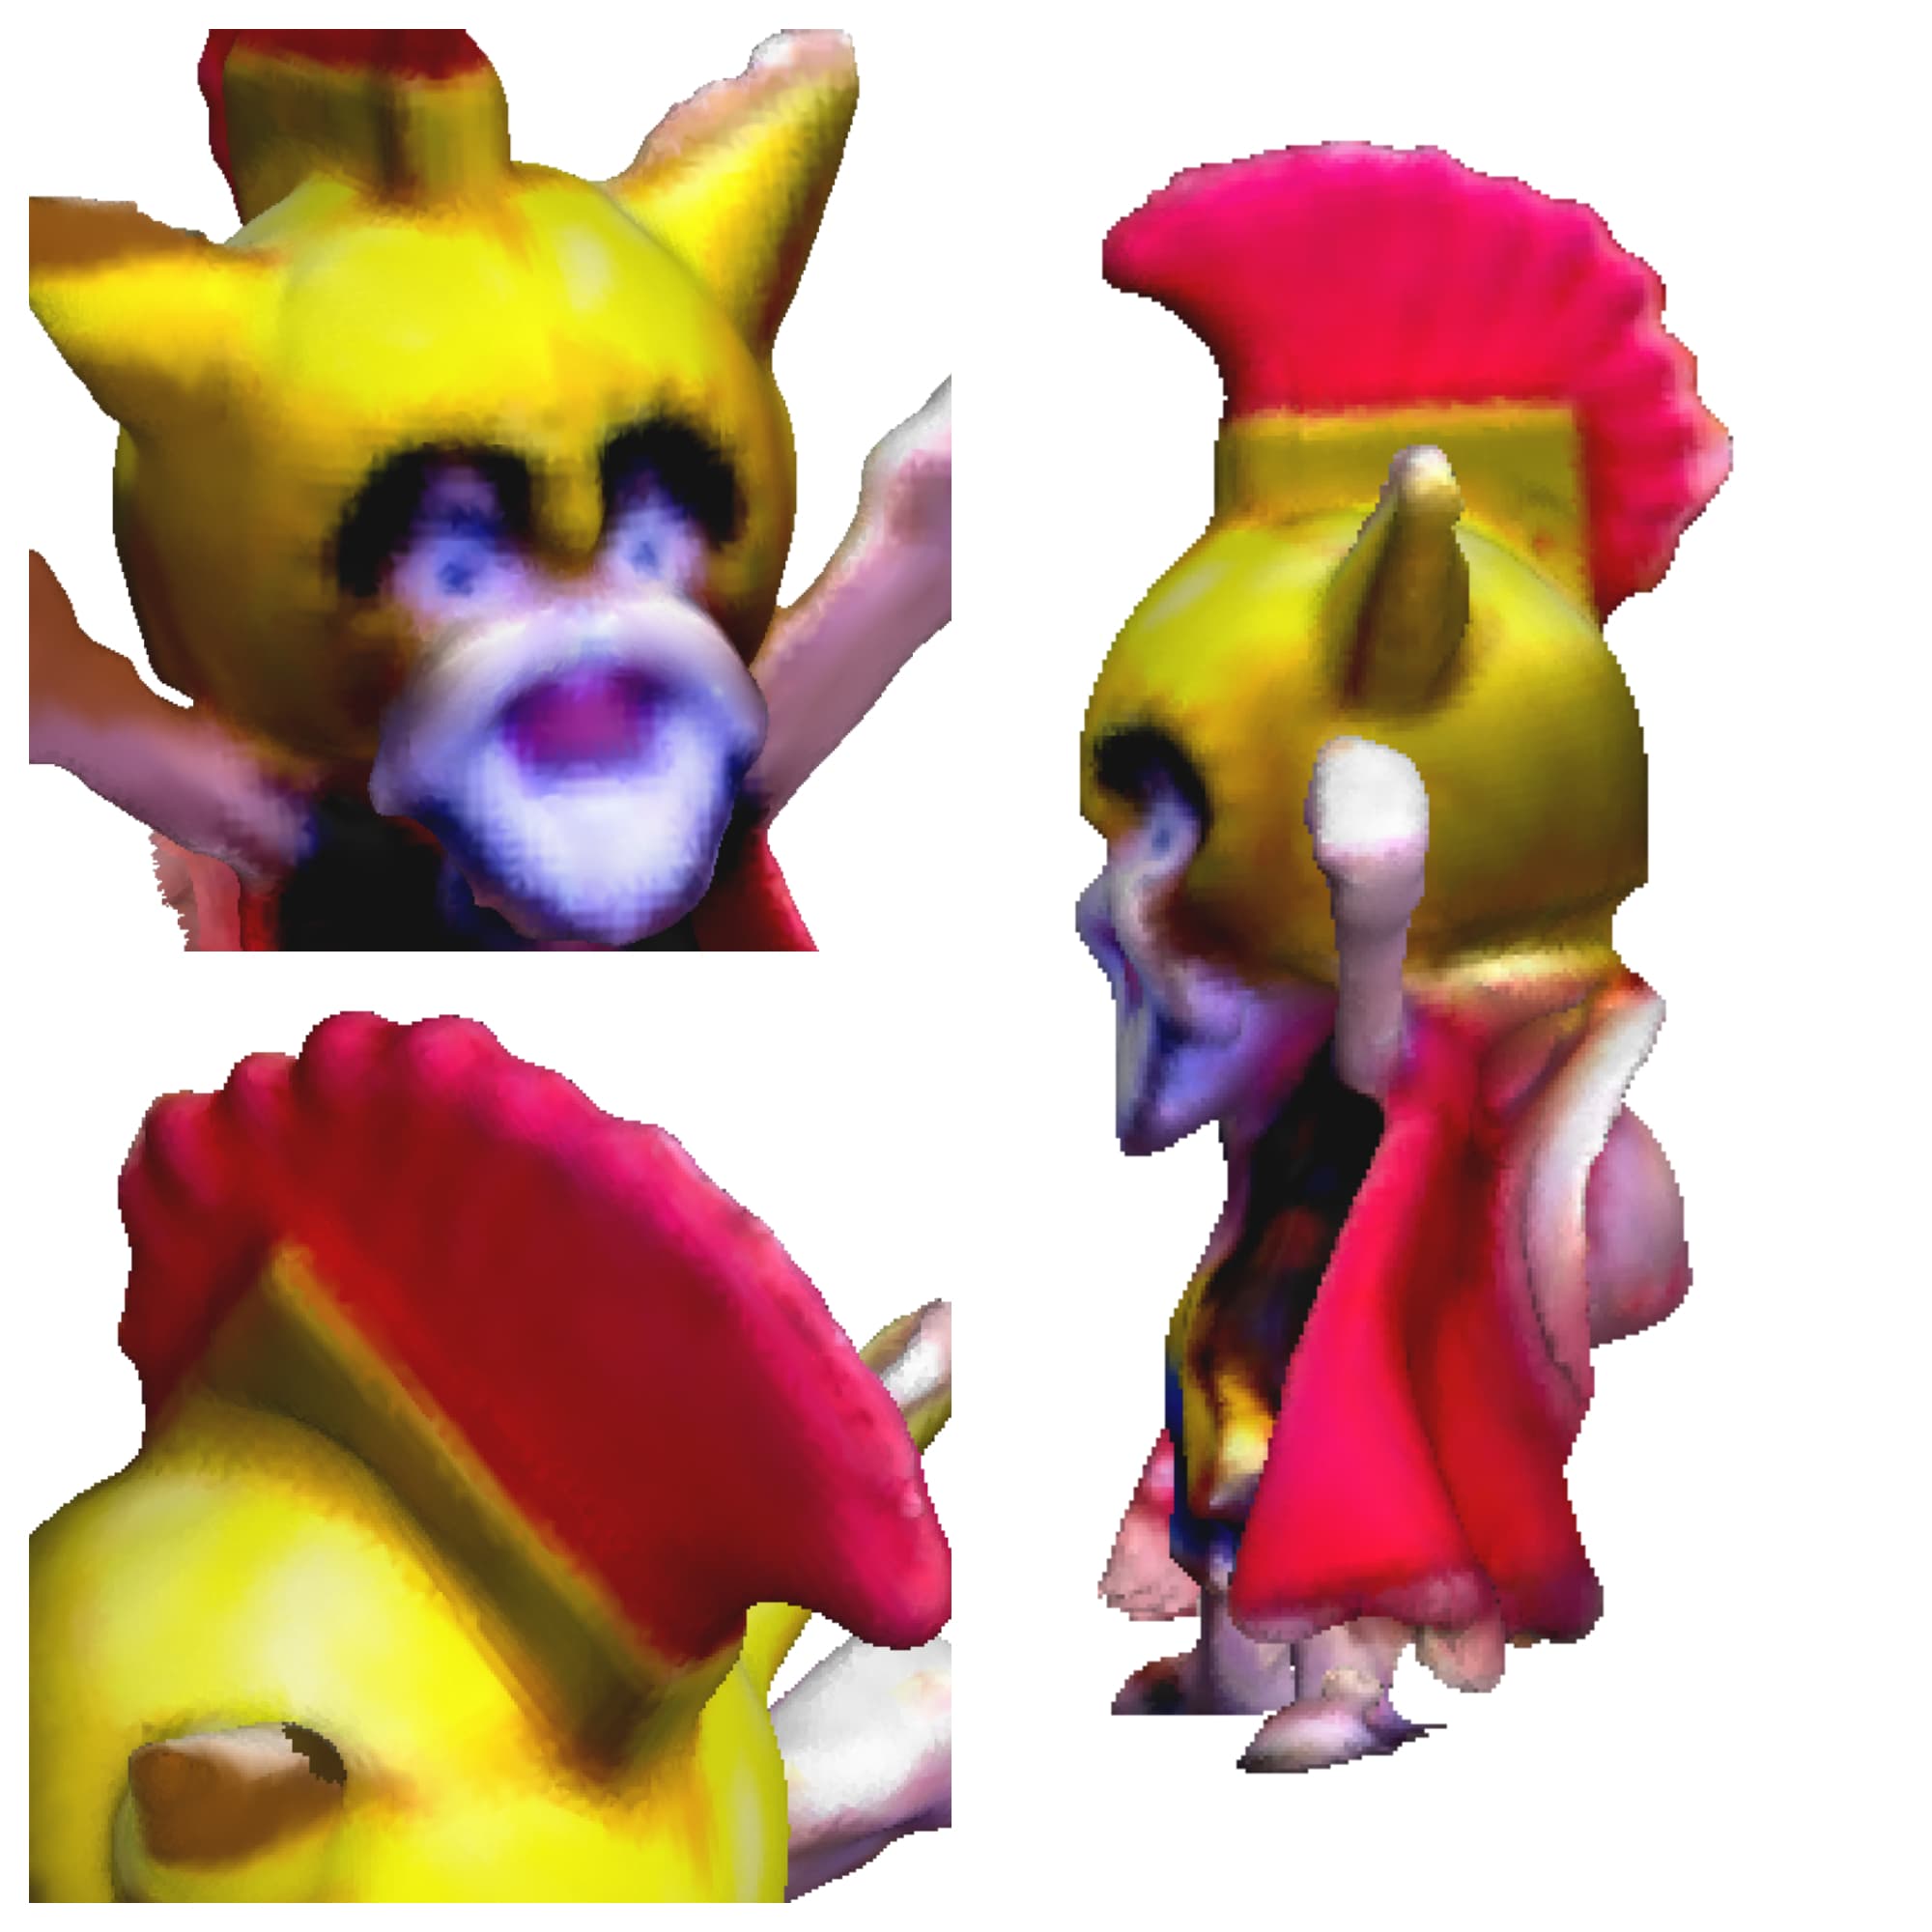
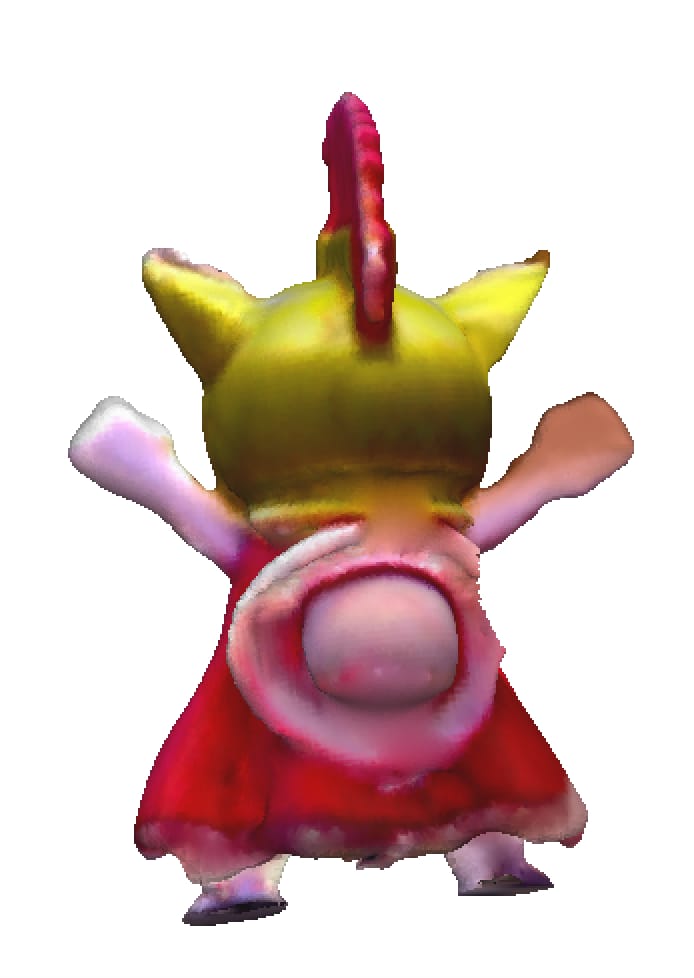
This method reduced the time and difficulty of the scanning process and allowed for a more precise system. For example, I experimented with the distance of the scanner from the object which I could actually keep constant considering that everything was in a fixed place. Plus, I could scan his back easily:
A disadvatage, however, was that the chair was not perfectly flat. This means that the vertical axis along which the object was rotating was probably slightly off. It didn't cause too much trouble while scanning the object, but is a possible factor to why the people scans were skewed.
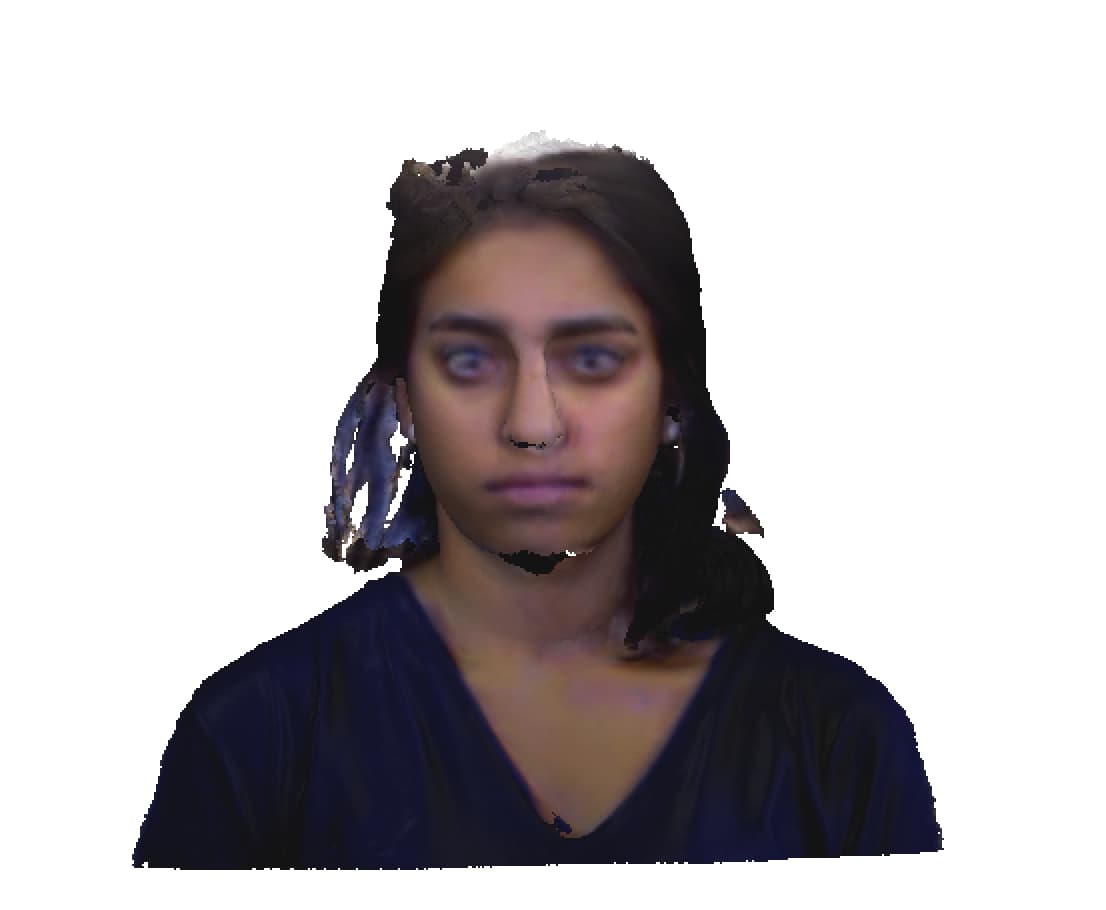
Next, I wanted to try to scan a person. Alex very kindly volunteered to be my first subject. We used the same tripod and spinning chair set up andapparently Alex looks like this:

I found the tips on this website to be very helpful: https://3dscanexpert.com/beginners-guide-3d-scanning-photogrammetry/ It also has a professional example of what is possible with the scanner.
After reading the lighting tipson this webpage I tried moving closer to the windows and scanning myself.
I thought it was pretty amusing (and also creepy) that if you rotated the image in the right way you could see my face through the hole in the top of my head.
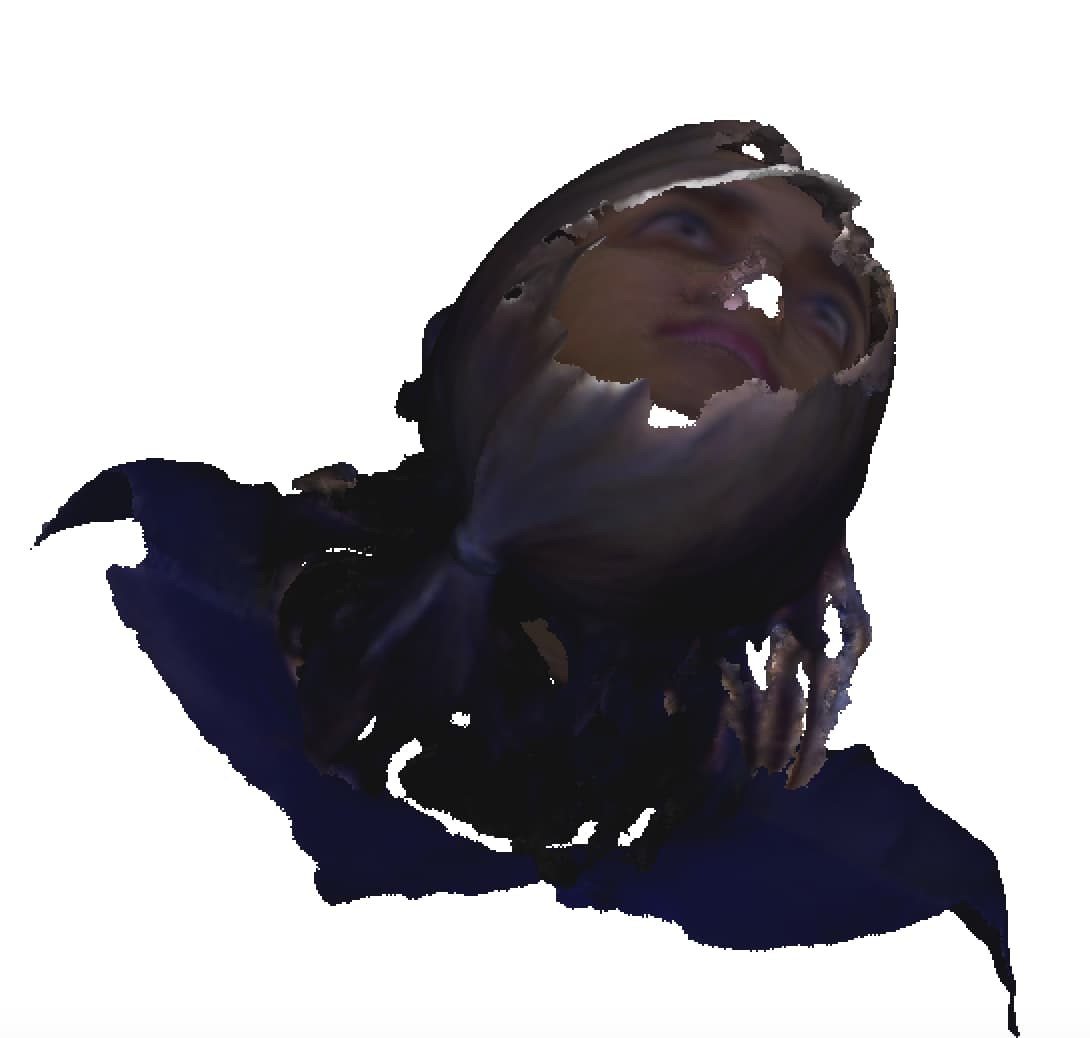
I think the scans of ourselves came out the way they did because we couldn't stay perfectly still. We would blink or move and, especially when rotating on a chair, our start and end positions wouldn't stay the exact same.
I didn't try to print the scan I took of myself because it had a large hole in the head. However, after seeing what people did in class, I realize that it is possible to patch over holes. I also realize the extent of things that can be designed - both complicated CAD designs like the height changing platform someone made, or the cloth that was a simple CAD design but creative idea. I want to learn how to edit meshes and downloaded STLs.
I used the 3DWox printer to print a 3D Printer Tolerance Tests on Thingiverse made by amandaghassaei
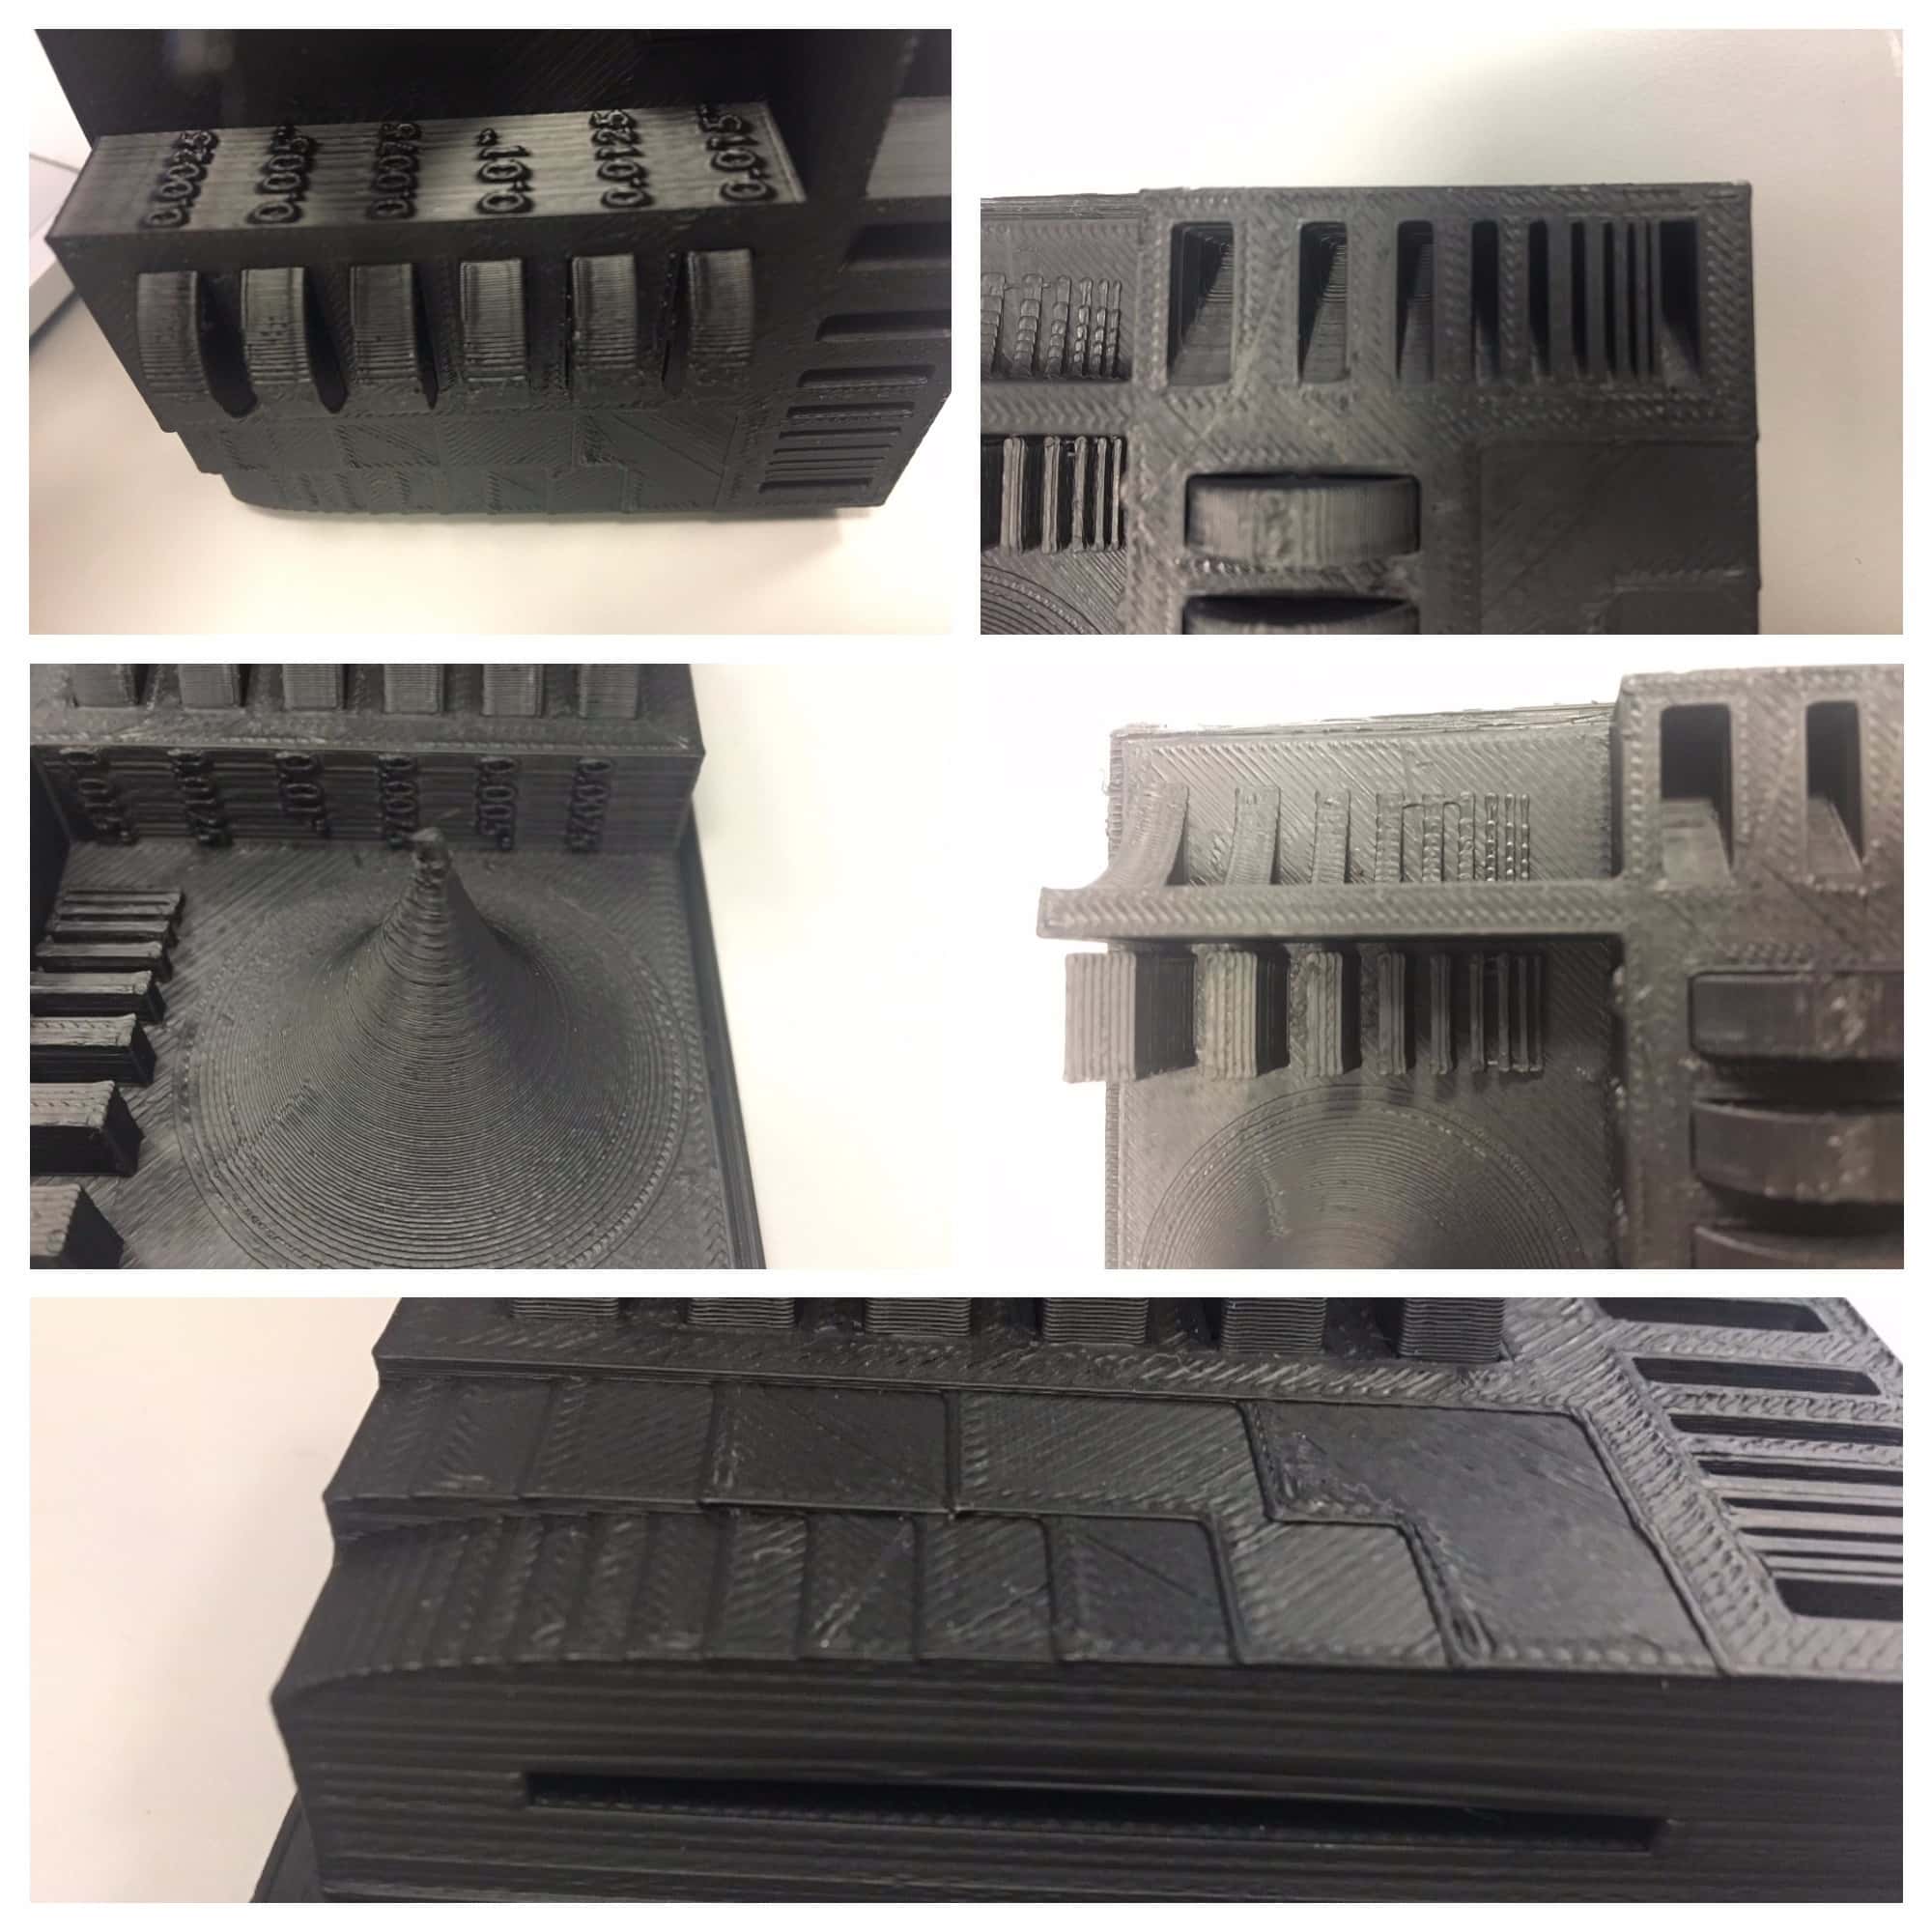
In the bottom picture, you can see the z axis resolution tested. It looks much prettier the steeper the curve. The middle left picture, of the sharp peak was slightly dull. However, there was another print job in the machine to which the peak was connected. I wonder if that hadn't happened if it would have looked better. The circular pieces didn't actually rotate, but since there weren't any reviews online of other people who had printed it I'm not sure if they were supposed to. I thought the step gradients of different straight and curved heights (middle right picutre) looked really good. Only the smallest gaps weren't perfect. The holes, top right, were essentially perfect. There were also small circles and squares (not pictured) embedded in the side that turned out very well.
Thingiverse has so many awesome designs - I absolutely love the site. Trying to think of something that would be interesting to 3D print and that couldn't be made subtractively, I decided to go with a whistle.
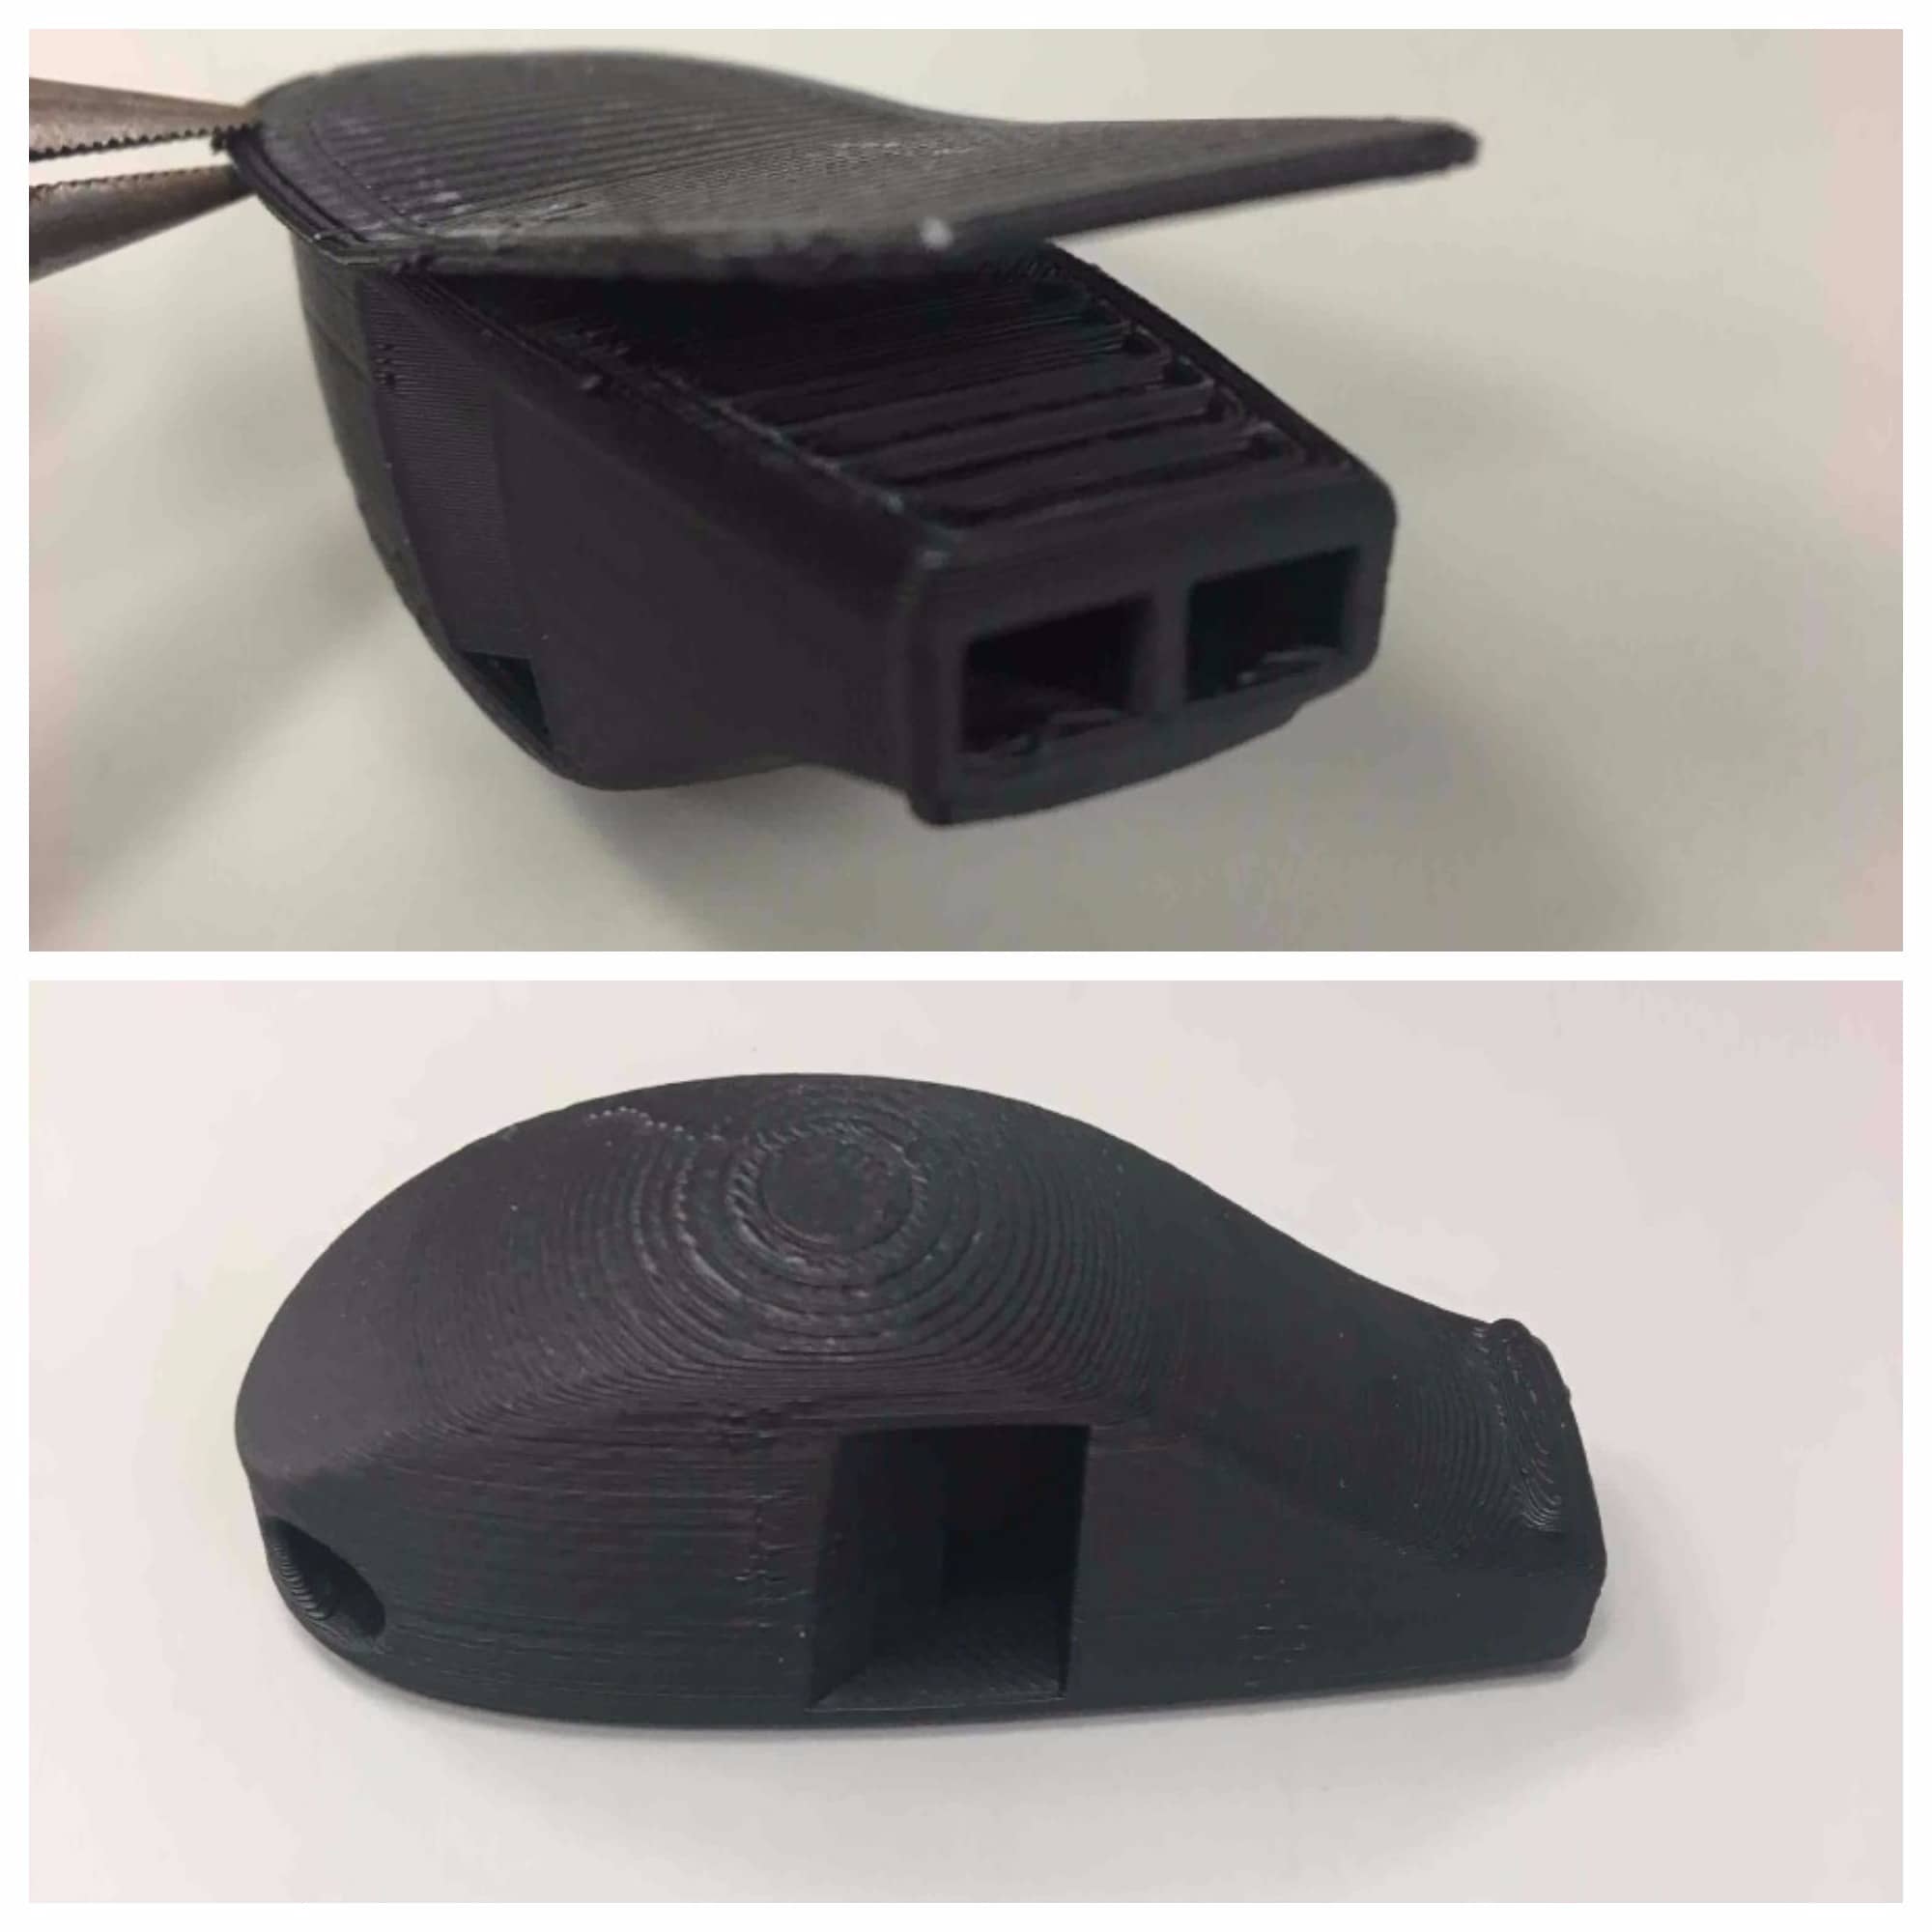
It printed easily enough and I just had to remove a small layer of support material. The sounds isn't as sharp as I was hoping it would be.
I also designed and printed beads. The benefit of 3D printing them is that I could make them hollow to save material! My CAD model looked like this:
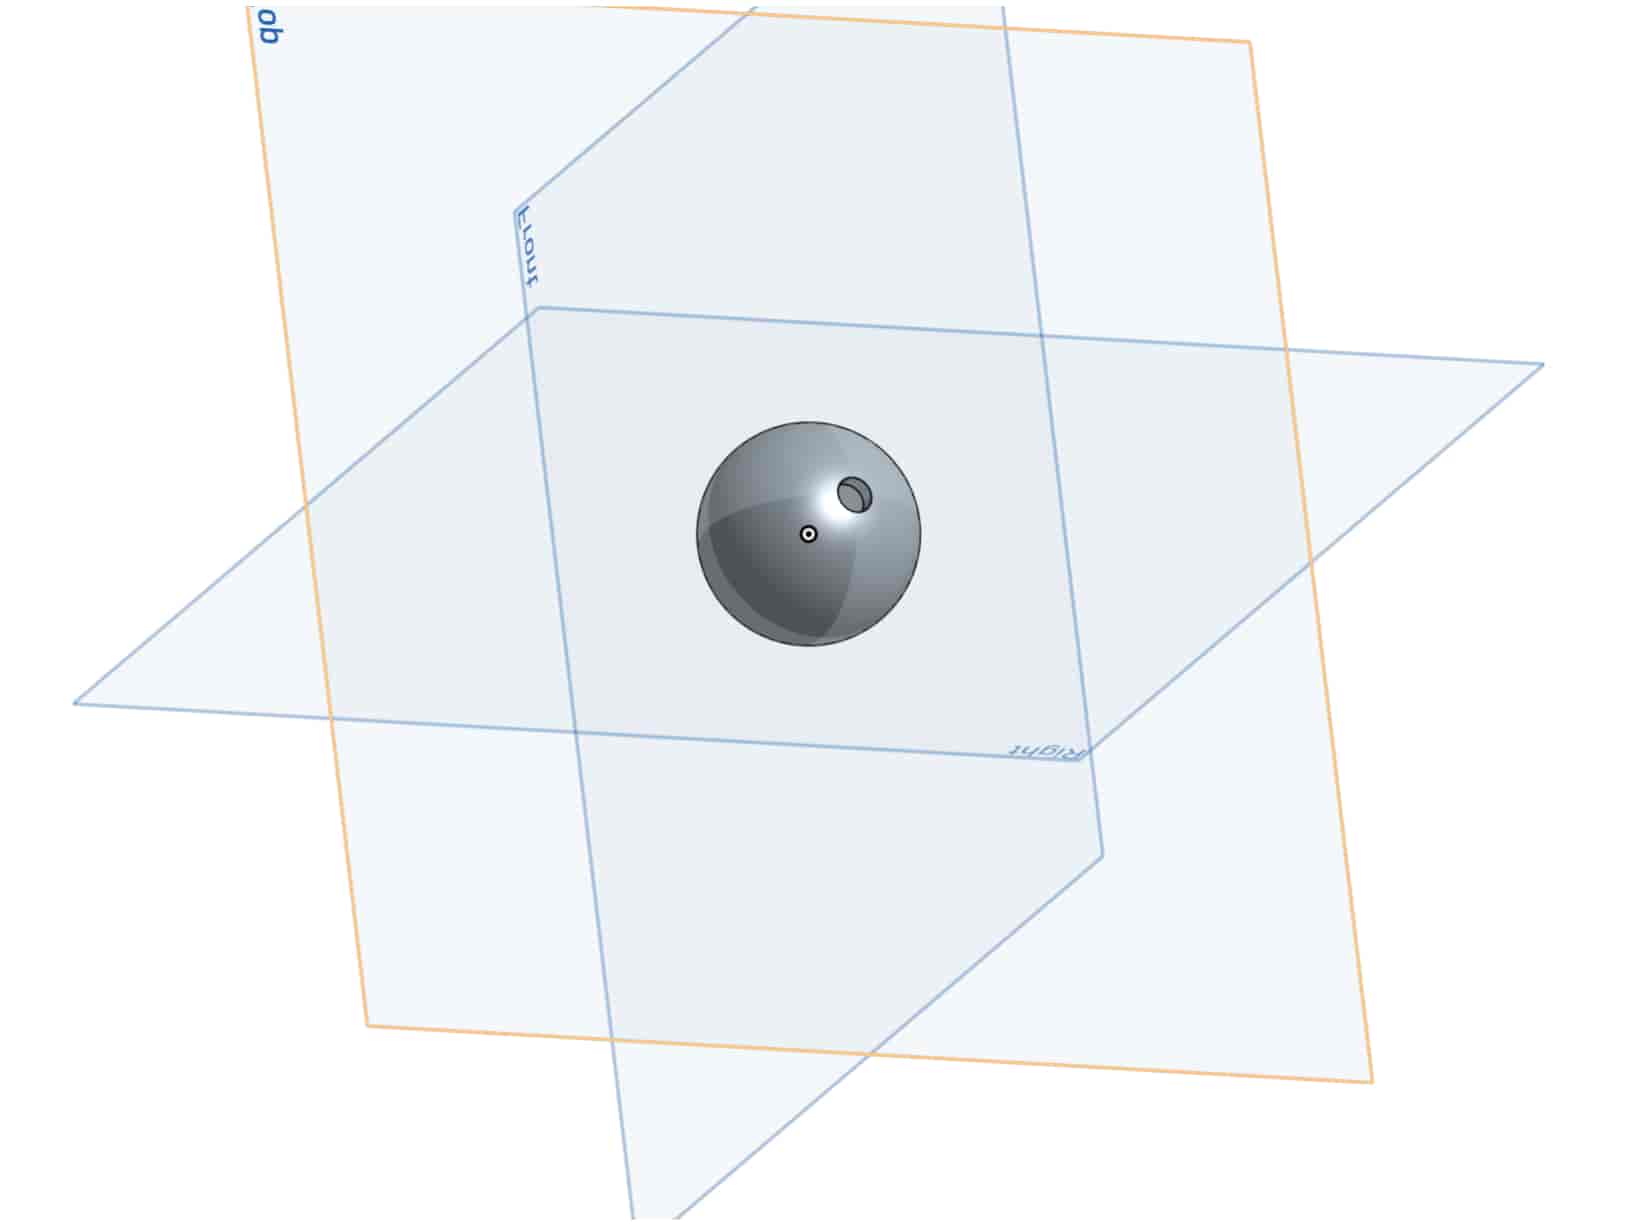
To make it, I drew two center aligned circles in OnShape. Then I drew a line through the middle and trimmed extra lines so that I was left with half a 2D curve, shaped like an arch. Then I used the revolve tool to turn it into a hollow sphere. Then I made another sketch of a center-aligned circle and extruded it (with symmetric) to cut out the holes.
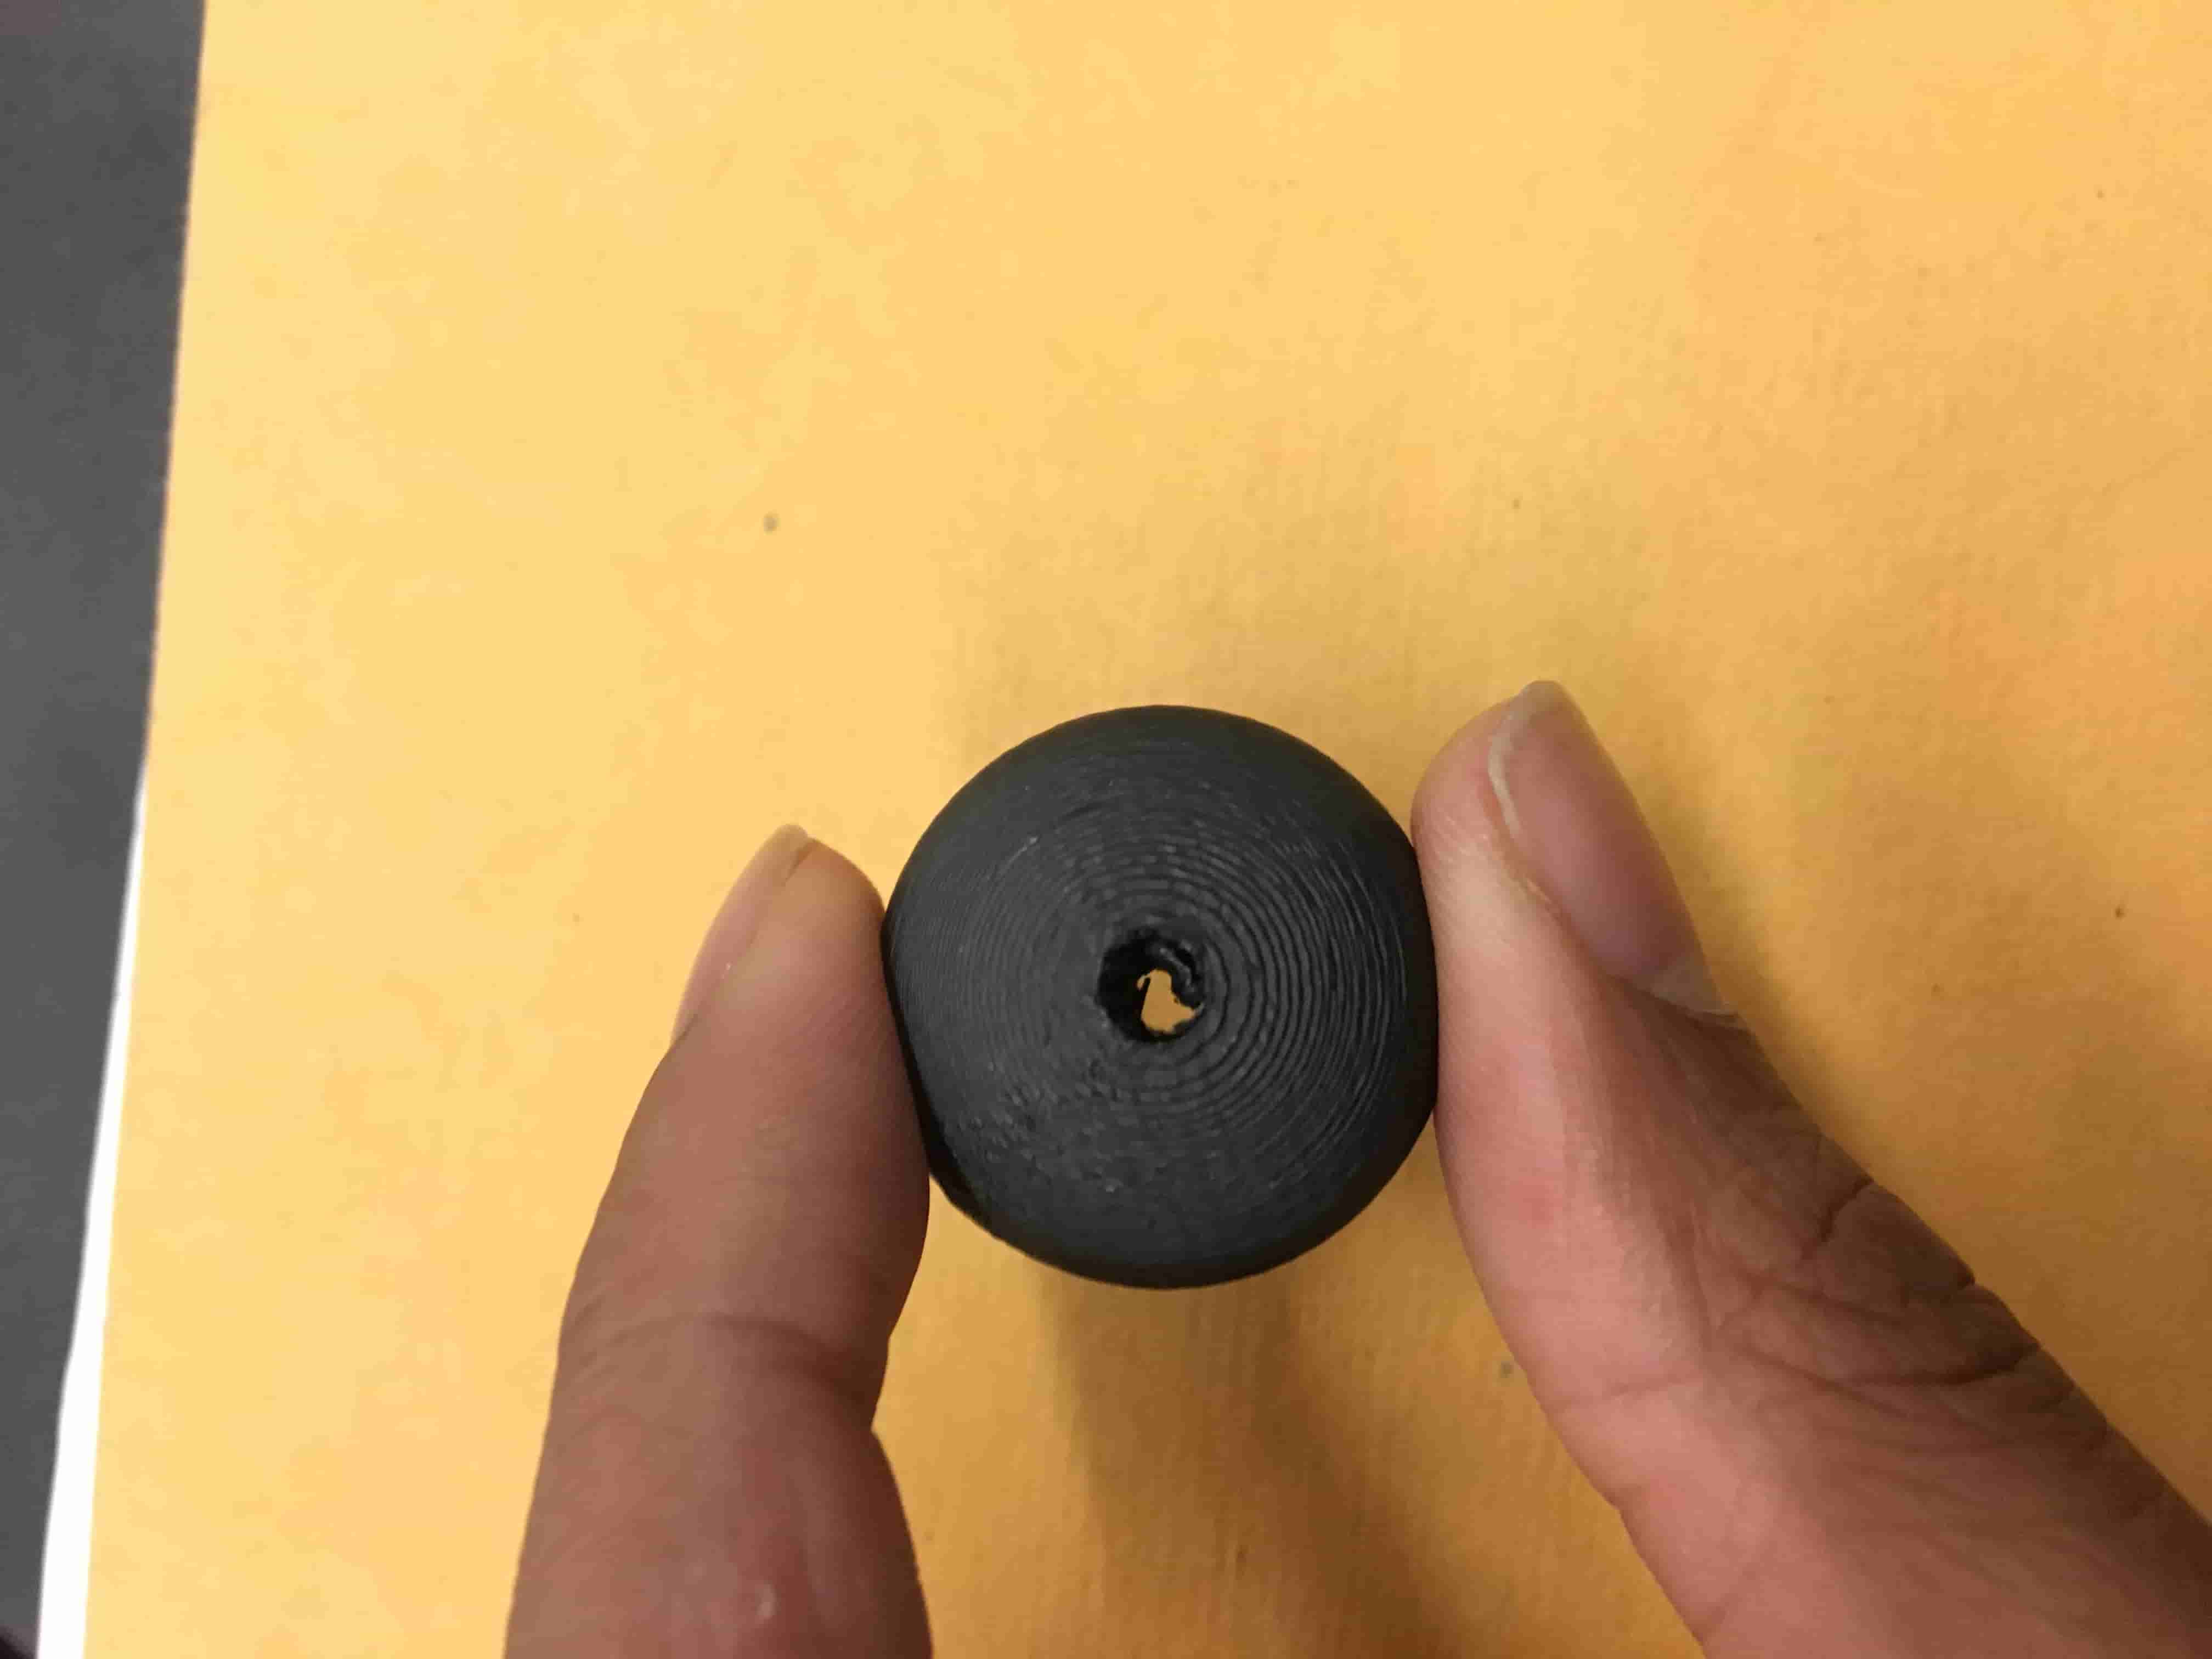
I first printed it on the 3dWox. It worked and you can see below it made a bead. the curve is beautiful and smooth to the touch, but I forgot that the support material is hard to remove and would fill it in, so it isn't hollow. I'm trying again on the other printing machine.
3D printing also ended up being super helpful in my final project, check it out here to see what else I made.