| Material/Component | Price | Origin Reference |
|---|---|---|
| 1206 SMD LEDs | 0.10-1.00 | Digikey |
| Copper Vinyl | CBA Shop | |
| 9V battery (and battery clip!) | 2.00 | amazon |
| Various resistors | 0.5-2.00 | CBA Shop/Digikey |
| 3.3V Voltage regulator | 0.5-2.00 | CBA Shop/Digikey |
| N-MOSFET | 0.5-2.00 | CBA Shop/Digikey |
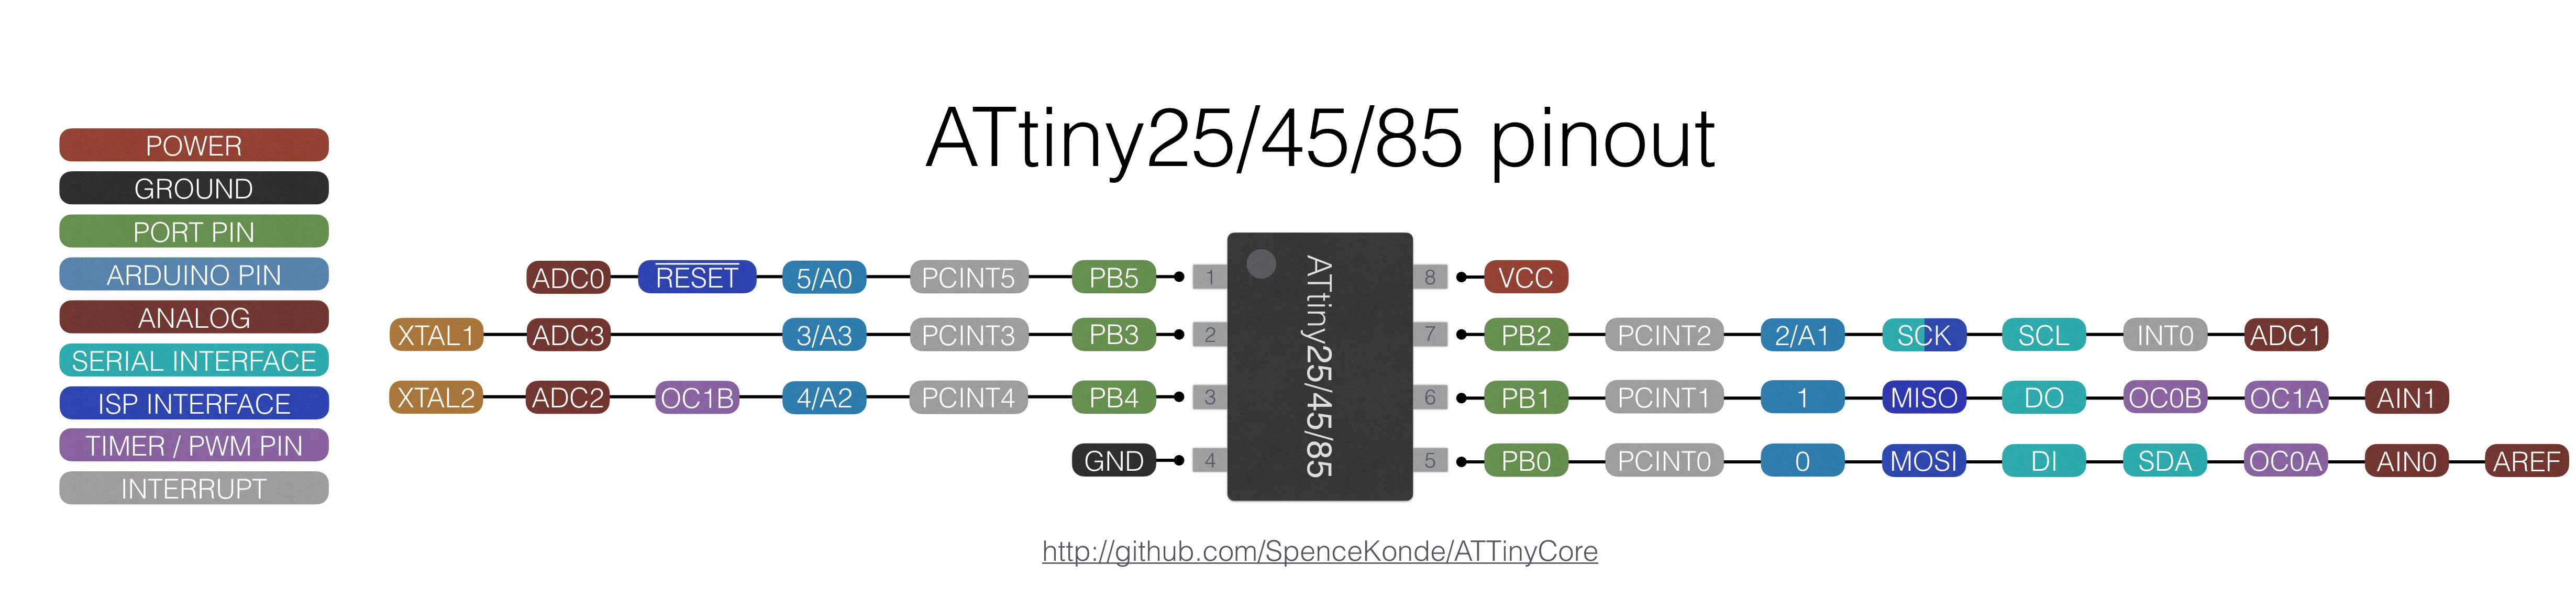
| ATTiny45 | 1.00-3.00 | CBA Shop/Digikey |
| Canvas/thread | CBA Shop | |
| XTC-30 Epoxy Coating | Smooth-on | |
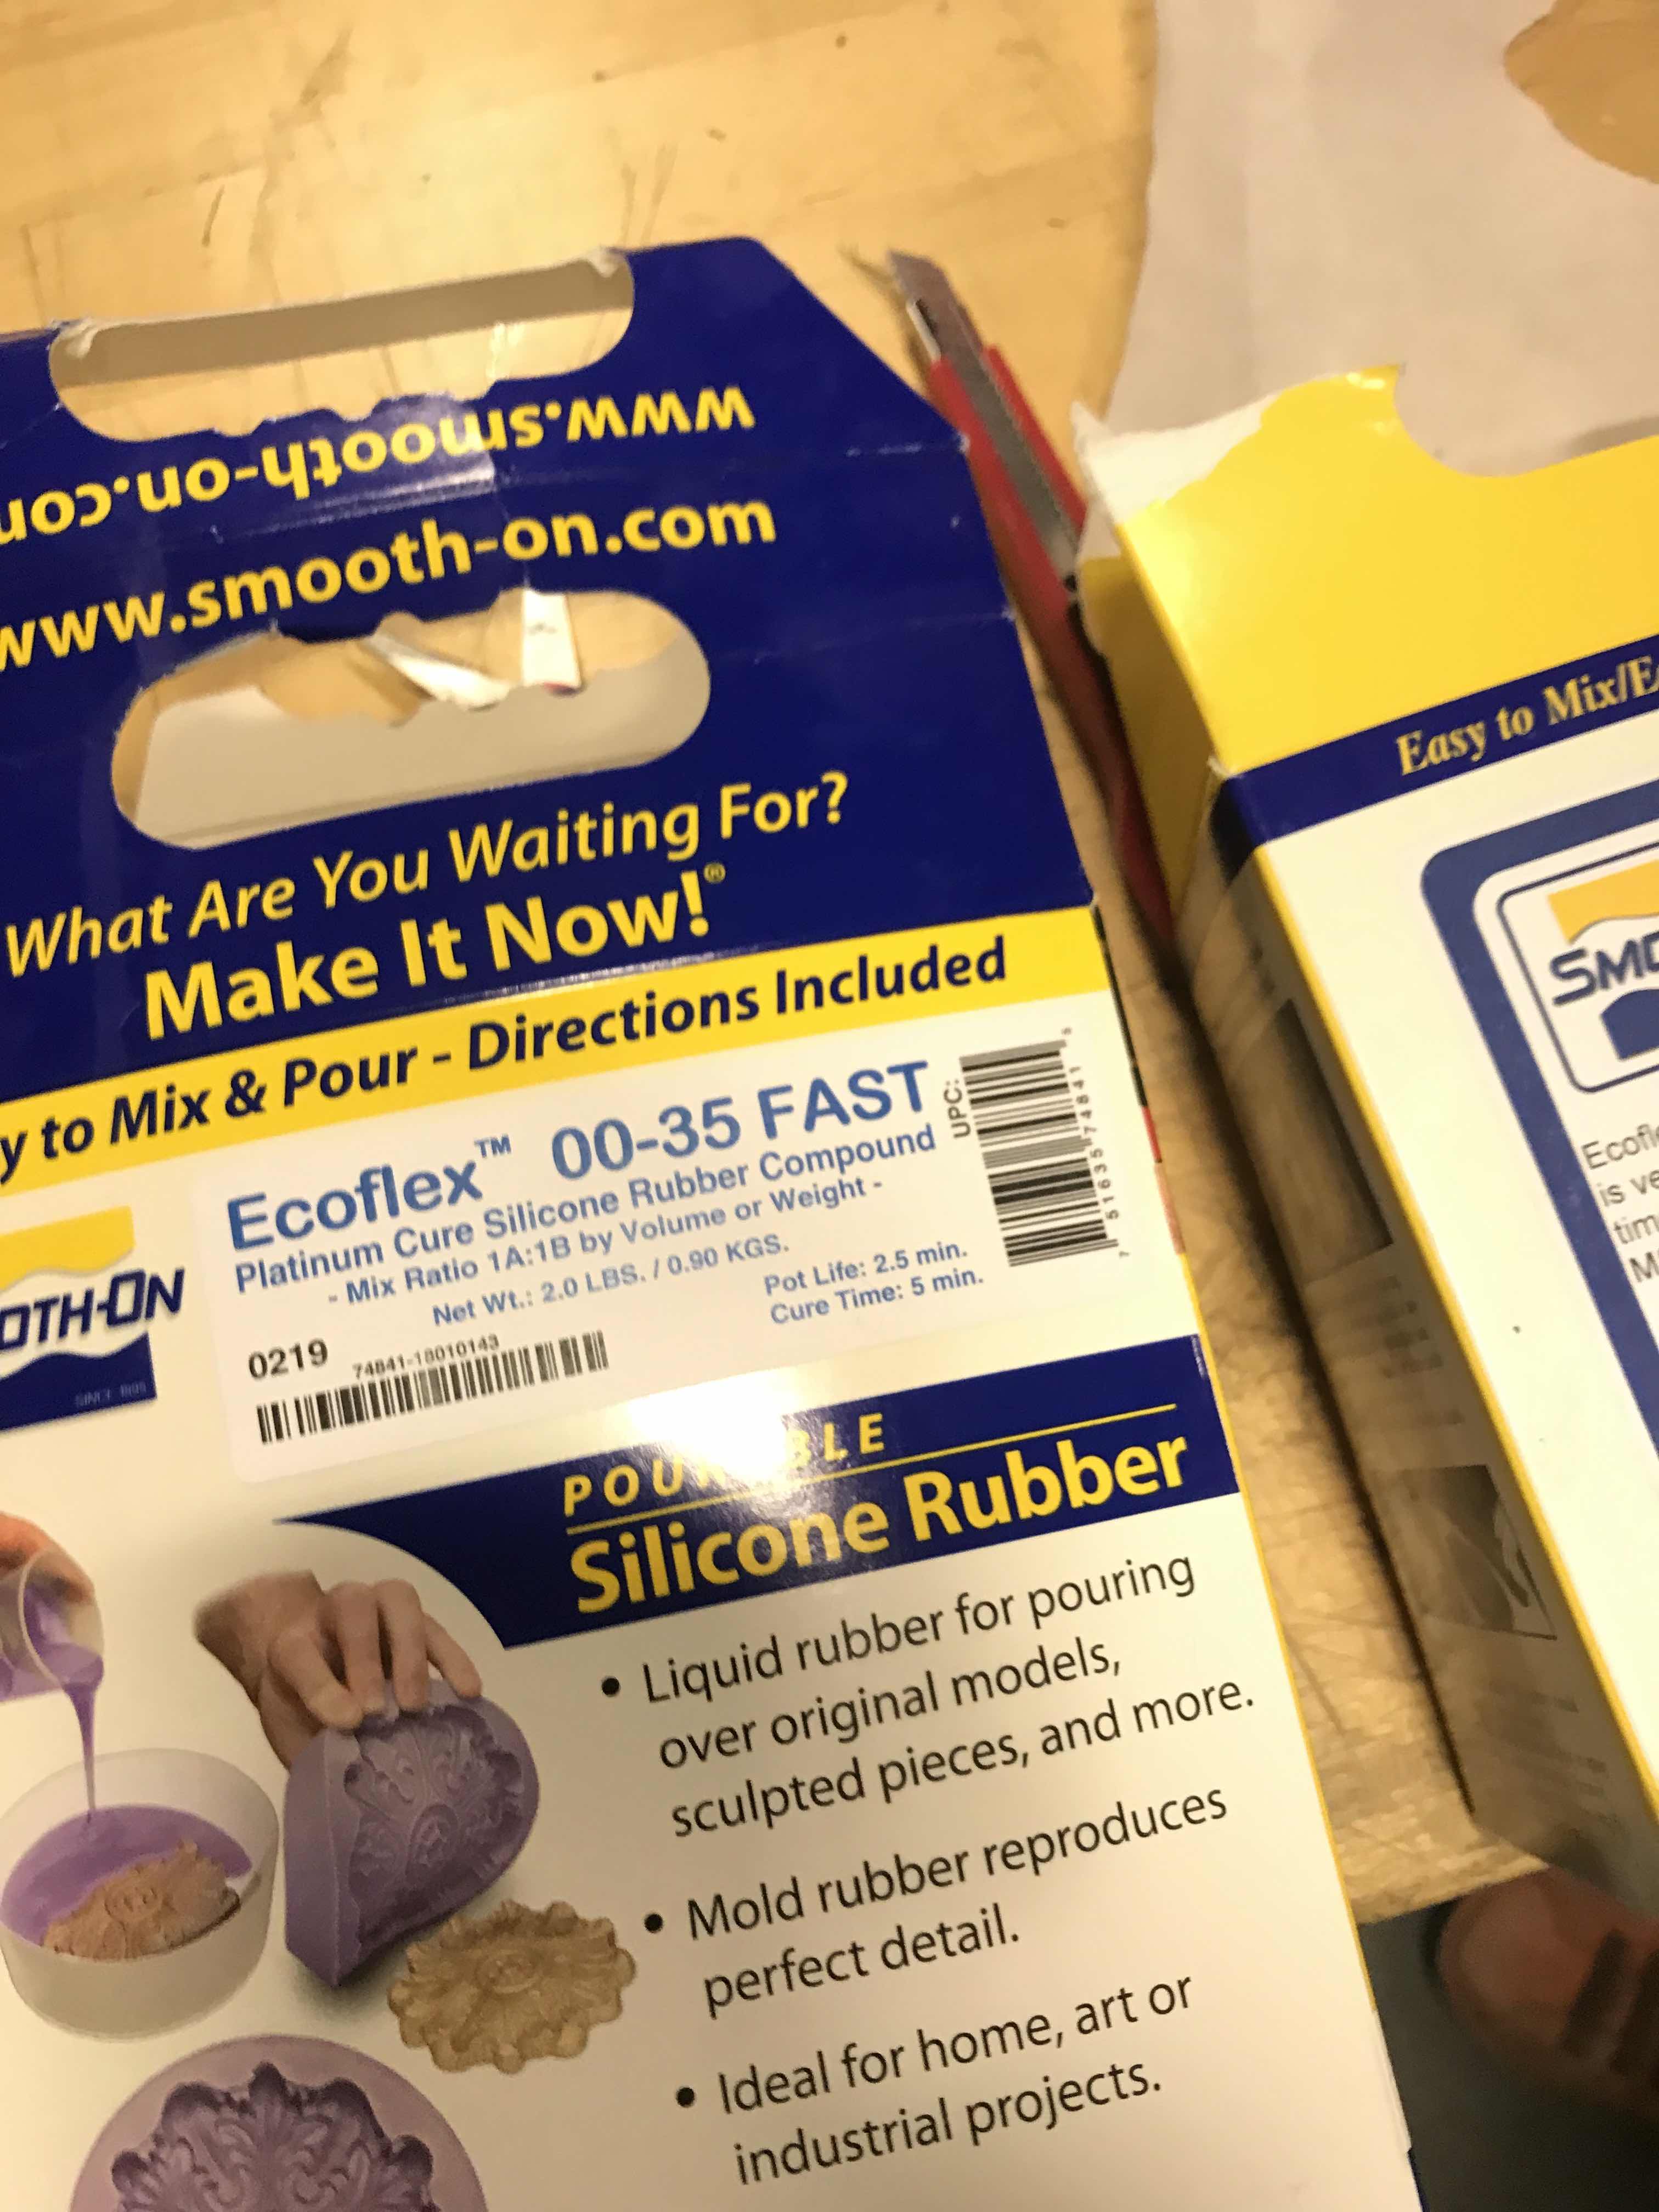
| Smooth-On Eco-Flex 00-35 FAST | Smooth-on | |
| Smooth-On Eco-Flex 00-50 (not as fast) | Smooth-on |
99fridays/Wizard Of Oz/Grandpa gif
“The Wizard of Oz” is a lovely story that I grew up watching.

LED strip kept falling off while I was dancing...
 Also this Grandpa gif
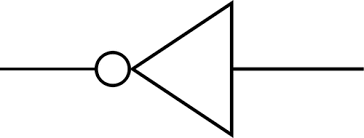
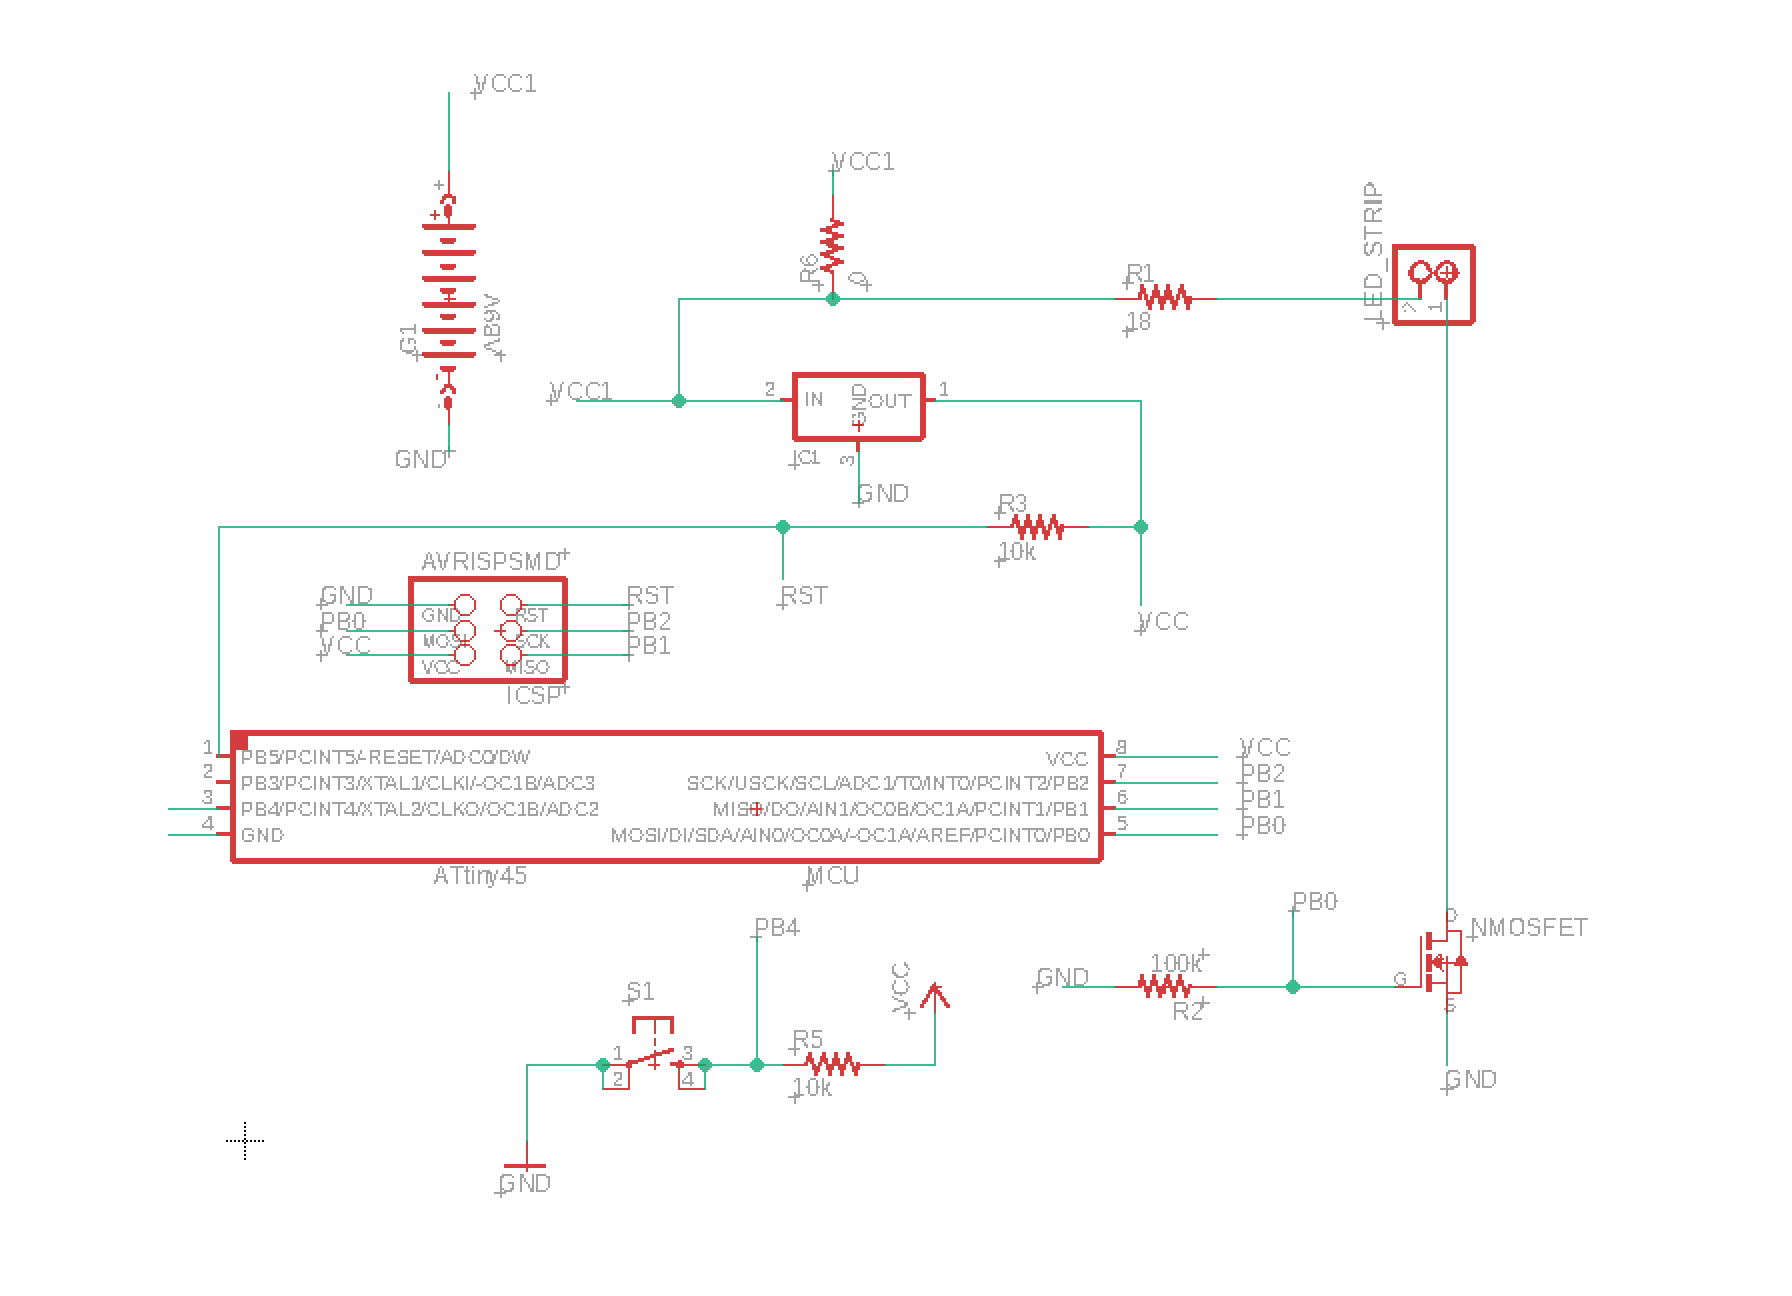
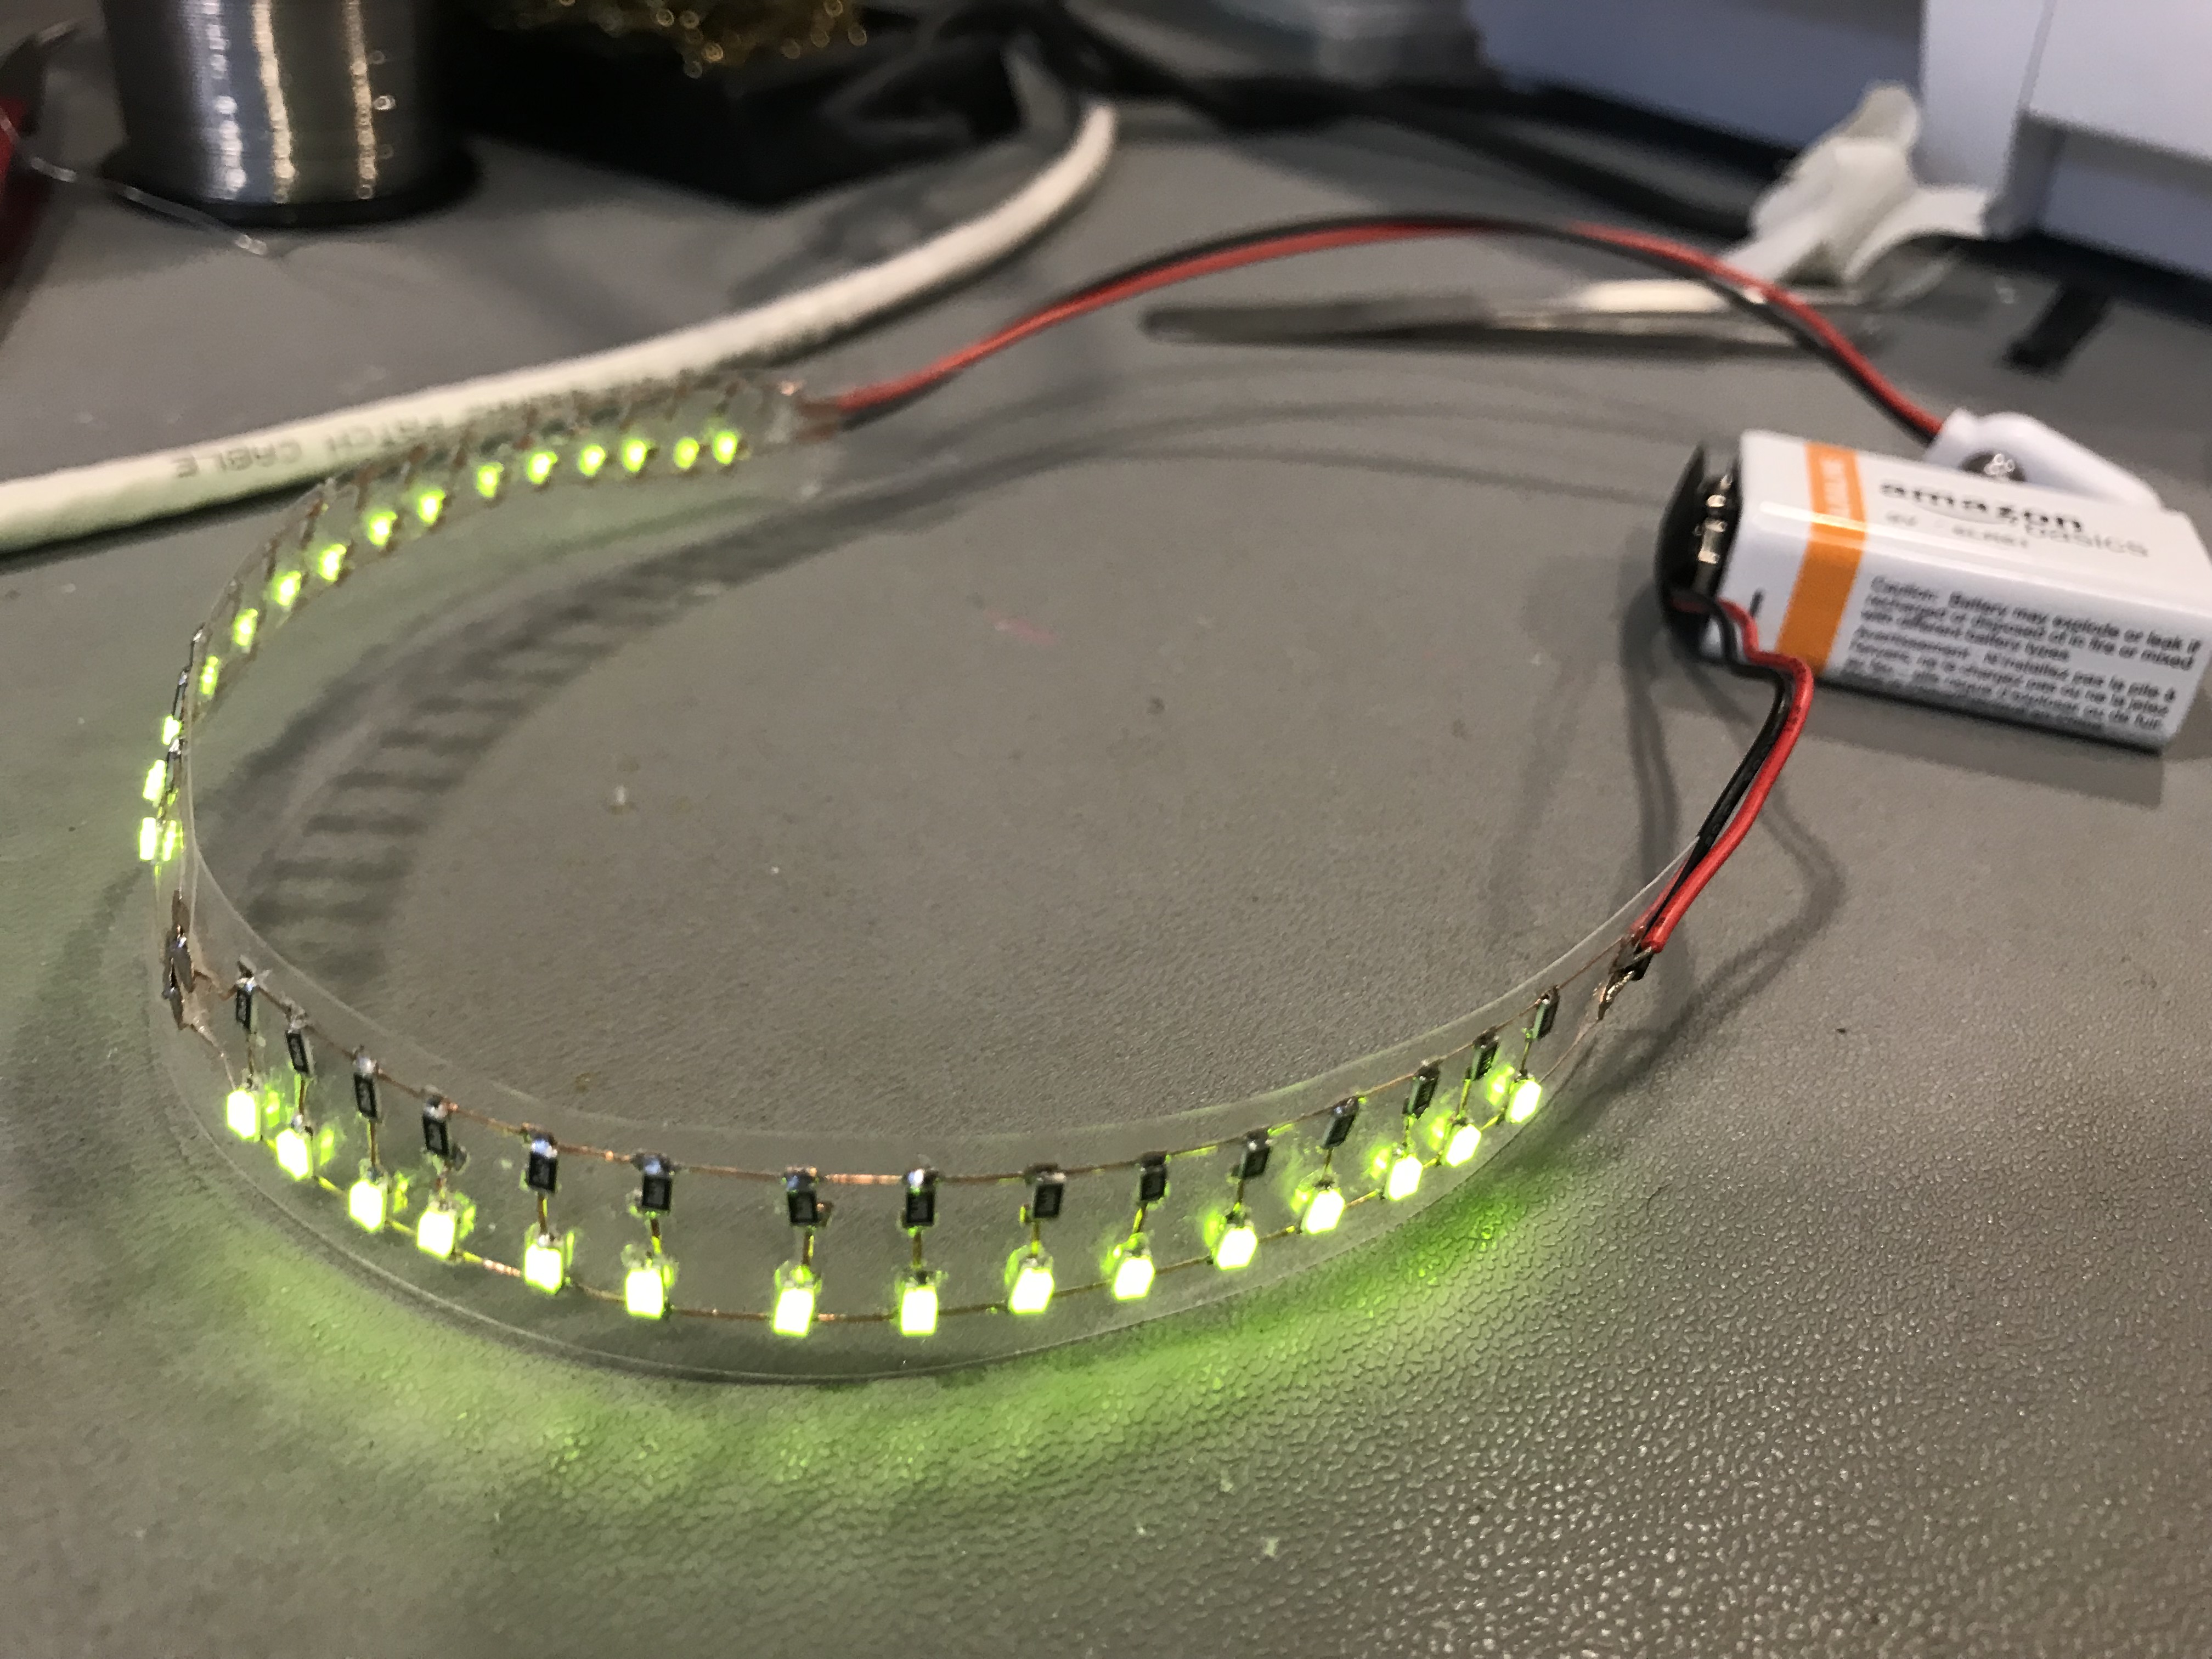
design goal: build a circuit that will controls LED strips with a switch. 1206 SMD LEDs requre 30mA an LED for max brightness. I don't need max brightness, so I'm using a 9V ~500mAh external battery to power the LED strip and ATTiny45. I used a 3.3V regulator to protect the Tiny and an N-Mosfet for LED strip control.
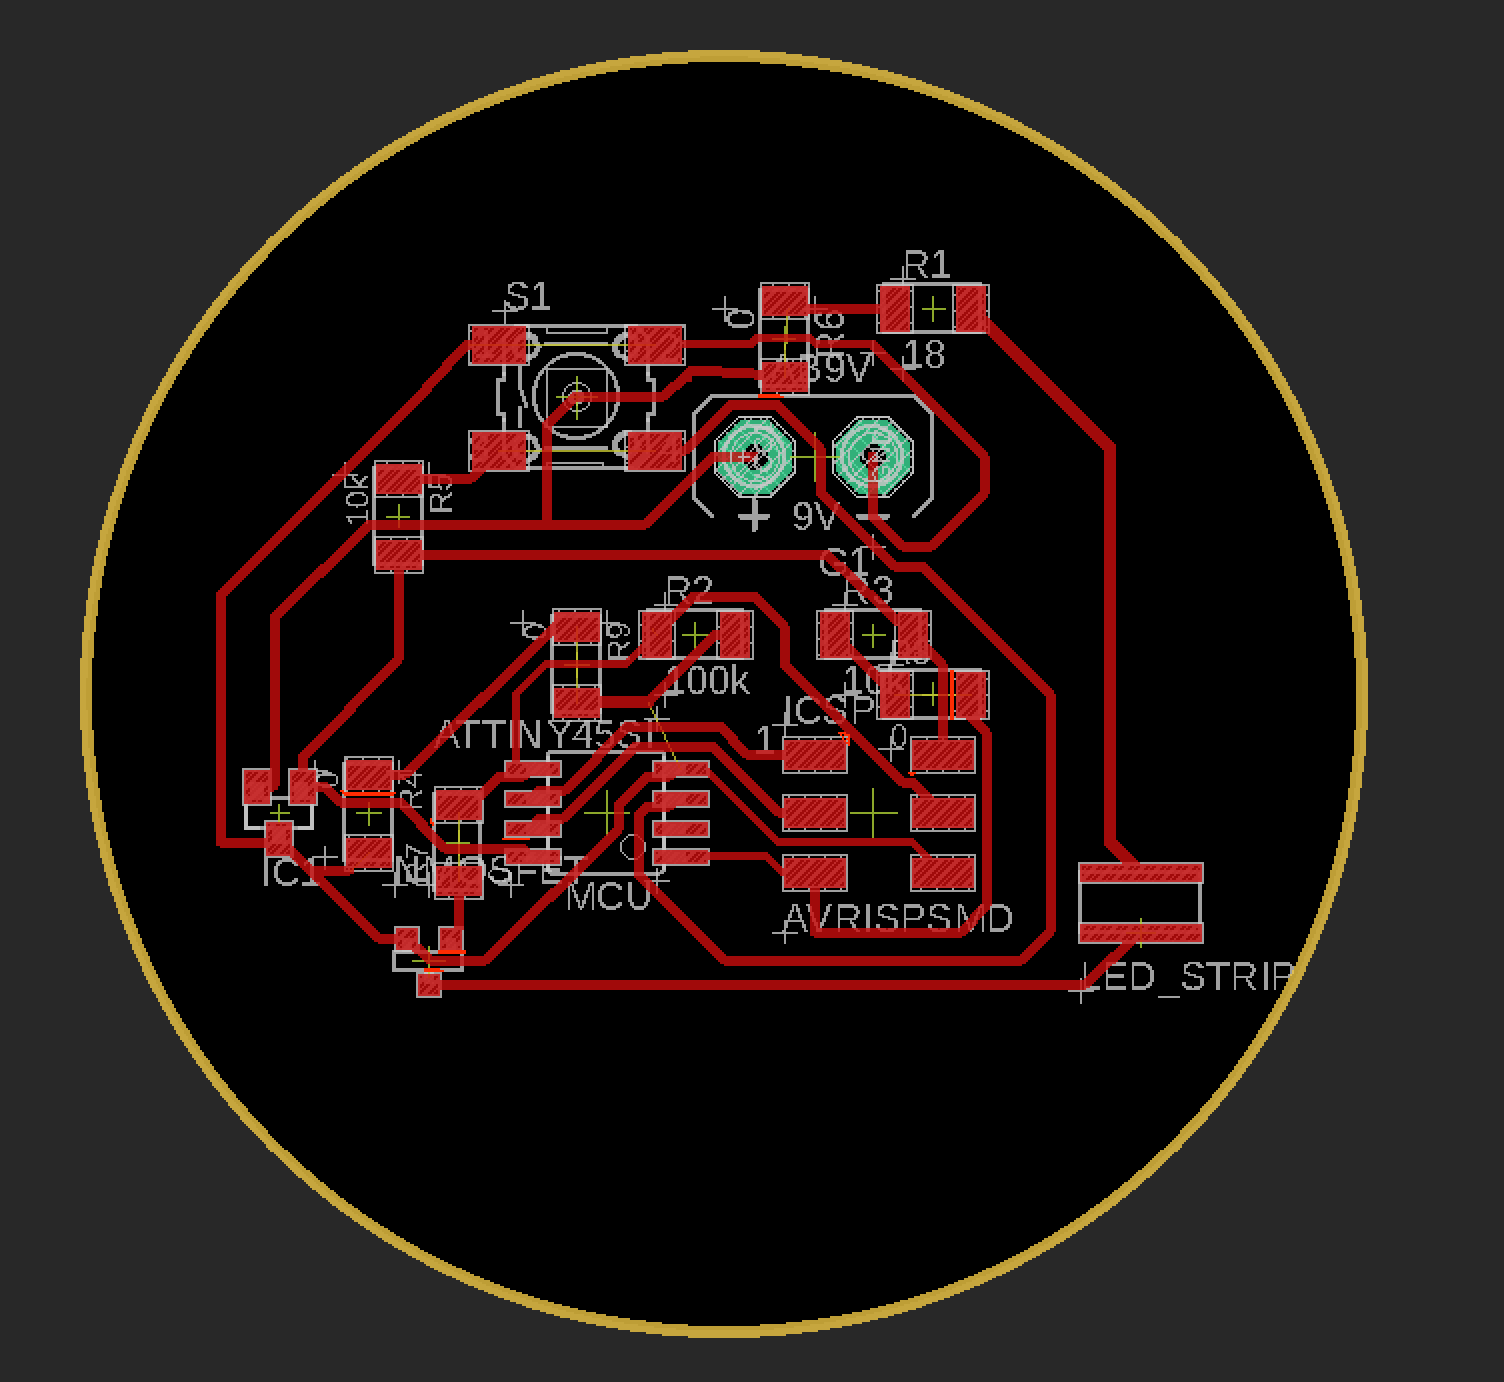
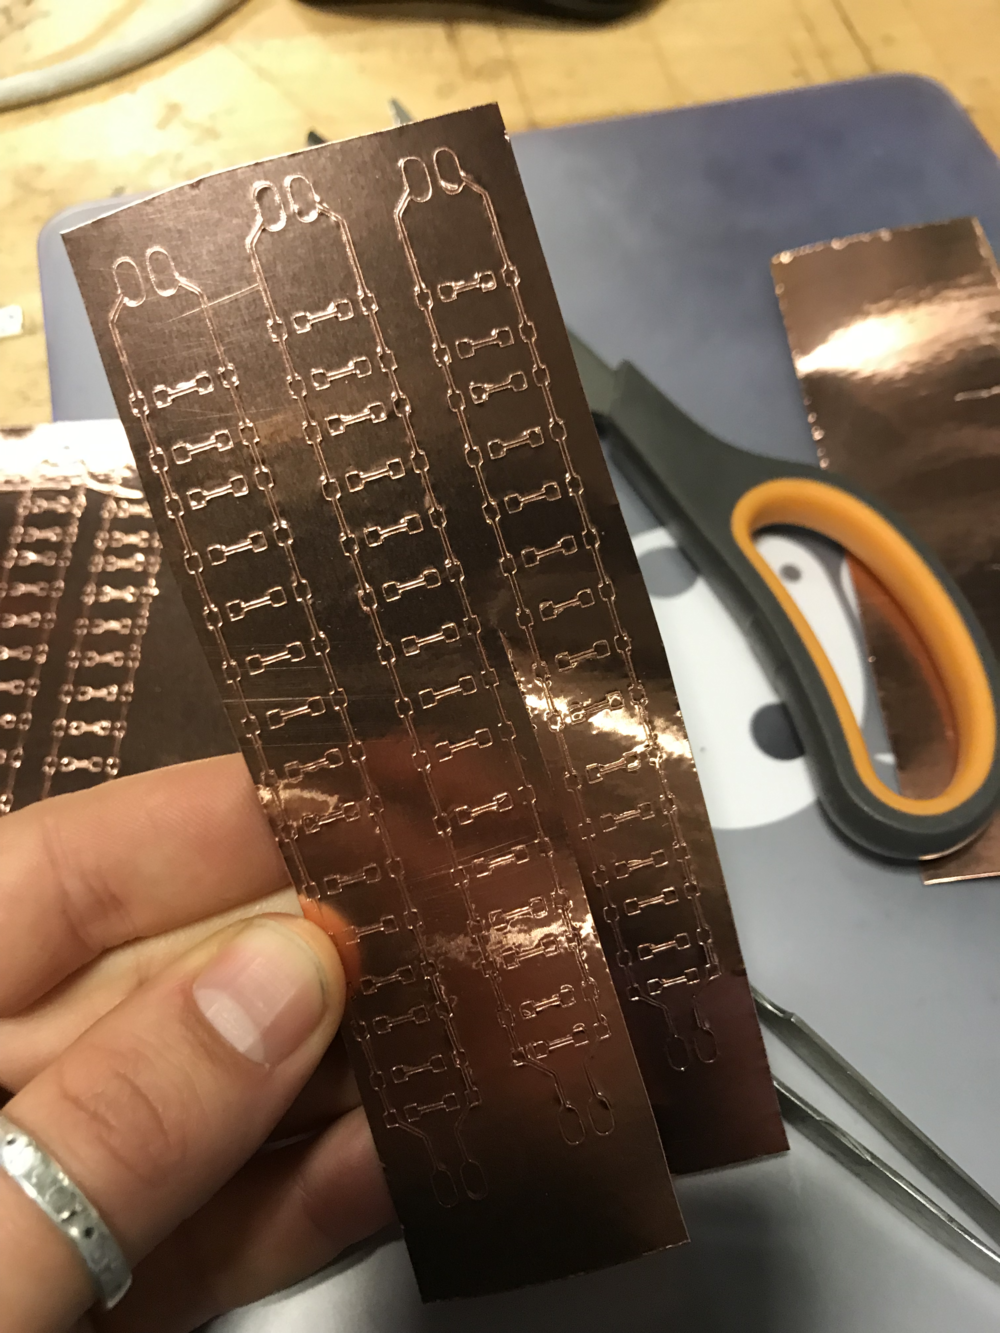
round #1: i want the board to sit nested in the fabric of the shoe, so i turned to my trusted alley, the Roland vinyl cutter to make this board.

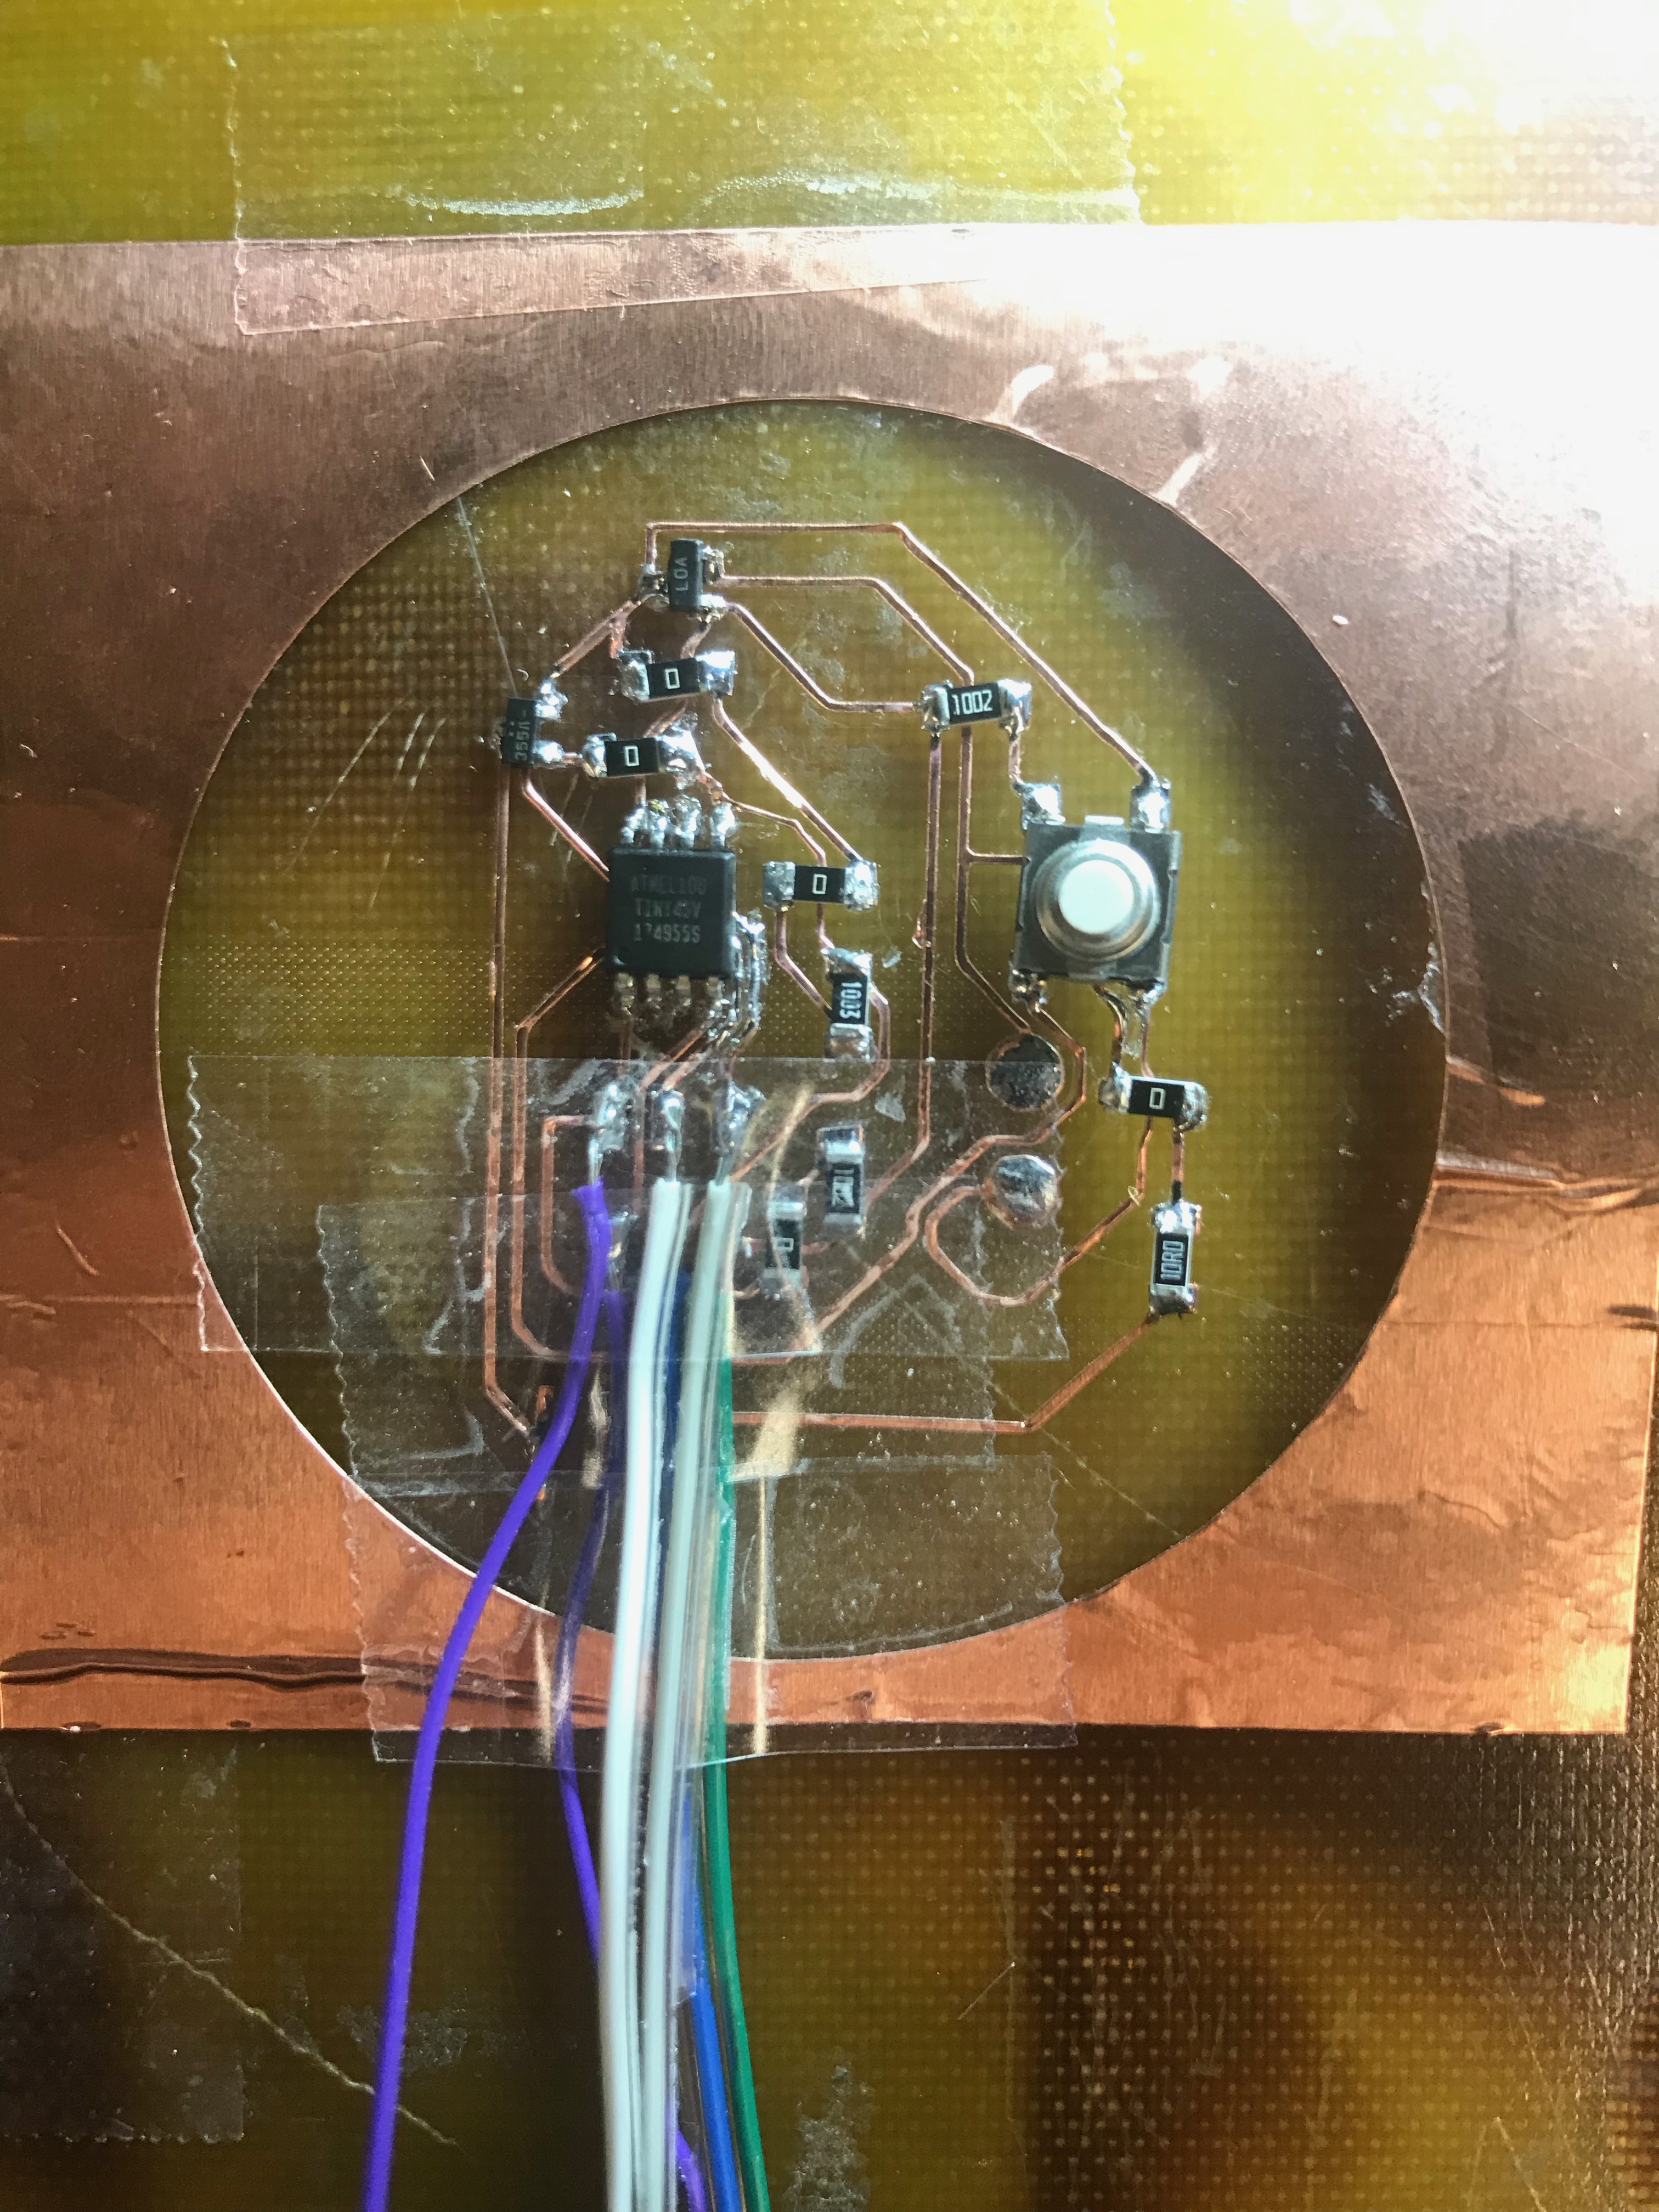
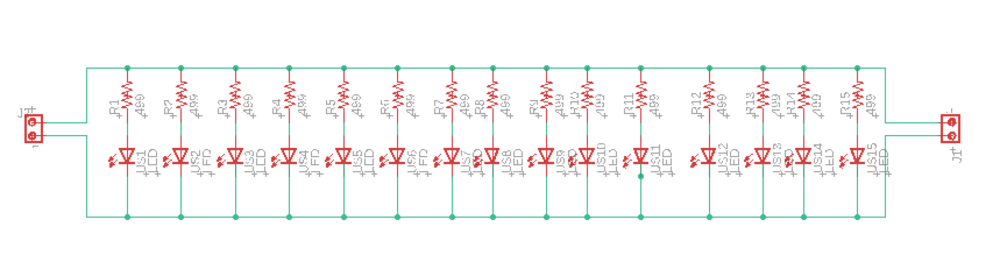
Below is the circuit and schematic for the vinyl cut strip. Calculation here is 15 SMD LEDs 1206 at 30mA per LED strip for max brightness according to the spec sheet

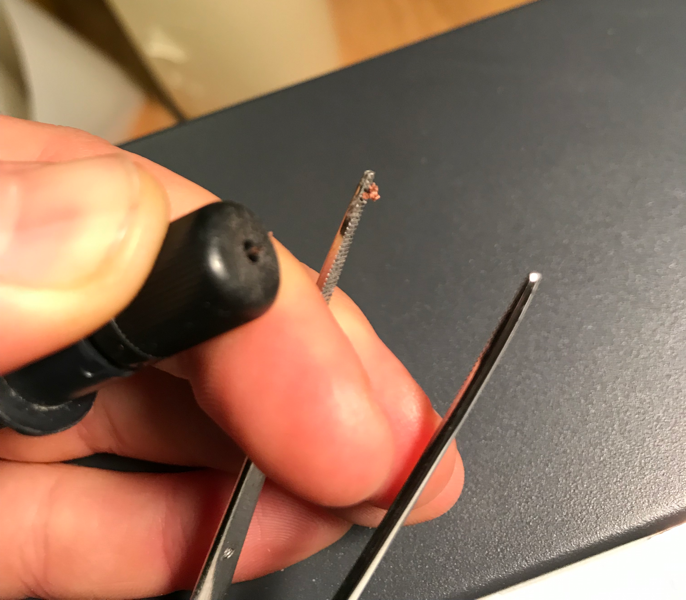
don't forget to clean the blade before cutting!
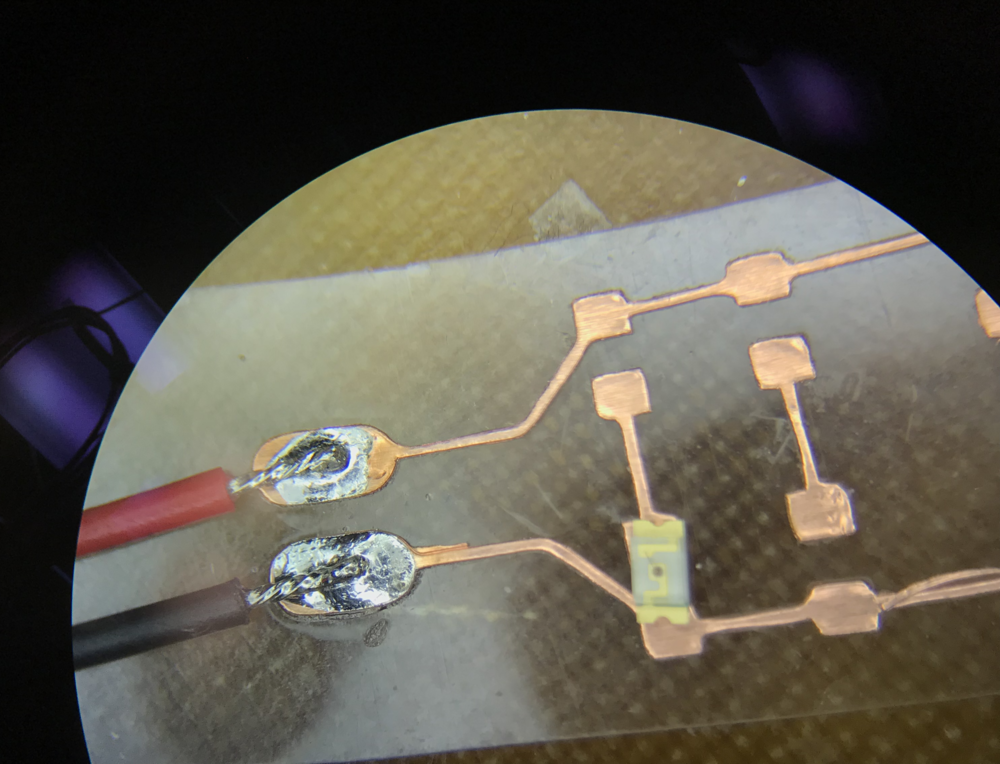
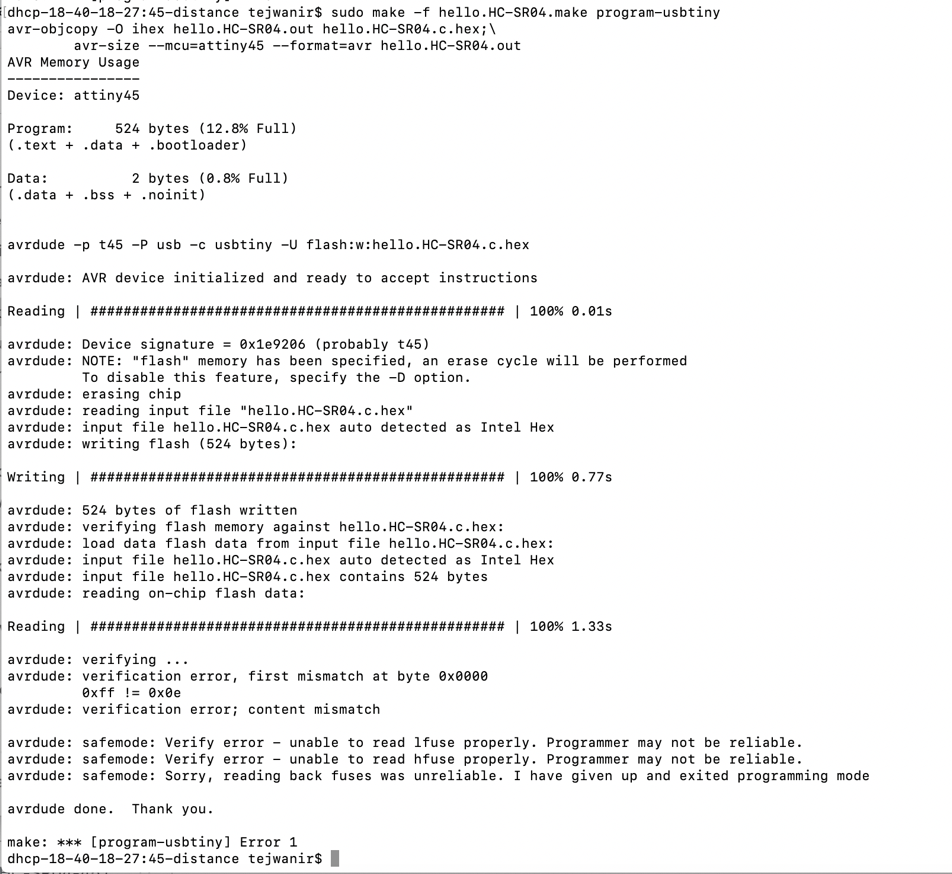
after creating plugging the jumper wires from the LED controller board into the USBTiny programmer, Neil’s ATTiny45 program was used to create a makefile for initial testing to make sure I could talk to the LED controller board. the first error I got was the dreaded rc = -1, which Ben the TA gave us a checklist to follow whenever we received such an error:
• Board is milled correctly (traces are properly isolated).
• No shorts between power and/or data lines.
• No open circuits between t44 pins and corresponding connector pins.
• Solder joints are in good condition.
• No unintended solder bridges between adjacent pins / traces.
• t44 is oriented correctly on board (check pin 1 indicator).
• Required clock source is present on board (depending on how you set fuses) and in good condition.
• No swapped data signals. (For instance, verify that MOSI goes to MOSI and MISO goes to MISO.)
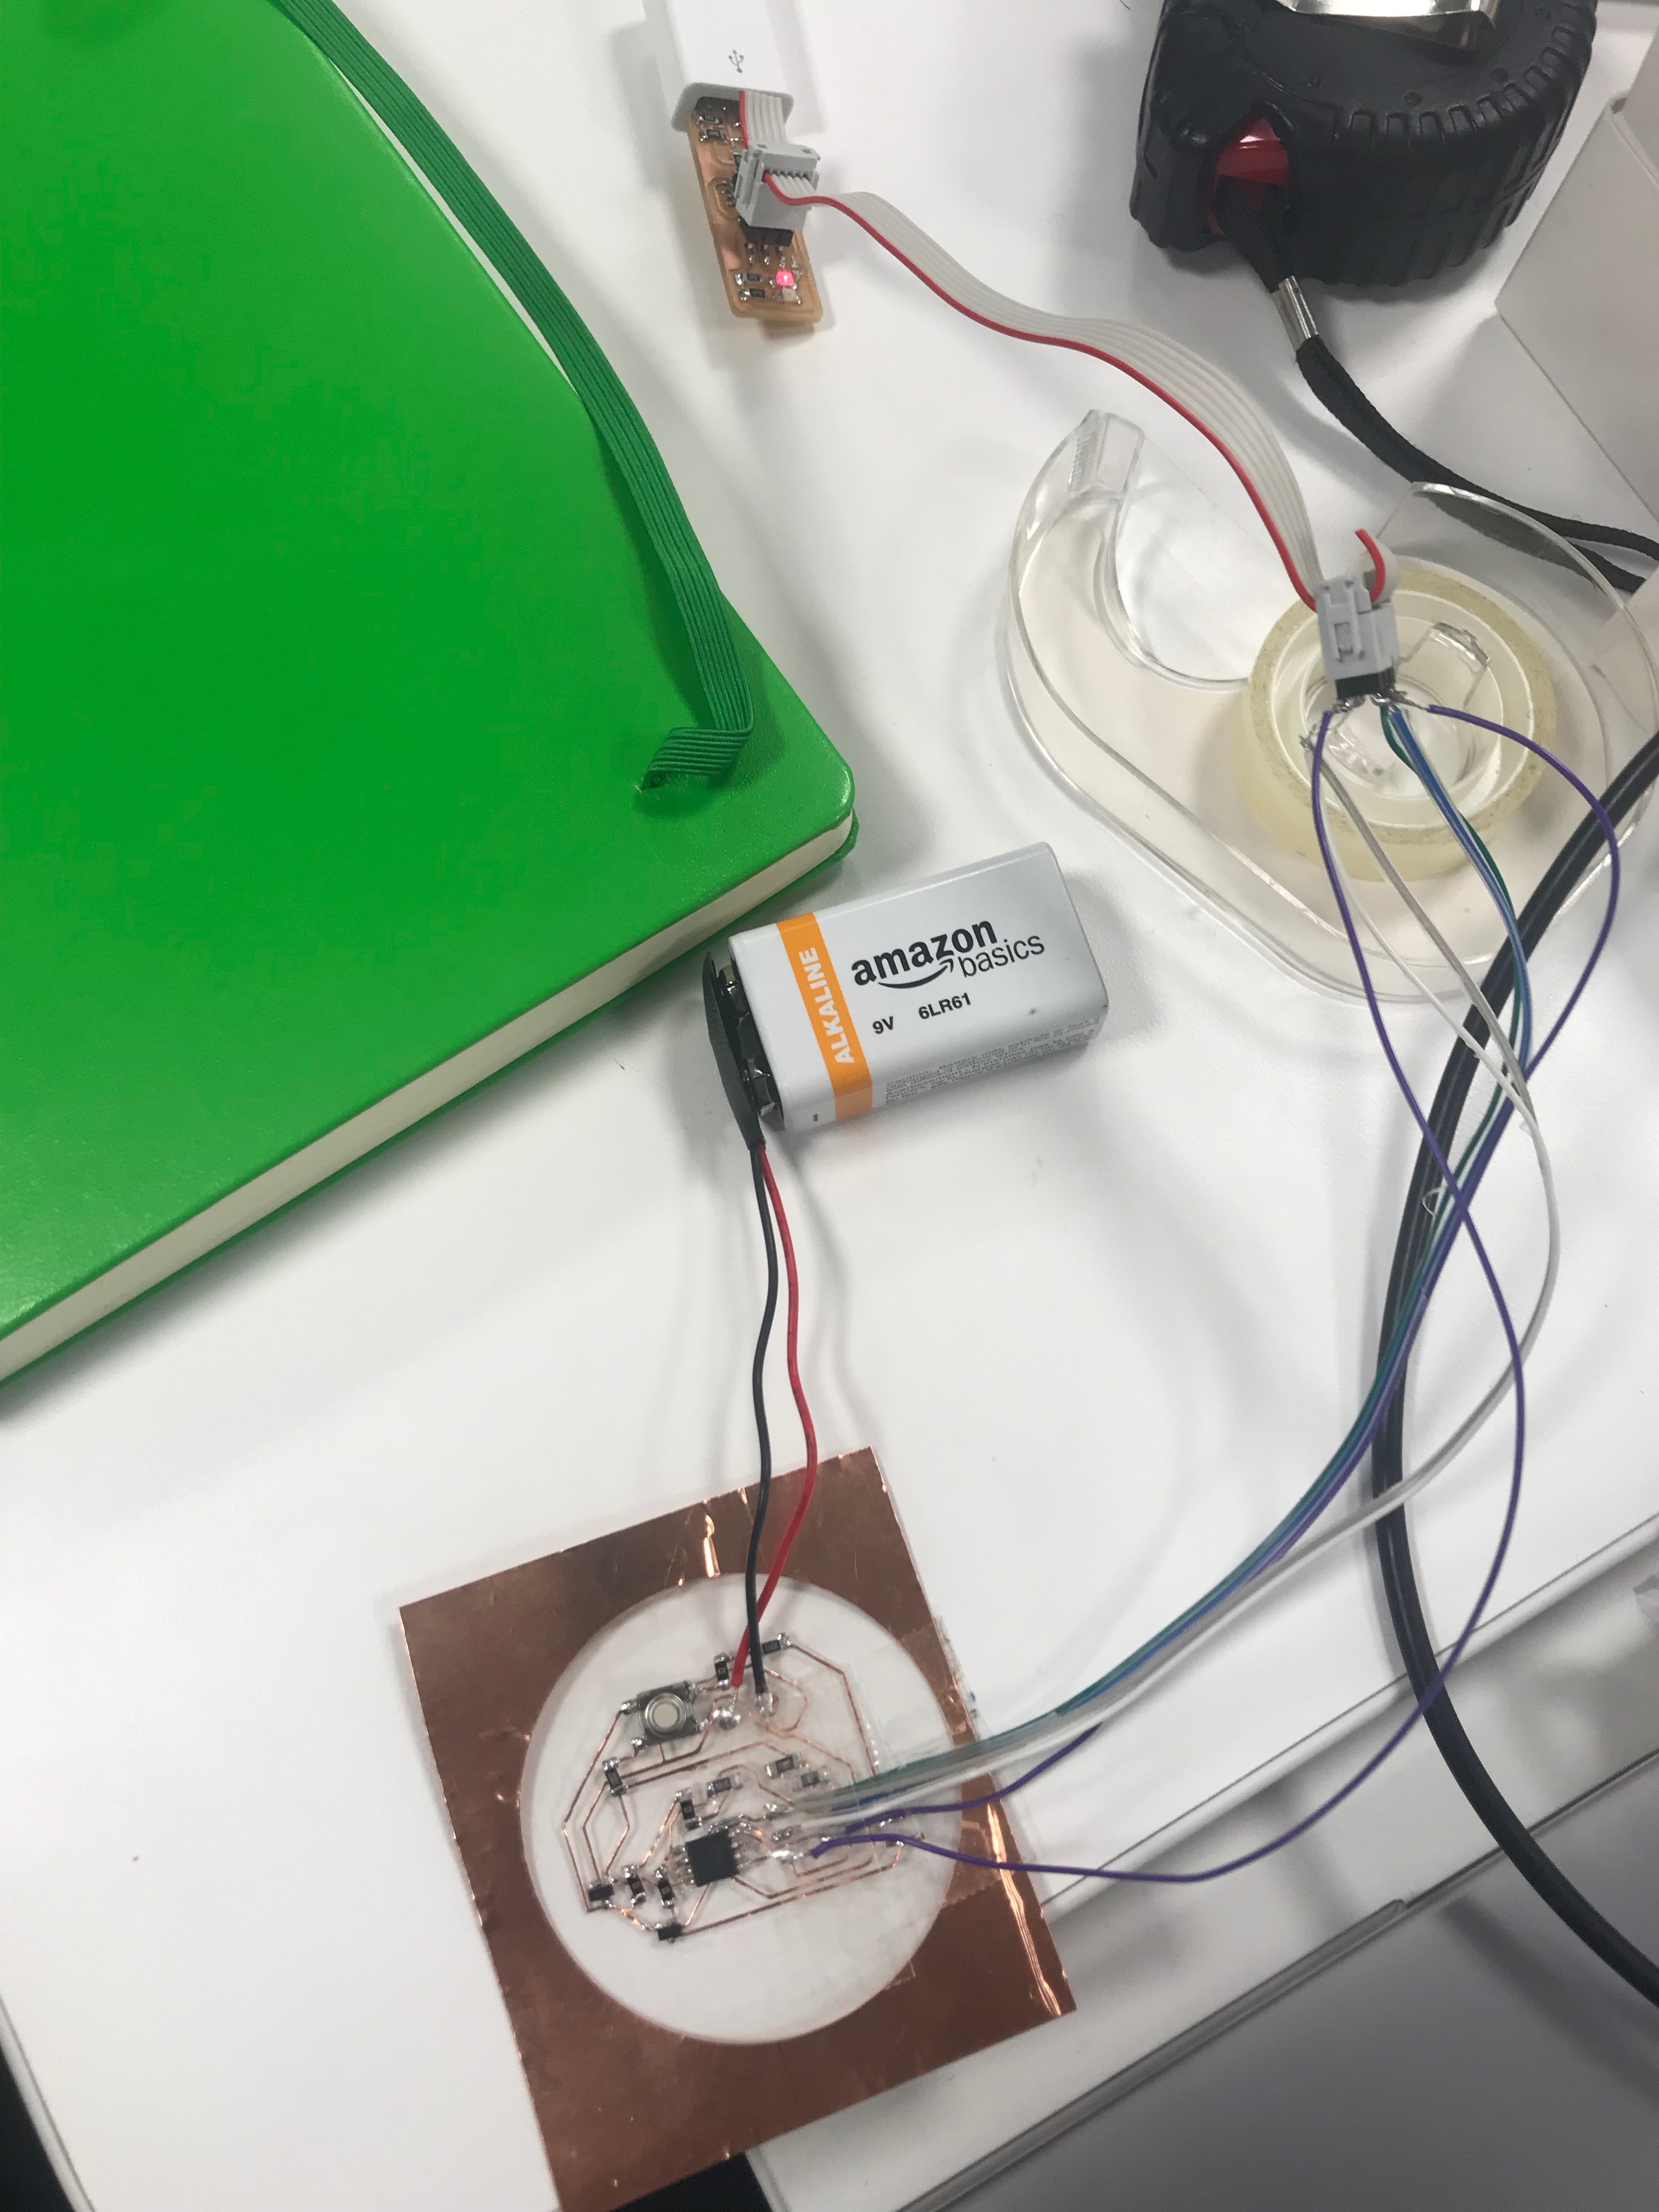
after going thorugh the checklist, we found that there is a short *sometimes* between VCC and GND. When there isn’t a short, avrdude found some content mismatch and gave up trying to fuse. Weird. Although I really wanted to see this circuit live on acetate for its flexible attributes that fit so nicely with fabric, I will be milling a board on the shopbot because there’s zero time left to play…
round #2: milling the board on the ShopBot.
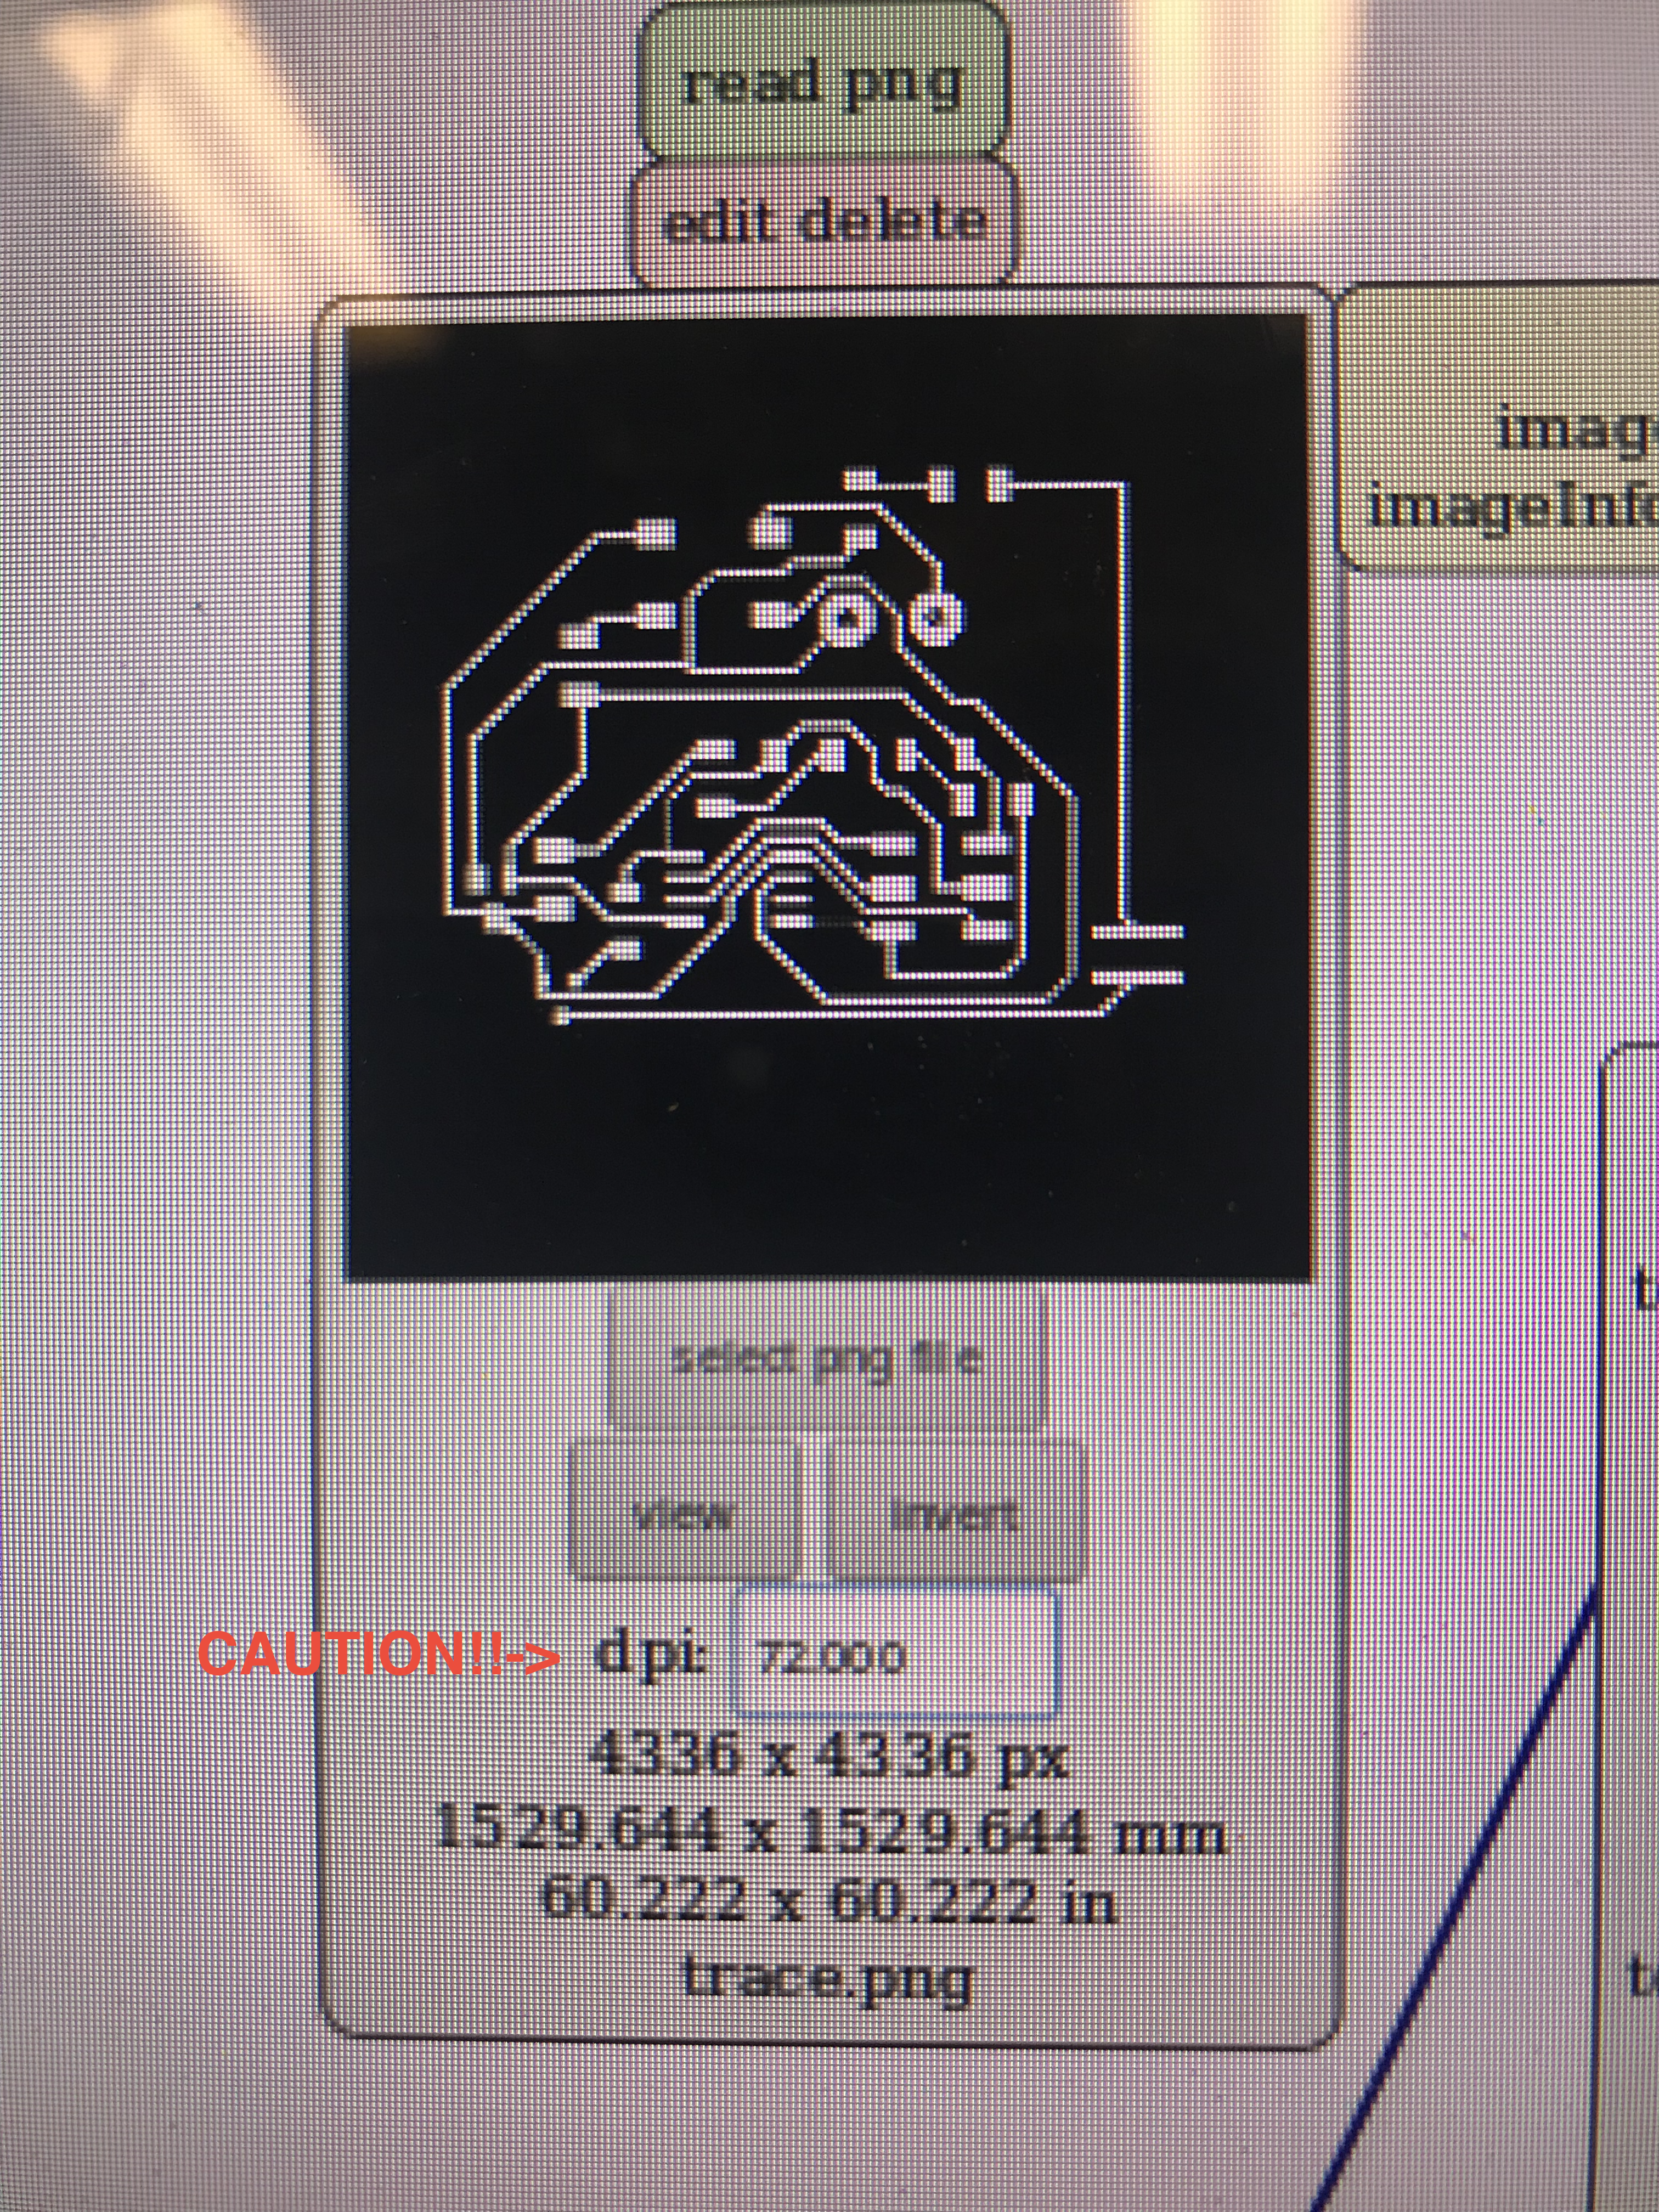
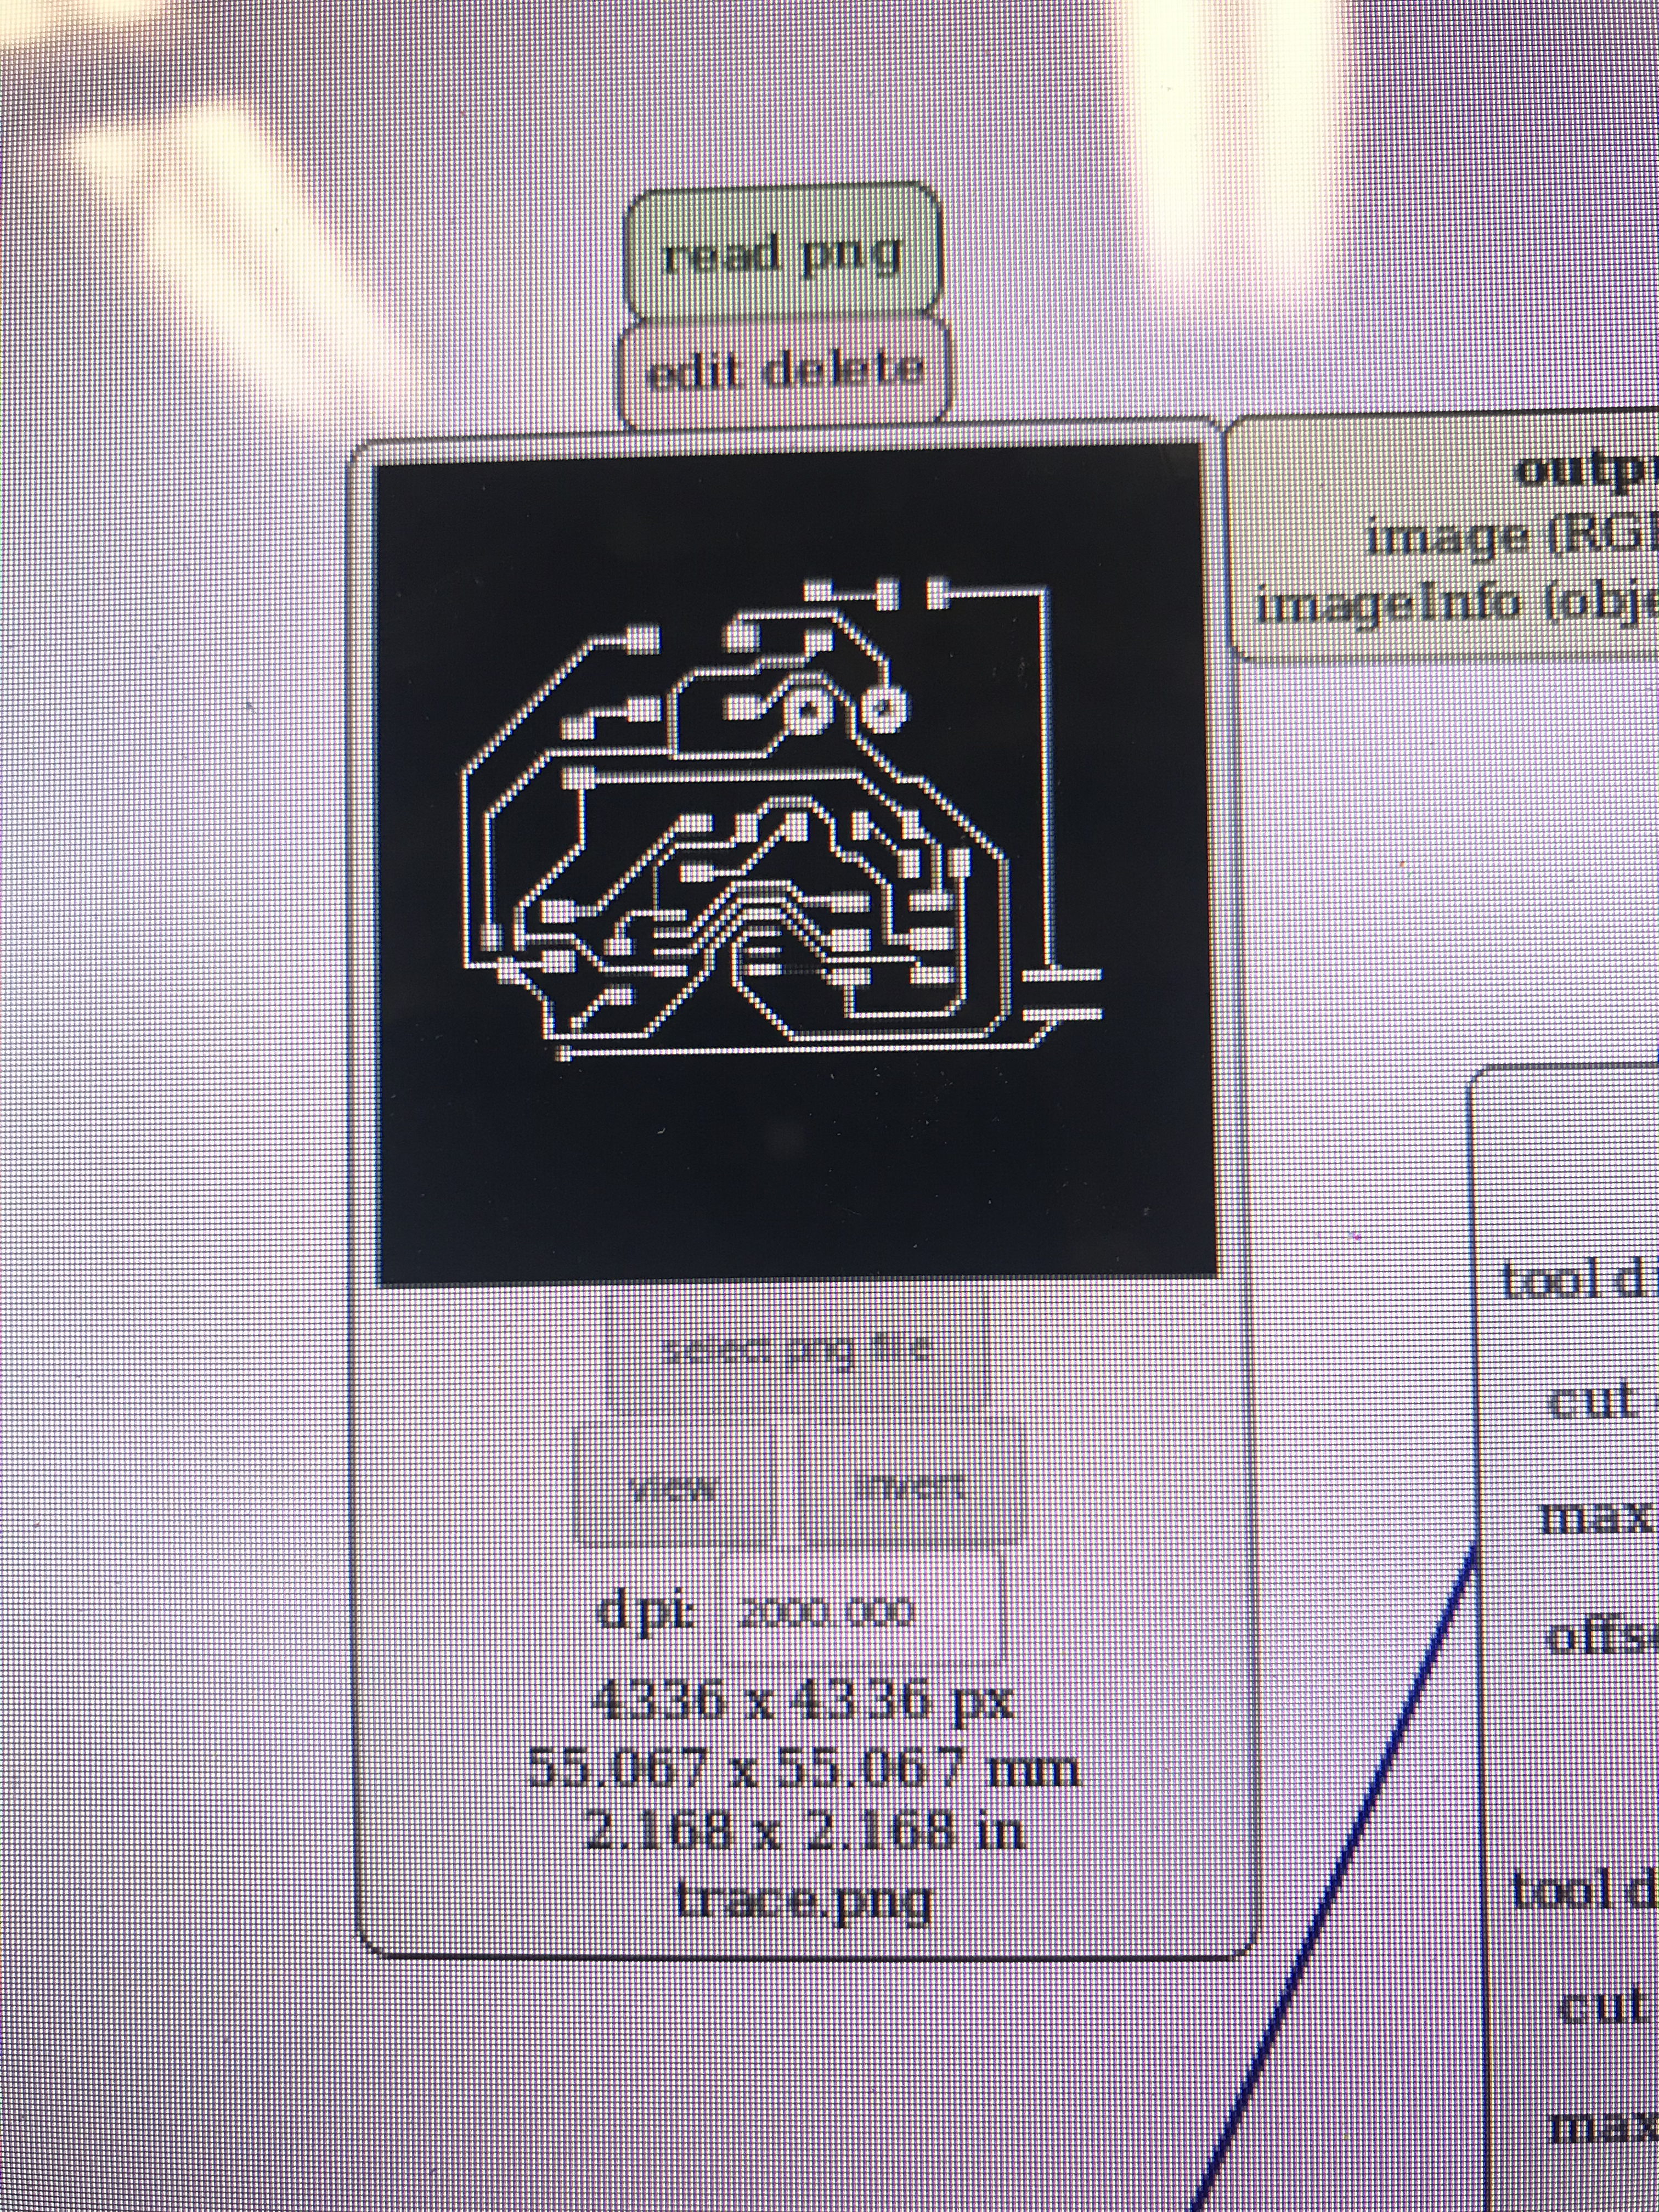
note to future self (and all Mac 2012+ users). if you export your PNG from Eagle straight into mods, a funky sizing error will occur, so be sure to change whatever your DPI is to 2000 and make sure the size of the board makes sense before printing.

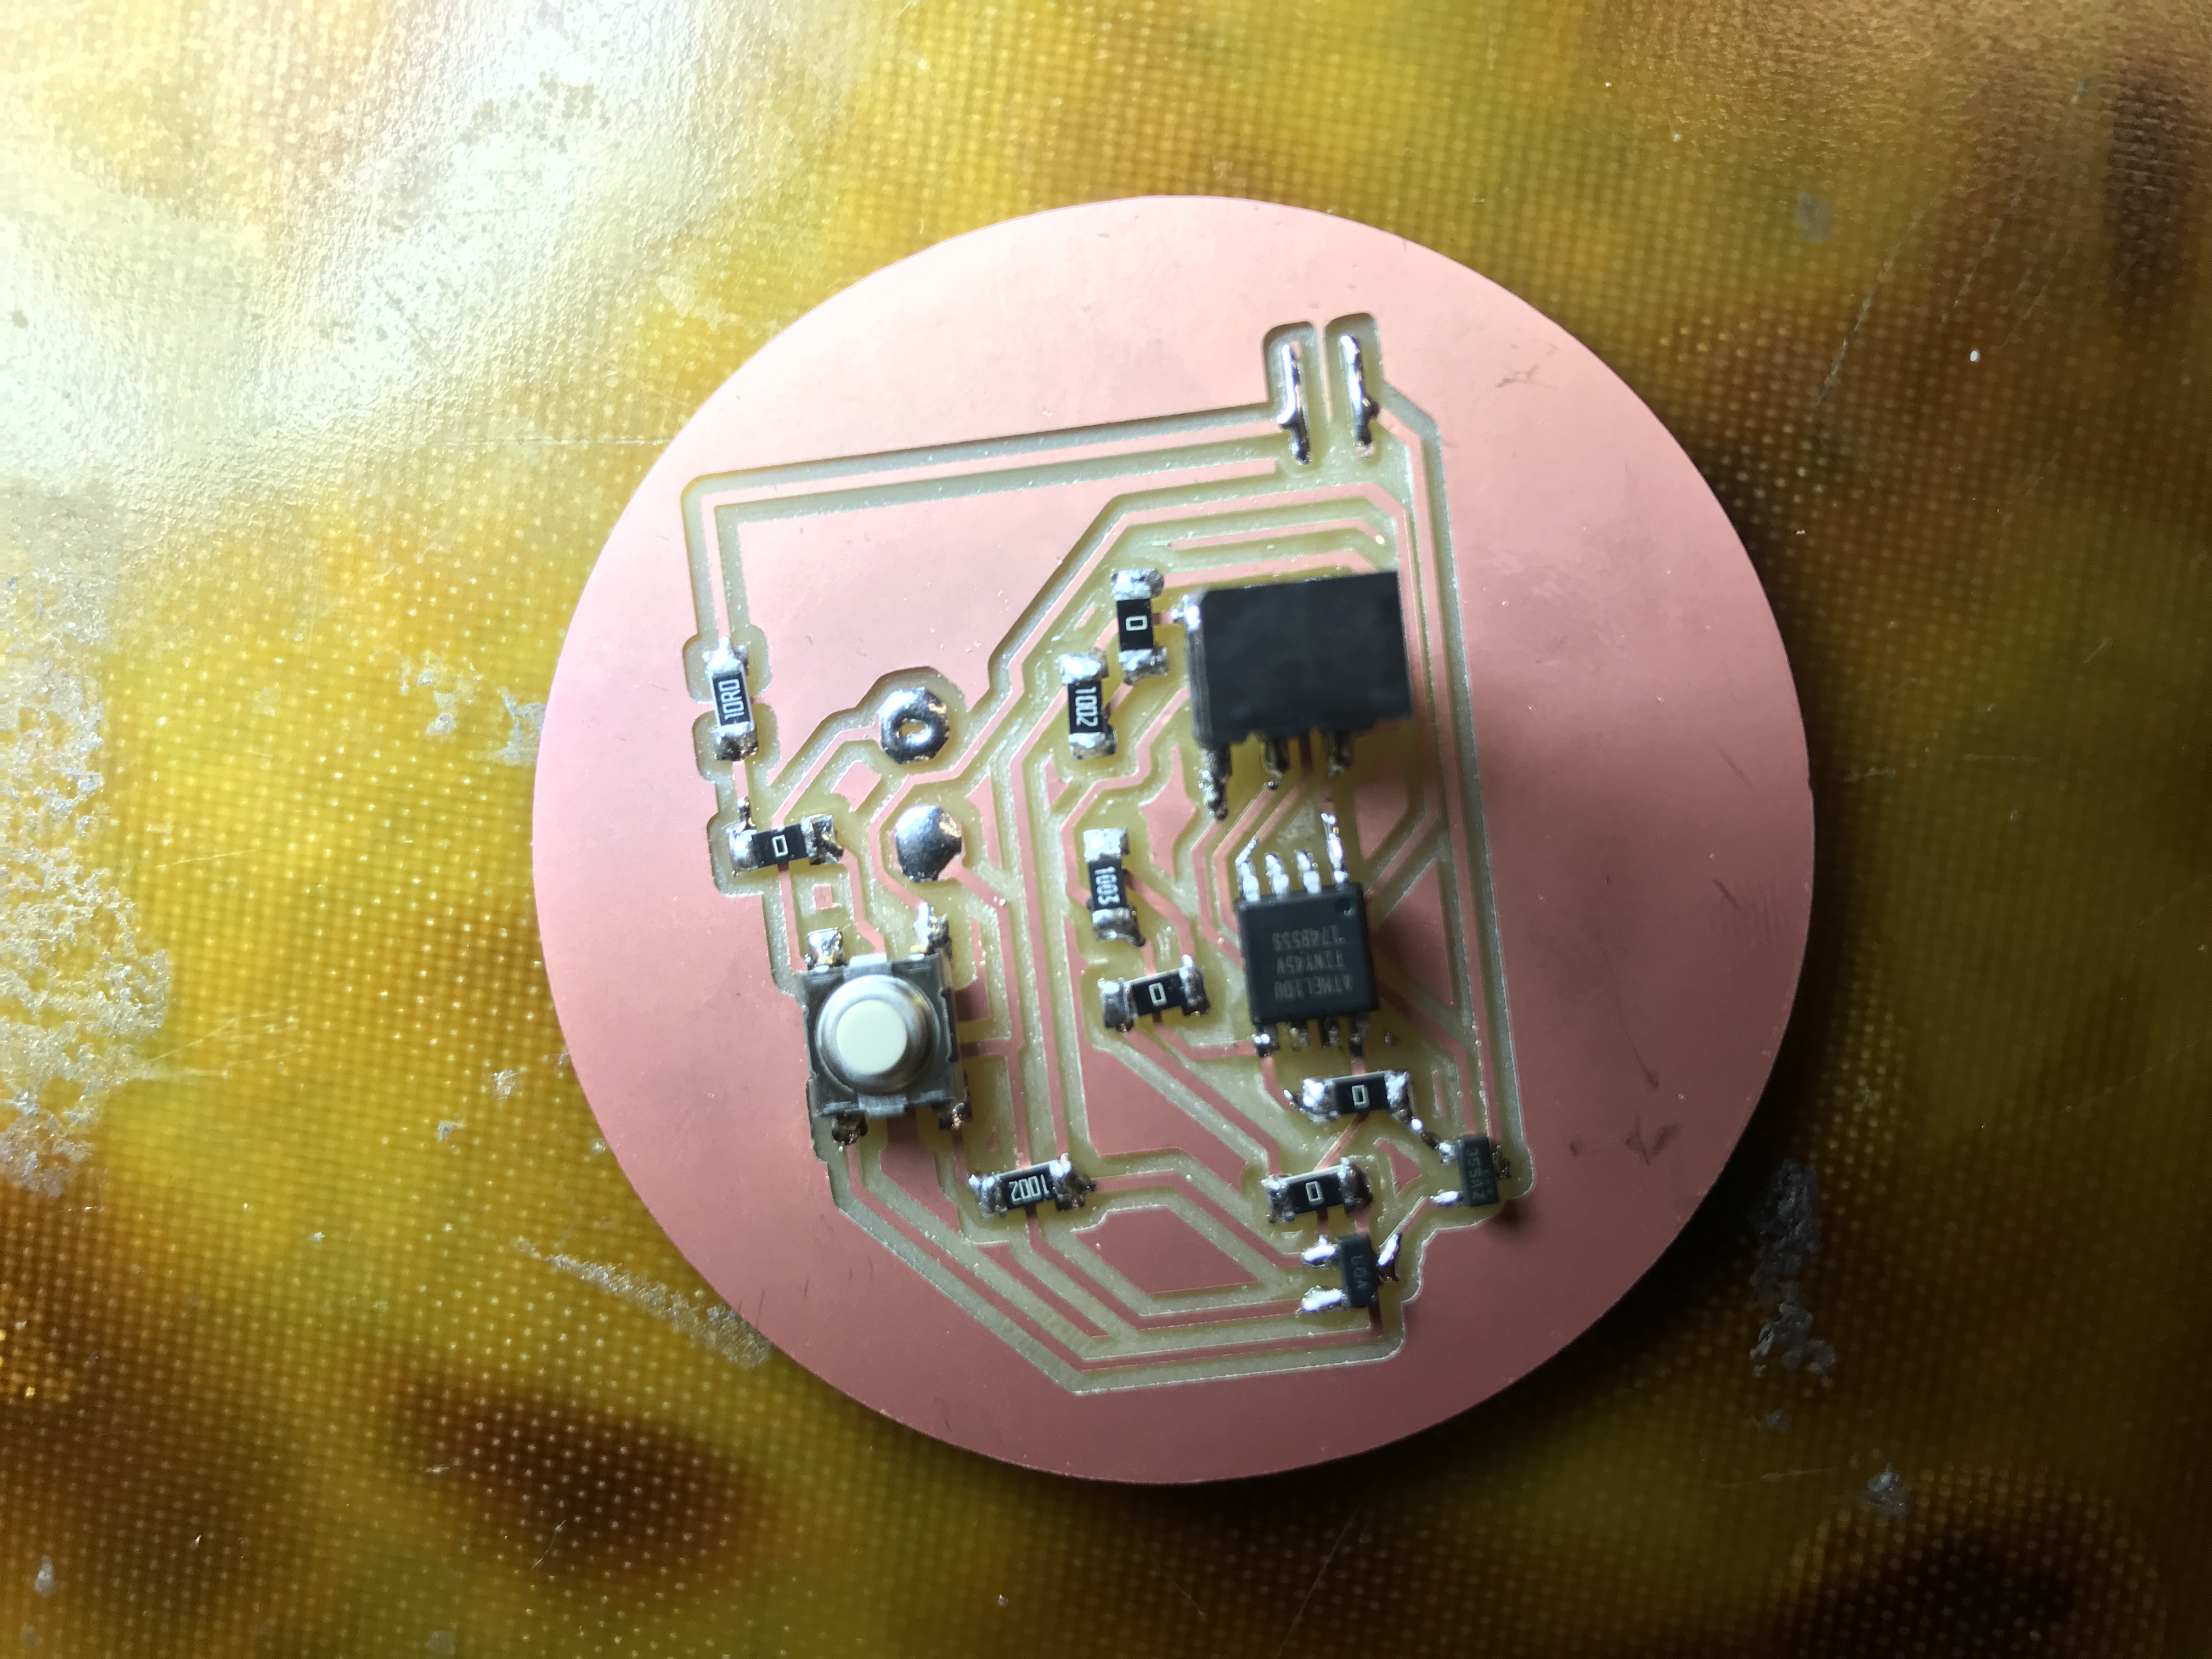
UPDATE #1:the board was programmed...but avrdude still delivers the rc = -1...WHYYY. i checked all pins and connections and everything seems to be powered at a happy voltage...
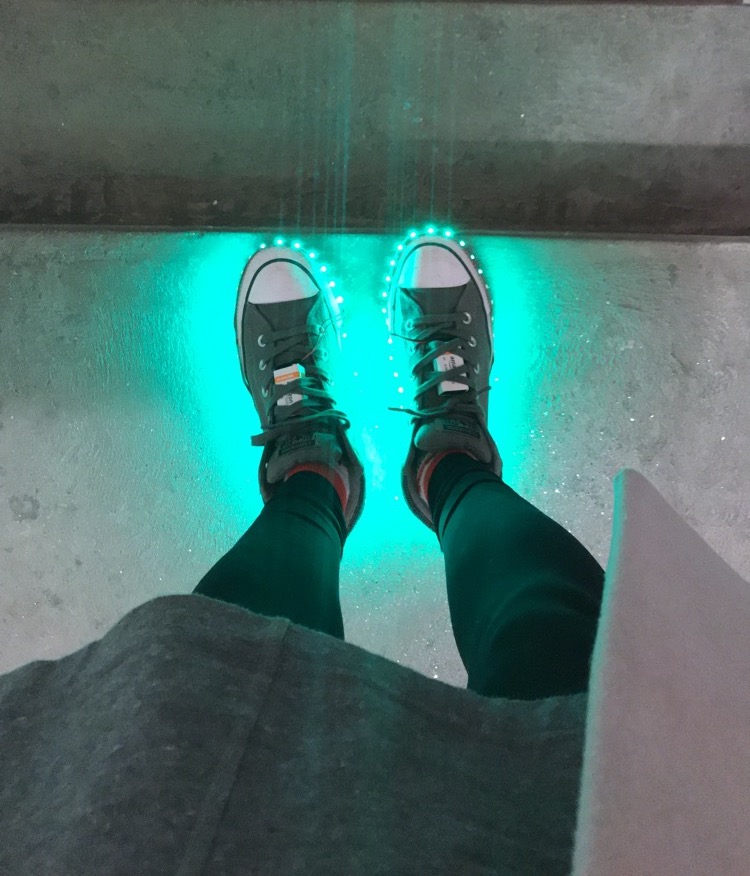
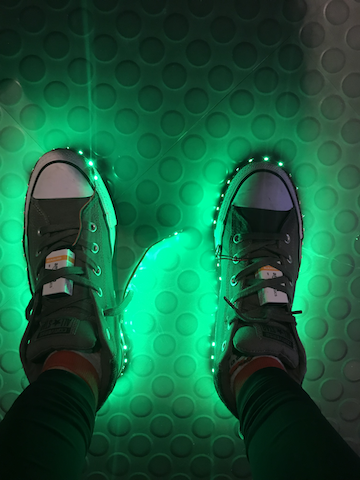
UPDATE #2: i programmed the Adafruit Flora with my simple program (located in at the repo link at the top of the page) and it works! The button press turns the pulsing LEDs on and off.
//////////////////////////////////////////////////////////////////
//Oceane Boulais adapted from bildr
//Released under the MIT License - Please reuse change and share
//Simple code to output a PWM sine wave signal on pin 9 of ATTINY45 with a swtich
//(button) on
//////////////////////////////////////////////////////////////////

#define ledPin 0
#define buttonPin 8


// variables will change:
int buttonState = 0;         // variable for reading the pushbutton status

void setup(){
  //initialize button pin as input
  pinMode(buttonPin, INPUT);
  //initialize led pin as output
  pinMode(ledPin, OUTPUT);
}

void loop(){

  // read the state of the pushbutton value:
  buttonState = digitalRead(buttonPin);

  // check if the pushbutton is pressed. If it is, then buttonState is HIGH and start pulse:
  if (buttonState == LOW) {
      for(int i = 0; i<360; i++){
        //convert 0-360 angle to radian (needed for sin function)
        float rad = DEG_TO_RAD * i;

        //calculate sin of angle as number between 0 and 255
        int sinOut = constrain((sin(rad) * 128) + 128, 0, 255);
        analogWrite(ledPin, sinOut);
        delay(5);
      }     }else {
    // turn LED off:
    digitalWrite(ledPin, HIGH);

}
}
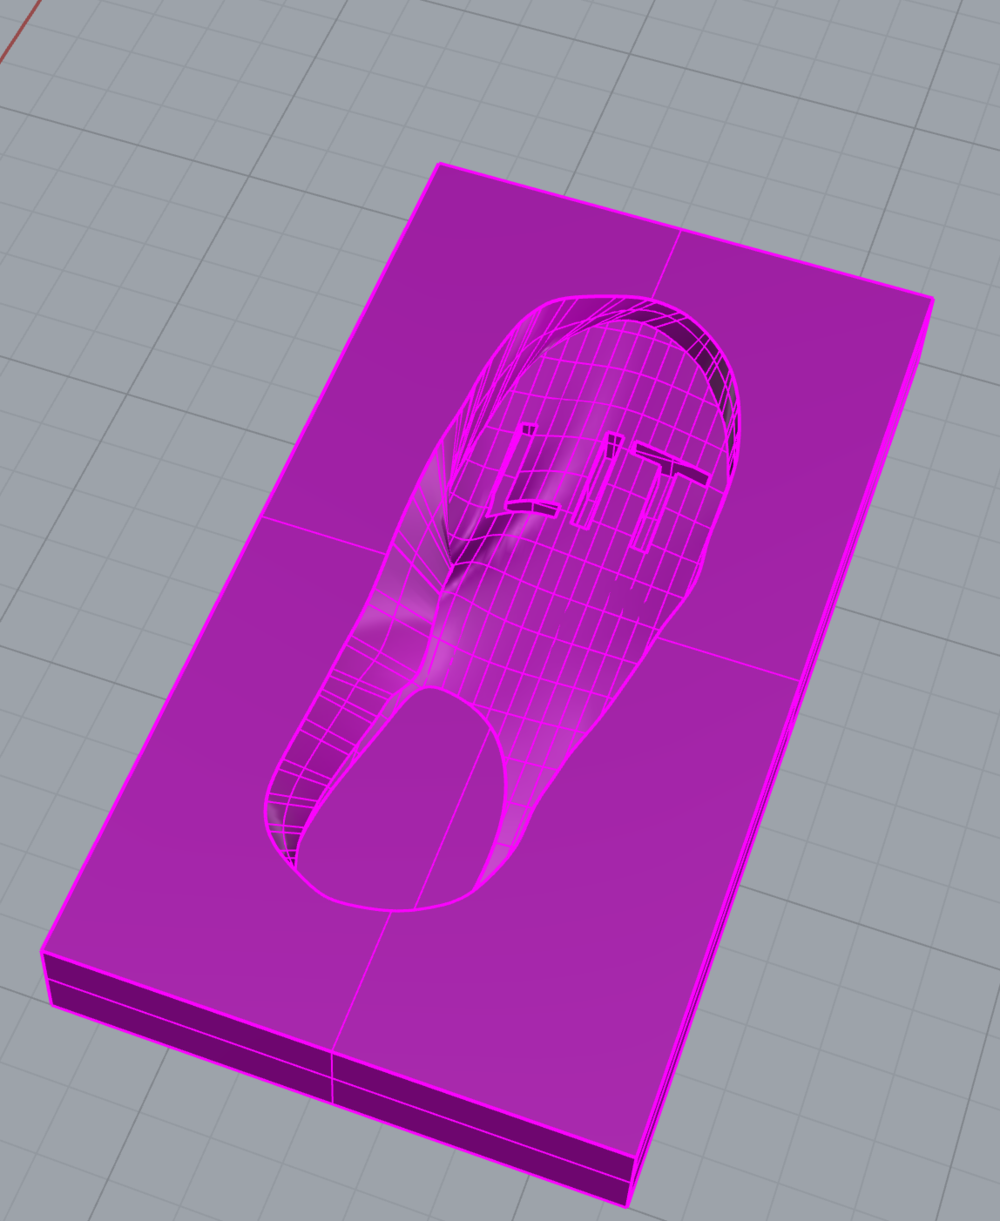
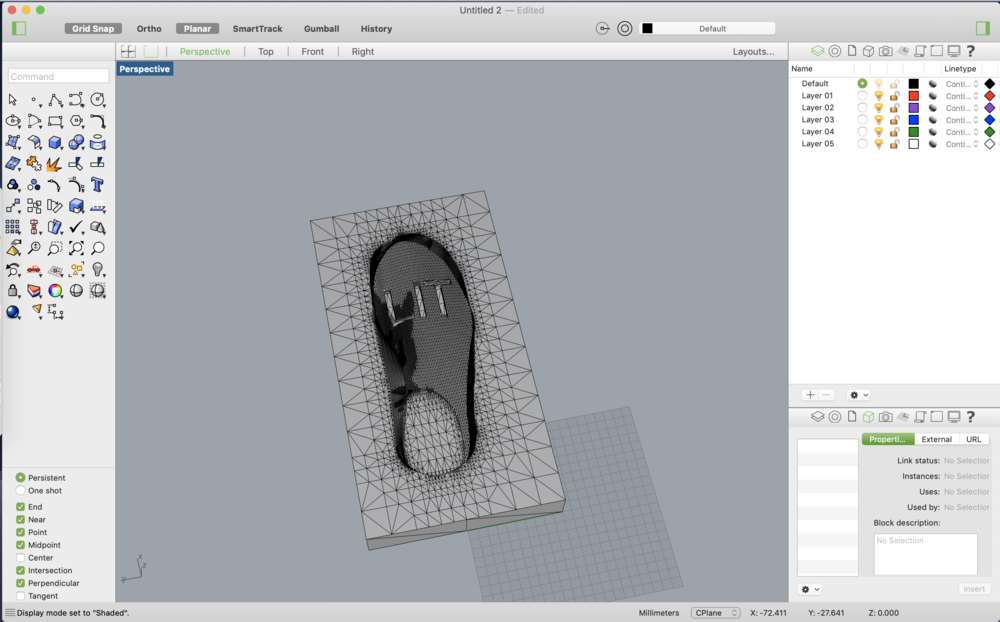
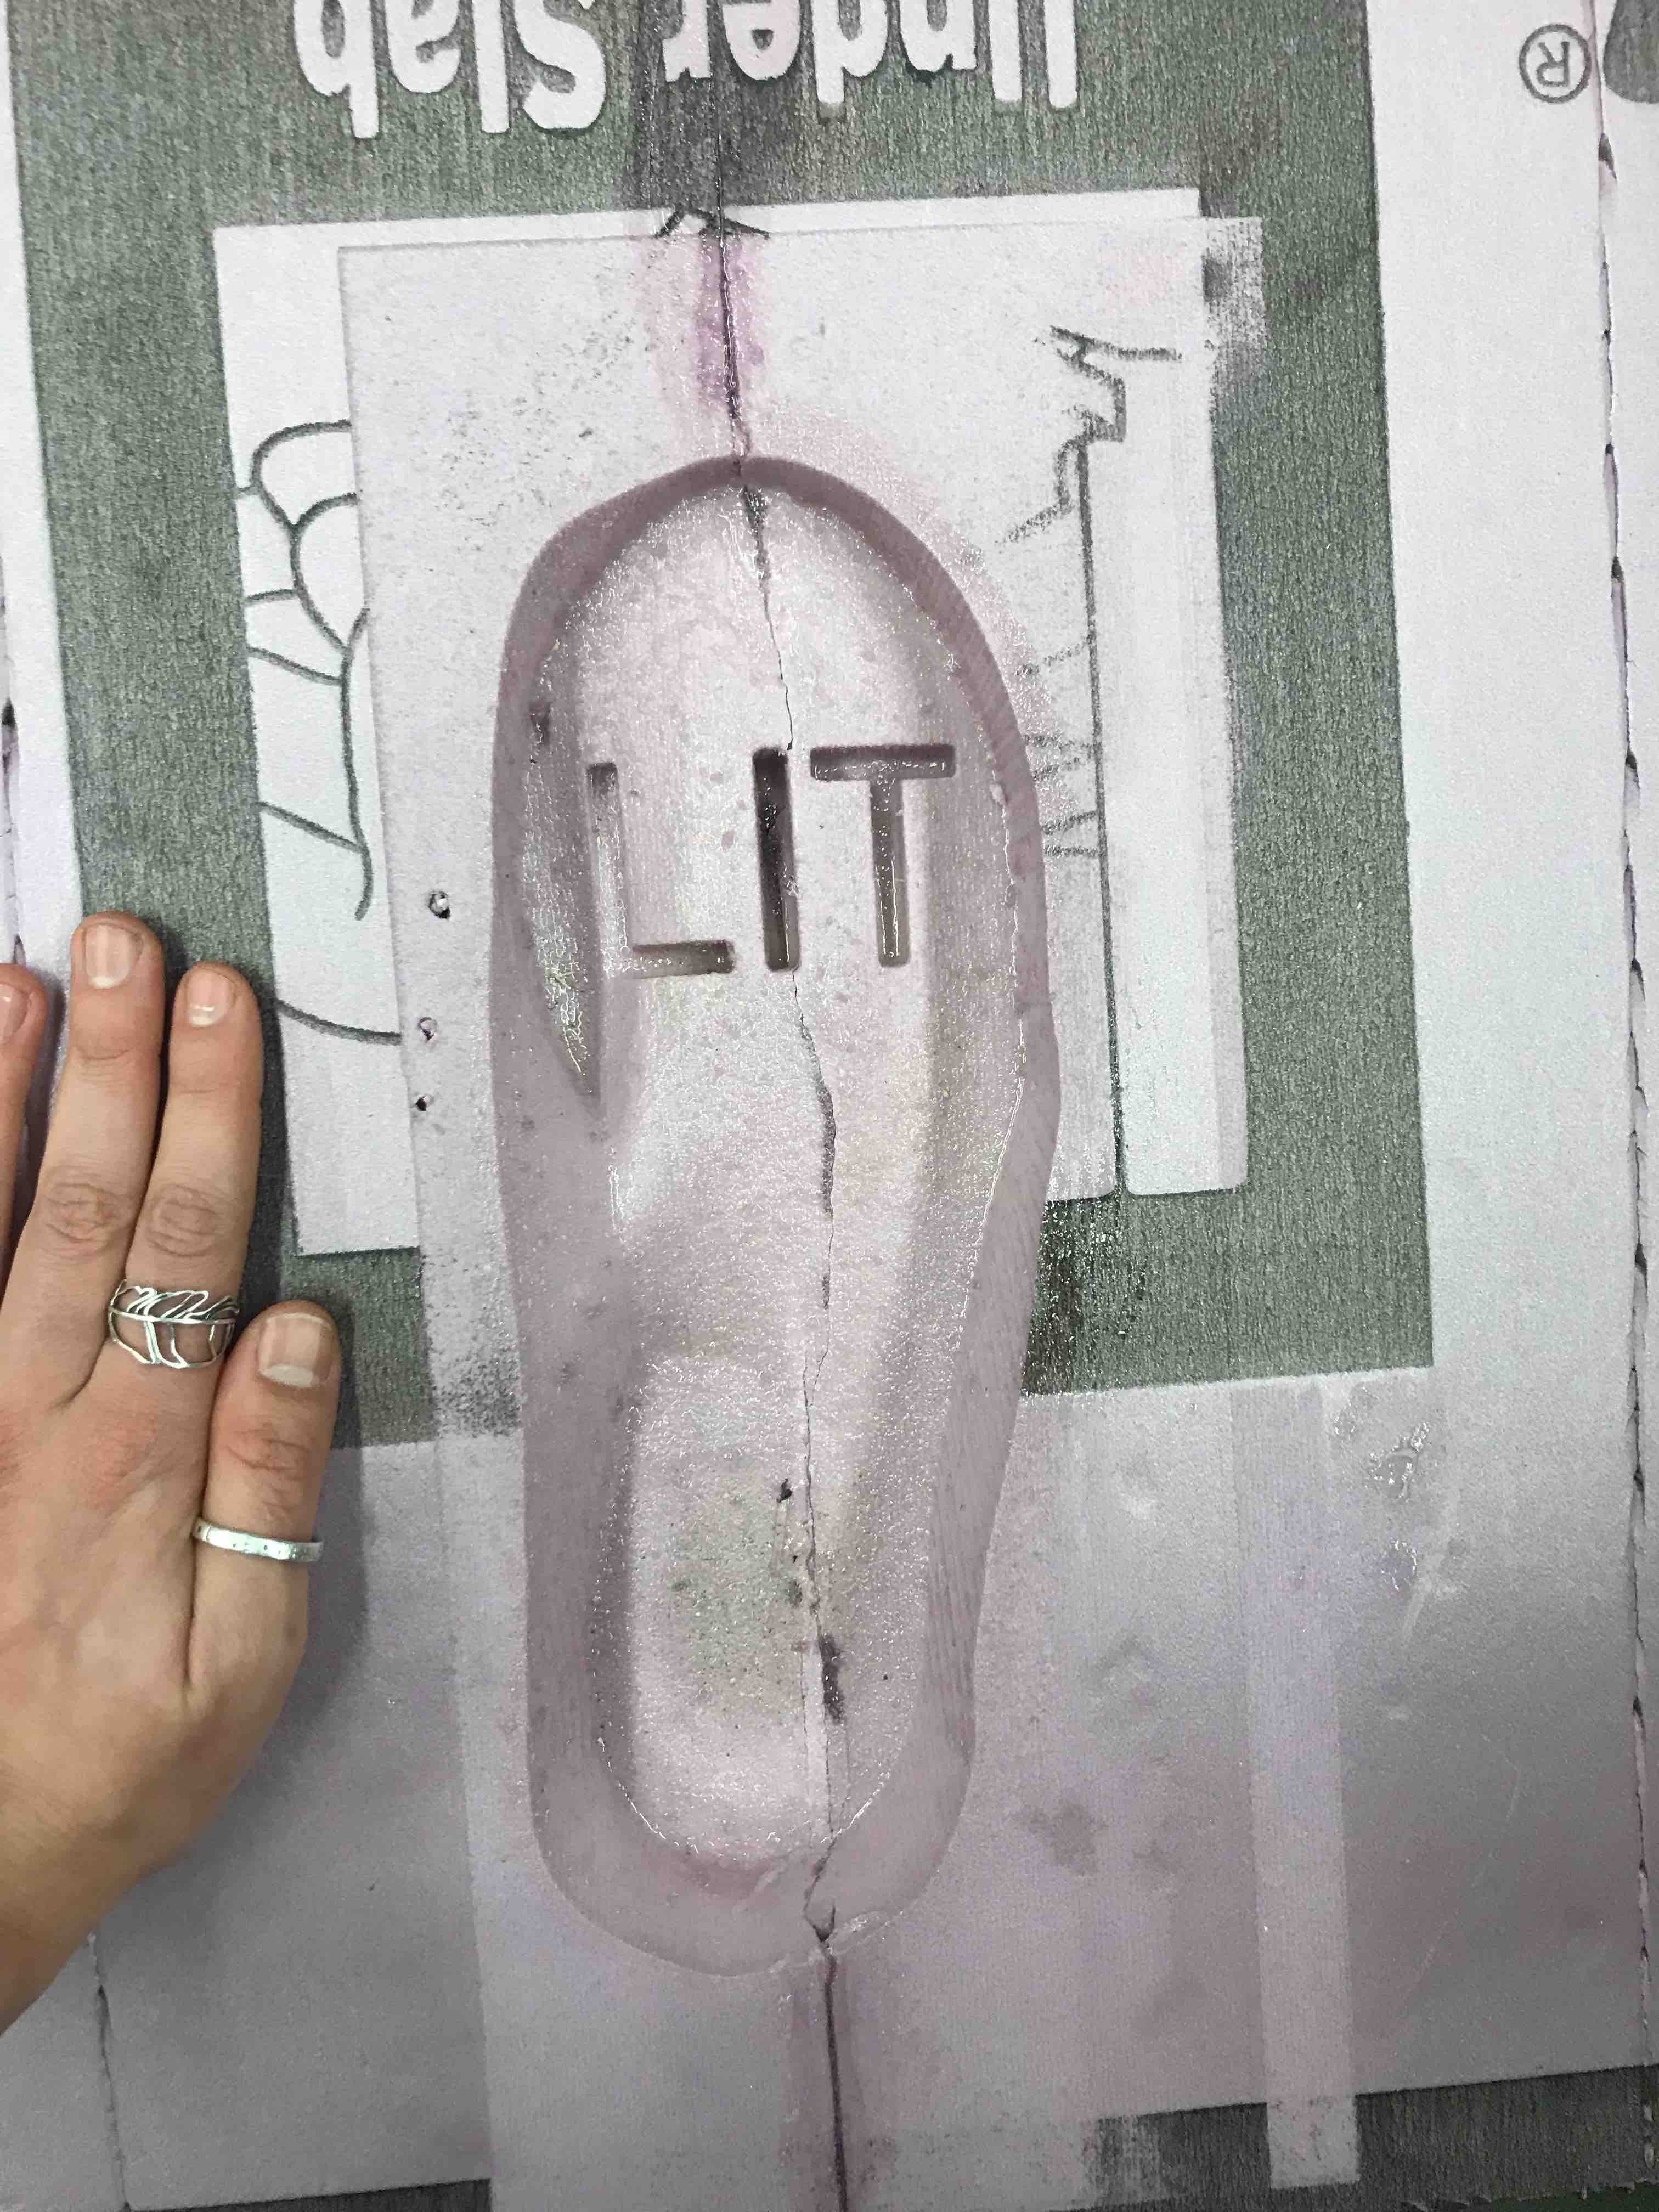
I needed to scan my shoe in order to get an idea of the shape that I should model aroud for a custom-fit sole. Here, I am modeling the negative component in Rhino and embossing the sole with text. Shout out to the Rhino wizard Sam R. for all the help on this powerful (but frustrating) platform!
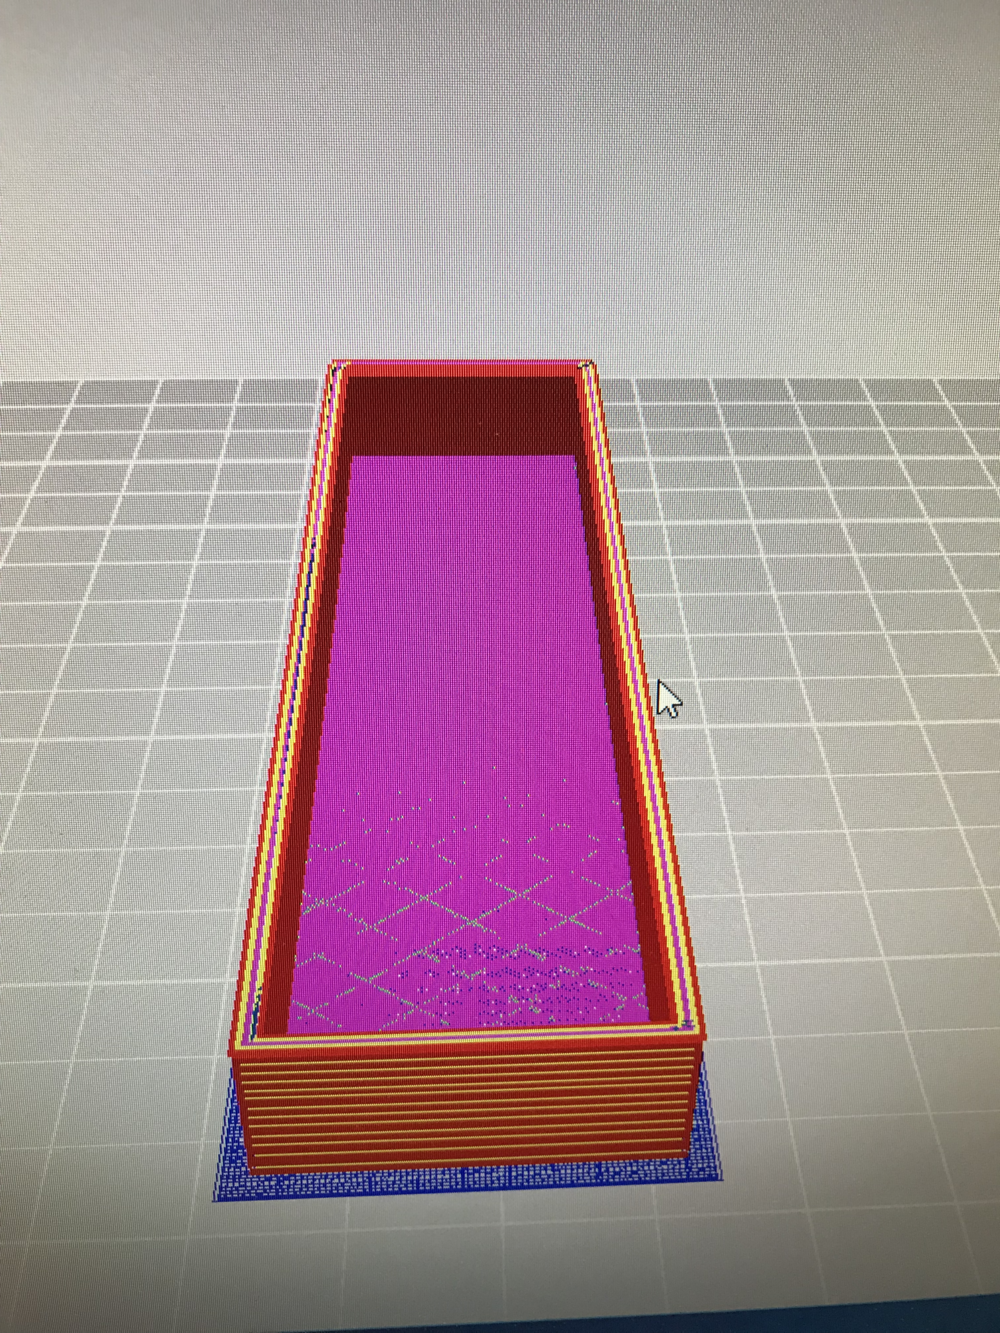
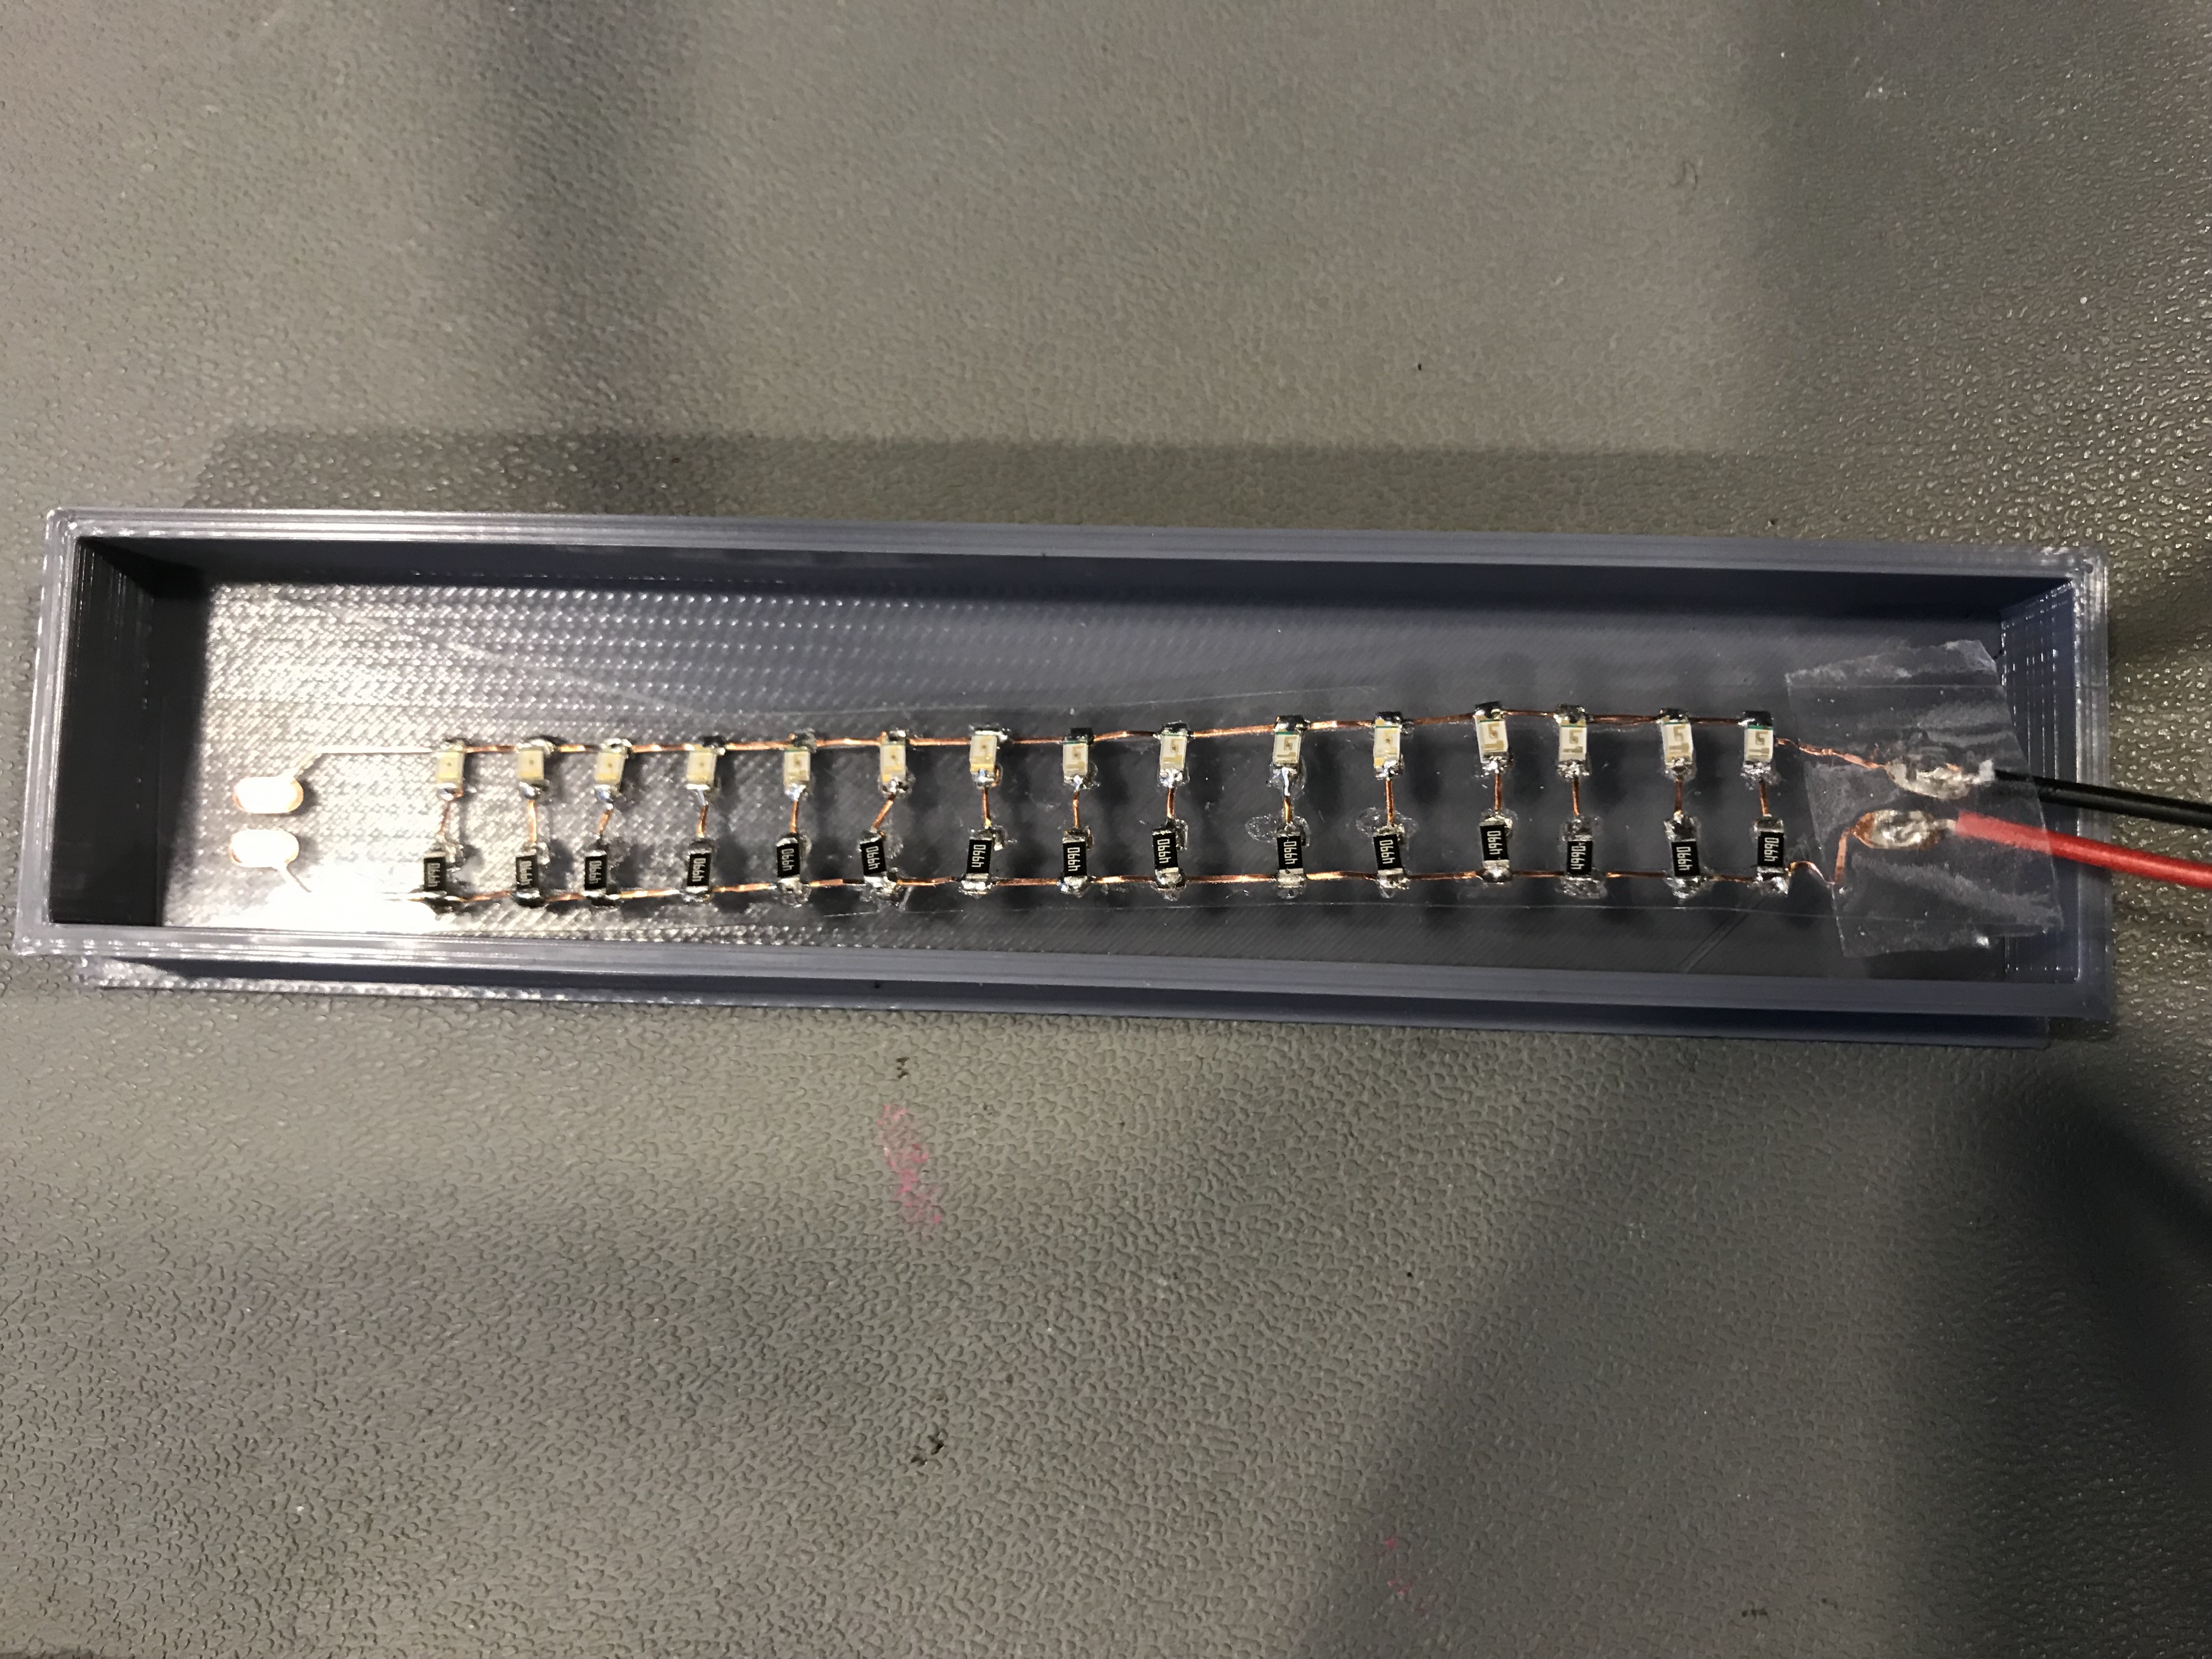
I printed out a small box for the LED strips to sit and cure in before placing them in the mold. I ended up not using it because placing them in the mold directly was much more effective...
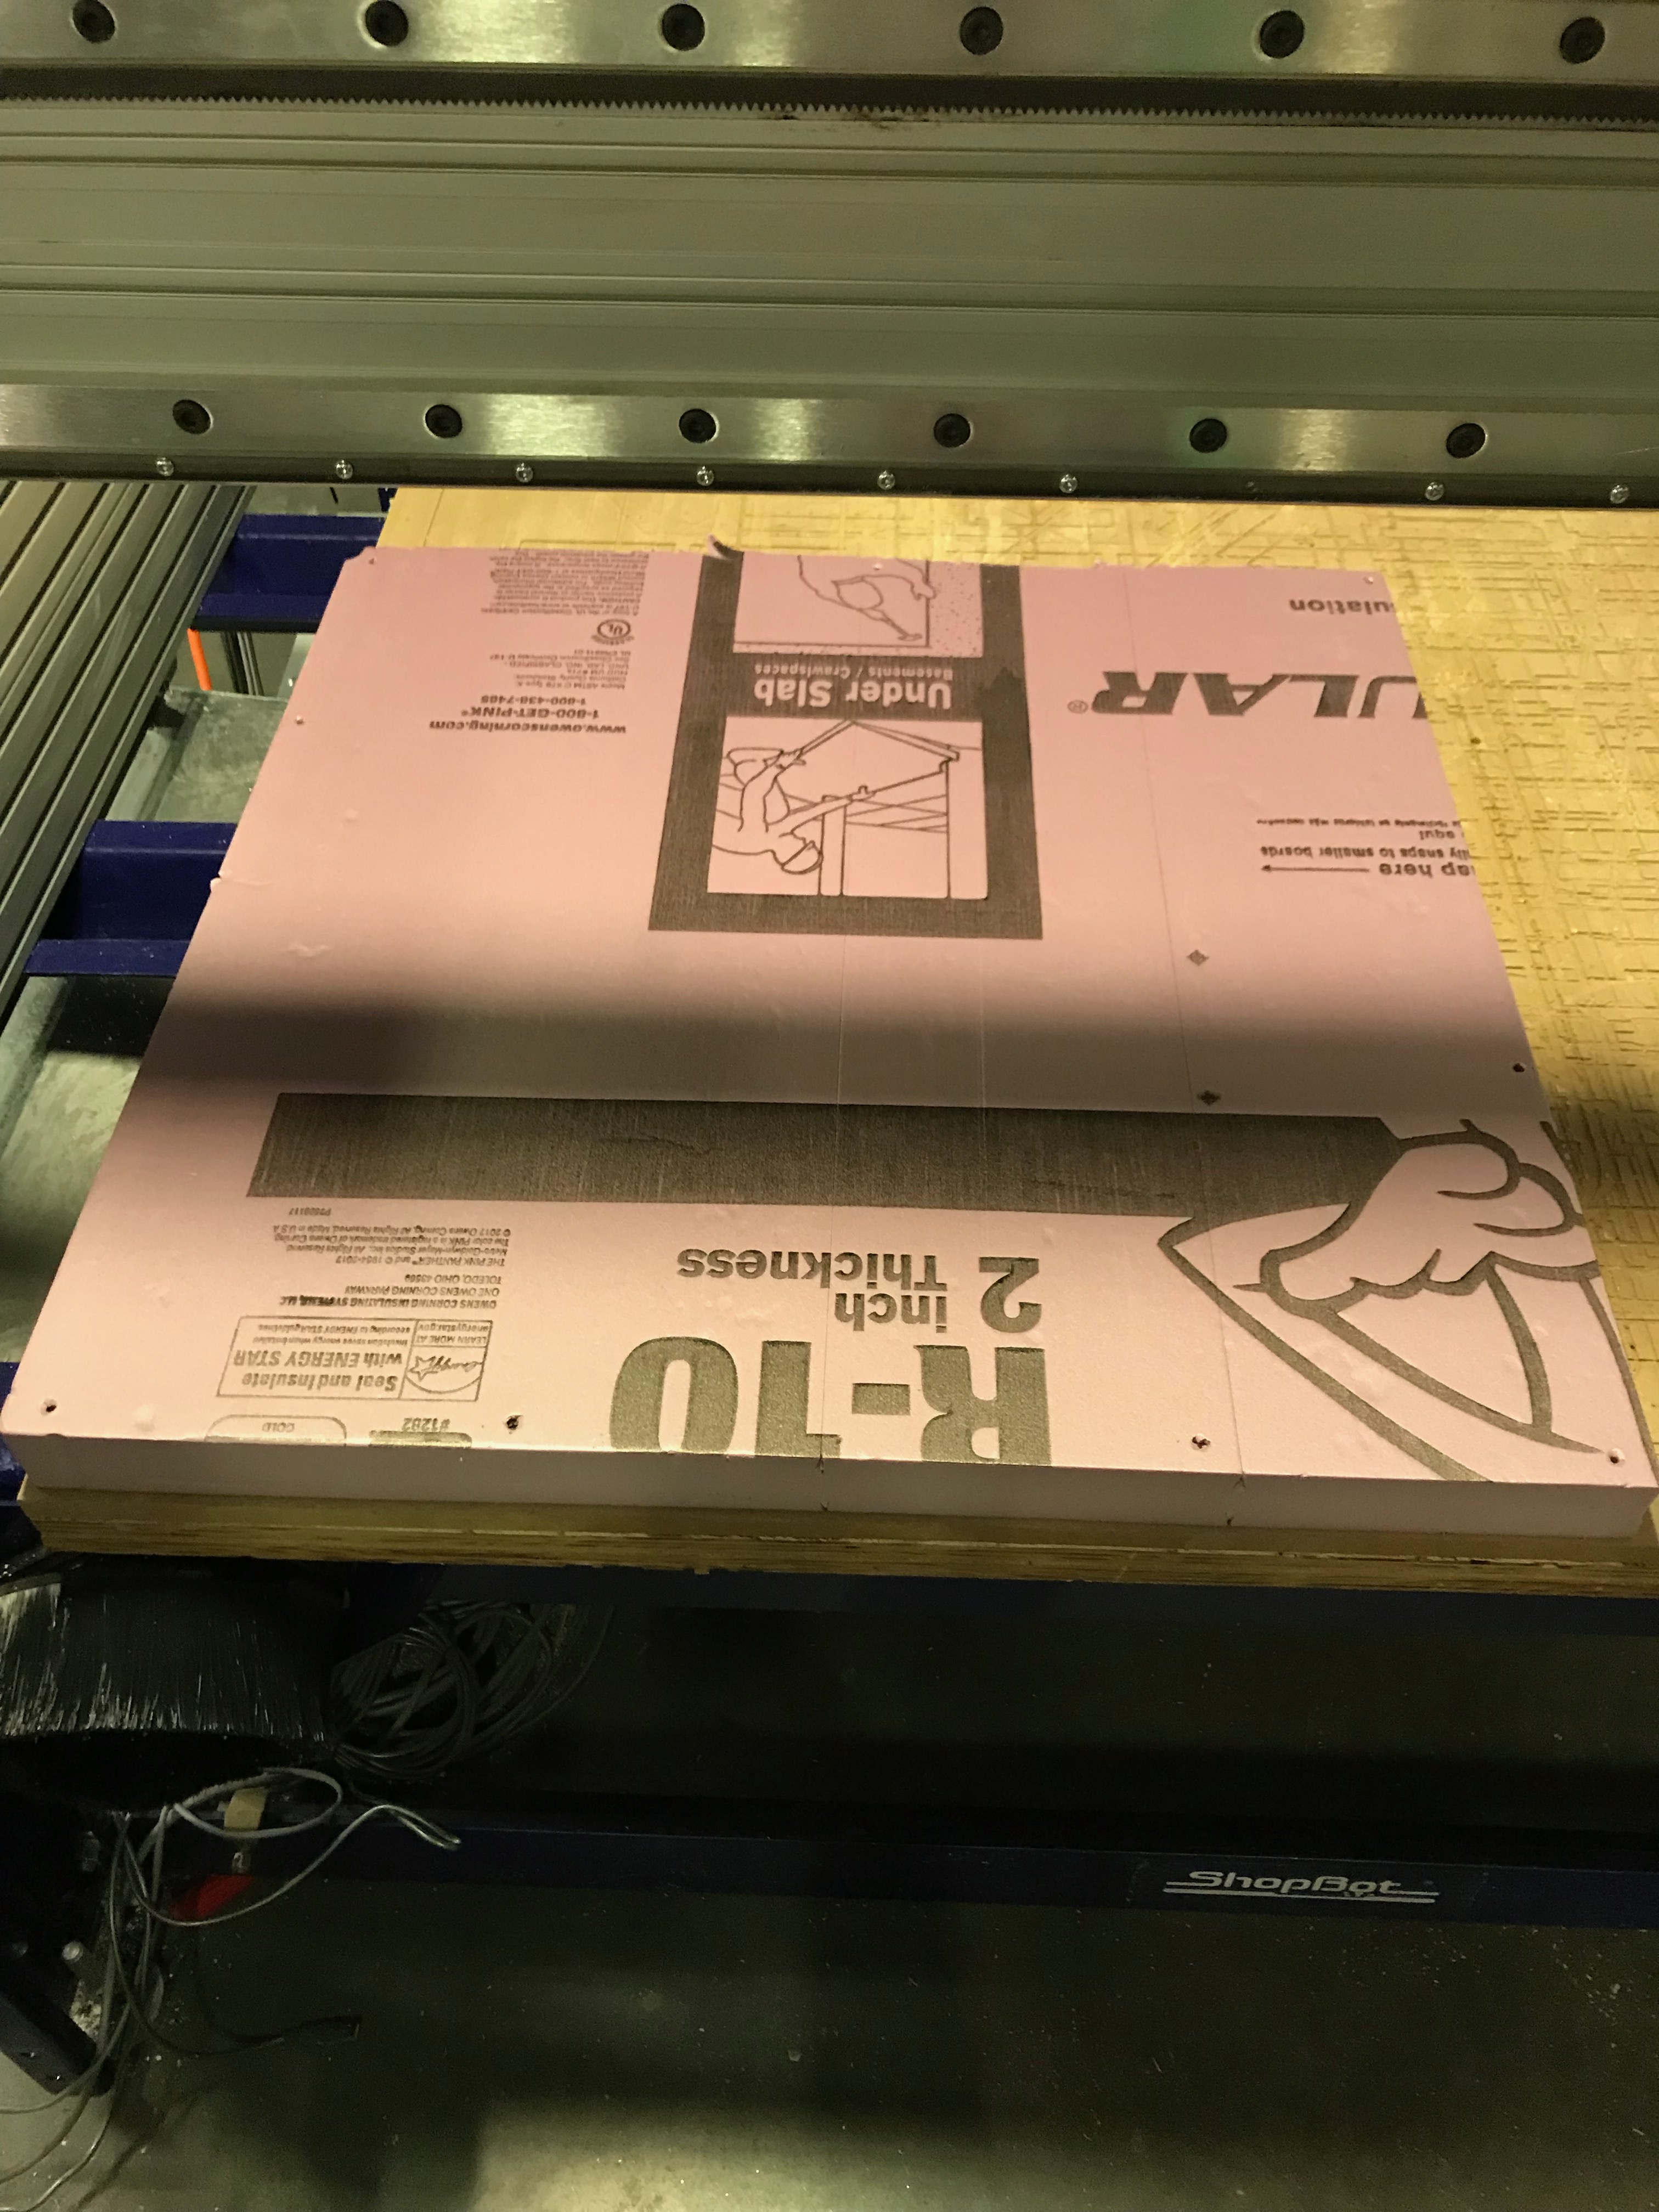
I bought some 2” thick dense insulation foam from Home Depot and secured it down to the sacrificial layer on the big ShopBot. Tom from the CBA shop helped set up the toolpaths and about 1.5hrs later, the custom mold came out!
I got a little too agressive with removing the extra side pieces of the mold and accidentally cracked it in half. Luckly the crack fit nicely back together and I kept on molding! The pot time for the ecoflex is about 18m, but the cure time was 3hrs. I was able to take my foot out after about 45m (Note: although I didn't experience any thermal fluctuations while the Ecoflex was curing, Neil reminded me that it can be potentially very dangerous and unpredictable.)
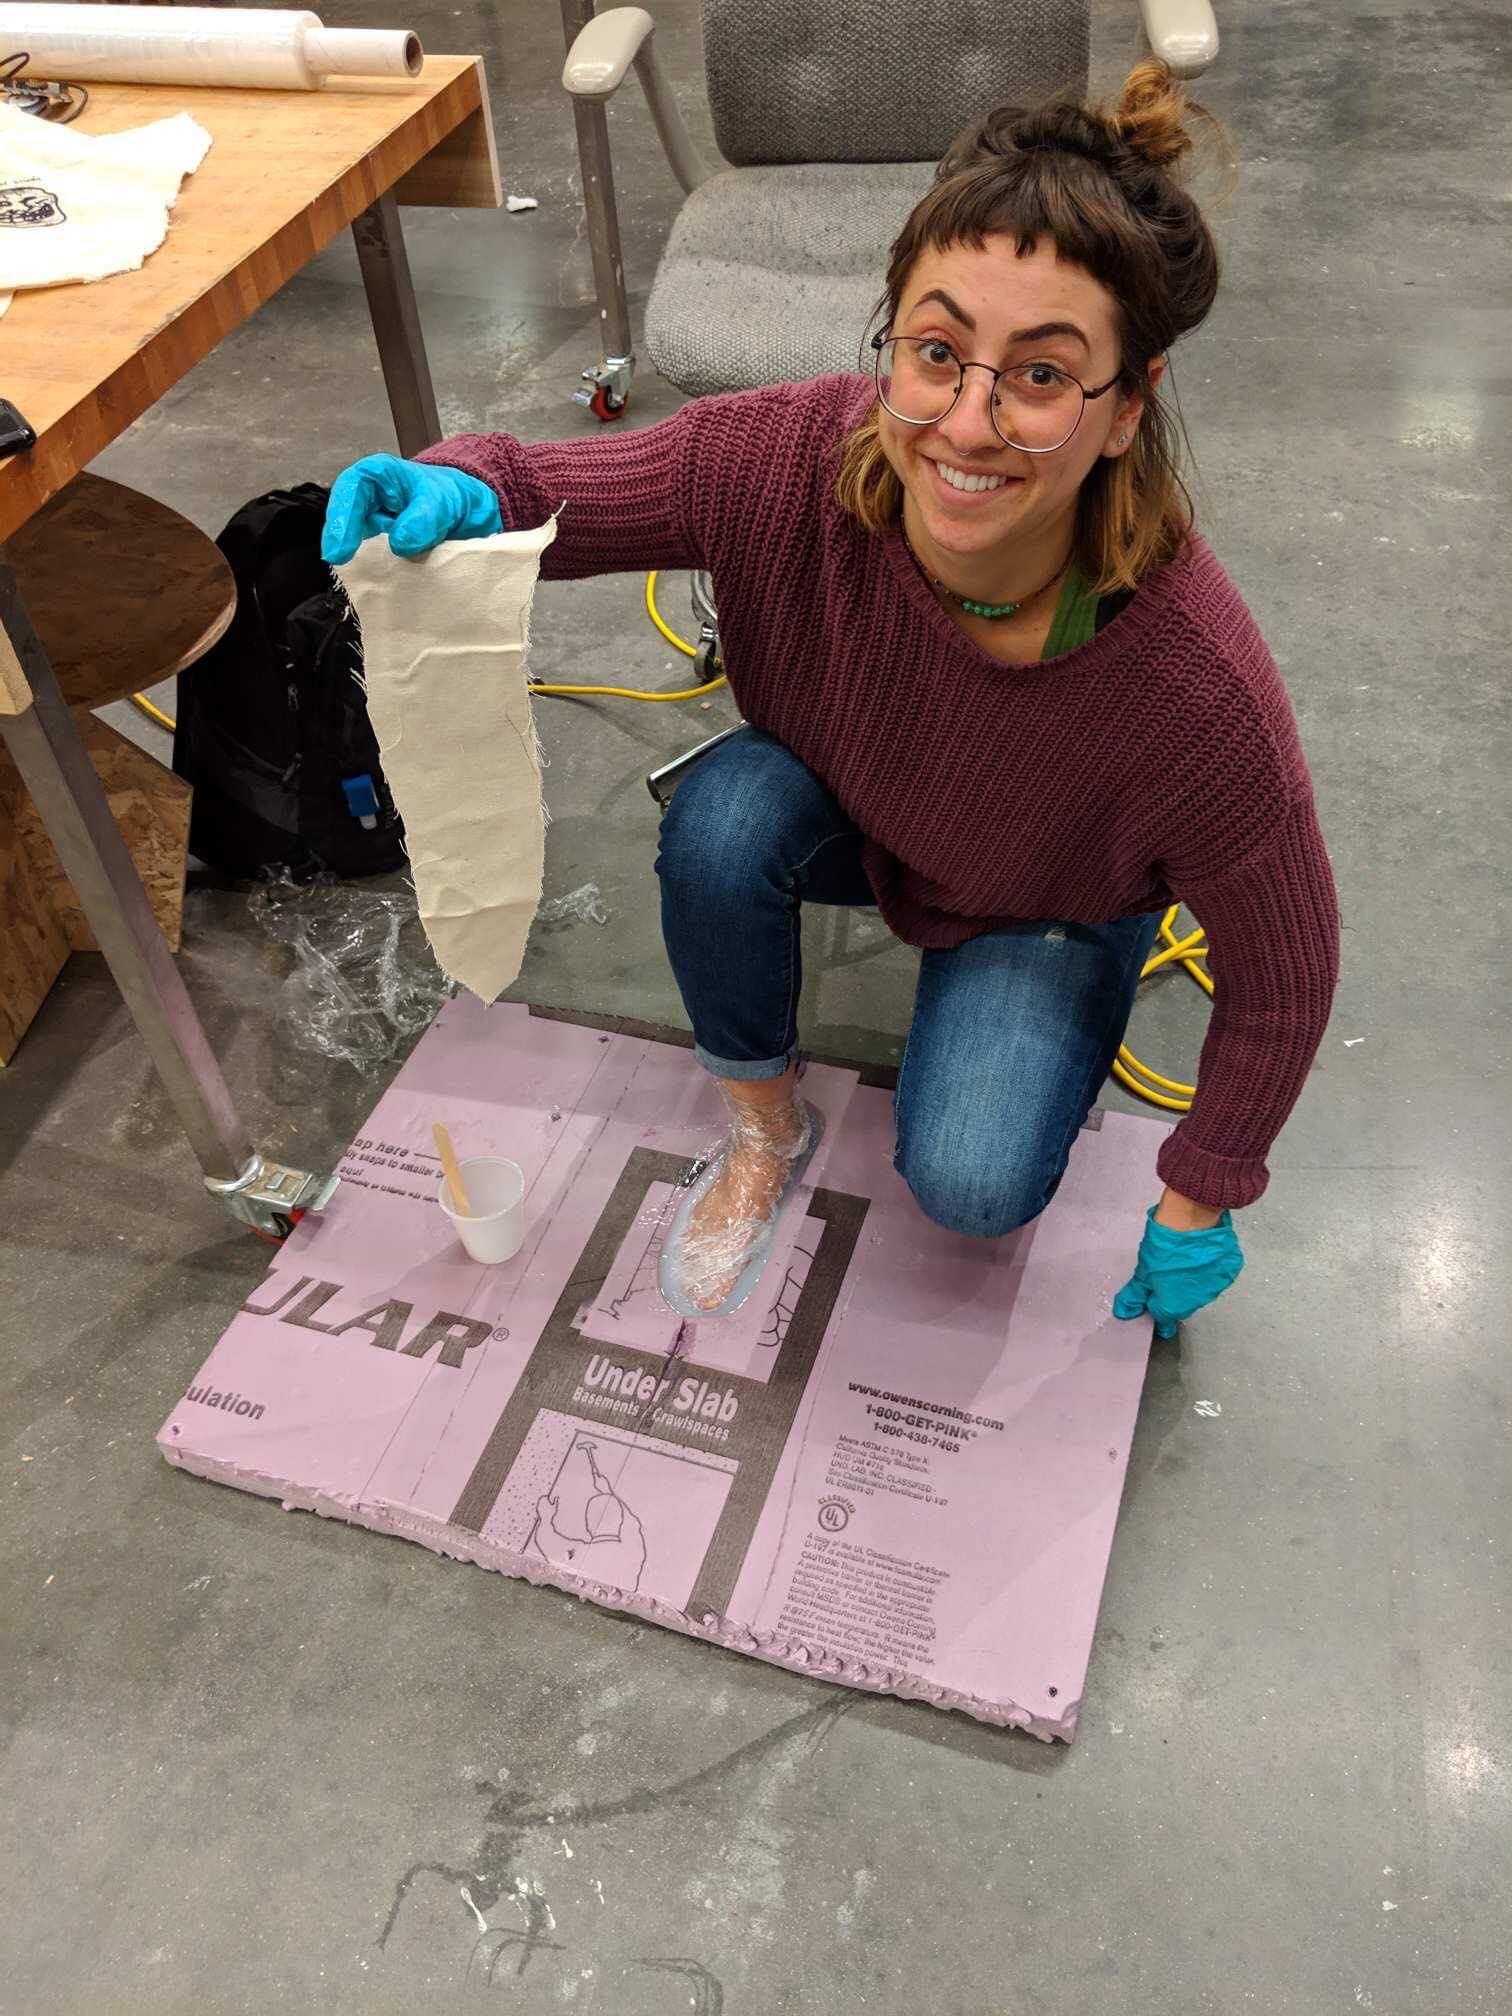

Although I couldn't get my microntrollers to work in time, I was able to upload the code to an Adafruit Flora to demonstrate the concept. I was frustrated that not everything came together, but ti was an enlightening process regardless. Note to future potential cobblers: soles made of Ecoflex are too squishy; a sturdier/less squishy substance would work better in the future!