
Week 10: Machine Making
The Task
Create a machine.
Our Idea
We decided to make a 360 degree panoramic camera that can be controlled from an interface.
My Role
Abdul and I are the CS majors in the Harvard section, so we decided to take charge of doing most of the coding for the week that involved writing new code or figuring out how a large body of code works. The part of the project that related to this was the programming of the stepper motor.
Learning rndmc module
This week, we were
told that the best way to program the components that we are given is to use
the Javascript module that Jake Read created. It is called rndmc and can be
found here. One interesting thing
is the very fact that the module is written in Javascript. I’m quite sure that
this is a highly uncommon choice of language for programming hardware, but I
guess it sort of makes sense in light of the fact that it takes advantage of
Node’s philosophy of being able to use Javascript everywhere. At the end of
the day, I actually didn’t mind the style of the module, especially since it’s
still in development, despite quirks such as functions being used as classes
(see here
for instance).
We’re supposed to write this documentation largely so that future generations are able to look back and hopefully learn from the mistakes we made and also to pass down the institutional knowledge about how things work. To this end, I want to give my quick overview of how the code works, as I understand it.
First, there’s no need to pay attention really to any folders besides modules
and src. modules contains the logic for interacting with the various types
of components that are available. This includes hardware, motion, and much more.
src contains some useful files if you want to understand how rndmc comes
together - this is definitely necessary if you are stuck on some inexplicable
bug, which is what happened to us :D. In my opinion, the most useful file is
jsunit.js. Here is it reproduced:
// event system to include type-checking etc
// dataflow types for javascript objects ...

function Input(type, fn) {
    var input = {
        accepts: type,
        fn: fn
    }

    return input
}

function Output(type) {
    var output = {
        emits: type
    }

    output.calls = new Array()

    output.attach = function(input) {
        this.calls.push(input)
    }

    output.isLinked = function(input) {
        // return true if already hooked up
        if (this.calls.includes(input)) {
            return true
        } else {
            return false
        }
    }

    output.remove = function(input) {
        if (!this.isLinked(input)) {
            console.log('attempt to rm input that is not attached')
            return false
        } else {
            this.calls.splice(this.calls.indexOf(input), 1)
        }
    }

    output.removeAllLinks = function() {
        this.calls = []
    }

    output.checkLinks = function(id) {
        console.log('checking links', this)
        for (index in this.calls) {
            if (this.calls[index].parentId == id) {
                console.log('popping null entry from', this.calls)
                this.calls.splice(index, 1)
                console.log('new record', this.calls)
            } else {
                // all good
            }
        }
    }

    output.emit = function(data) {
        if (this.calls.length == 0) {
            console.log('no inputs bound to this output')
        } else {
            for (index in this.calls) {
                this.calls[index].fn(JSON.parse(JSON.stringify(data)))
            }
        }
    }

    return output
}

function State() {
    var state = {}

    state.emitters = {}
    state.parentId = null
    state.socket = null

    // called when change from UI
    state.onUiChange = function(item, fn) {
        this.emitters[item] = fn
    }

    state.emitUIChange = function(item) {
        if (this.emitters[item] != null) {
            this.emitters[item]()
        }
    }

    state.pushToUI = function(key) {
        if (this.socket) {
            var data = {
                id: this.parentId,
                key: key,
                val: this[key]
            }
            this.socket.send('put state change', data)
        } else {
            console.log("ERR on state update to UI, socket is", this.socket)
        }
    }

    state.init = function(parentModId, socket) {
        // get hookups from top level program
        this.parentId = parentModId
        this.socket = socket
        // and wrap state objects in getters / setters
        for (key in this) {
            if (isStateKey(key)) {
                this['_' + key] = this[key]
                this[key] = {}
                writeStateGetterSetter(this, key)
            }
        }
    }

    return state
}

function writeStateGetterSetter(state, key) {
    Object.defineProperty(state, key, {
        set: function(x) {
            // update internal value
            state['_' + key] = x
            // console.log('SET', key, this['_' + key])
            // push to external view
            state.pushToUI(key)
        }
    })
    Object.defineProperty(state, key, {
        get: function() {
            //console.log('GET', key, this['_' + key])
            return state['_' + key]
        }
    })
}

function isStateKey(key) {
    if (key.indexOf('_') == 0 || key == 'parentId' || key == 'socket' || key == 'init' || key == 'pushToUI' || key == 'emitters' || key == 'onUIChange' || key == 'emitUIChange' ) {
        return false
    } else {
        return true
    }
}

module.exports = {
    Input: Input,
    Output: Output,
    State: State,
    isStateKey: isStateKey
}
The first thing to note is again, capitalized functions are used effectively as
classes. Then, note that there are two main classes of importance, Input and Output.
Modules seem to have to have outputs of the Output class, while the Input
class is used for logic that involves delays and repeats of particular actions, etc.. and is not mandatory.
For instance, if you want the logic in some component module to be repeated 10 times
at 10 second intervals, this involves the attachment of Inputs.
Please note that while these things are important to understand in order to understand the module, there is no need to hardcode any sort of inputs or outputs.
Further, there is a file called atkunit.js also in src that describes the
Hardware class. I believe that most of the components must engage with this class
in some way, so it’s worth it to look over it to some extent.
I’m happy to try to answer any questions about the module in future years, if you happen to come across this page. You can reach out to the gmail account jeffreyw128 (note that I’m scared that web scrapers are now capable of scraping the more common varieties of email masking).
Implementation
This week was a ton of late night wild goose chases. In short, I did not understand a
particular error message and thought that it was the cause of all of our woes.
This message was inputs bound to this output' and it is printed in the jsunit.js` file
when there are no inputs. At the time, I did not know that this is fine - you
can have outputs with inputs. So when we sent commands to our router board
which in turn went to the stepper board and then to the stepper, I did not
realize that this message is okay to have. Debugging this involved me trying
to basically hack the code into having inputs, even though inputs are really
supposed to be added through the GUI. It turns out that while I believe that
outputs are named correctly, inputs are things that are only necessary when
some additional GUI logic is added.
After many nights of trying many different things, we asked Jake for help and realized that our problem was actually just a busted stepper board. This was really a surprising finding because the board’s LEDs were lighting correctly and because it’s a manufactured board, it looks very pristine. Switching the board out solved our issue - the stepper was finally working! (See basically anybody else’s page from the Harvard section 2018 to see it in action) Our final GUI looked like this:
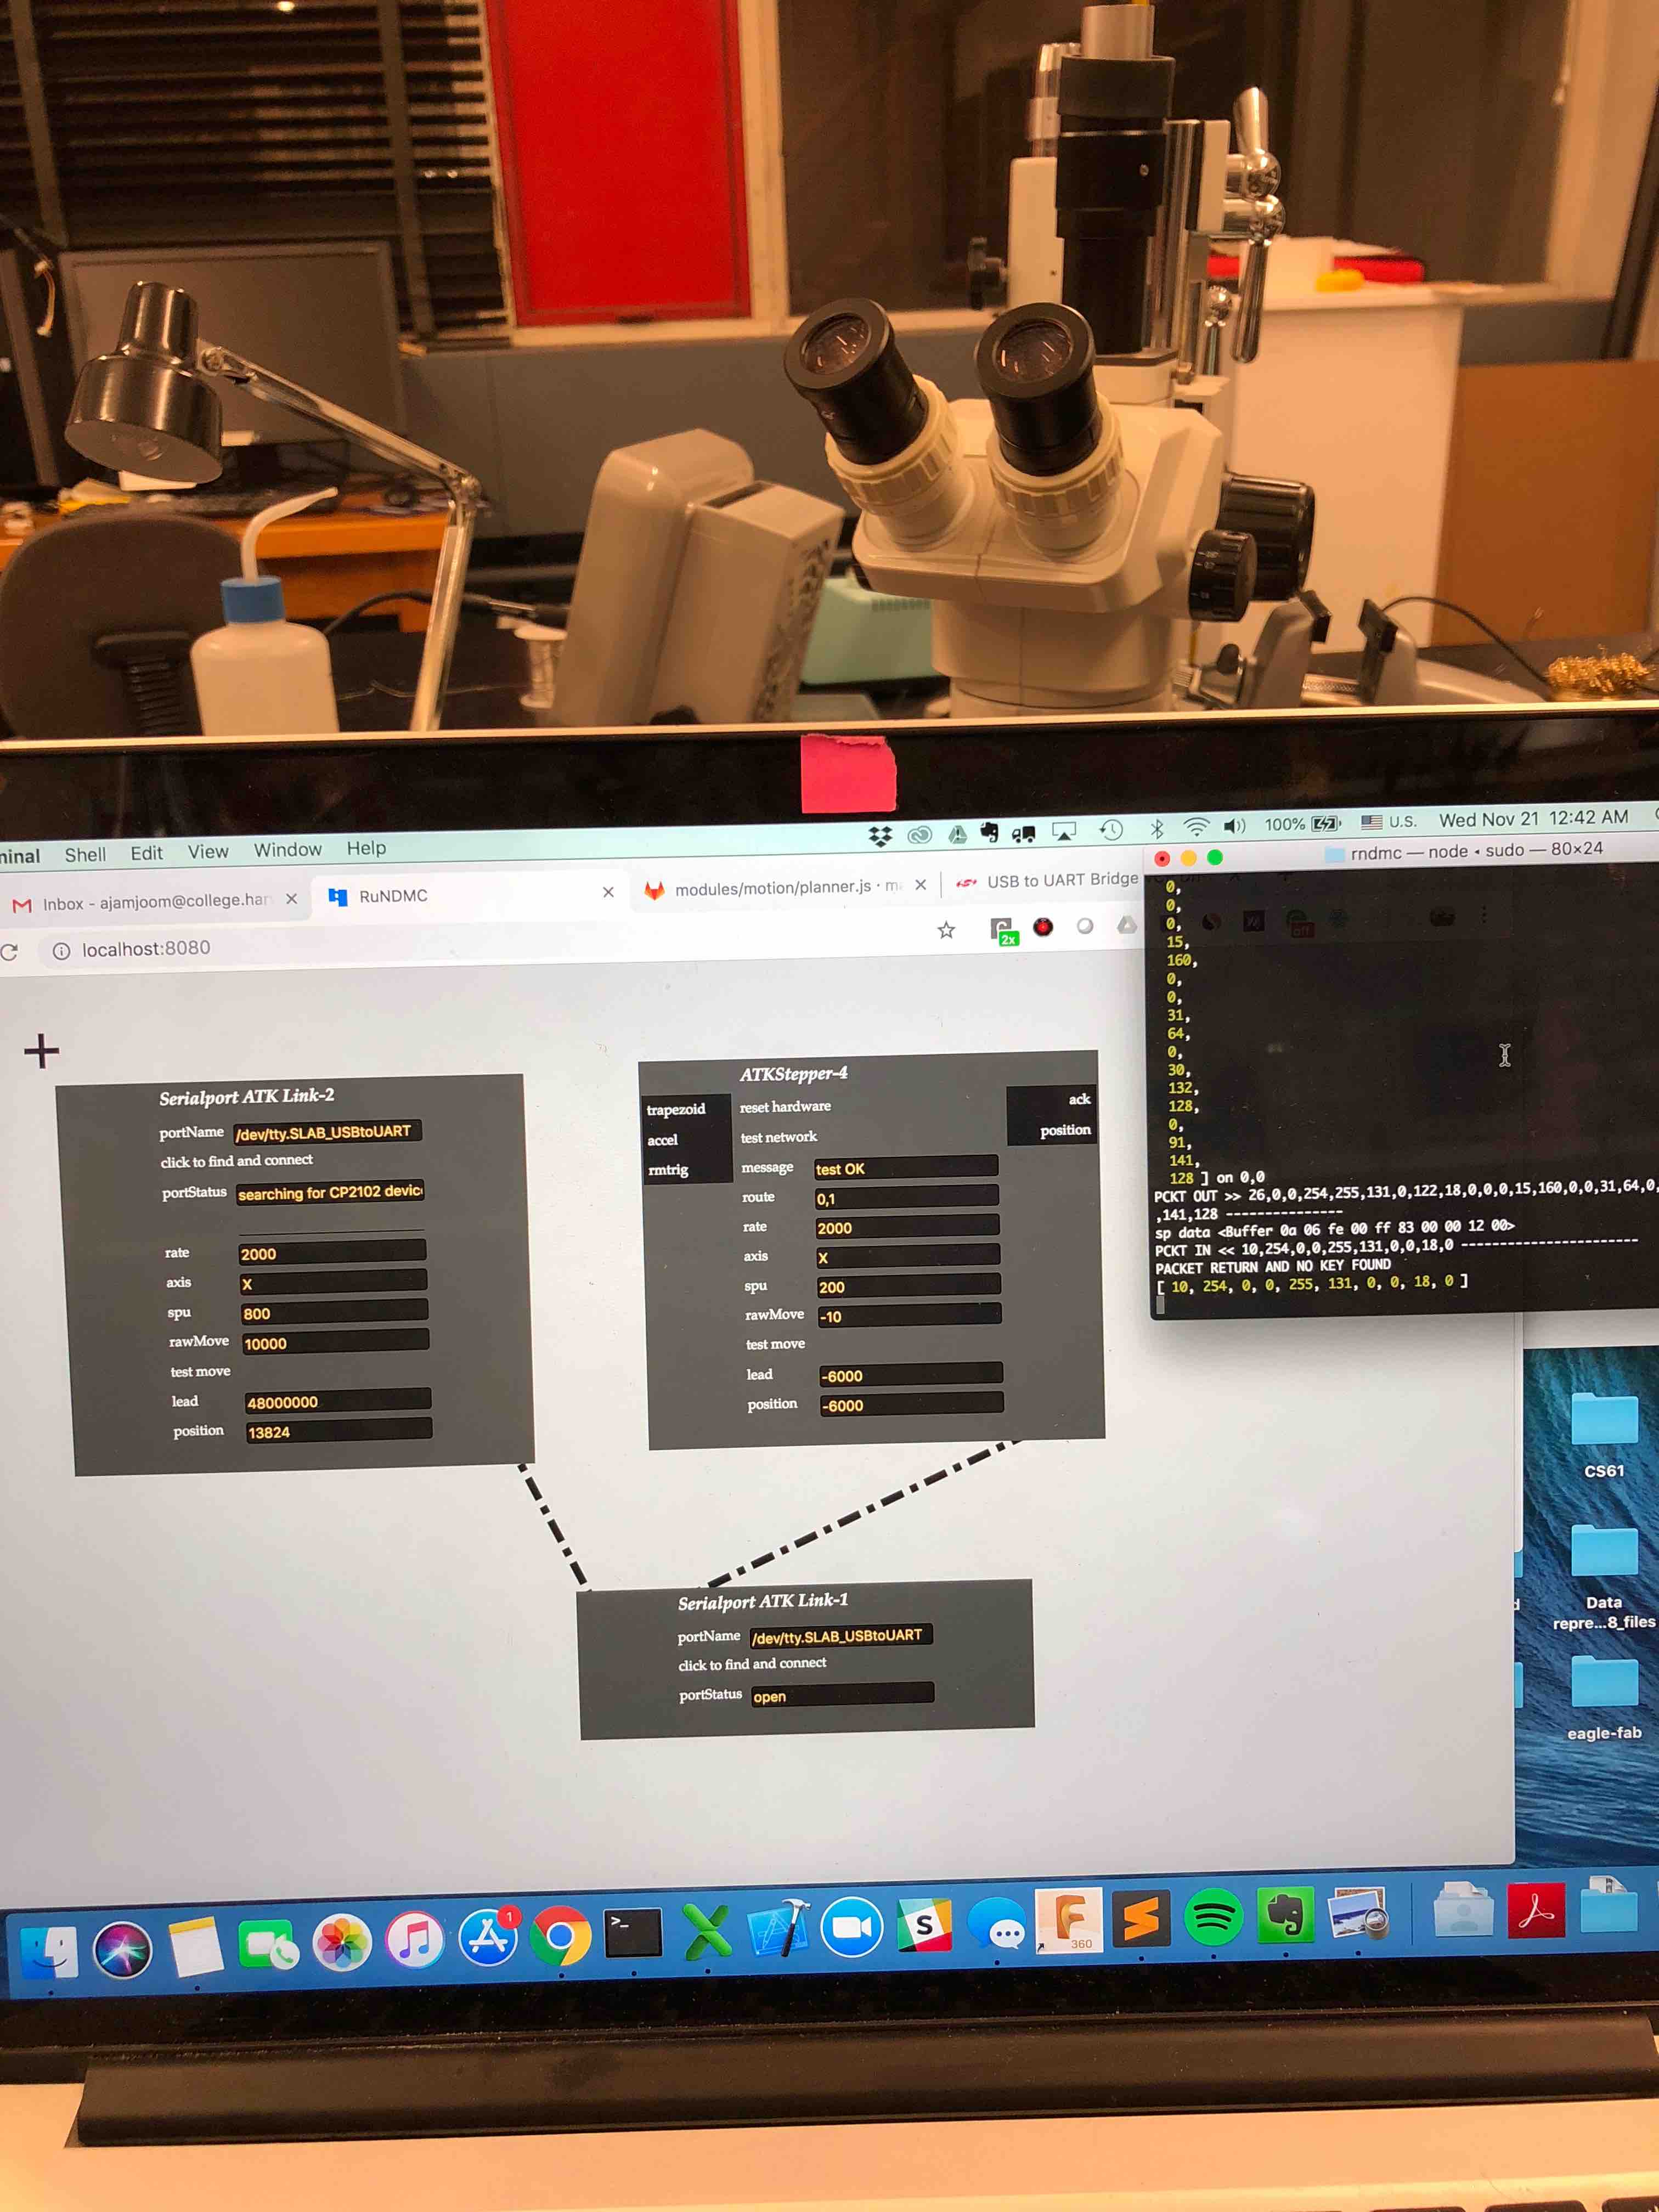
There are two steppers as well as some input repeat logic.
Misc
Also spent a significant amount of time this week helping Lara and Jasmine with programming the cammera shutter functinonality. That is documented here and here.