
Week 13: Wildcard Week - Composites
The Task
This week is wildcard week, where we chose from many fabrication methods. I chose to do composites, for which our assignment was to make something using composites.
My Idea
I’m not too ambitious this week - I really want to work on my final project, and one thing that I’m running into is that I have lots and lots of different boards and parts, and I don’t know where to put them all. I think that a really good idea would be to make a container for all of my things that I can keep in the lab so that things aren’t just lying around. This is what I decided to make this week.
CAD
My design for this week was pretty straightforward. I made a box that has one inch high walls and that is 12 inches by 12 inches. This should be big enough to hold all of my things.
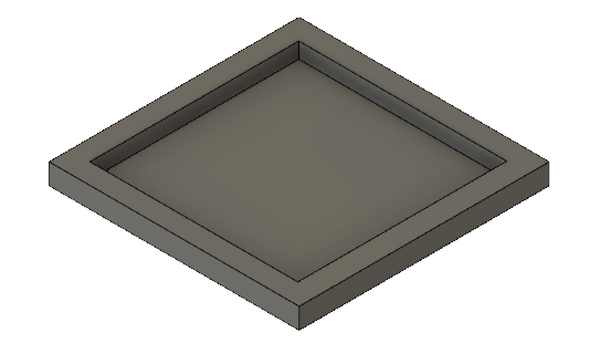
Having previously gotten good at Fusion extrusions made designing this container pretty easy. Further, I had seen from prior projects that the composites do not deal with fine detail very well, so I knew that a somewhat coarse design would suffice.
Work flow
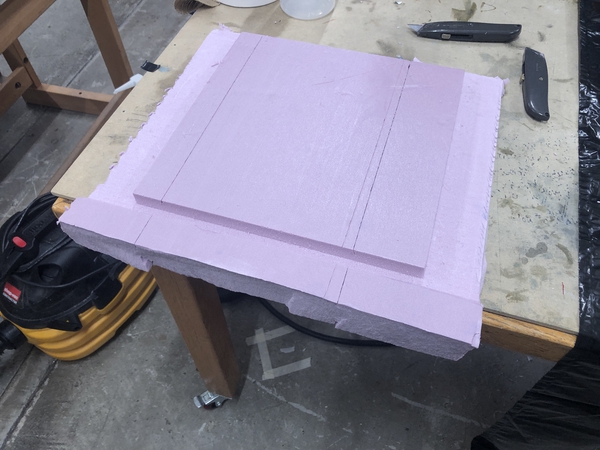
Foam mold
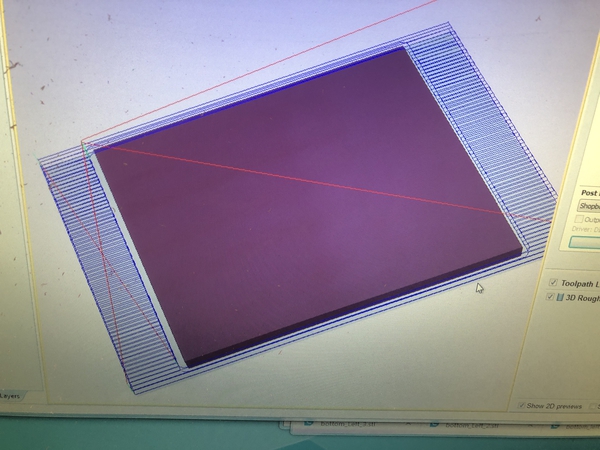
The first step was to cut my mold using the ShopBot. We had 2 inch thick pieces of foam, and I cut a piece that was 13 in. by 16 in.. I used a 1/2 inch endmill since there are really no fine details in my design, and I had no boundary in VCarve.
Material
I decided to use burlap, which seemed to make pretty decent looking containers and was a material that we had a lot of. Rob suggested cutting squares that just cover my mold, or else there would be weird unwanted folds and such.
The following were the steps.
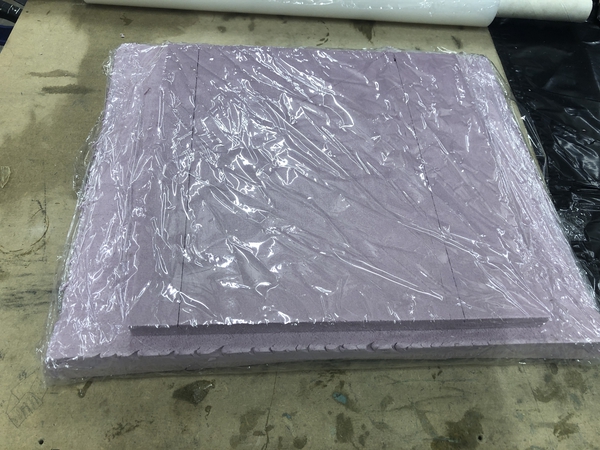
- Cover mold with plastic wrap.
- Mix 2 squirts of epoxy and 1 squirt of hardener and mix.
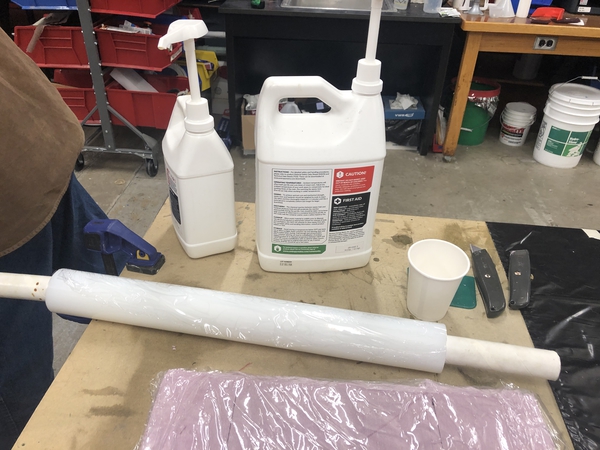
- Use scraper thingy to cover material with epoxy so that it is thoroughly
applied (color will change when applied to burlap, will look wet).
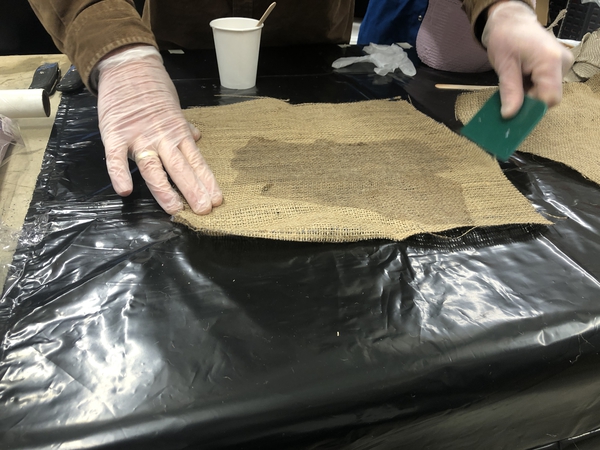
- Lay material over foam.
- Repeats step 2 and 3 for each layer (I had 4 layers).
- Cover layers of material with perforated trash bag.
Medieval looking hole maker
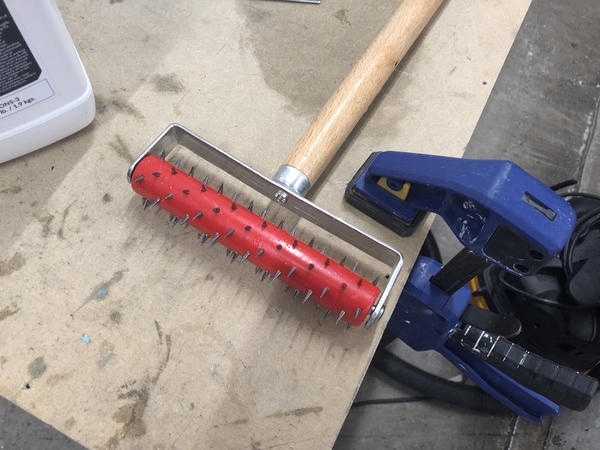
- Cover with another layer of insulation type material.
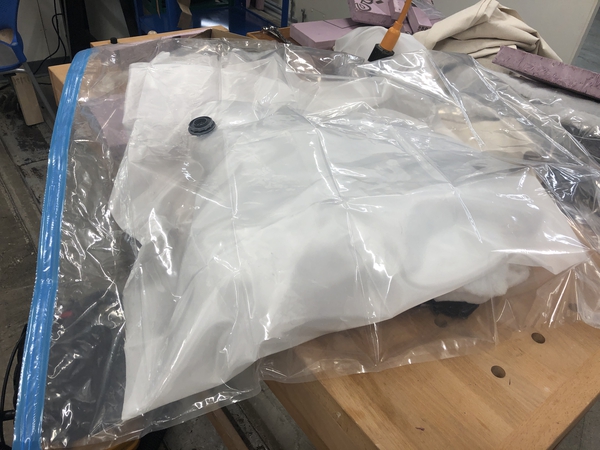
- Put whole thing into vacuum bag.
- Cover with fiber that will soak up epoxy.
- Suck air out of vacuum bag with vacuum.
- Wait 24 hours.
12 hours later…
I unwrapped everything, used scissors and a saw to cut away some edges, and got a final result:
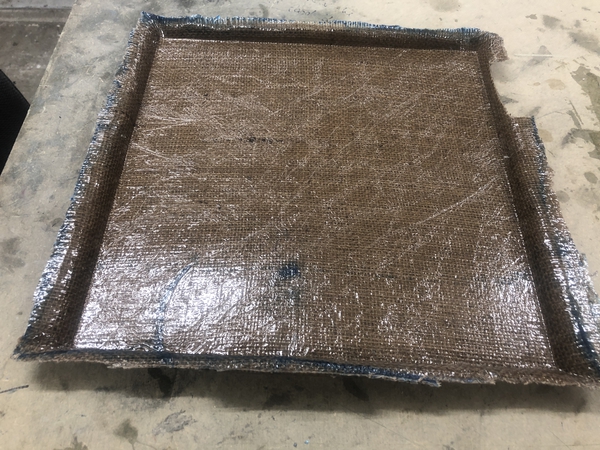
Yeah, it looks really bad and the walls were definitely not as high as I thought they would be. Oh well, I guess.
The only positive adjective I would use to describe my composite is “strong”. I’m thinking about using this tray as some sort of violent device.