Week 7: Molding and Casting
The Task
Design a 3D mold, mill it, and use it to cast parts.
My Idea
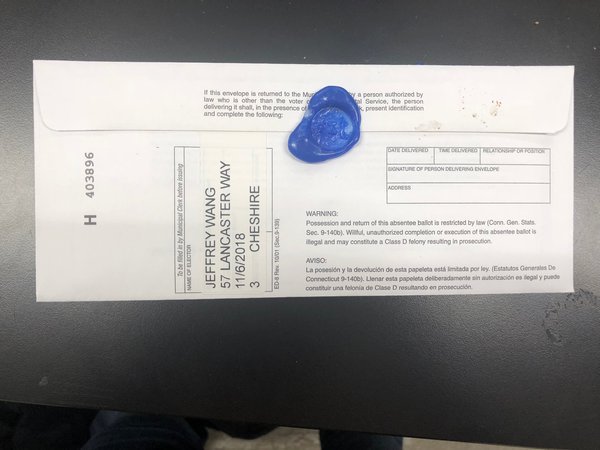
The wax we use for making the molds made me think of making a wax seal stamp. My idea is to make a wax seal stamp of my initials to send in my absentee ballot for this year’s election!
Design
I found dimensions for wax seal stamps online - a typical diameter for the stamp is 3/4” and a typical handle length is 2”.
I designed a wax seal stamp in Fusion.

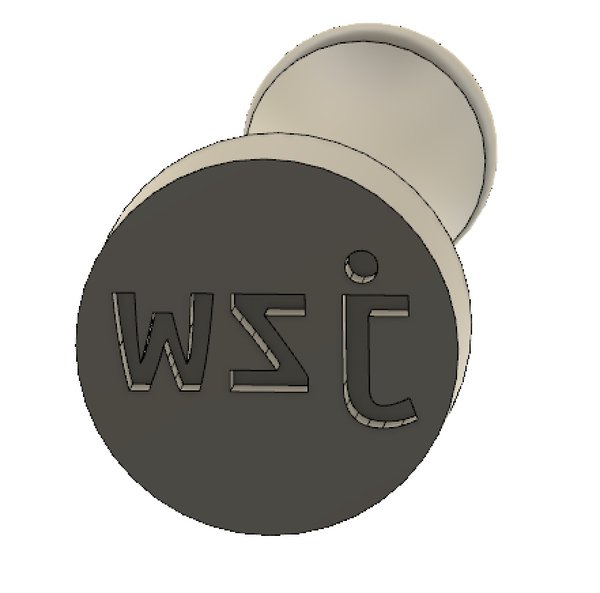
The bottom must be an indented reverse image of what you want. I repeat, make sure that what you want is indented and reversed, or else the stamp will make an indentation and not a protrusion when you use it. (I made this mistake and had to redo everything once I tested out the wax seal stamp)
Another note: At first, I wanted to make the entire thing out of metal and use 3 molds. However, I thought that this would be too time consuming - also, the handle for the stamper would not be reusable. So I decided to3D print the handle and mold/cast the stamp.
Process
The logic is sort of confusing but once its understood, it’s pretty intuitive. The first step is to cut into wax in order to make a positive representation of the final result. Then, this wax is used to make a mold that is a negative representation. Finally, this negative representation is used to cast the final positive representation using whatever materials you want.
Wax Block
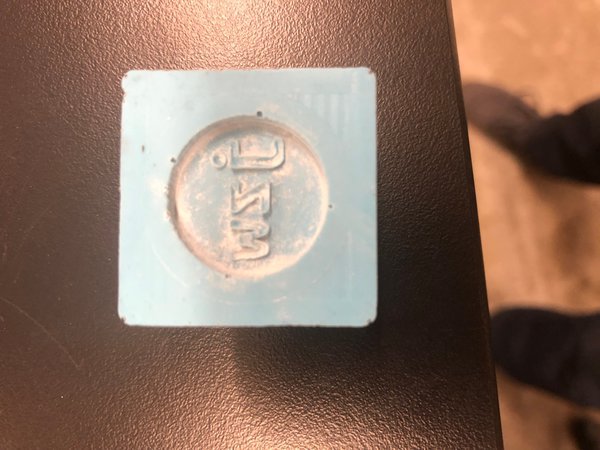
We had 3” x 3.5” x 1.5” wax blocks. The first step was to use the Shopbot to cut into the wax in order to make a mold for the mold that will be used to cast the final product.
Setting up VCarve Pro proved to be nontrivially hard. The biggest thing I ran into was my letter sizing. Initially, my letters were simply too small - the finest endmills we had access to on the ShopBot were 1/32”, and the thickness of my letters was below that. The solution was to simply make the letters bigger and also bold them.
Cutting takes two steps. The first is a roughing cut, during which a 1/8” endmill is used to do a relatively fast cut of the wax. Then, there is a finishing cut to get all the fine details right. For this, I used a 1/32” endmill since I needed all the fine detail precision I could get for my letters, but some people opted for a 1/16” endmill for this step.
Setting up the cut is pretty similar to the “make something big” week. Z axis must be zeroed and the cutting happens in a controlled environment on a sacrificial layer. One thing that is different is that the block is taped down instead of nailed down. Some people even opted for gluing their wax blocks onto the sacrificial layer. Also, a modelling boundary must be decided. Because this step is to make a mold, it is useful to have some extra space around the object being carved so that the mold has some more substance.
After doing these two cuts, I got this final result:
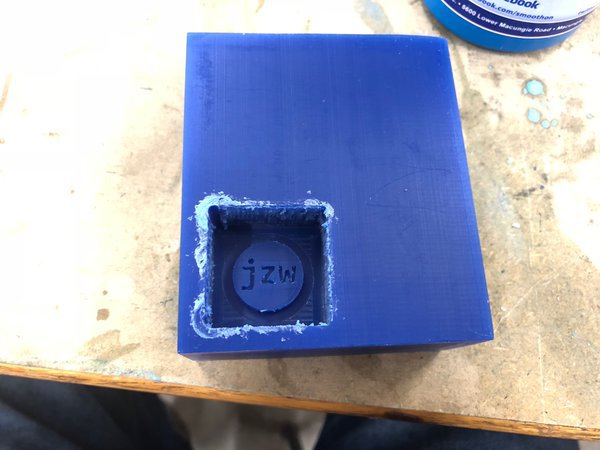
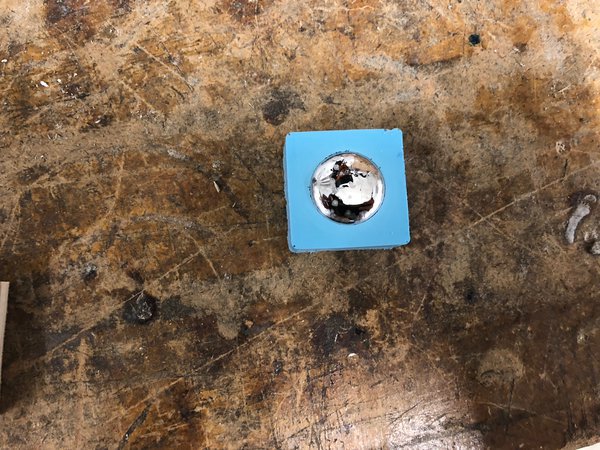
Making the Mold
This step was pretty easy. Oomoo comes in two parts that must be mixed, A and B. By weight, the ratio A:B should be 10:13. When stirring the Oomoo, it is important to try to avoid adding air bubbles, so avoid egg beating style stirring. And then when pouring, it is important to pour slowly and in a small stream - this allows some bubbles to pop, especially larger ones. Finally, I saw some people tapping their wax mold on the table after pouring the Oomoo into their mold. I didn’t do this, but it seemed to be quite effective.
After pouring the Oomoo and waiting >90 minutes, I used an Xacto knife to take the mold out. Tada!
Note that this was the second iteration - in my first iteration, I didn’t pour the Oomoo slowly, so I had tons of bubbles that resulted in incomplete letters.
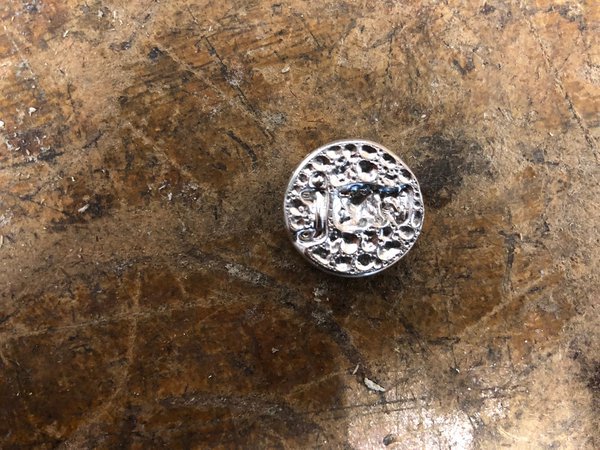
Metal Casting
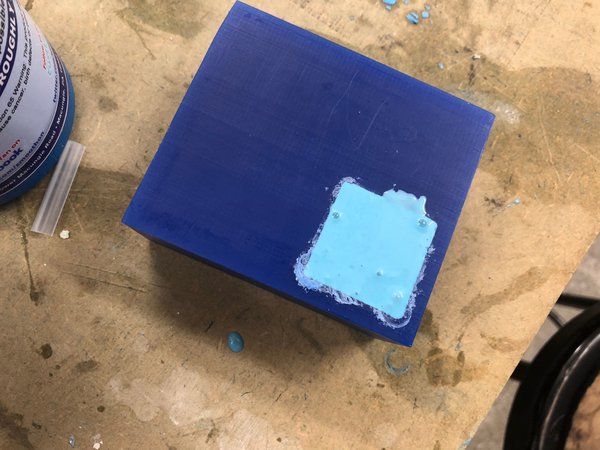
In SC102, metal casting is with a tin-bismuth compound that has a relatively low melting point. After baking the metal in a toaster oven at 450F, it’s ready to be poured into the cast. Things look like this after pouring.
This was my first, bad result attempt.
Please note that this stamp is bad for two reasons - firstly, it is in reverse because this was still at the time when I had not reversed the letters. Secondly, notice that there are tons of gross-looking bubbles on the metal. This was because I did not cover my mold in talc powder, which in my understanding magically makes the bubbles go away.
After talc powder, I got a much prettier result, although this is still with the bad letter direction.
Because of capillary action, the back of the metal part of my stamp wasn’t flat as I envisioned it, making it hard to attach to the handle. Rob suggested that I sand the back - this worked wonders and is a lot easier than going back and doing a two part mold.

(image of good stamp will be uploaded when stamp orientation is corrected)
3D Printing
I 3D printed the handle - it was pretty straightforward. The final result looked like this:

Civic Duty
With my finished result, I carried out my civic duty (albeit with the reversed stamp out of fear that I wouldn’t be able to send it in on time)..