1. Programming with the Arduino IDE
I first wanted to use the Arduino IDE, because it makes the most sense for my future projects. It will give me a smoother transition between prototyping with Arduino and finalizing a design with a custom made circuit board.
The first step was to install the ATtiny support in the Arduino software from here.
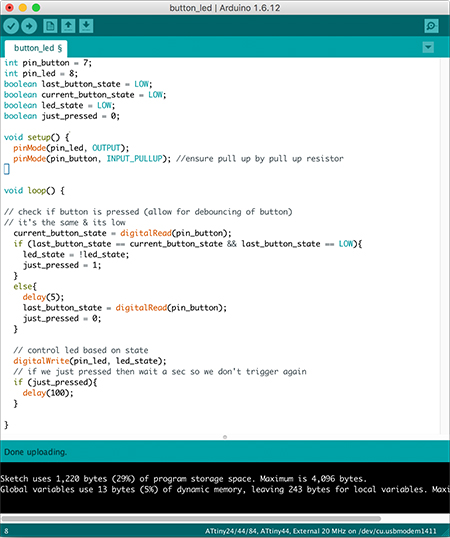
I first wanted to test the programming process, so I started with a very simple blinking code for my LED. I found Jiamin's images very helpful in the Arduino-ATtiny "conversion" Jiamin.
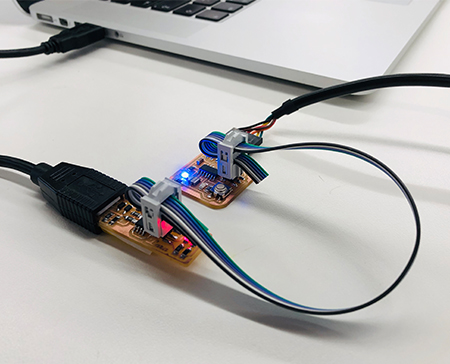
I used my programmer from week 2 to program my board in the Arduino IDE. It required quite some troubleshooting (both to get the code onto the board and correcting the clock).
This sequence worked in the end:
1) Connect the programmer with the computer, connect the board to power (with a plug to an outlet) (my computer seemed a bit confused when the board was plugged in the computer), and connect board and programmer with an ISP cable.
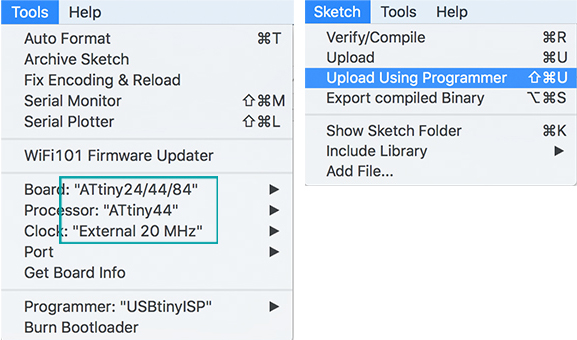
2) Select the correct settings. Important was to select the 20MHz external, because the board contains a resonater with that frequency. There is no need to select a port.
3) Burn bootloader (Which was necessary to get the clock right)
4) Upload using programmer
5) Repeat step 4 for uploading any new code.
I also tried using an Arduino as a programmer (following the tutorials here and here), but was not successful. My strategies either gave me error messages, or did not give me error messages but did not upload my code.
Now that the programming issues were solved, I set out to code something a little more sophisticated. I wanted to use the button to turn the light on and off with each click.
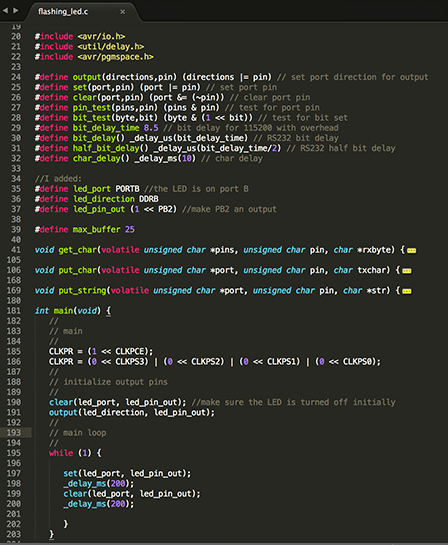
2. Programming in C
Subsequently, I modified the hello.ftdi.44.echo code to program the board to have a blinking LED.