Week 7. Embedded Programming
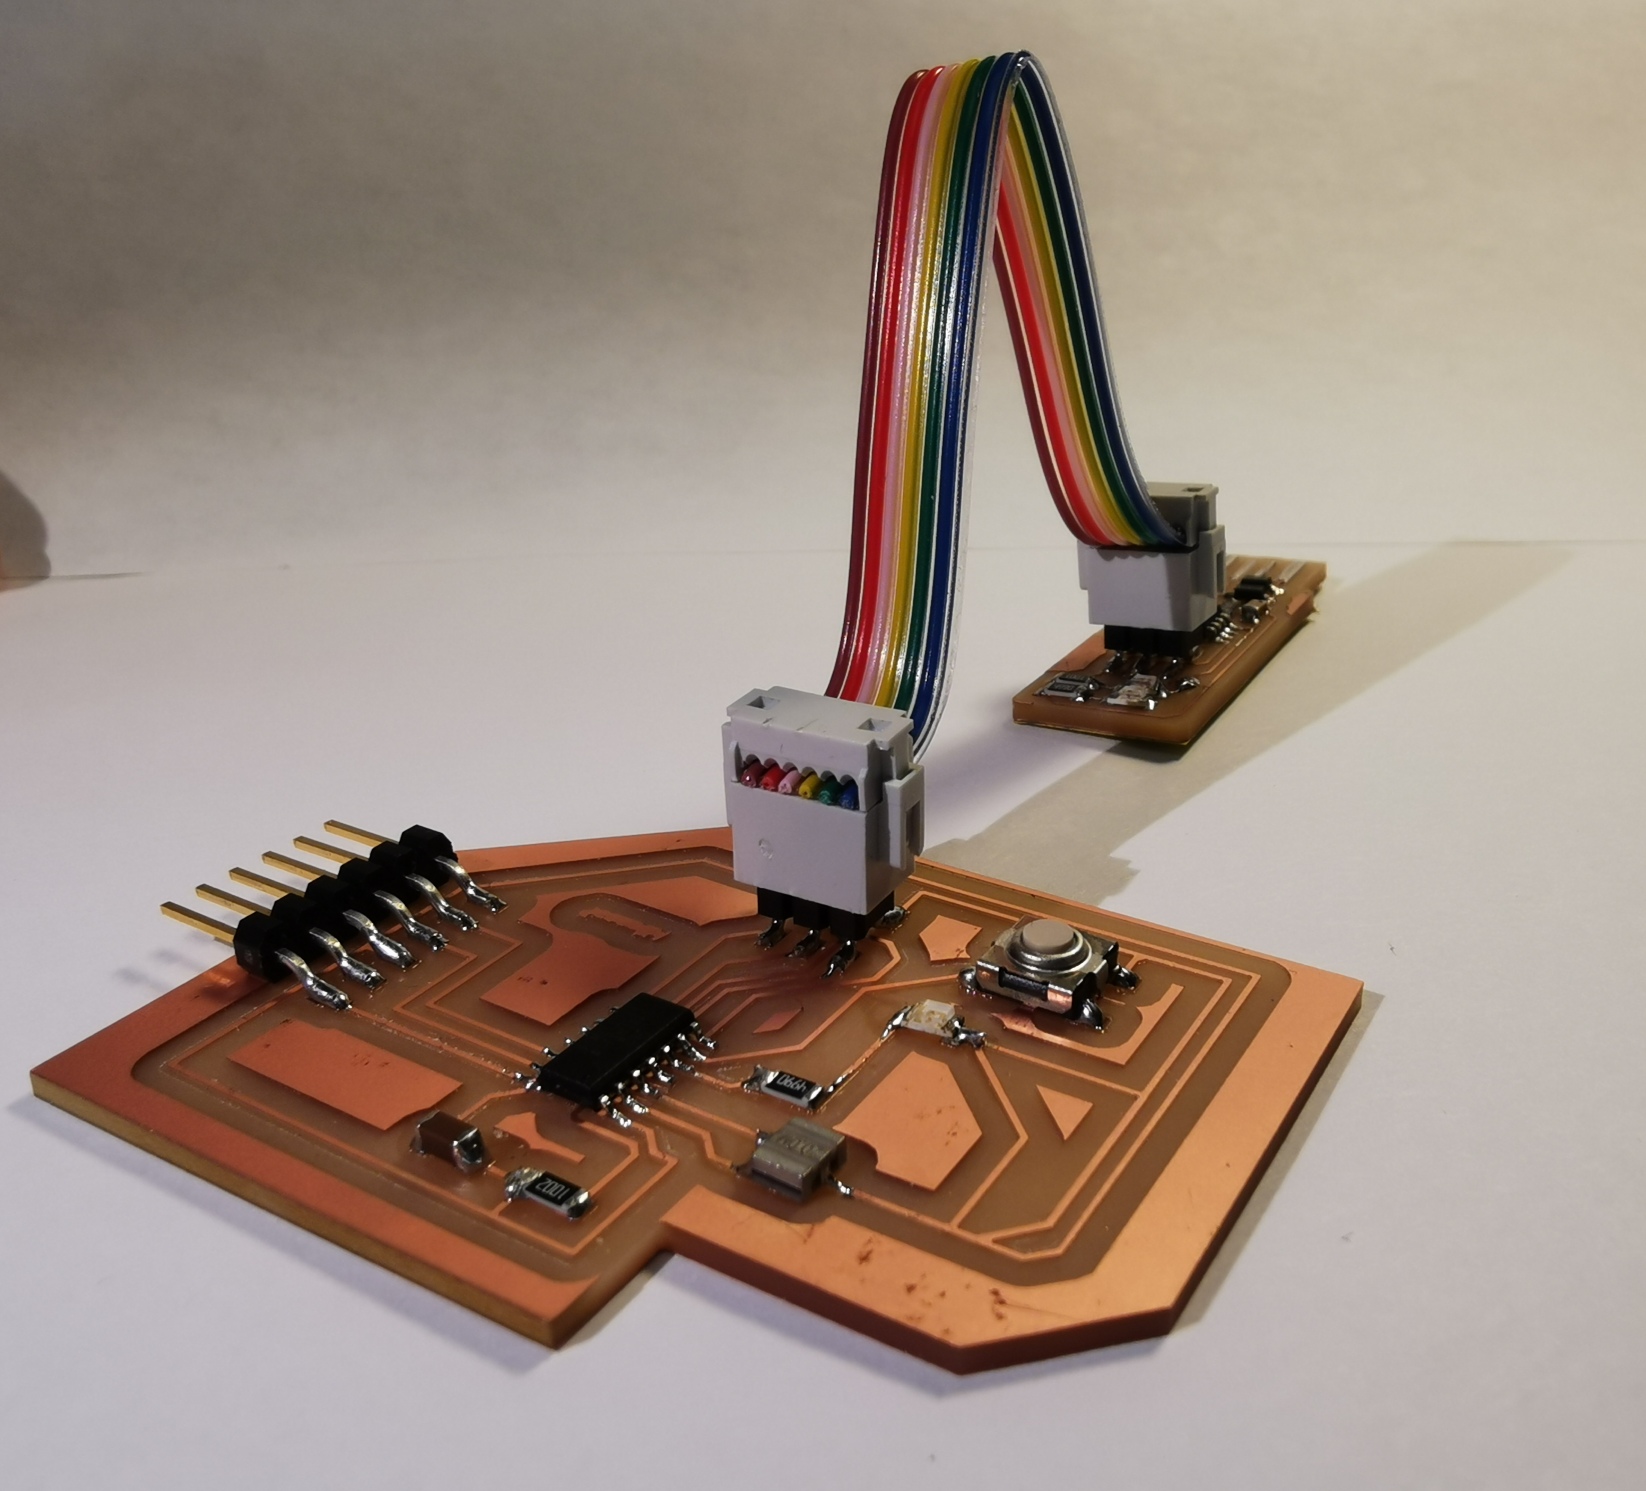
Three weeks ago we learned how to manufacture our own PCB with the available technology of our facilities (milling with the SMR-20 some copper - glass fiber plates). Two weeks ago we learned how to use Eagle or Kicad to re-do another PCB but now with some new features designed by us (just an LED with it corresponding resistor). But today, we are going to use both of this PCBs and use them to program our own c code directly to the ATTiny44!

First thing first. We are going to need some hardware to make this guys talk each other. The tiny programmer will be the one who loads the code to the big PCB. To do that, we need to first set a phisicall connection between them. Thy both talk through the 2x3 pin heather.

Secondly, we are going to connect our programmer though USB to the computer we will load the code. I decided to use the UBUNTU CPU downstairs due to I knew i wont have any Windows related problem. And It was like this. My first attempt of lsusb was succesfull, telling me that my tiny USB was founded there, ready to load some c code.
Third step will be to provide the big PCB, the one wich will be programmed, some power to be able to run the microprocessor! To do that we will load a USB - FTDI cable to any 5v source. The FTDI will be connected in the right polarity to our PCB and now, we are ready to start coding!
Before start talking about the code, I want to thanks this week again to Zach, Jiri and Camron. I've asked all three questions about logical operators, C code structure, debugging and more C related stuff.
As in class we were told that no one start a code from scratch, I decided to try to learn the basic of C through some previous work Erik Strand did. I decided to replicate his codes, re write them by myself and try to modify some of them to do some extra features. I have realize that C code is such a deep language in which we program bit by bit!. To start doing something, I decided to replicate his coded that make the LED be on when I pulse the button
#define led_pin (1 << PB2) #define button_pin (1 << PA7) int main(void) { // Configure led_pin as an output. DDRB |= led_pin; // Configure button_pin as an input. DDRA &= ~button_pin; // Activate button_pin's pullup resistor. PORTA |= button_pin; while (1) { // Turn on the LED when the button is pressed. if (PINA & button_pin) { // Turn off the LED. PORTB &= ~led_pin; } else { PORTB |= led_pin; _delay_ms(300); } } return 0; } Now I start undertanding how C works, and how the communication is being declared setting inputs, outputs and logic operations, I am going to make the LED be turn on some time before it swich off. To do that, I will use the _delay_ms(time) function. To do this function we need to load a new library. I took this information from Brian's example on last recitation.
#include < avr/io.h> #include < util/delay.h> #define led_pin (1 << PB2) #define button_pin (1 << PA7) int main(void) { // Configure led_pin as an output. DDRB |= led_pin; // Configure button_pin as an input. DDRA &= ~button_pin; // Activate button_pin's pullup resistor. PORTA |= button_pin; while (1) { // Turn on the LED when the button is pressed. if (PINA & button_pin) { // Turn off the LED. PORTB &= ~led_pin; } else { PORTB |= led_pin; _delay_ms(100); PORTB &= ~led_pin; _delay_ms(100); PORTB |= led_pin; _delay_ms(100); PORTB &= ~led_pin; _delay_ms(100); } } return 0; } After get this code (it required several debuggin) I wanted to add an internal for in order to be able to modify the delay with a function that allows me to make it blink progressively slower. The first problem I founded was that this delay function only allows to set time as a constant integer. Jiri helped me to improve this code by correcting my for loop as a wait loop. Instead of the for loop modify a certain value, we will use it only to make the code wait some time.
#include < util/delay.h> #define led_pin (1 << PB2) #define button_pin (1 << PA7) int main(void) { // Configure led_pin as an output. DDRB |= led_pin; // Configure button_pin as an input. DDRA &= ~button_pin; // Activate button_pin's pullup resistor. PORTA |= button_pin; while (1) { // Turn on the LED when the button is pressed. int i; for ( i=1; i<=100; i++ ) { if (PINA & button_pin) { // Turn off the LED. PORTB &= ~led_pin; } else { PORTB ^= led_pin; int e; for (e=1; e<=i*2; e++) { _delay_us(100); } } } } }