topic choices
This week has SO many cool skills to learn. I picked both the advanced embedded programming and machine knitting topic to focus on.advanced embedded programming lecture
Set up openOCV for programming bootloadercan brew install, but note that the SAMD51 bootlaoder needs the newest version of openOCD which is not yet in brew
- with ARM chips it's worth it to use arduino libraries becuase its much more complicated to do things ~~2000 page datasheet~~
- .elf files are the binary files that are being sent to the chips. like .hex file equivalent in avrdude
- gdb tool for live debugging and give you a shell to print variabesl defined on the microcontroller ~ super cool.
- python -m serial.tools. . . open serial port in python. or could use screen.
knitting overview lecture
knitting wiki overview.- we will be making weft knitted fabric
- different types of fibers are important for different use cases
- this machine can do something that looks like a hybrid fo weaving and knitting - explore different patterns. can even do knitting that looks like lace!
- latch needle mechanical, not electronic
- best to use the carriers (parts holding the yarn) in the center instead of the ones on the edge because they have the least amount of weird tension angles
- Jacquard knitting cannot be used for circular structure
knitting prep
GOAL: in an ideal world, i'd make four little jacquard pattern patches and socks, fingerless gloves, and headband/choker/scarf thing. I want to use the jacquard patterns to make little patch pockets on the wearables to hold the circuit boards for my final project.I think these are too many things so I'm going to prioritize the jacquard patches and the socks. If I finish in time, then I can add the gloves and head piece.
Alex has developed a CAD-like software to generate basic knitting patterns here
notes from knitskel paper
- columns of stitches are called wales, and rows are courses
I tried making a sock skeleton from scratch
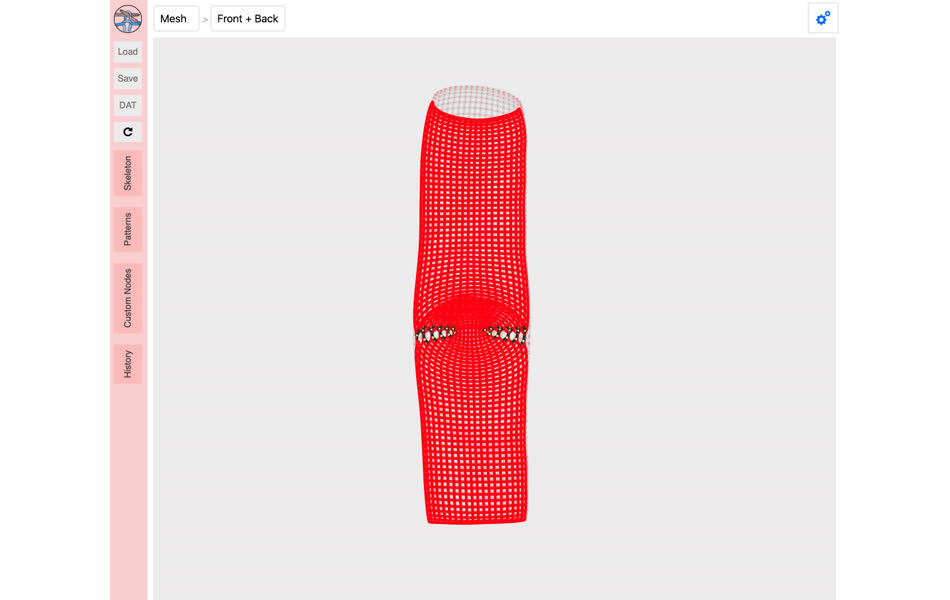
But then I noticed that I could load a premade sock pattern from the server:
i was kind of close . . .
I'm confused at what the dimensions are for the width and height - what do that correspond to in real life? how big does the sock need to be? I set it to 20 width by 30 length on the foot and then 20 by 40 on the top for now and will wait for Alex's input
Then, I tried adding patterns to the top of the sock, starting with just a simple ribbed pattern. However, I can't do that without setting the sock to half gauge, but when I move to half gauge the width gets ruined for all the other nodes. particularly, the join node doesn't work in half gauge. Running out of time before my first knitting session with Alex, I'll transition to getting a bitmap image ready for the Jacquard pattern.
pockets to hold electronics, but I don't have the actual boards made yet so I don't know the exact dimensions . . . but they need to be larger than BNO breakout board.
let's say around 4.5 by 4.5 cm pockets
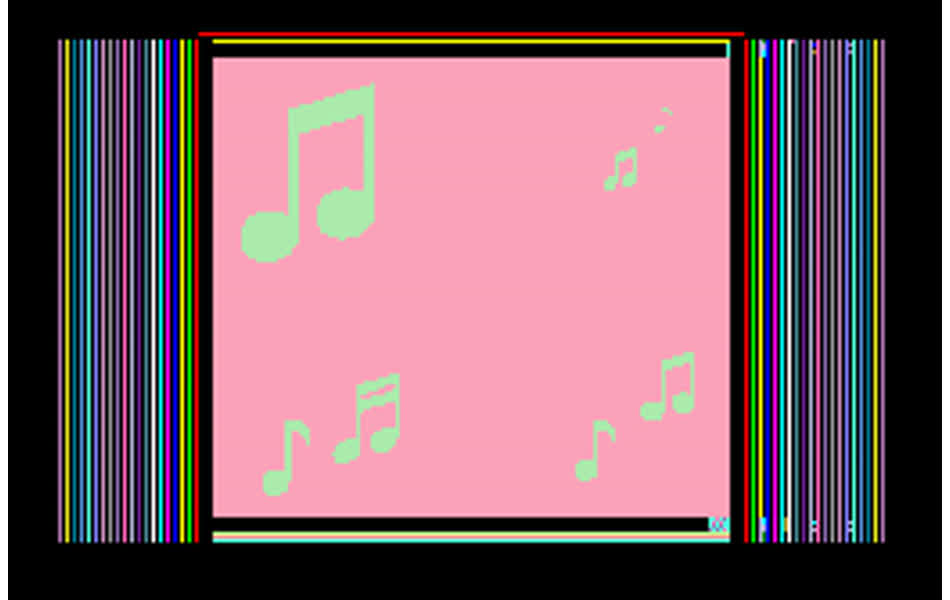
I made little music notes in GIMP to go on the pockets

I wasn't sure how to scale them, so I just measured everything in cm.
first knitting session
programming prep is complicated and time consuming for knitting - everyone said it, but now I finally get it.In two hours, Alex and I didn't get around to actually knitting anything. BUT the software now makes a lot more sense and we have a jacquard pattern in the Shima format that's *almost* ready to be sent to the machine.
The knitskel UI gives units in # of stitches. that converts to different real world measurements bsed on what type of fabric you use. Also, the preloaded sock is a little finger size sock - getting the right size may take a couple tries. Alex referenced a normal size sock that he made previously - width 50, height 40 on the foot, 60 on the top? Also, there is a bug in making the joint node half gauge to add patterns - I can work around it be knitting the whole foot of the sock in full gauge and then switch only the top part to half gauge to make fancy patterns :)
Then, we switched focus to the jacquard pattern because it was more prepared and "simpler" than the sock. Alex is worried that I may run into issues with my pattern since I'm trying to make such a small patch and the design has skinny, diagonal lines. The pattern has a limited number of stitches, like pixel in an image so intricate details won't be picked up on small rectangles.
we used a previous jacquard knit that Alex did to roughly estimate the number of stitches needed in mine.

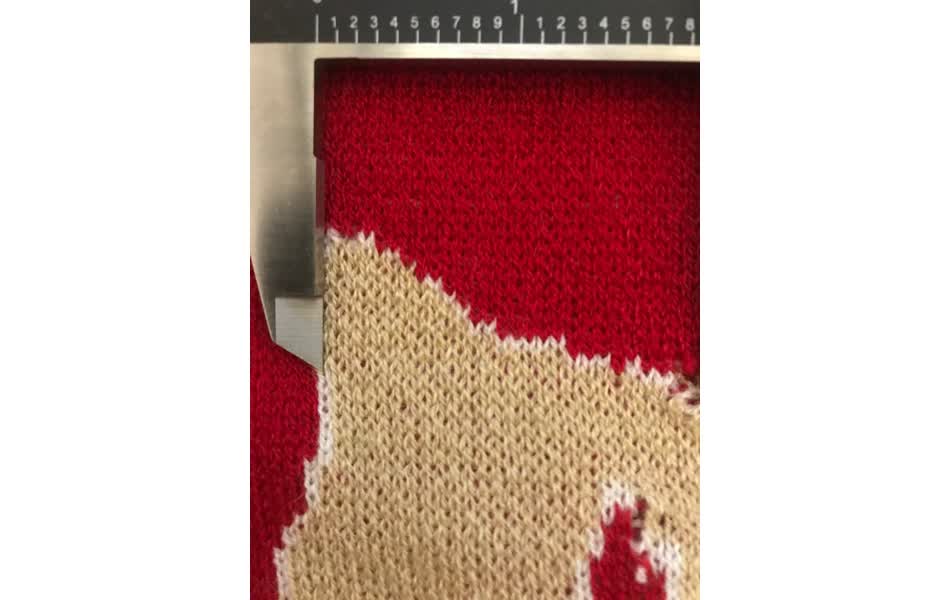
50 mm by 50 mm = 26 wales and 35 courses
Unfortunately, it's not as simple as importing the png that I made before. The Shima receives patterns from KnitPaint - proprietary Shima software that encodes stitches and machine options in a color encoded png format. So, i need to remake the pattern with the same color pallete and options that have been used before. I pulled this dino pattern from Kate Spies wild card page last year
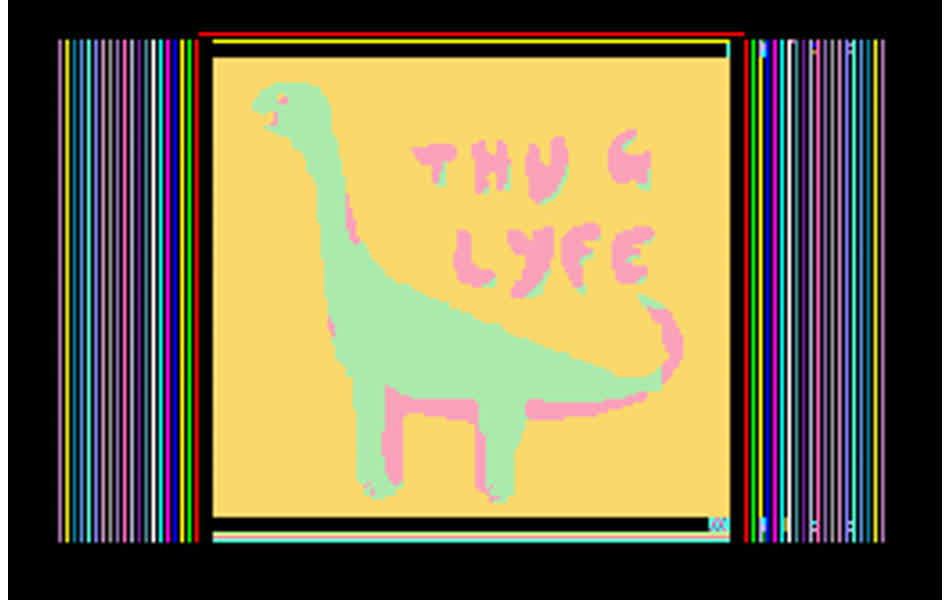
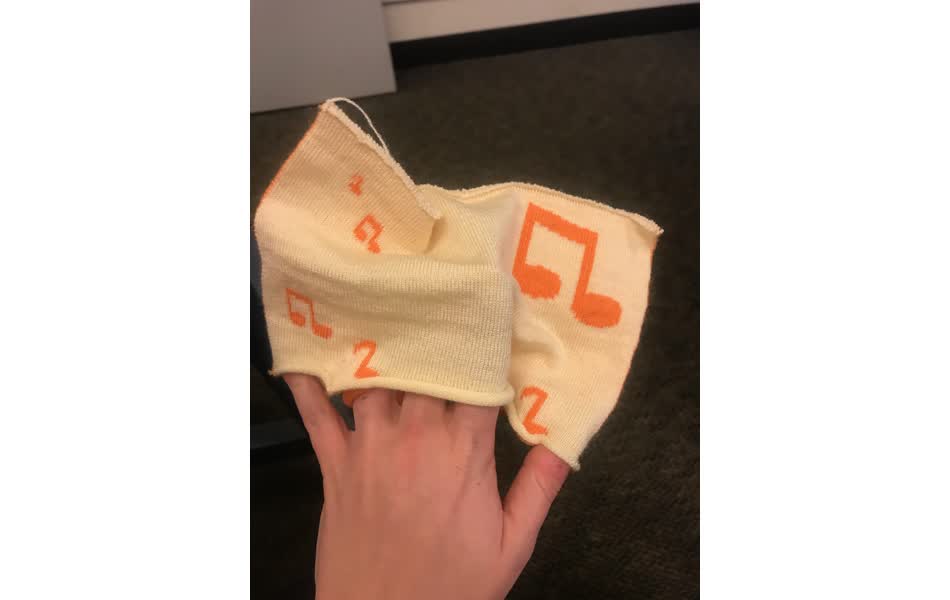
Imported that in to GIMP and used the same color palette to make the music note patterns. Unfortunately, the pixel count did not exactly match the stitch count in the downloaded image (as it does in the shima software). So, judging that the final dino pattern is a few inches across, I roughly split the pattern into four quadrants with varying sizes of music notes - that way this can be a test knit to gage actual sizing.
From a pattern design perspective, the jacquard is ready to go. But there was a bug in the machine options - something about the threads not being sent to the right location. We were running out of time and Alex needed to dive into the error on the machine, so we had to stop the session without a knit. but we'll pick back up on Monday morning and I'll prep the sock pattern for then as well.
more pattern prep
now that I have a better understanding of KnitSkel, I can move on to patterning the sock. I can add basic ribs with the drop down example - it sets every 2 wales to be a purl or a knit.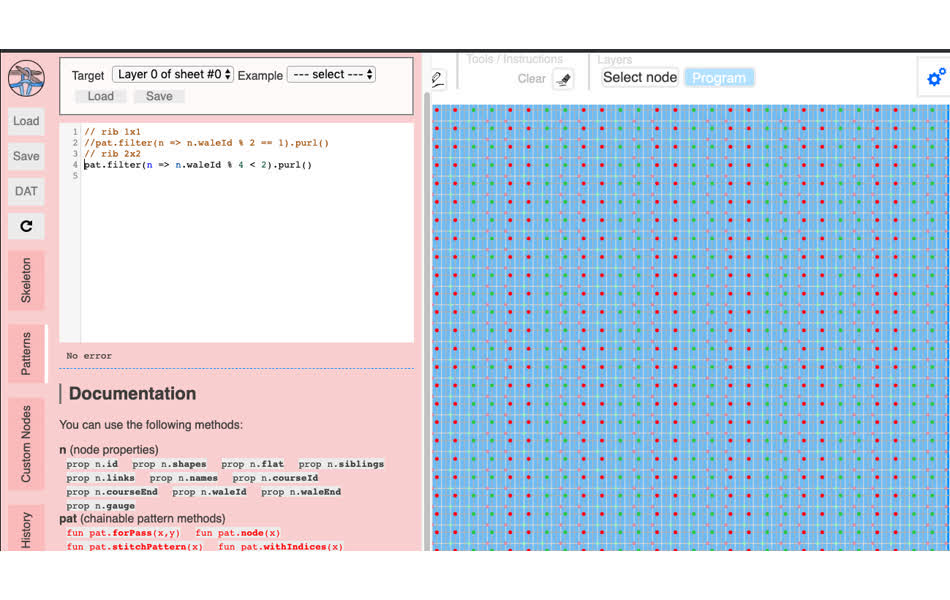
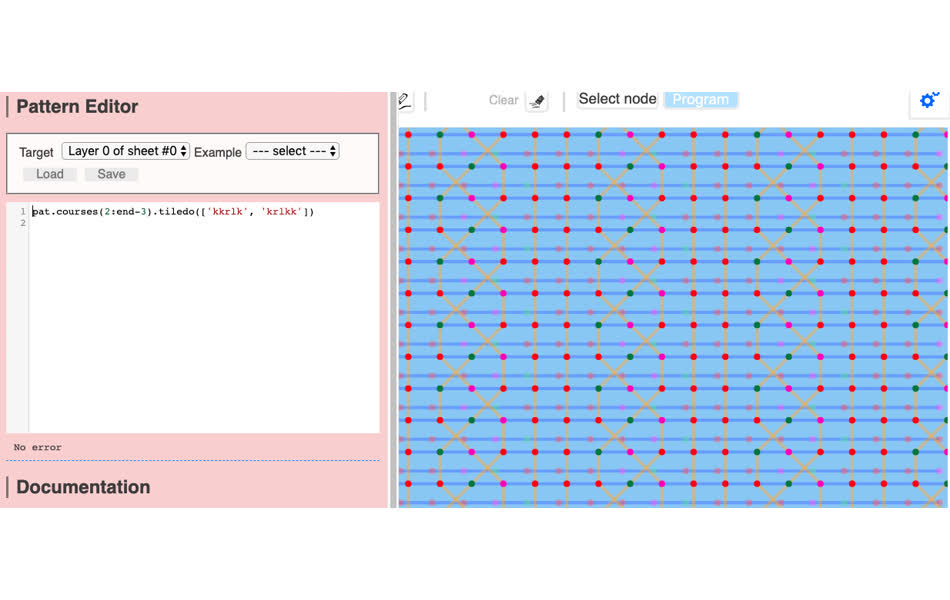
But loading different pattern examples from the git repo, it looks like the easiest way to make more intricate patterns is picking the courses and setting individual stitch instructions with the 'tiledo' function. I found the key to stitch commands here.
I *think* this is a simple cable pattern that I"ll add to the top of the sock:
pat.courses(2:end-3).tiledo(['kkrlk', 'krlkk'])
Alex's sock (published inn the knitskel paper) is split into nodes: let's call 'em toes, foot, heel, ankle, and cuff. The toes are about 50 stiches long and the width goes from 2 to 50. The foot is 0 stitches long and 50 wide. the "smart heel" joint is 50 rows by 50 width. the ankel is 40 stitches long and tapers from 50 to 40 width. The cuff is 64 stitches long and 40 wide. All of these nodes are in half gauge. But now, there's a bug with doing joints in half gauge so I created the same sock in full gauge with only the cuff in half gauge so I could add the pattern there.
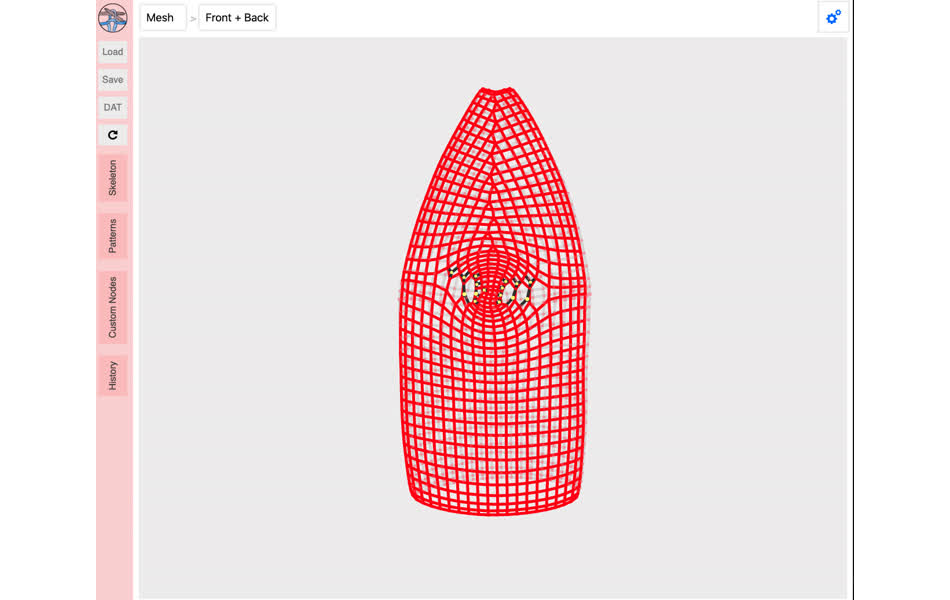
sock skel
we'll see how it goes monday morning . . .
knitting round 2
The jacquard pattern was ready to go !
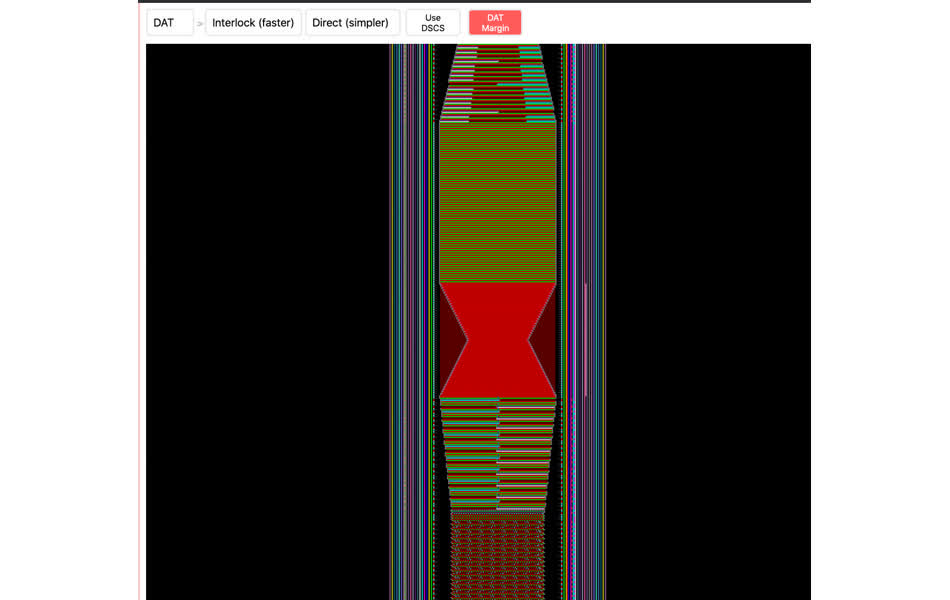
.dat file (sent to the machine)
The green and pink music note images are the ones I edited and designed in GIMP. Then, in KnitPaint, they get converted into the dat file - this lays out the knit with each column representing a needle, each row moving a step in time, and the colors/number on each square indiciating a specific stitch or action. then, the tubular color options in the right are determine how the jacquard pattern is made - will the back by reversible or a woven-like pattern.
within about 3 minutes, the knit was done!
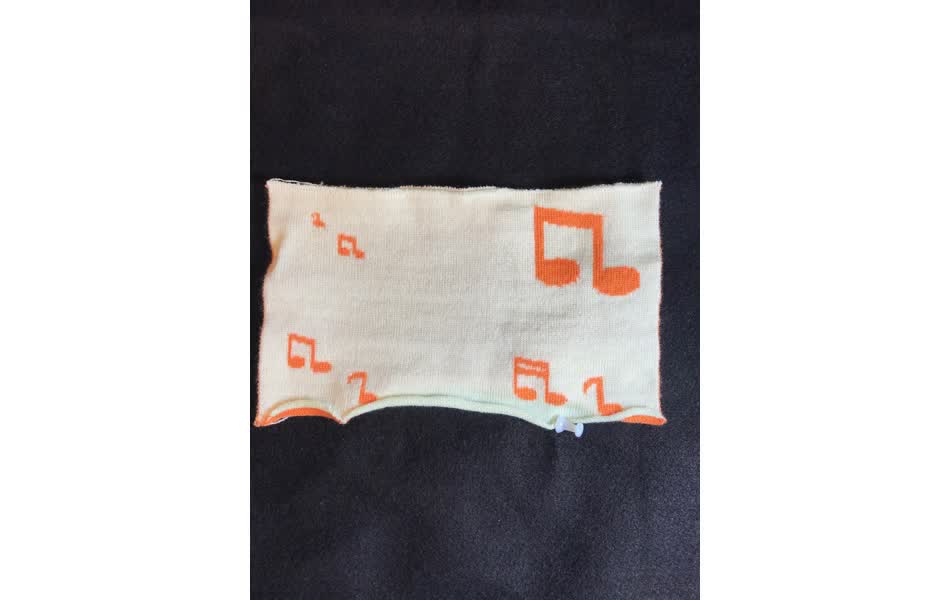
I chose the fully reversible pattern
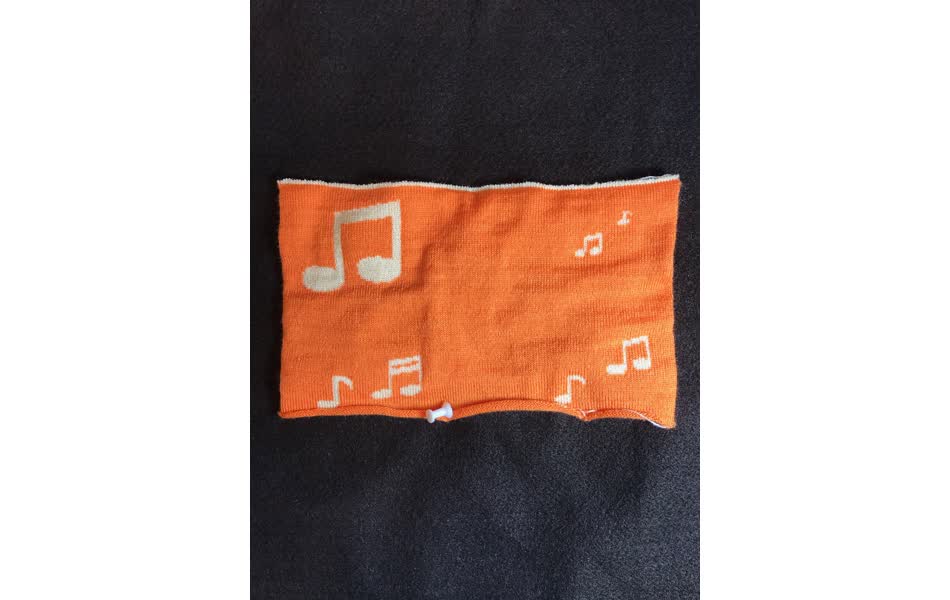
this basically knits a tub structure and then alternates which color is in the front or back depending on the pattern - so it's one large tube that's closed off by smaller tubes.
Then we moved on to the sock. There was a lot of uncertainty in the sizing and how the cable pattern would come out. Most of it came to the fact that the sock pattern Alex had knit previously was in half gauge, but the half gauge joint node has a bug so we decided to knit the whole thing in full gauge instead since cable patterns do not require half gauge. But, this means that the tension in the threads become very important when increasing or decreasing stitches since there's less space between each stitch is easier for the machine to become jammed or the loops to fall off. That and the dimensions were off because converting the heel to full gauge doubled the width of everything except the joint node.
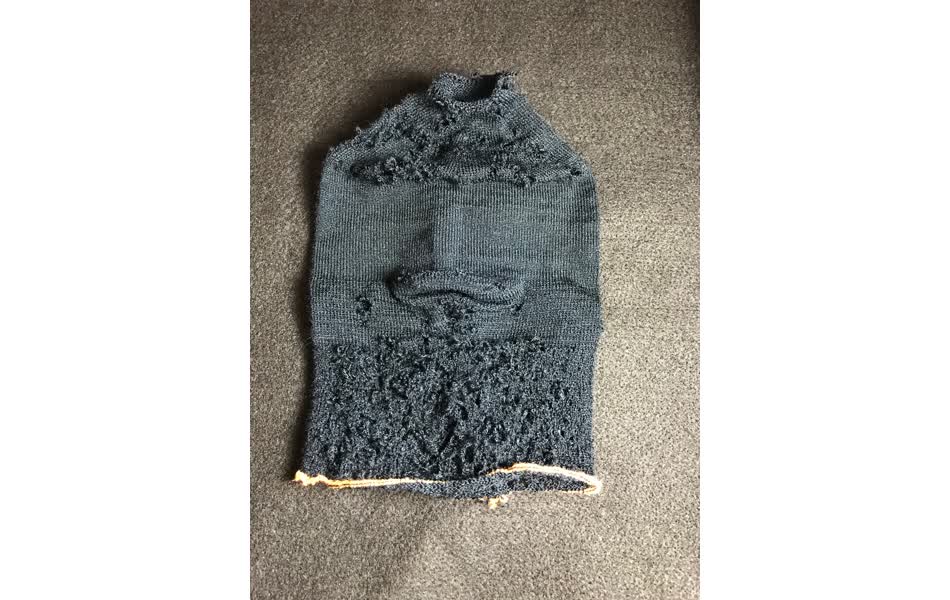
Alex and I spent a while after trying to figure out if the cable pattern failed because of the tension of the black thread or the knit instructions. It turned out to be a combo of both. The pattern we created in the knitskel software was correct and should work, but the conversion from knitskel (open source Alex project) to knitpaint (proprietary Shima software to machine code) had a bug in it for the back left and right cross stitches when making a cable pattern. Then the holes and random areas where the sock is not a tube are due to machine tension problems.
it was a good learning experience, alex found new bugs to fix in his software, and I'm excited for the kniterate to be up and running in CBA. but, I won't be making a sock this week ~ many other people need time on the machine and I at least have a solid jacquard pattern complete. I'll figure out another wearable to hold my final project circuit.