Final Project: Record Player
Brainstorming | Electronics | Hardware | Software | Integration
Brainstorming
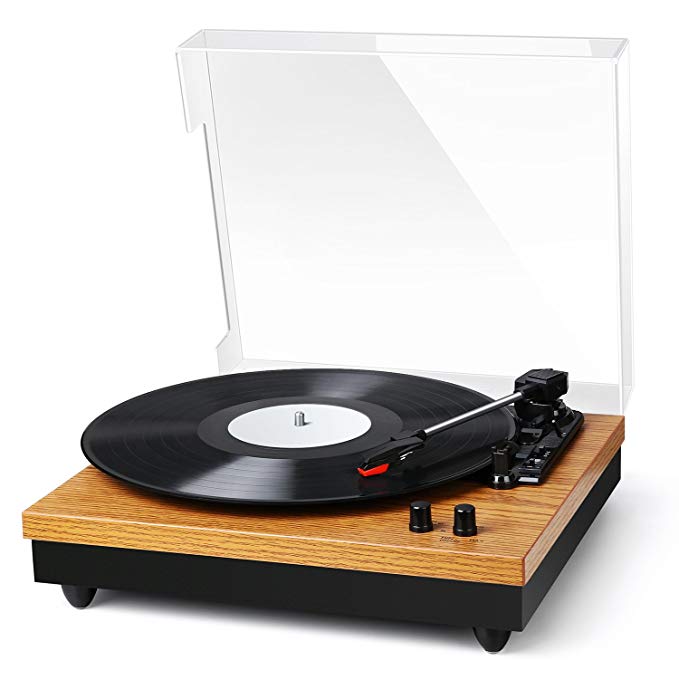
Over the past few years, I've been growing increasingly interested in music technology, or how people can use technology to play, listen, or enjoy music. I have never owned a vinyl record player, but I've always been interested in how they work. For my final project, I would like to potentially build my own vinyl record player.
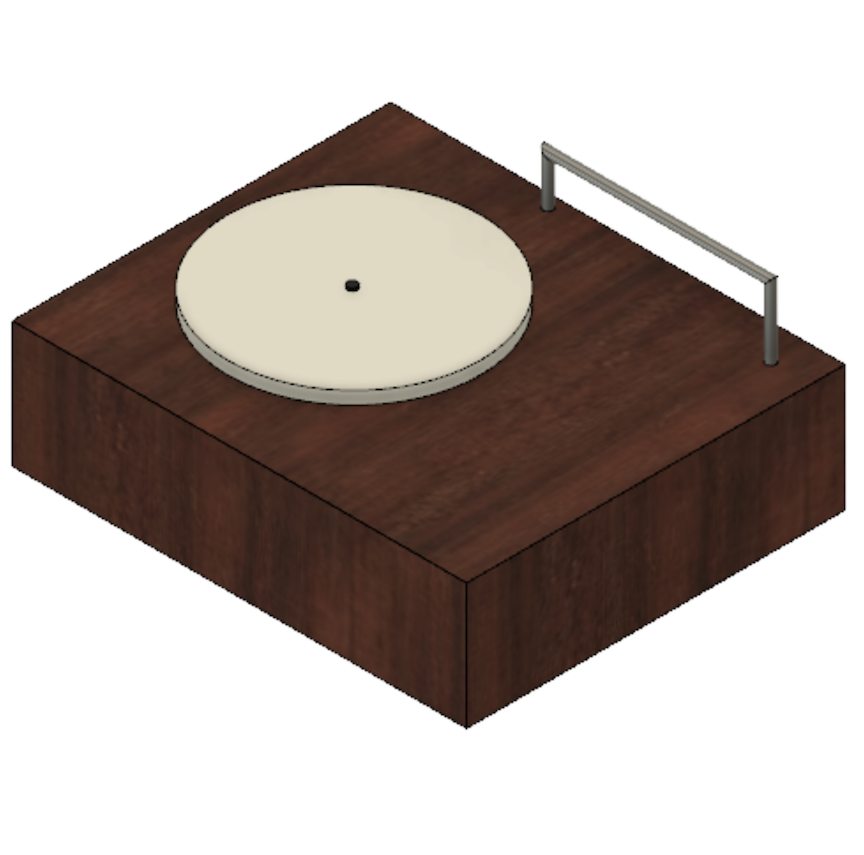
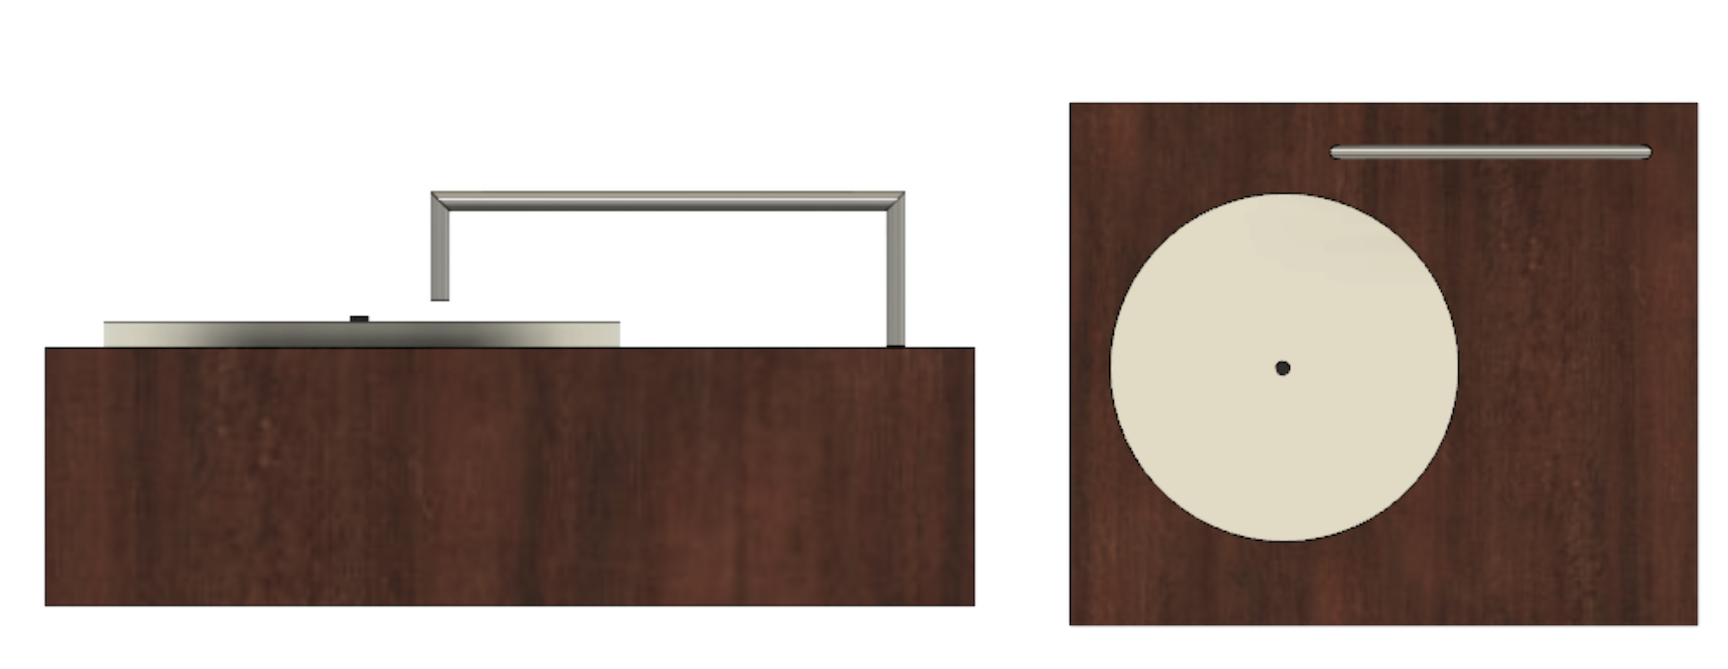
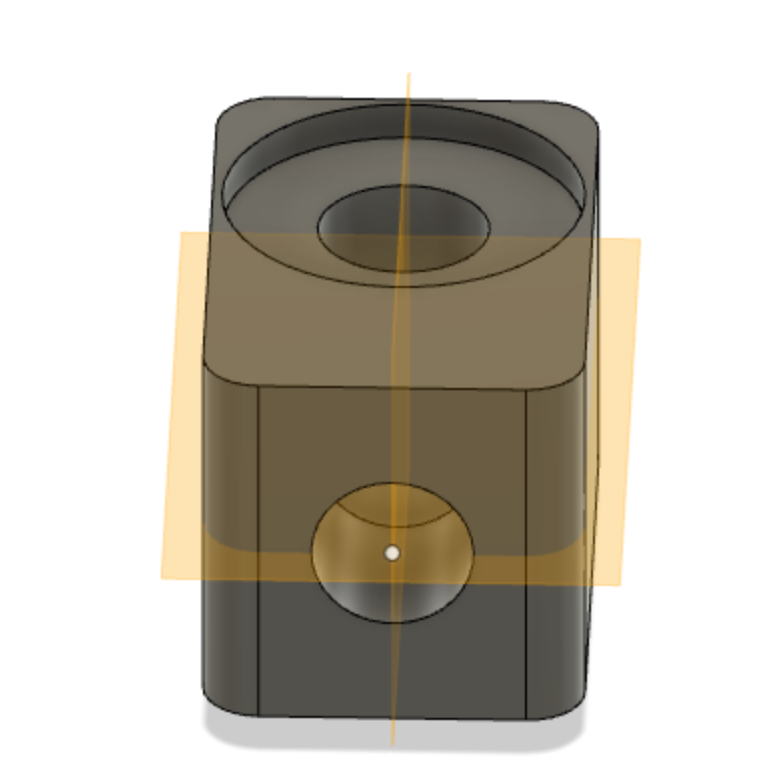
I read through this tutorial and used Fusion360 to sketch out a rudimentary model of what my project could look like:
Other useful links:
- Maxine Tan's project
- Eagle CAD files for a preamplifier and motor controller
- Homebrew Turntable, a open-source, 3D-printable record player project
- James Silva's tutorial
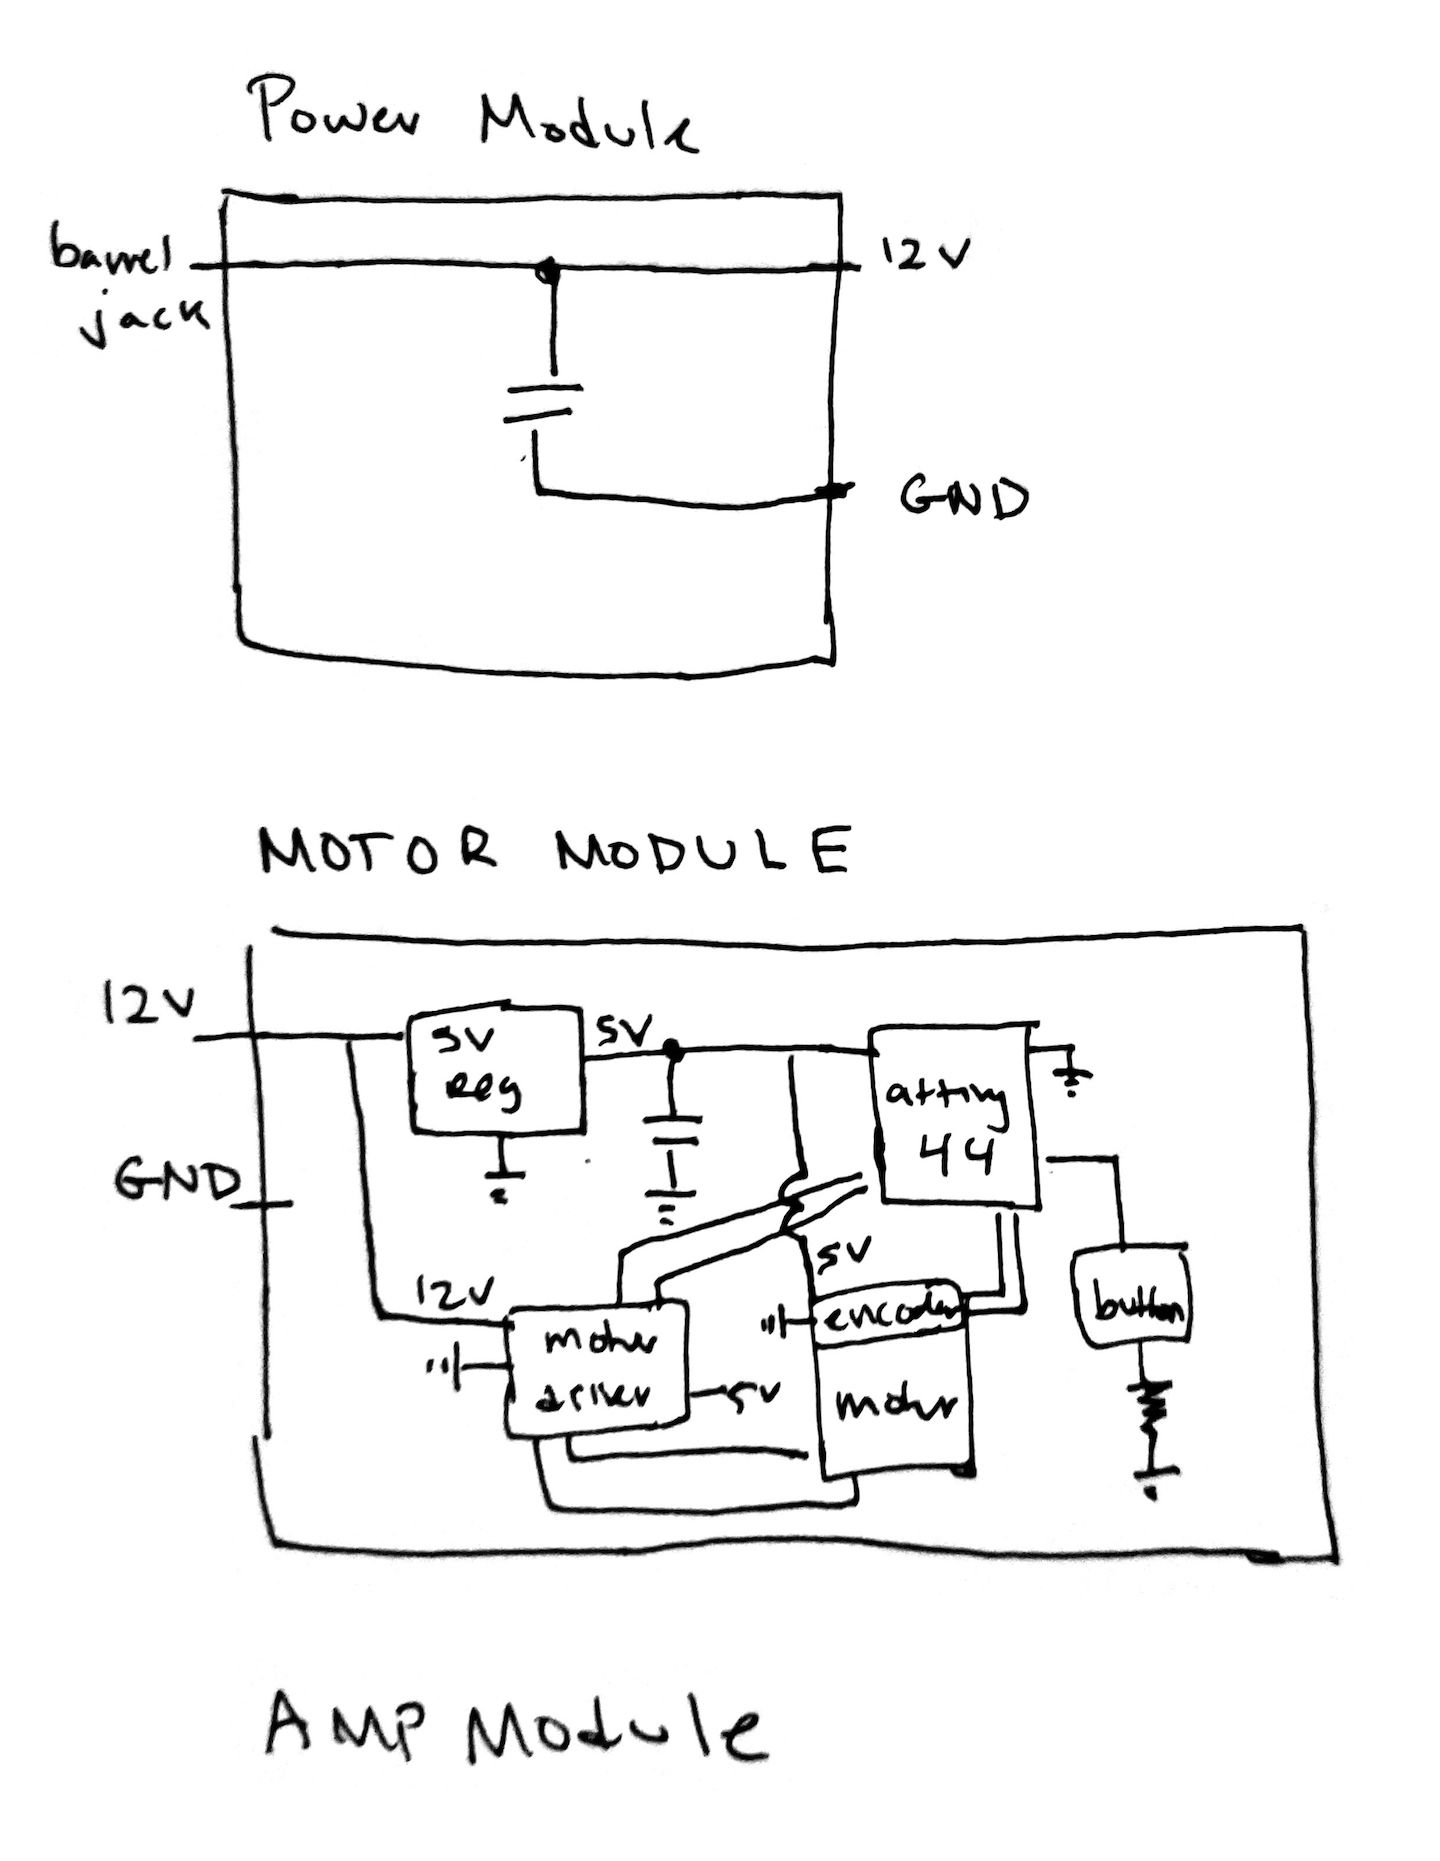
In my final project meeting, Anthony told me to draw up some block diagrams for my boards. I think I am going to make a power module that takes in a DC jack and outputs 12V, a motor module that spins the motor and can be switched from 33 1/3 RPM and 45 RPM, and two amplifier modules that amplify and output the audio signal to a speaker. I haven't decided yet if I'm outputting to a audio jack so I can connect an external set of speakers to the record player or if I'm including a set of speakers in the record player box so I'll add the amp module later.
In terms of hardware, I'll need to build a box to house my electronics and actually spin the vinyl record. I'll also need to think about the design on my tonearm. The tonearm has to be free-moving so that the needle properly travels along the record. The two options I am currently thinking about are ring magnets placed with the same poles facing or ball bearings .
Electronics
As mentioned above, I need three different boards: (1) power module to distribute 12V across my modules, (2) amplifier board to pass sound from the needle to the speaker, and (3) motor board to control the record spinning.
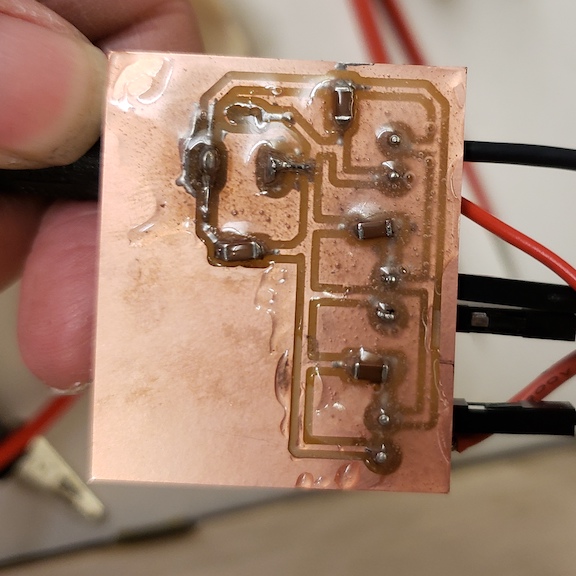
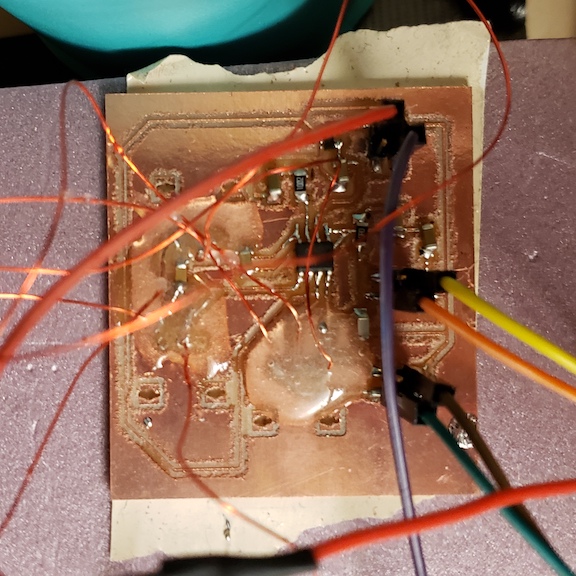
I used the Othermill to mill these boards because it was easier to drill the holes for my through-hole components. One issue that I ran into was that the Bantam tools software would only drill small circular holes. To make the holes large enough for my barrel jack and the pots, I manually added extra holes in the "Holes" layer in Eagle before exporting my .brd file.
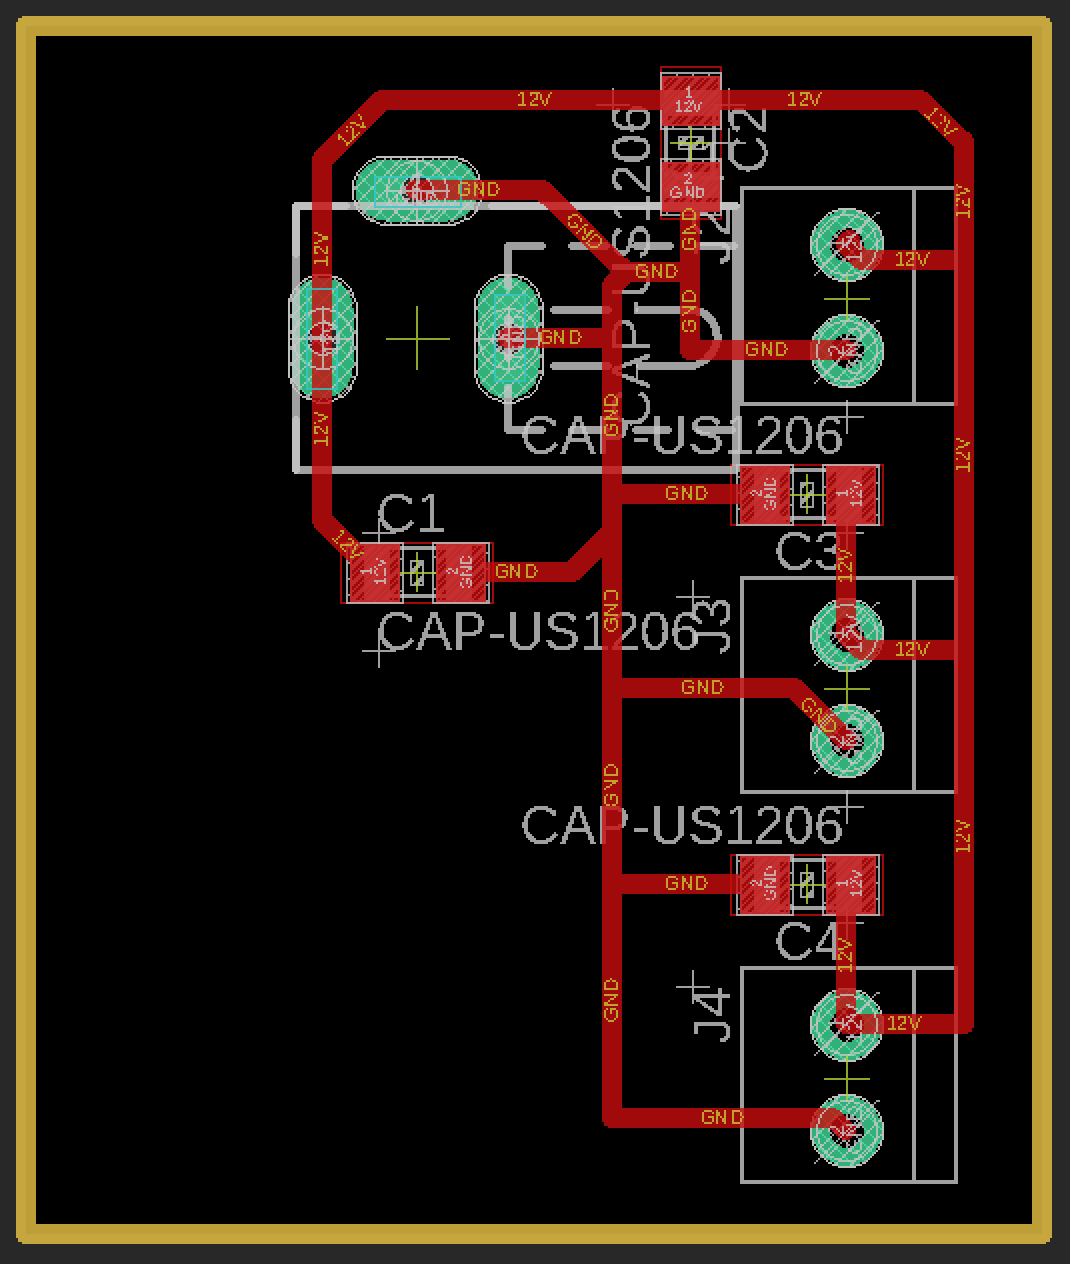
Power Board
I made a board that takes in a barrel jack and distributes 12V to screw terminals where I can plug in my other boards. I use the power board to power the amps and the motor.

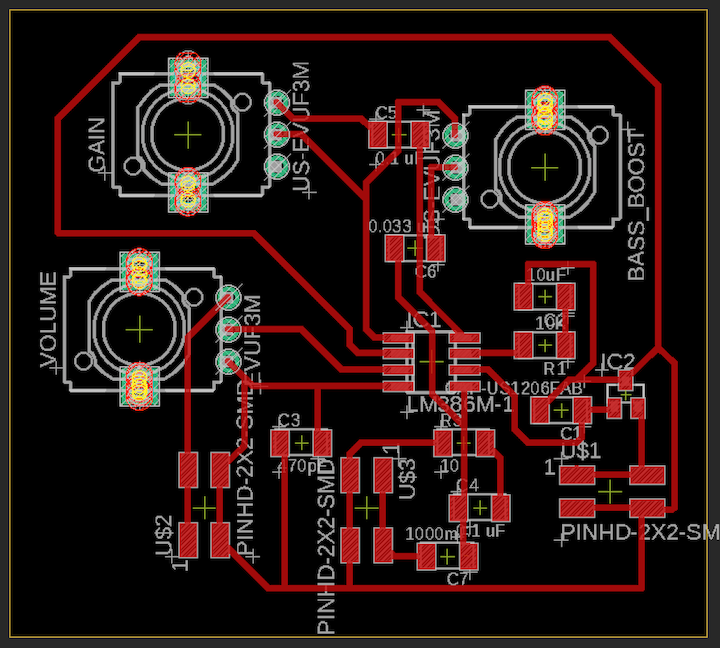
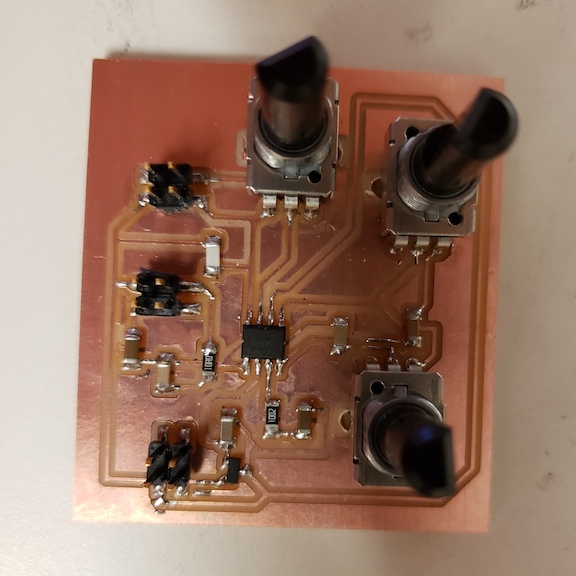
Amplifier Board
I used the LM386 audio amplifier chip to design a board to take the sound signal and increase the voltage in order to play sound through a speaker. The LM386 is a low voltage audio power amplifier that provides the ability to vary the gain anywhere from 20 to 200 times the input potential. I found a great tutorial that also described how to use a capacitor and a 10K Ohm potentiometer in series to add a bass boost effect. I designed my board using the tutorial and made two versions, one for the right and one for the left sound input. The three pots control the gain, volume, and bass boost.
Motor Board
I used the board I made during input devices week .
Hardware Design
I designed the components of my record player in Fusion 360 and fabricated the parts using the laser cutter and 3D printer. The main components of my design were the base, motor mount, and tone arm. The bill of parts can be found in the integration section.
Base
I designed the base in Fusion, adding finger joints the fit all the pieces together. The bottom and sides were cut using plywood. I also added circular holes on the side to fit my speakers.
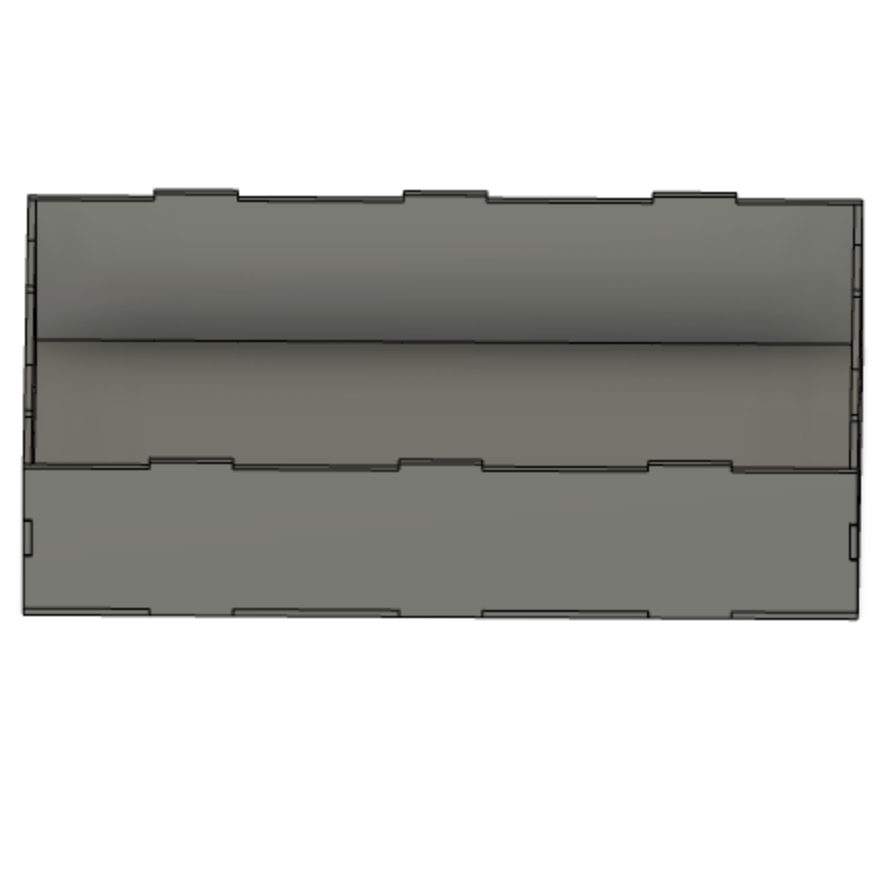
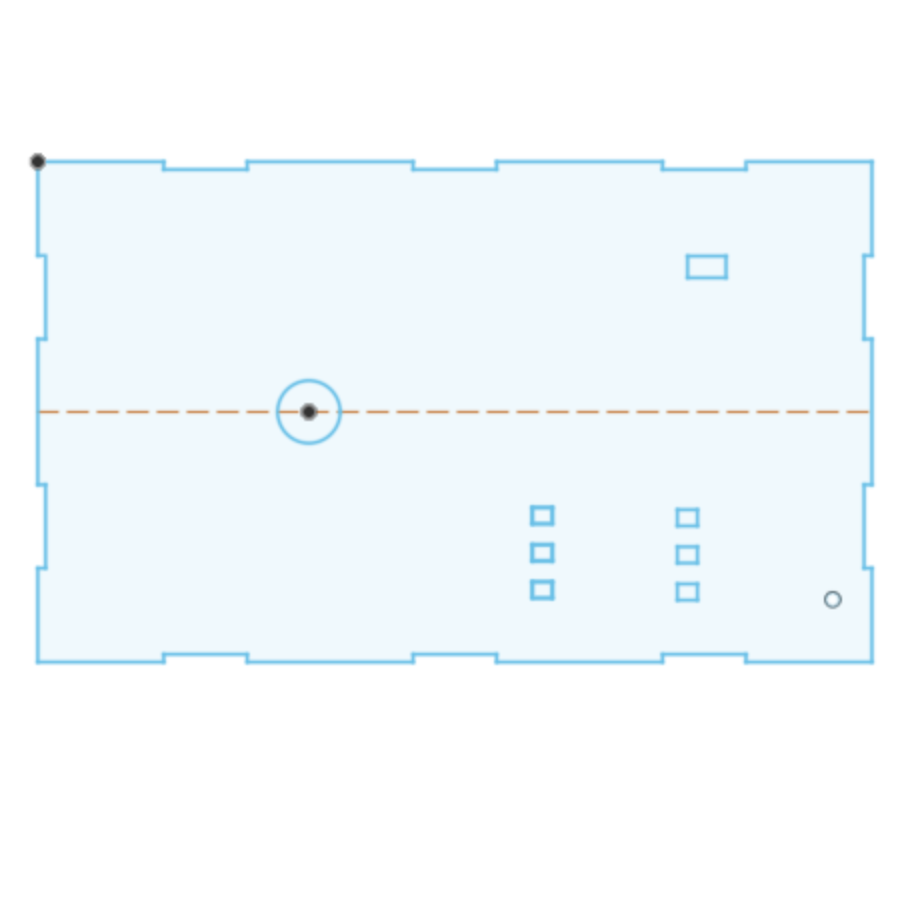
The top piece was cut out of acrylic. I needed to add holes for the motor, pots, switch, and tone arm.
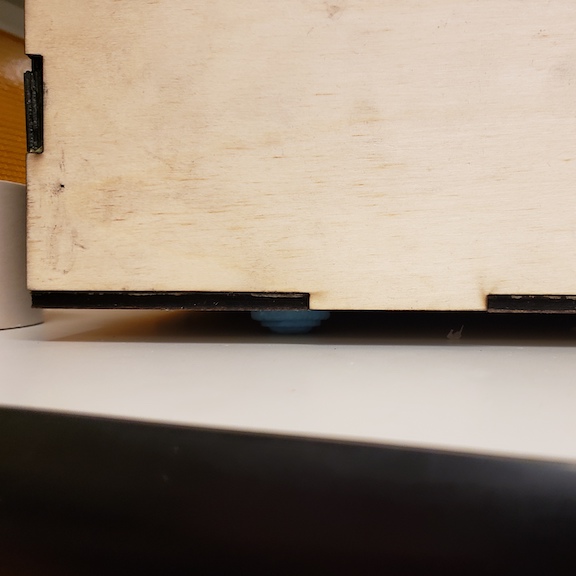
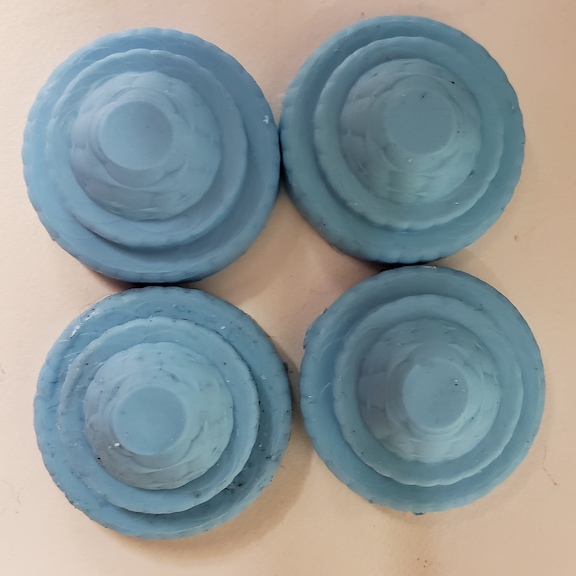
I used the mold that I made during molding and casting week to cast some feet for my record player. I made them out of oomoo because I wanted a rubbery material that had a quick cure time.
Motor Mount
The part that connected to the shaft of the motor ended up being 3D printed. I first attempted to find a shaft coupling that would fit and then tried drilling a hole into a plastic tube to create a coupling but decided it would be easiest to design my own coupling. I also wanted to add a nub to hold the vinyl record on top.
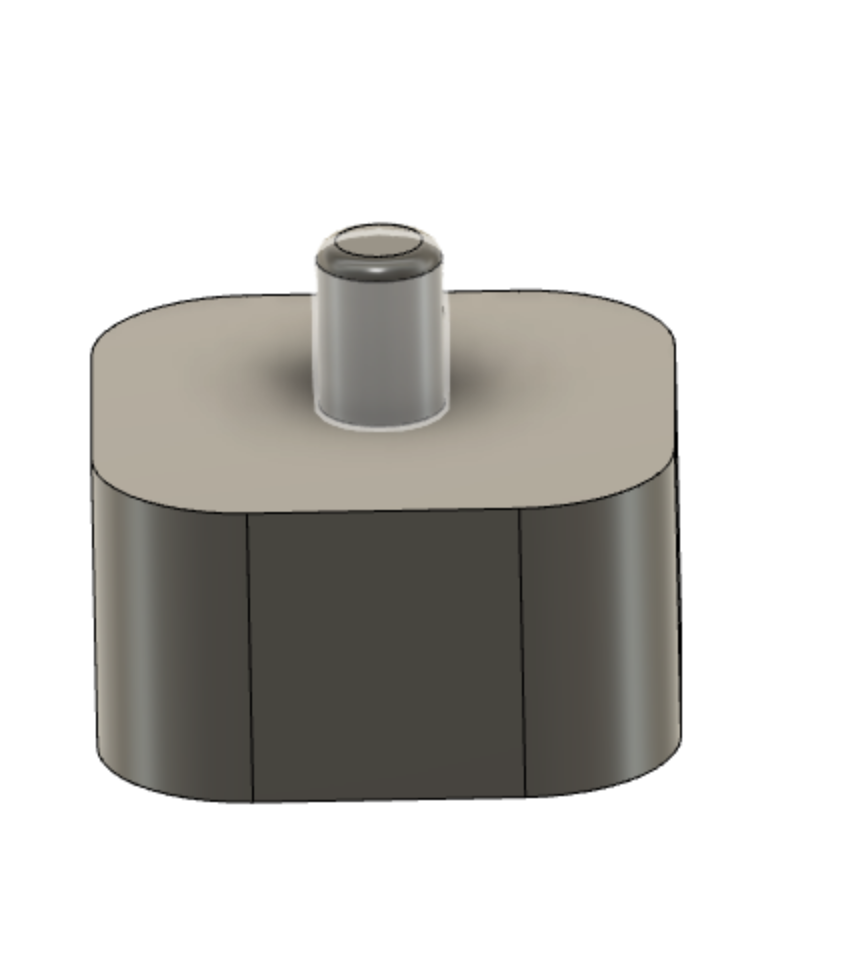
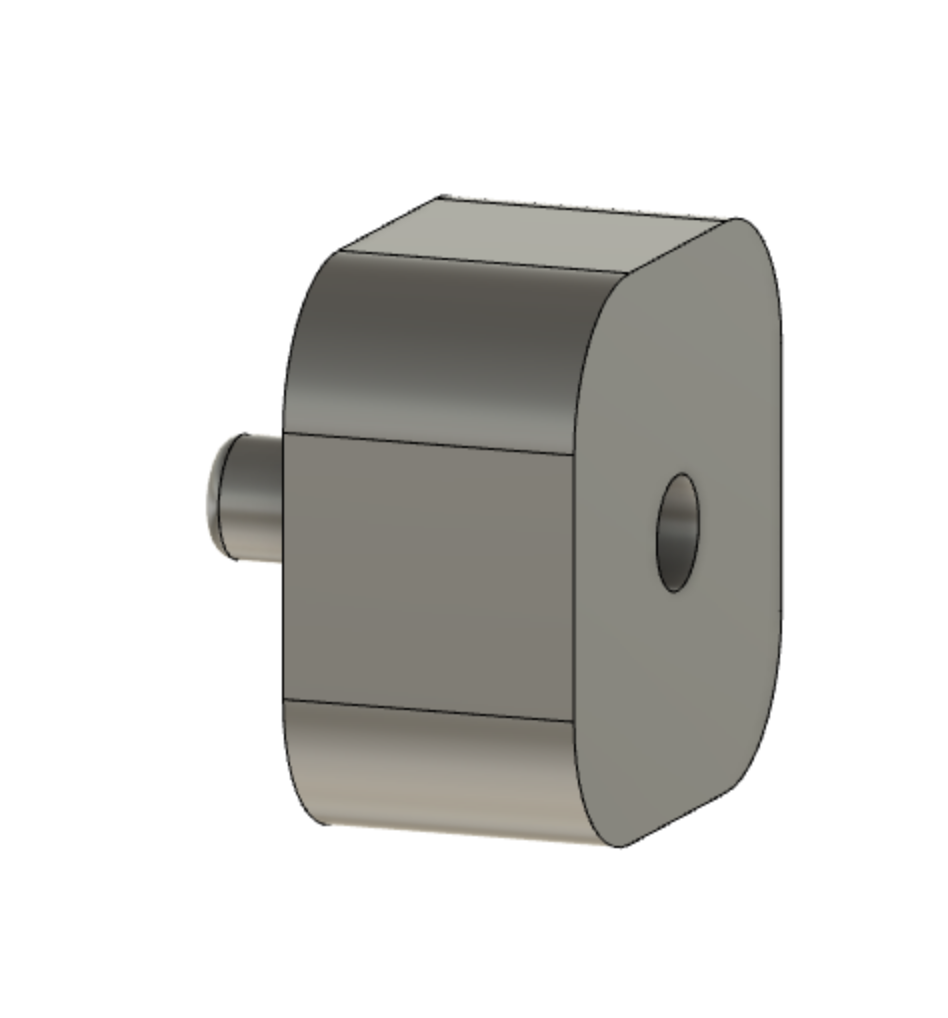
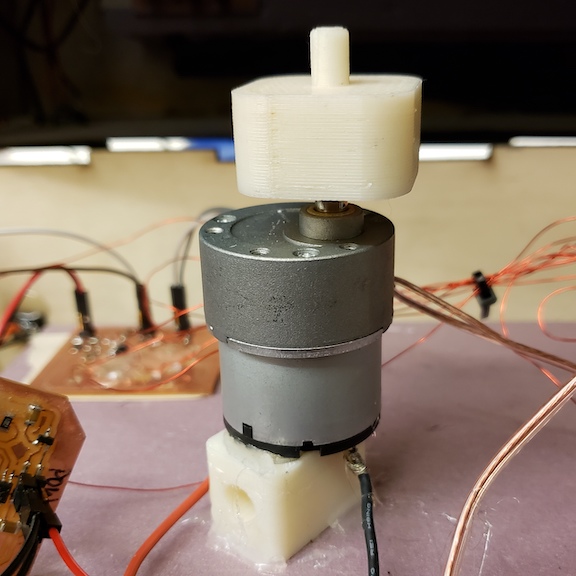
I 3D printed this part using the Sindoh. I also laser cut an acyrlic circle to put on top of the motor nub to give the vinyl record a platform and for the aestetic.
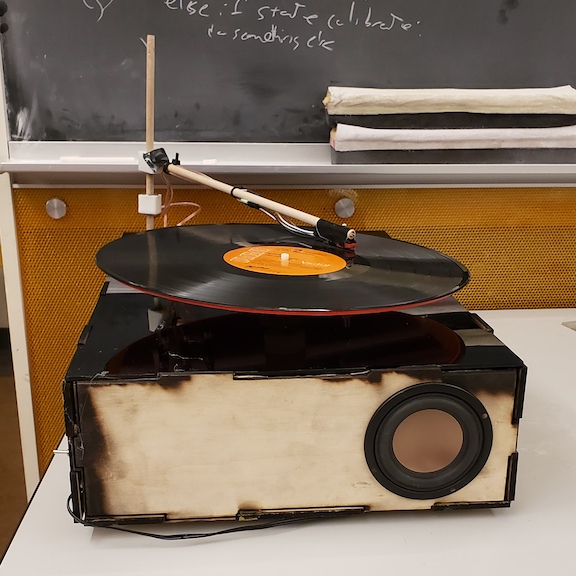
Tone Arm
The tone arm is the part of the record player that allows the needle arm to swing freely. I decided to use a wooden dowel to create my tone arm. Ring magnets allow the tone arm to be freely spinning. I had to design a part that would slide down the vertical dowel and attach to the horizontal arm with space to slot in a ring magnet. I also 3D printed another part to hold the bottom magnet in place.
The end of the tone arm is where the cartridge is attached. I soldered wires to the sound pins and thread the wires along the tone arm, down the vertical dowel, and into the box to attach to my amplifier boards. One of the trickiest parts about the design was determining the correct weight at the end of the tone arm. I want to make sure the needle just barely touches the surface but makes enough contact to slide along the grooves. The weignt is dependent on how long the tone arm, how angled it is, and the actual weight distribution along the arm. I had to test many times to determine the optimal placement of the tone arm.
Software
I originally planned to use a motor with an encoder for my project so I would be able to program in a smarter controller. However, because of time constraints I was only able to use a standard DC motor. I programmed the motor to run at a constant speed using the Arduino IDE. My plan for future work is to use the encoder to set up a feedback loop and use PID control to make accurately run the motor at a specific speed. This will make the music play at the correct tempo and pitch.
Integration
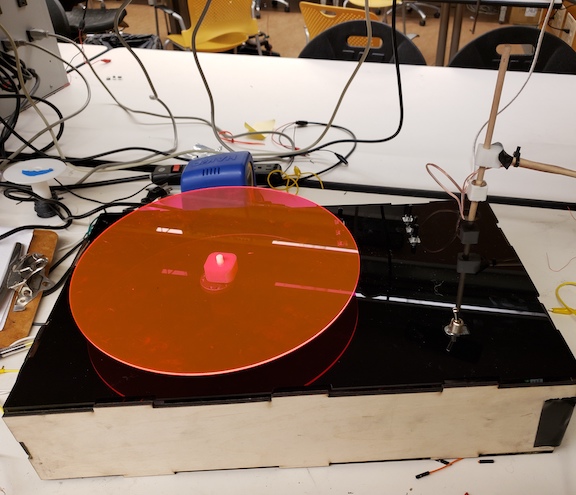
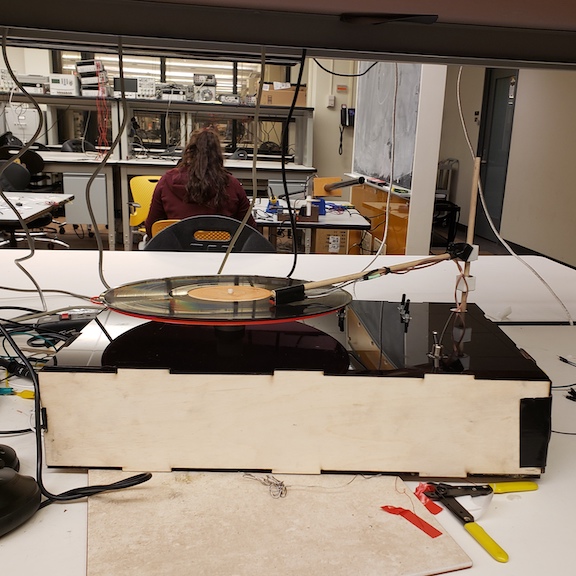
The hardest part of the project was integration. I ran into many challenges while trying to integrate all the components together. I wanted my potentiometers to be accesible from the top of the box so I had to remove all the potentiomers from my amp boards and wire them to the top of the box.
Once I had everything wired correctly, I closed up the box and plugged it in.
Bill of Materials
- Wooden dowel
- Needle cartridge
- Acrylic
- Plywood
- Ring magnets
- DC motor
Here's the slide that I made for the open house:
