Week 4: 3D Scanning & Printing
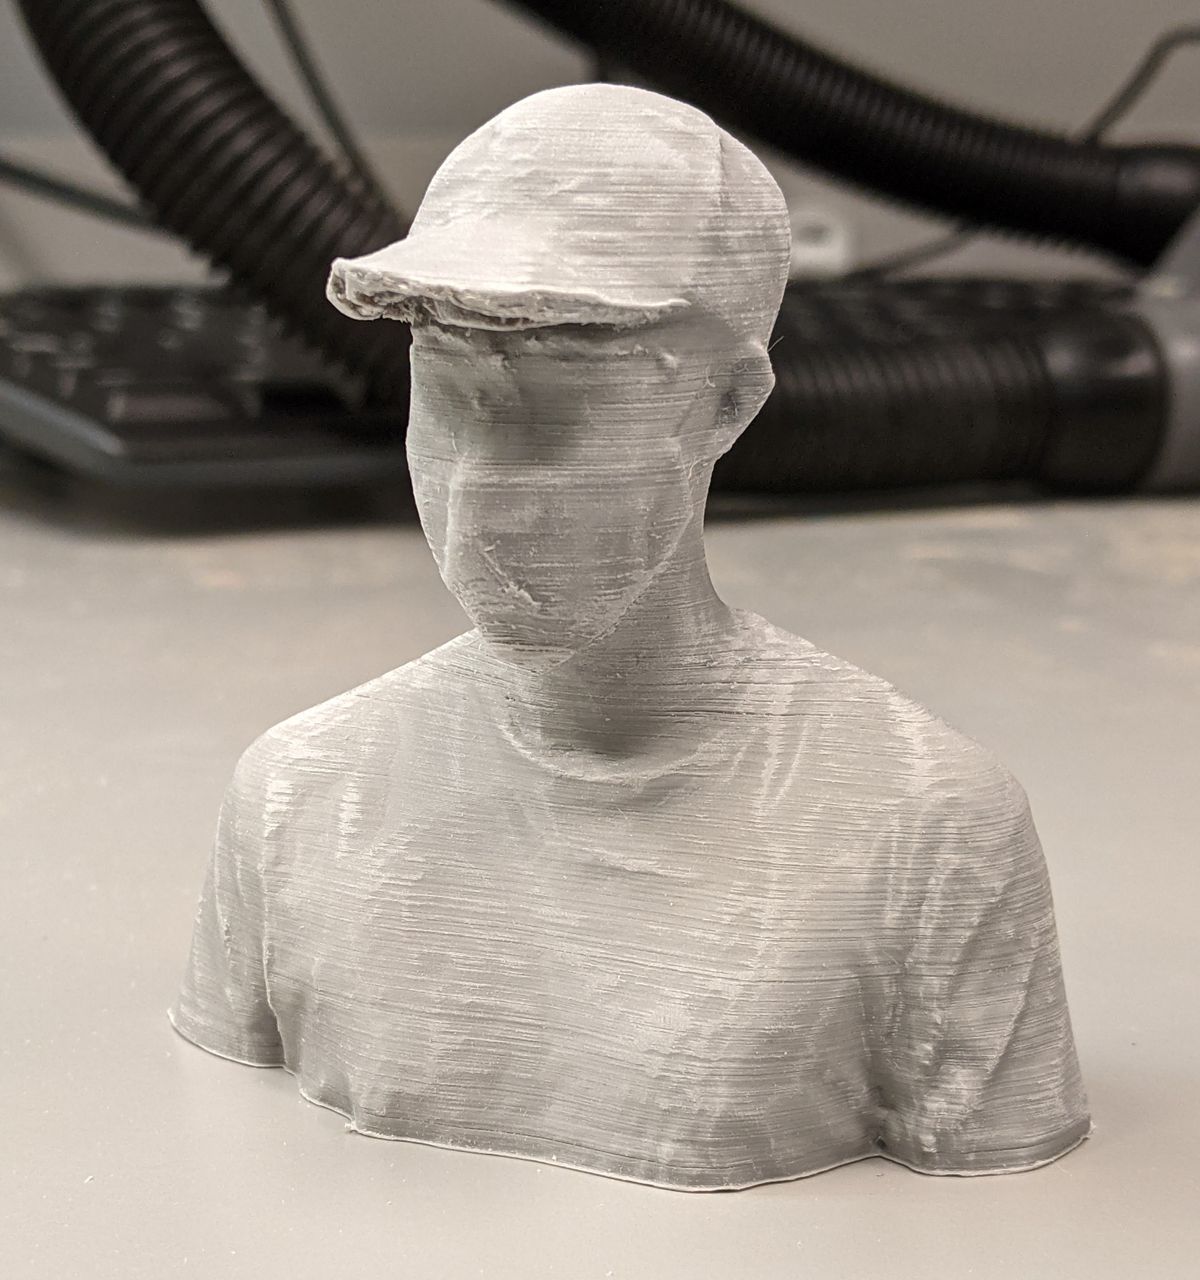
Due to the limited number of printers we had (3 total), the quantity of prints I had, and size of prints, I opted to print on my home 3D printer in order to free up valuable printing time in the EDS shop. This is probably the first week I'm starting to think about how we can visualize data differently!
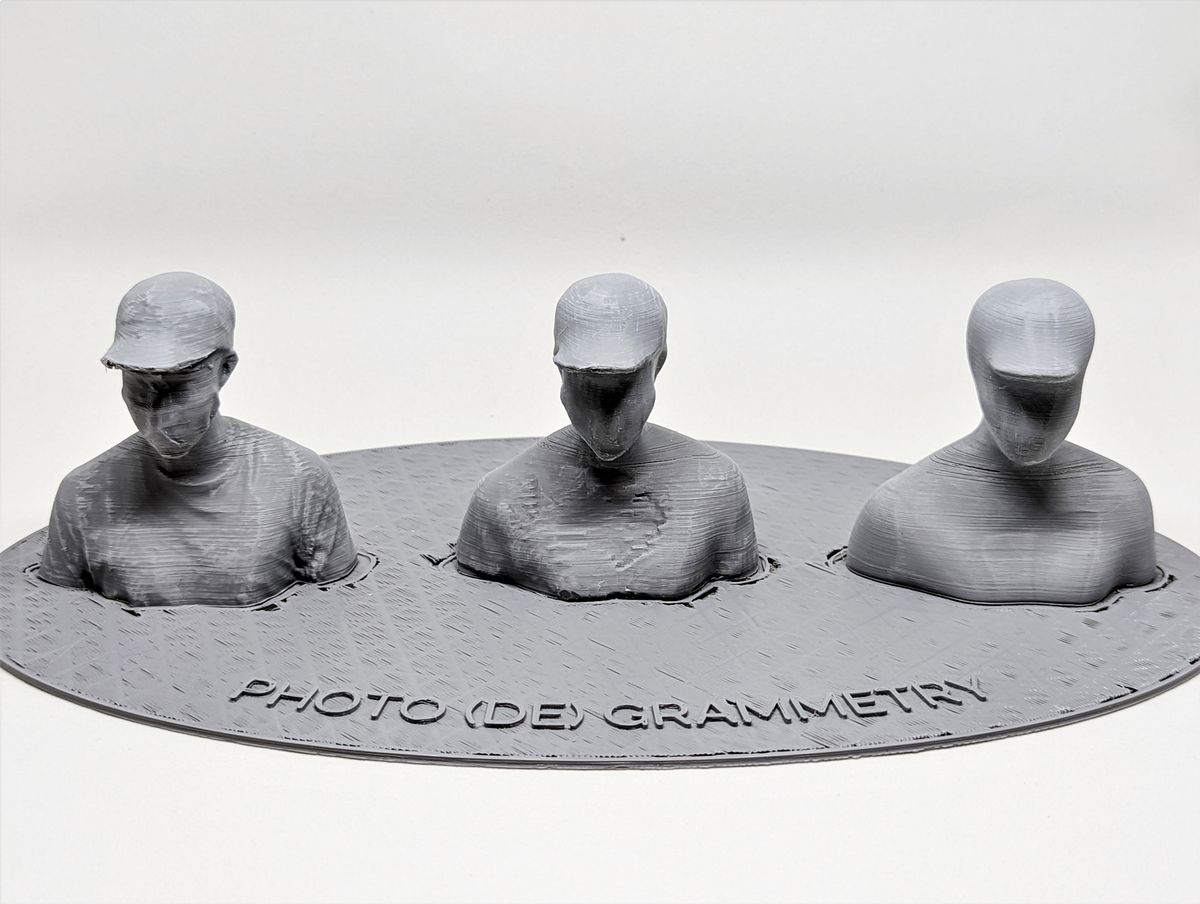
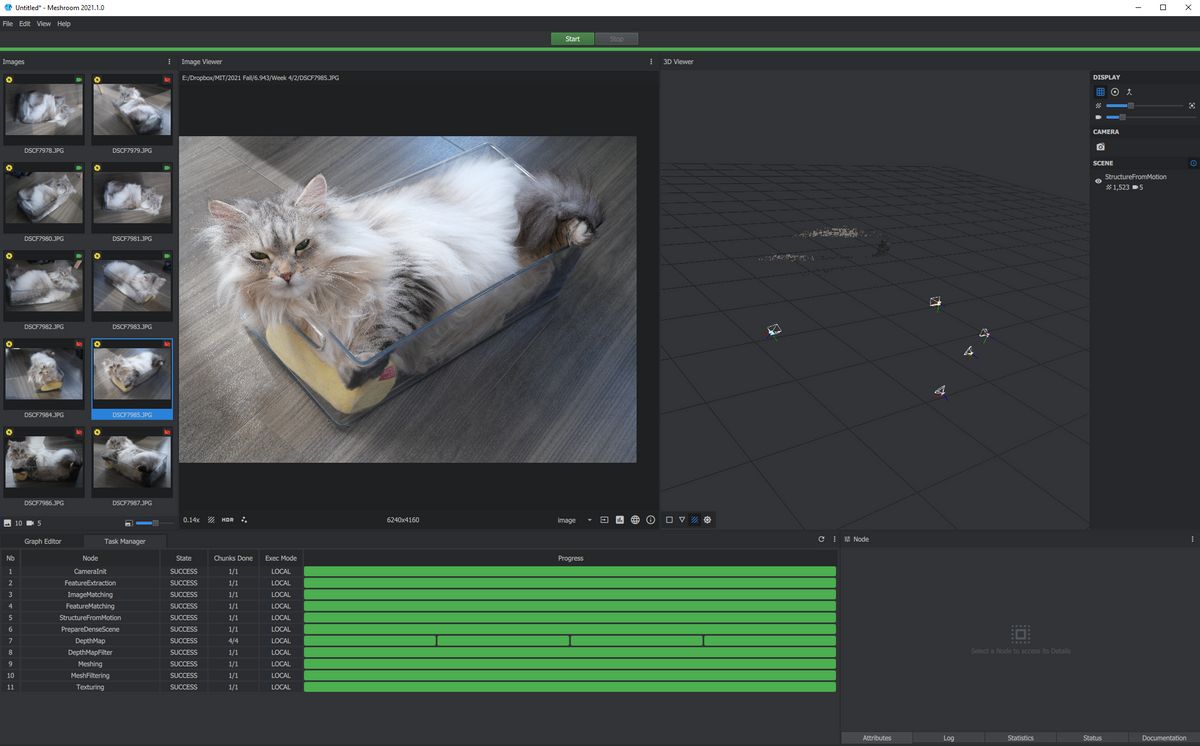
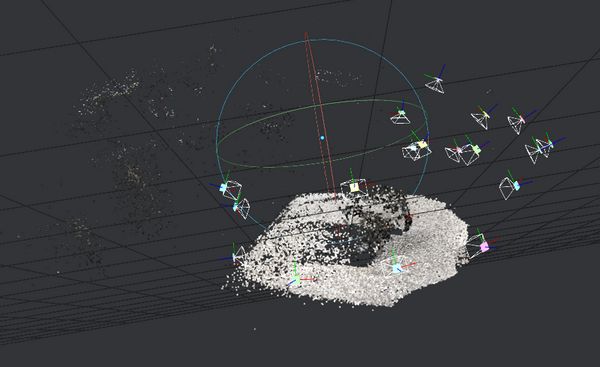
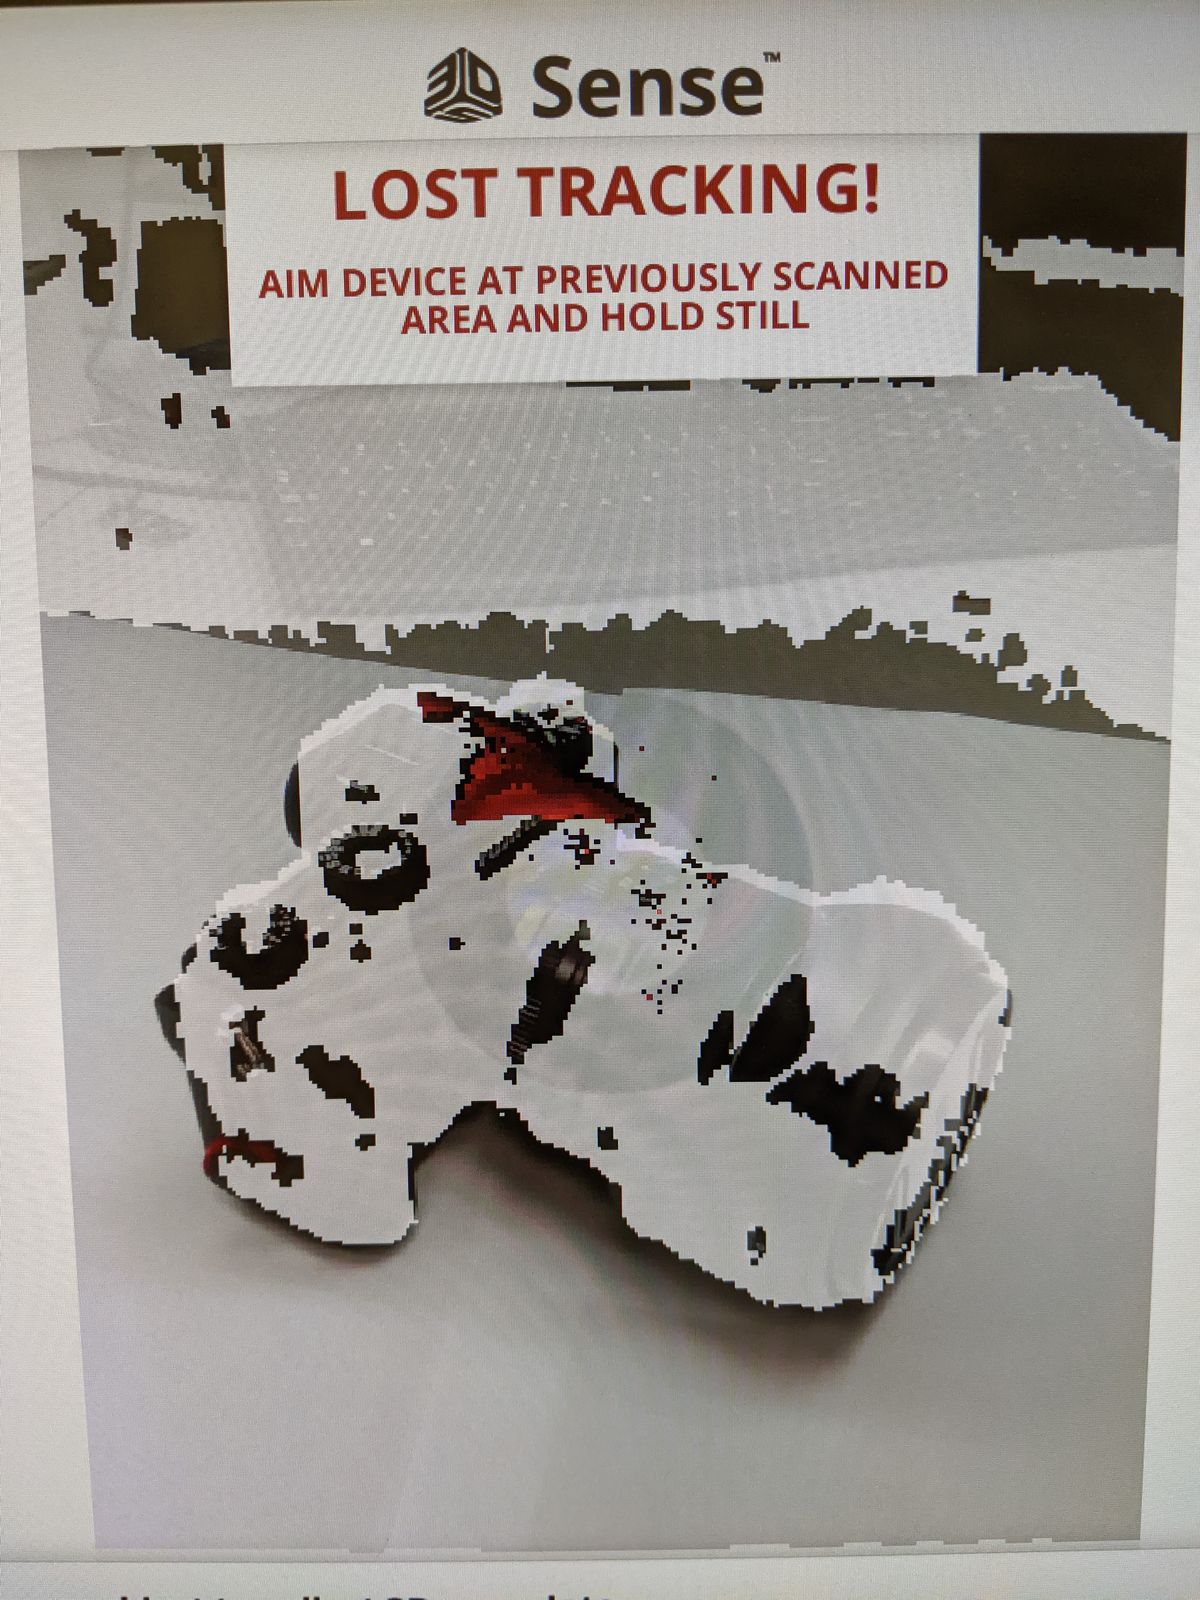
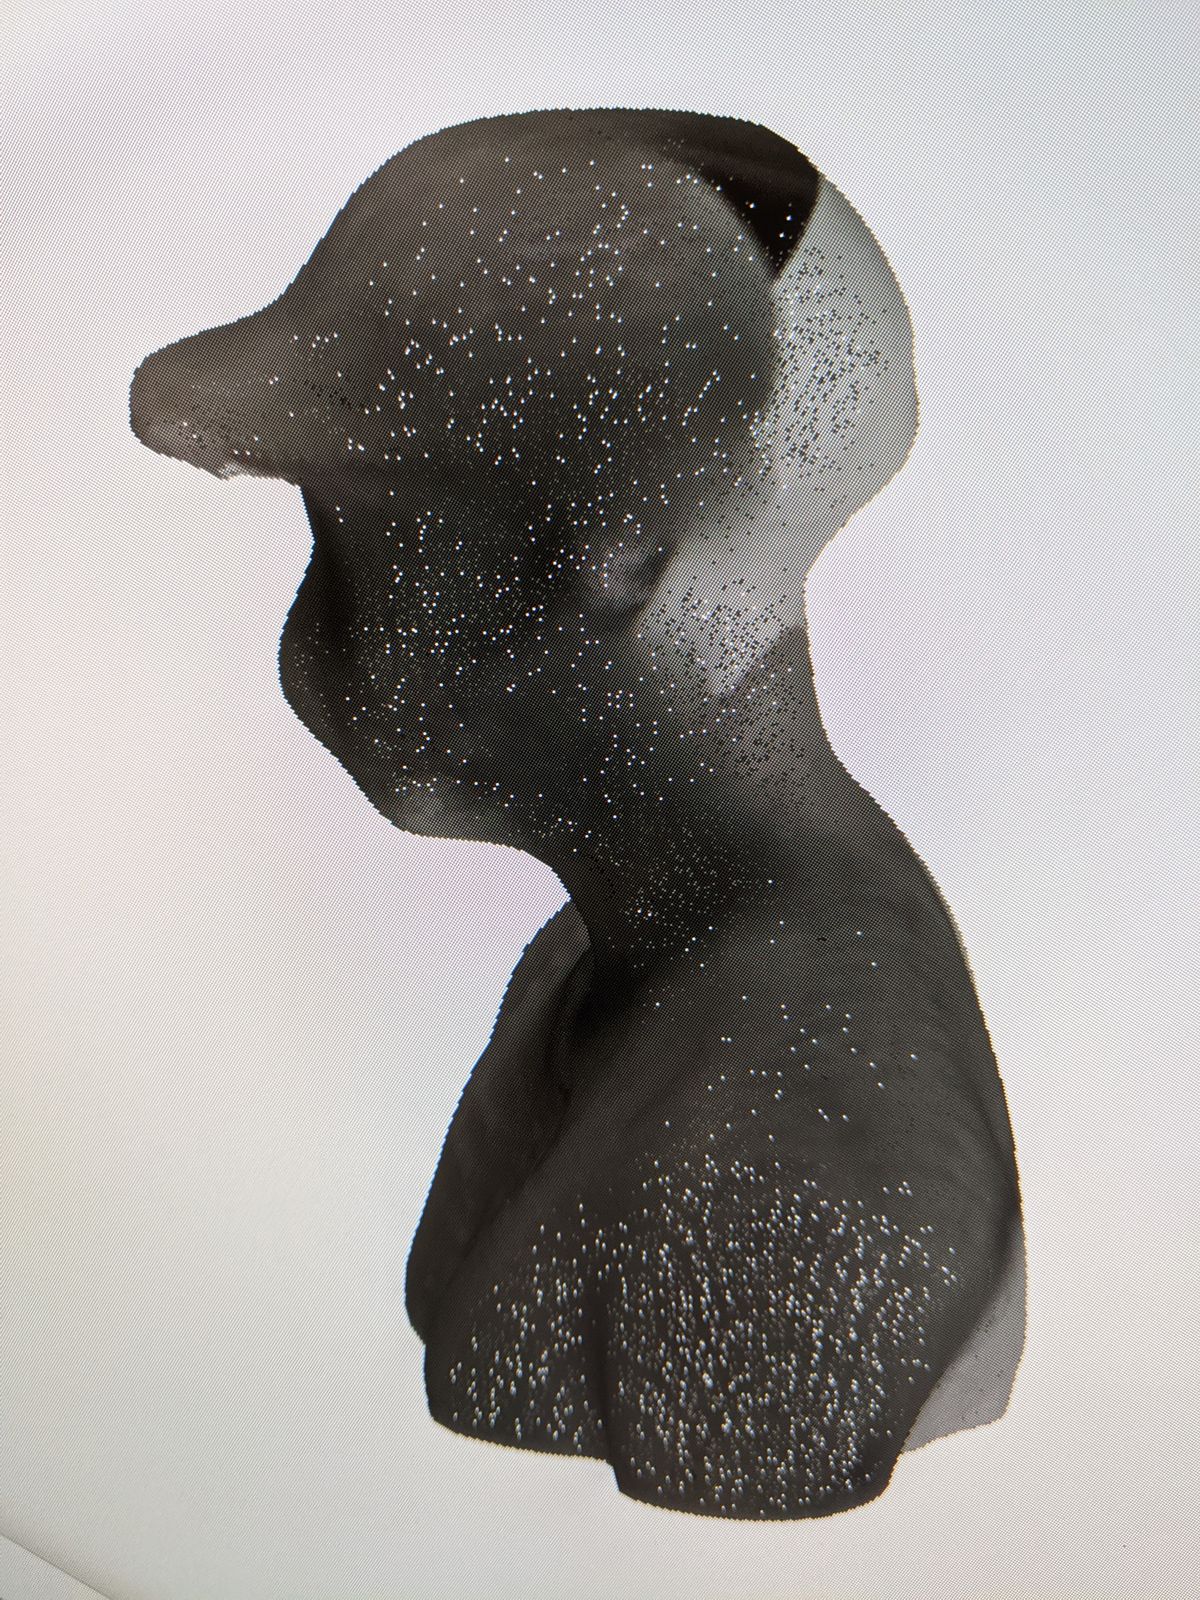
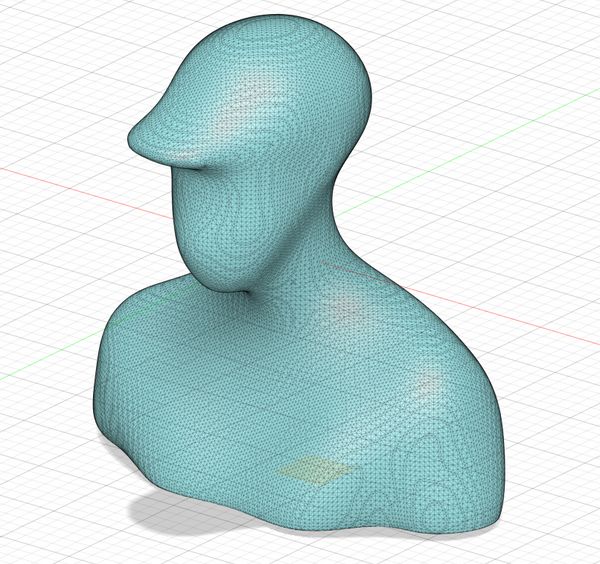
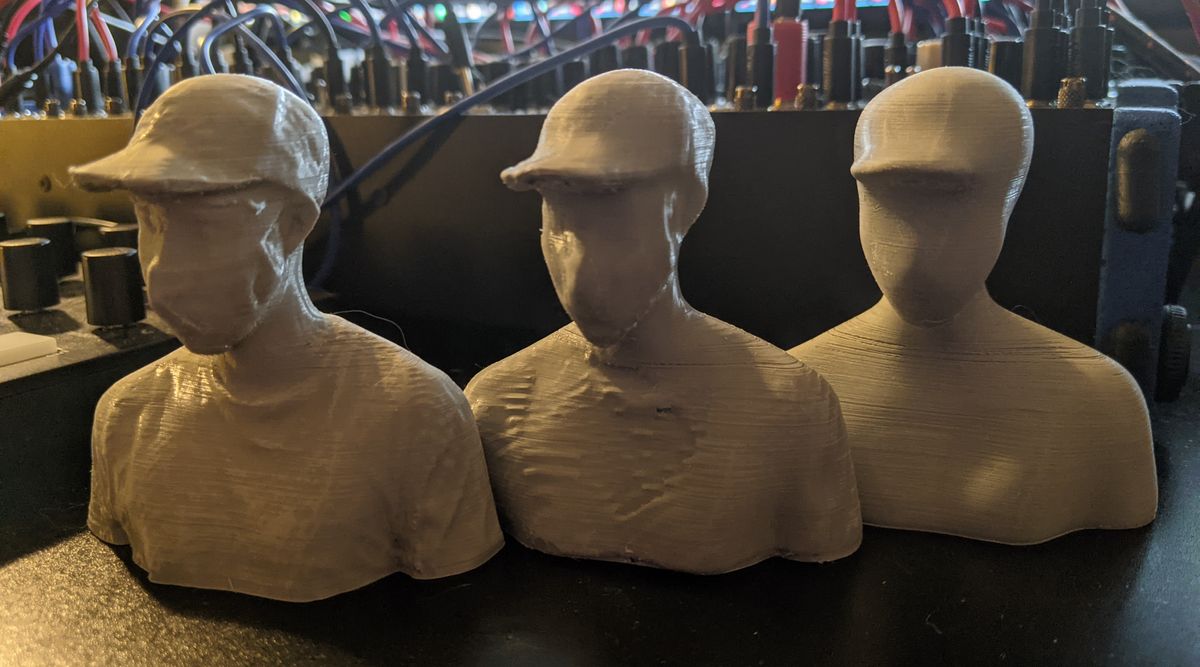
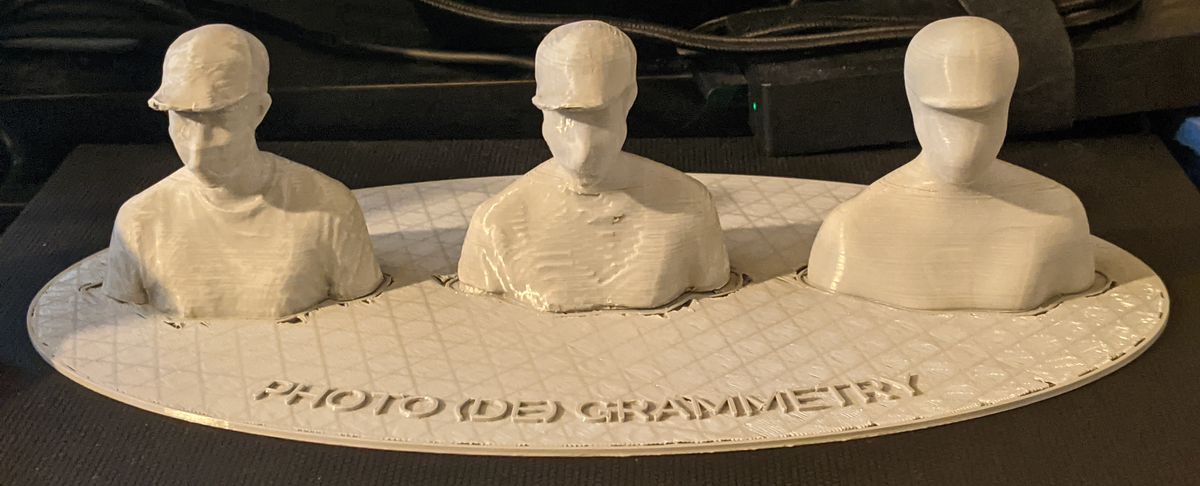
3D Scanning: 'Photo(de)grammetry'
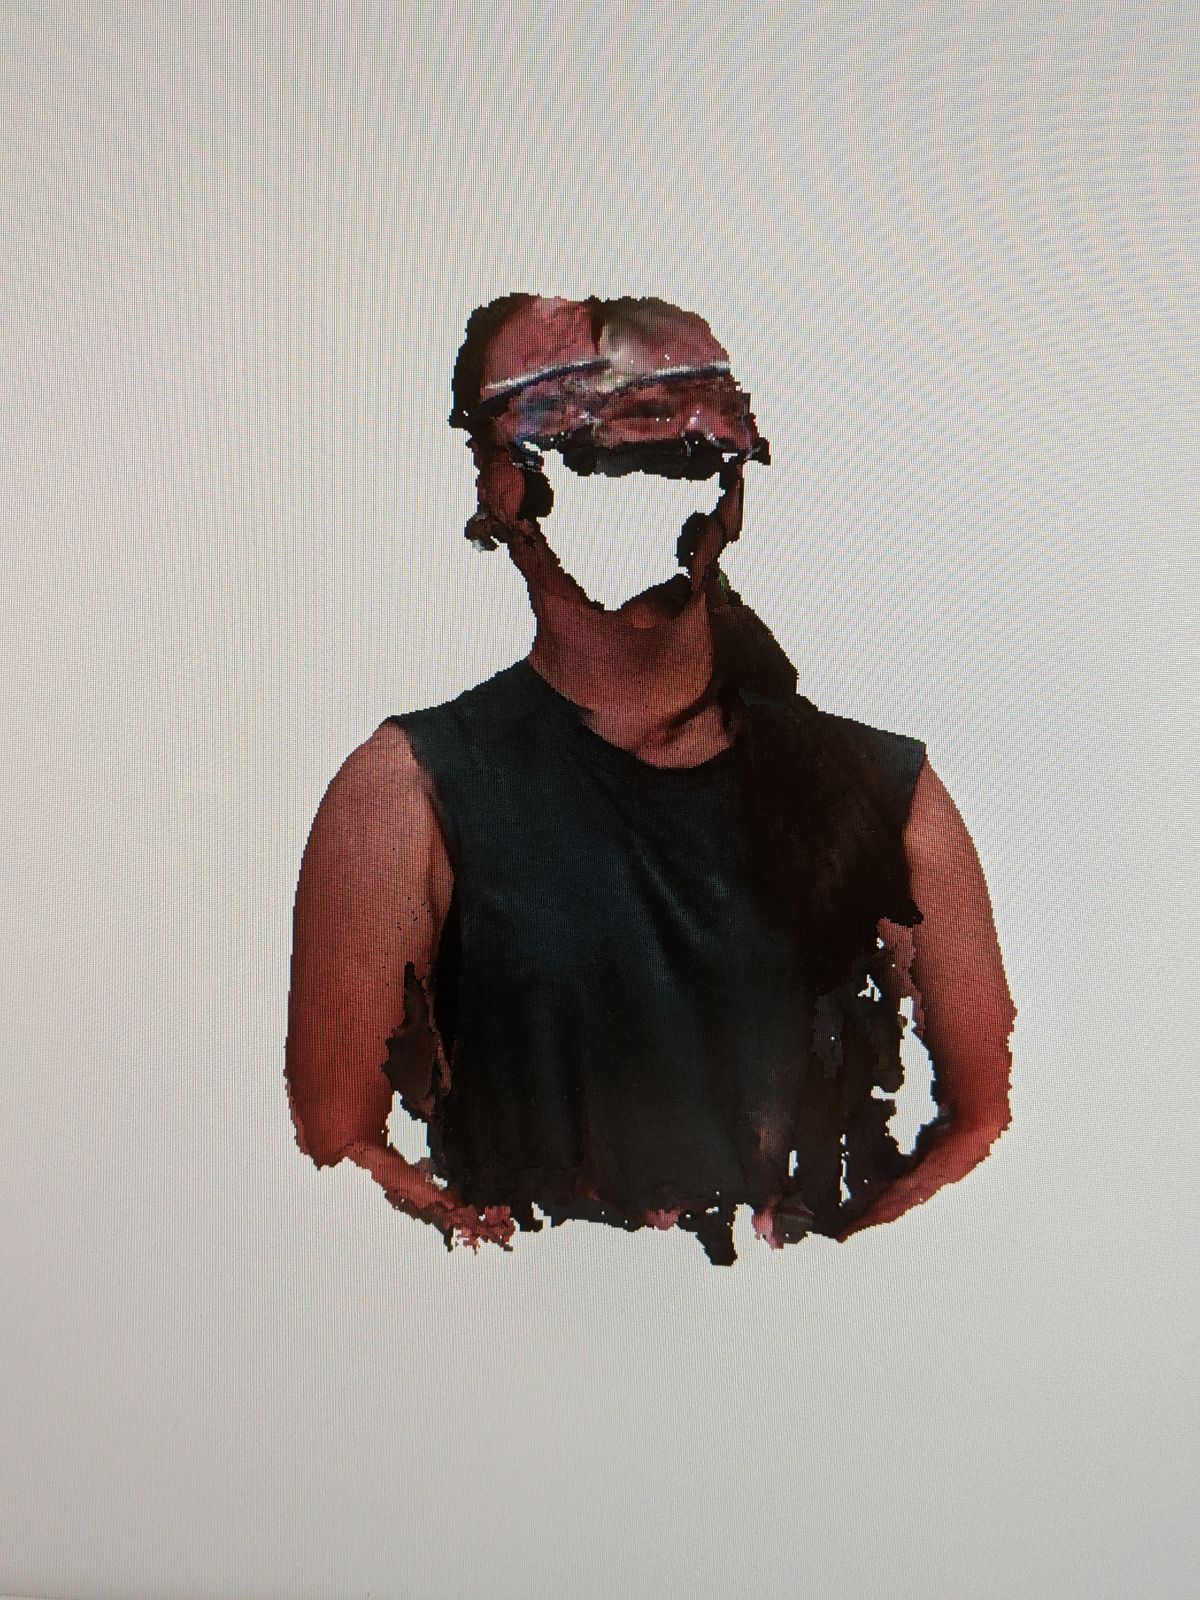
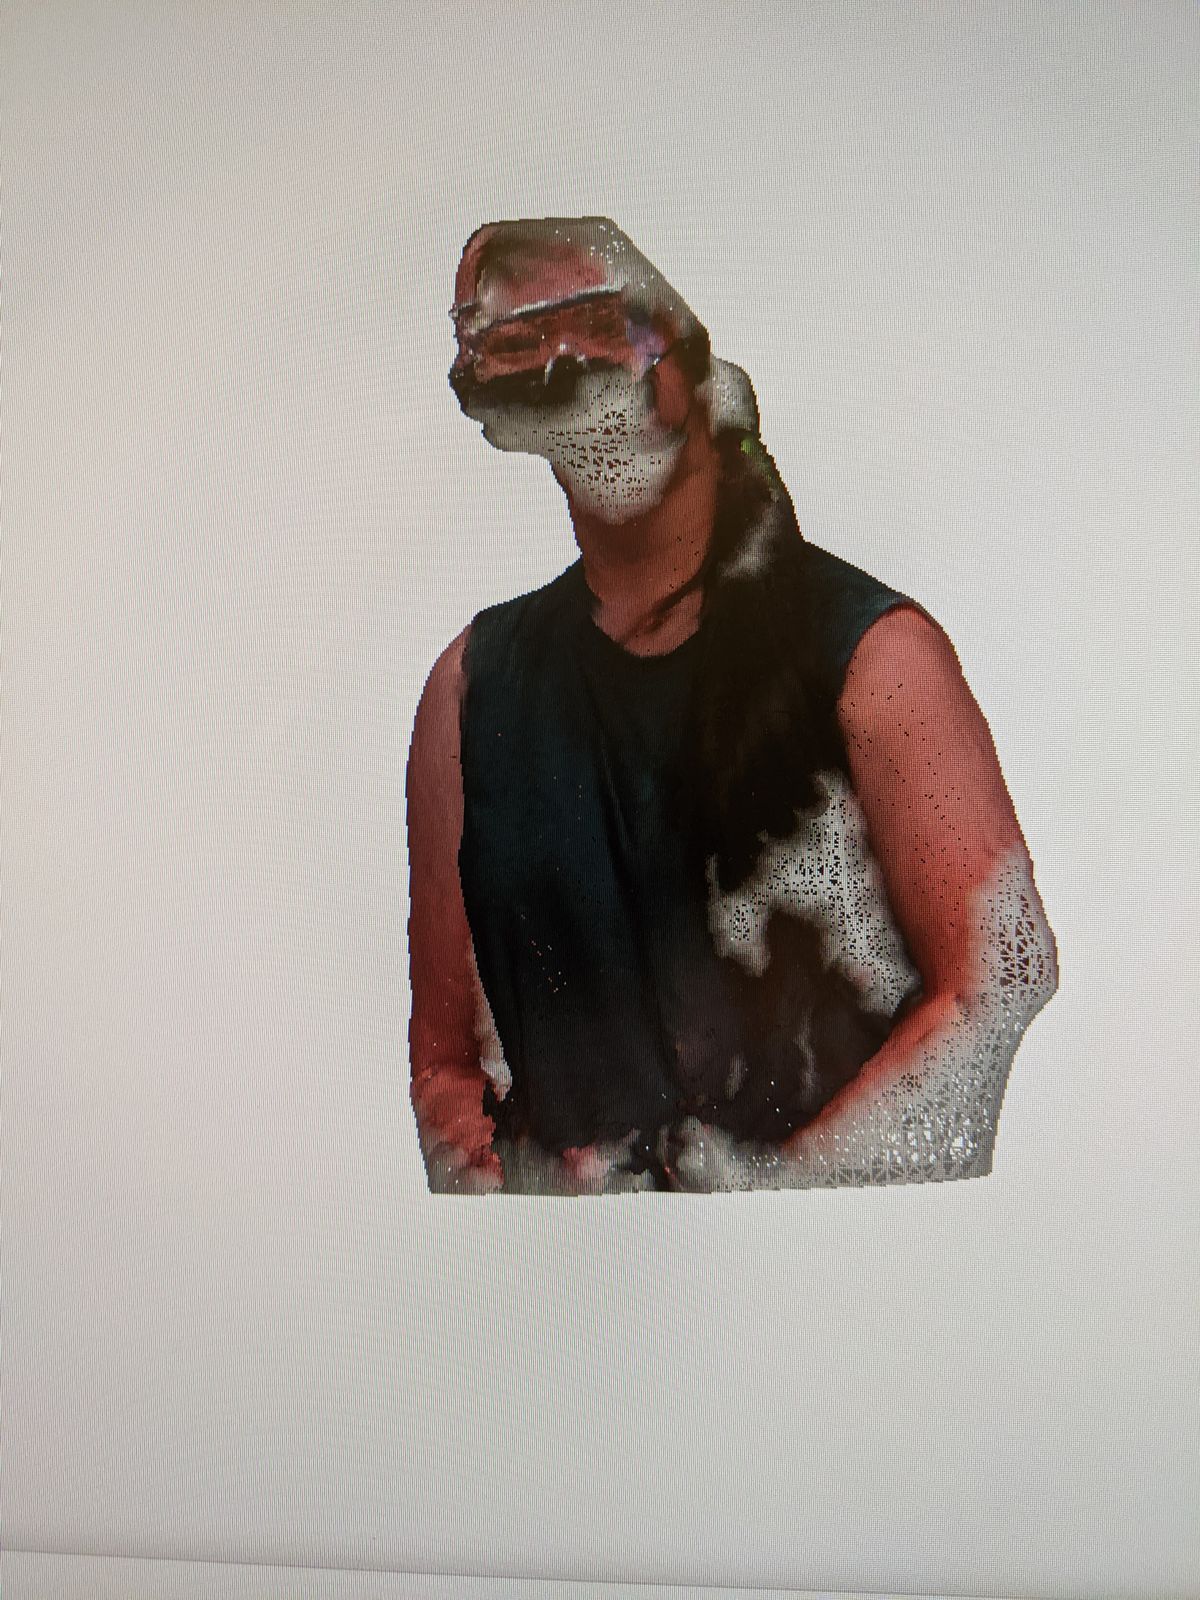
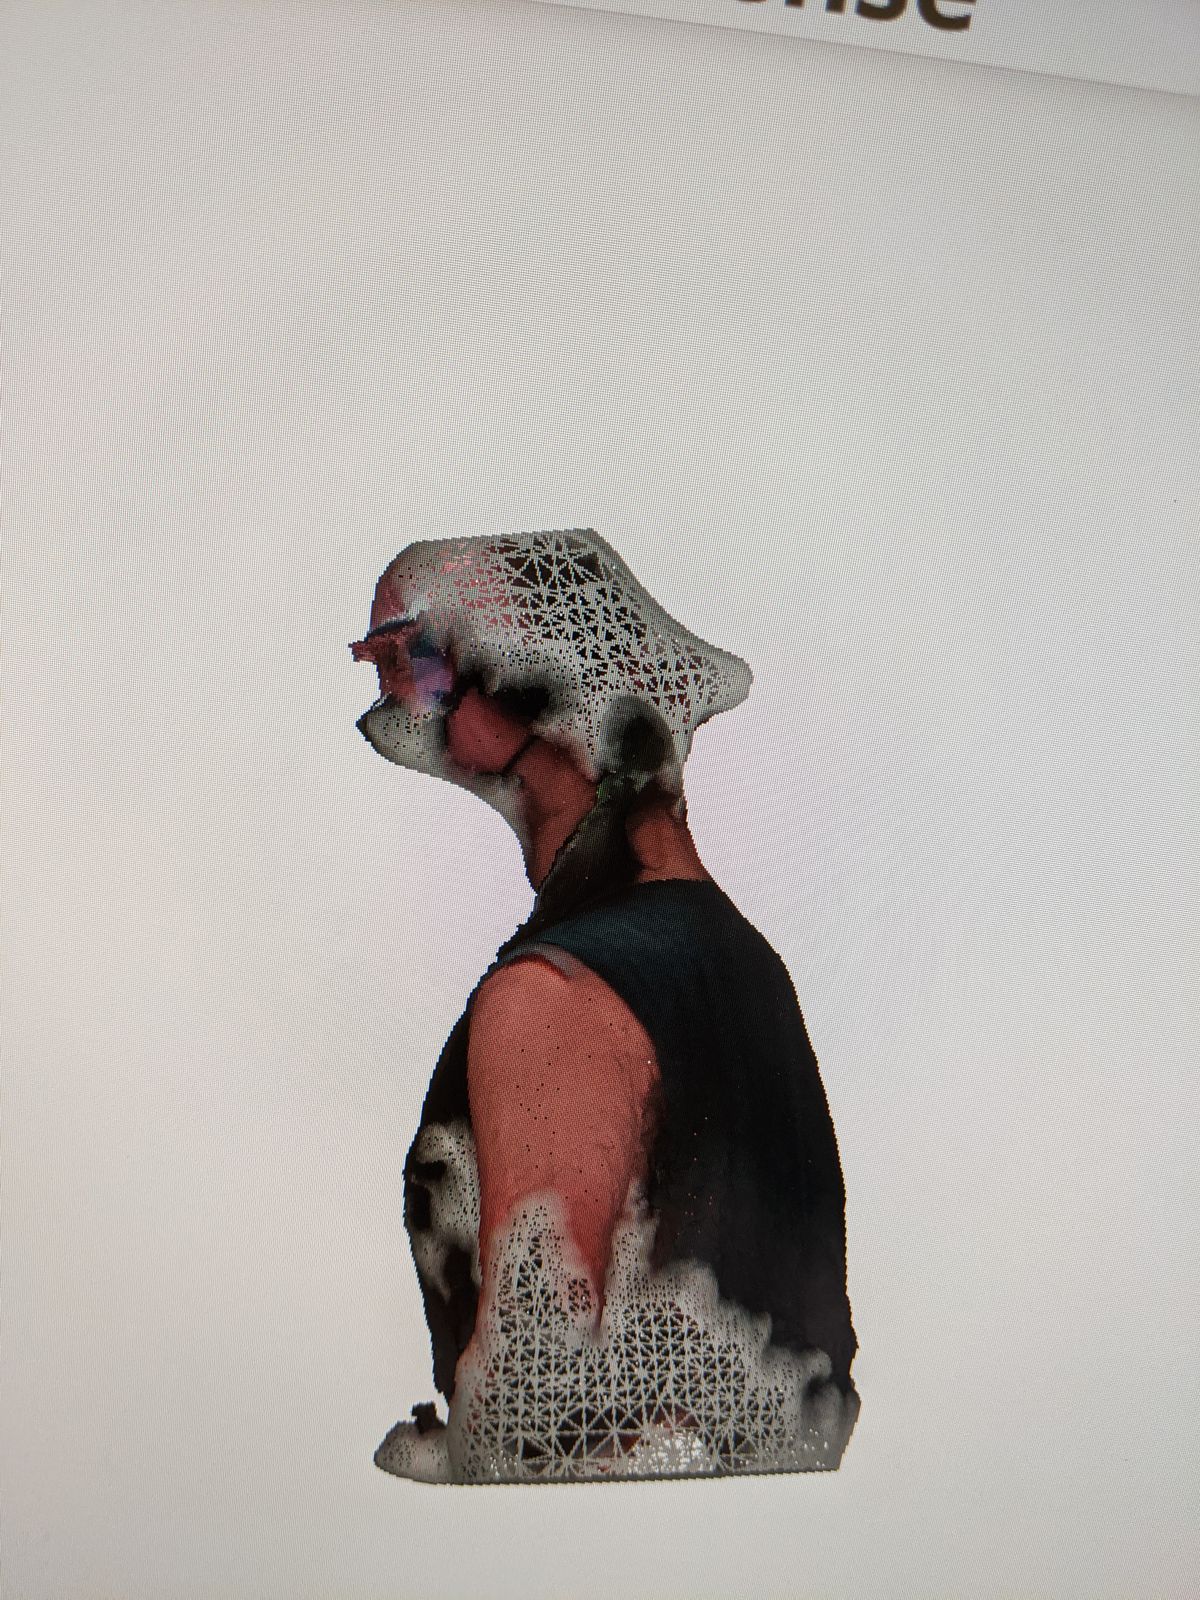
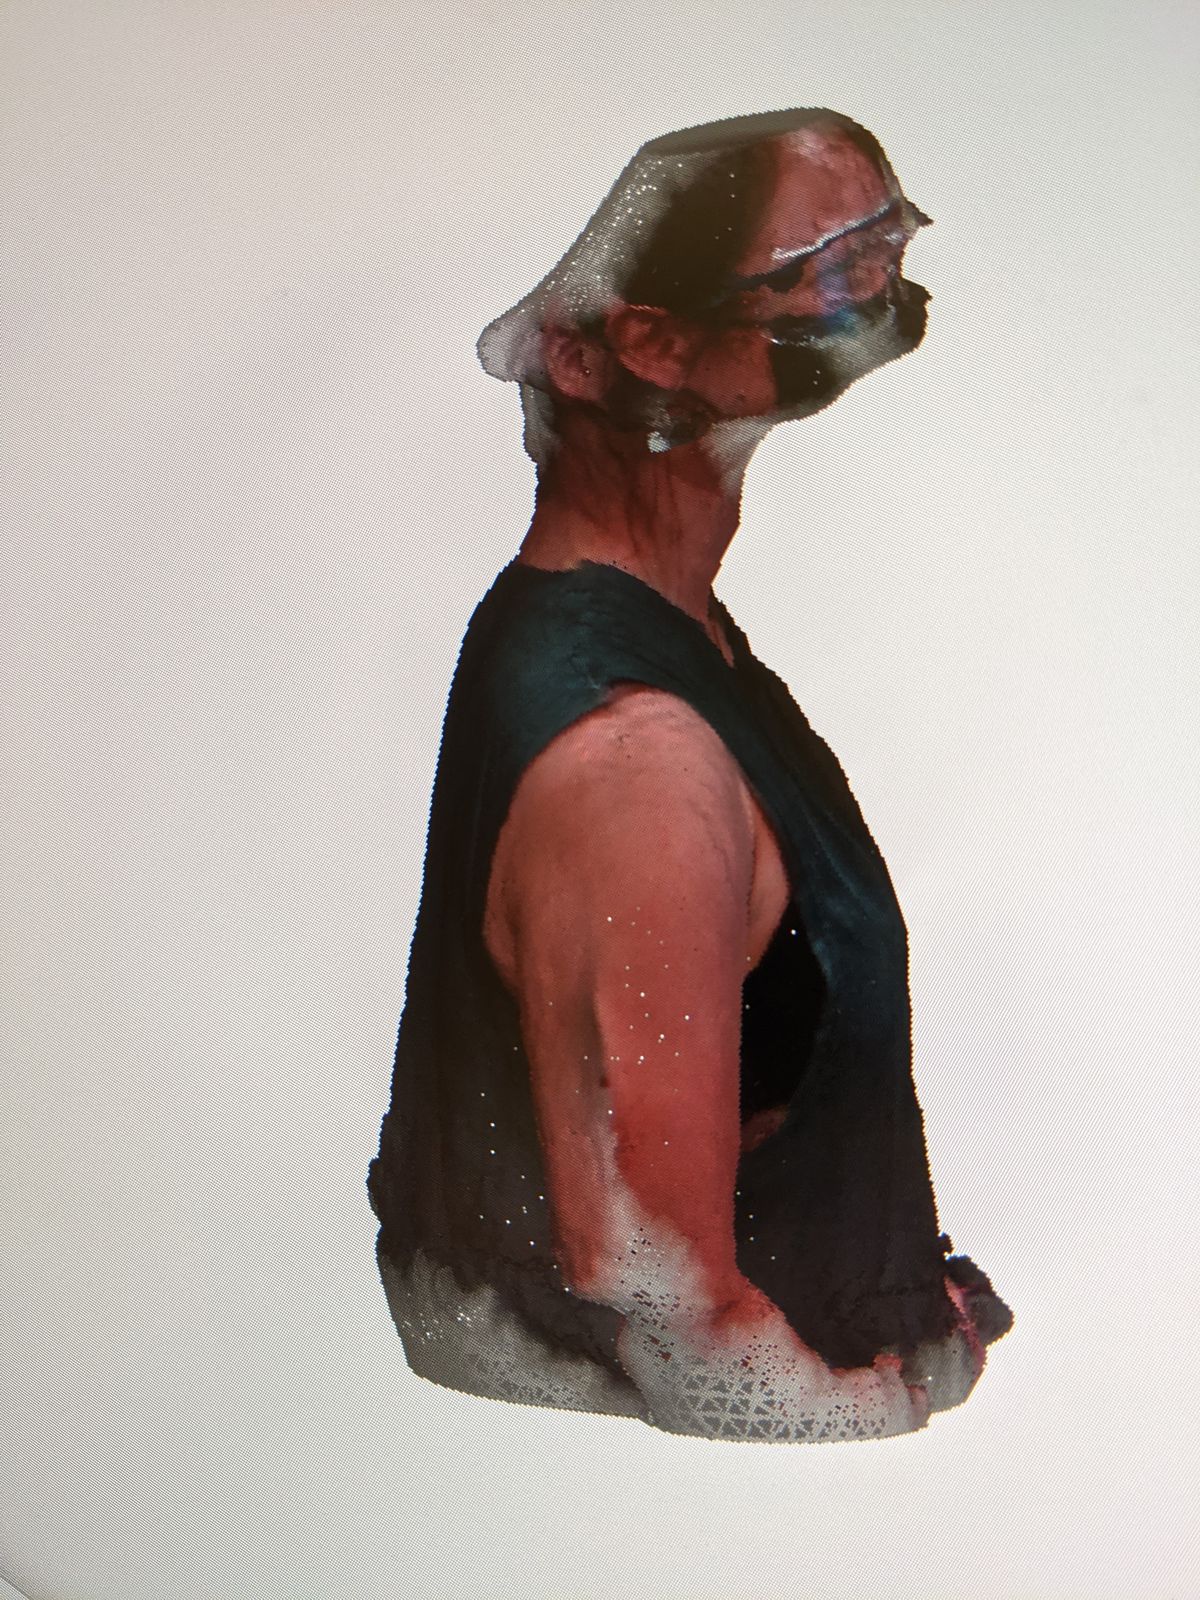
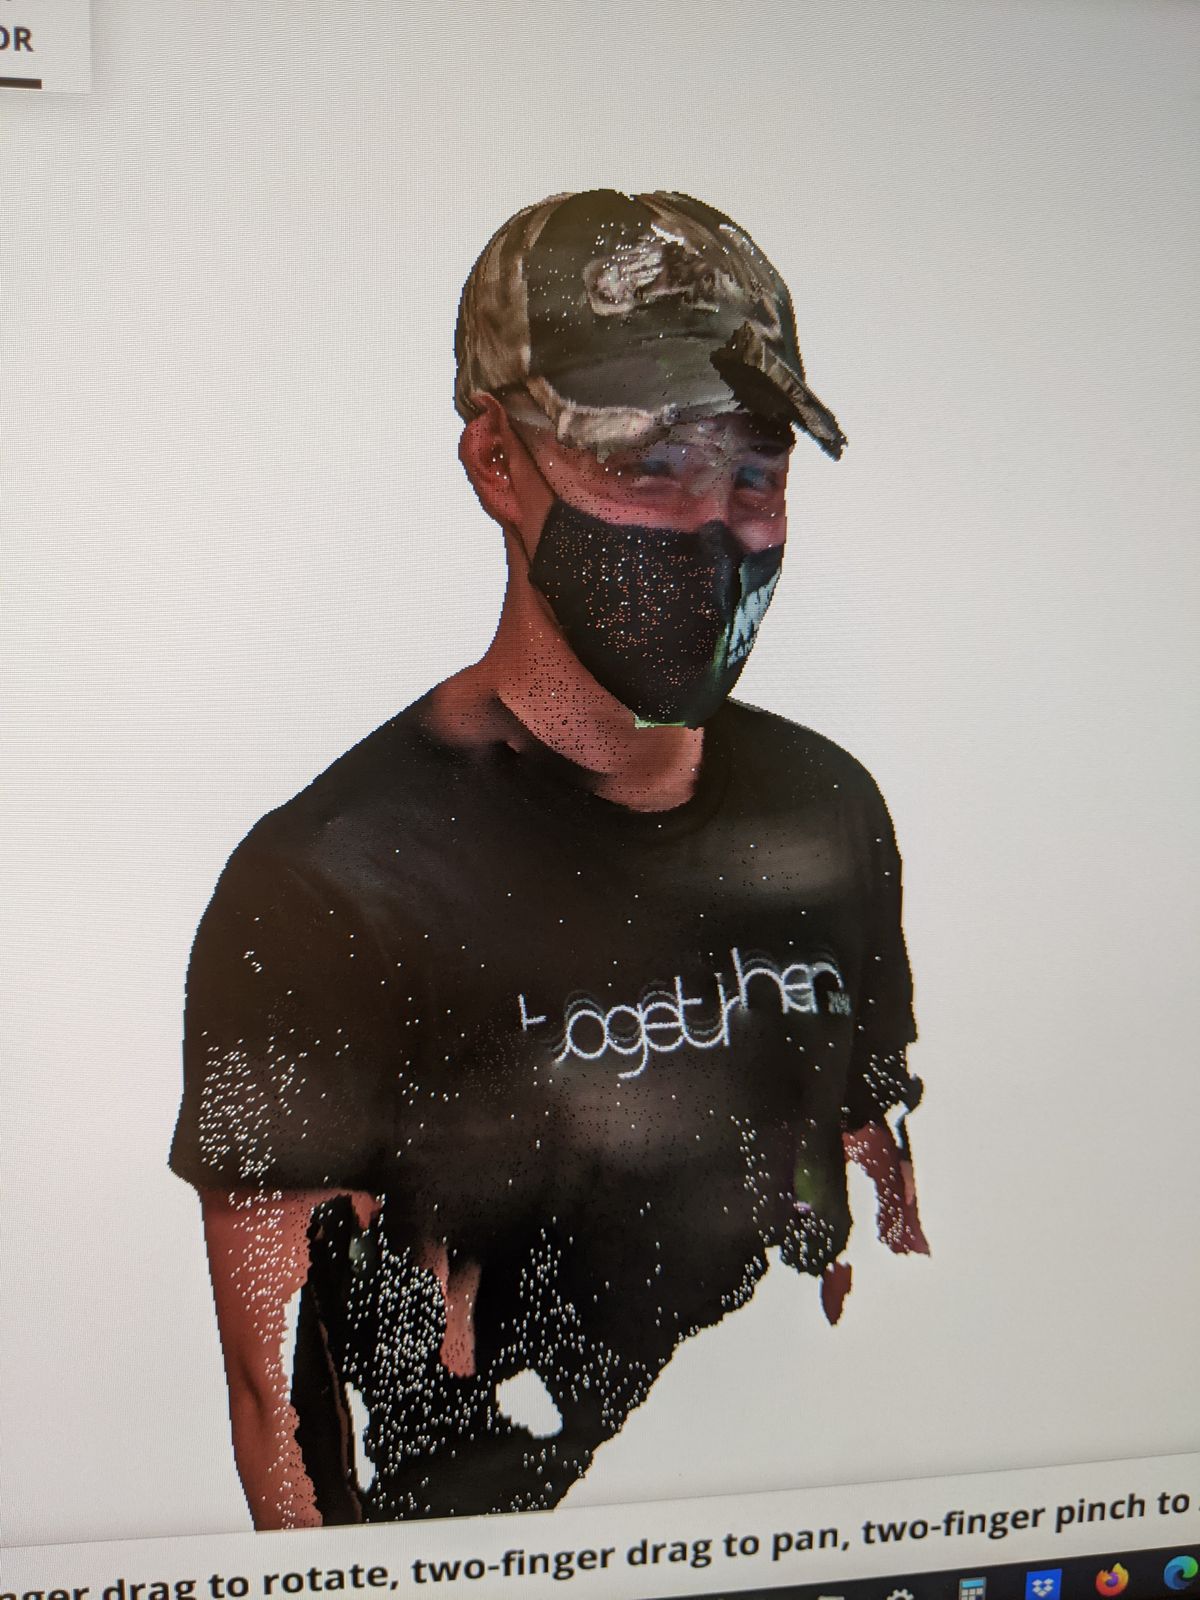
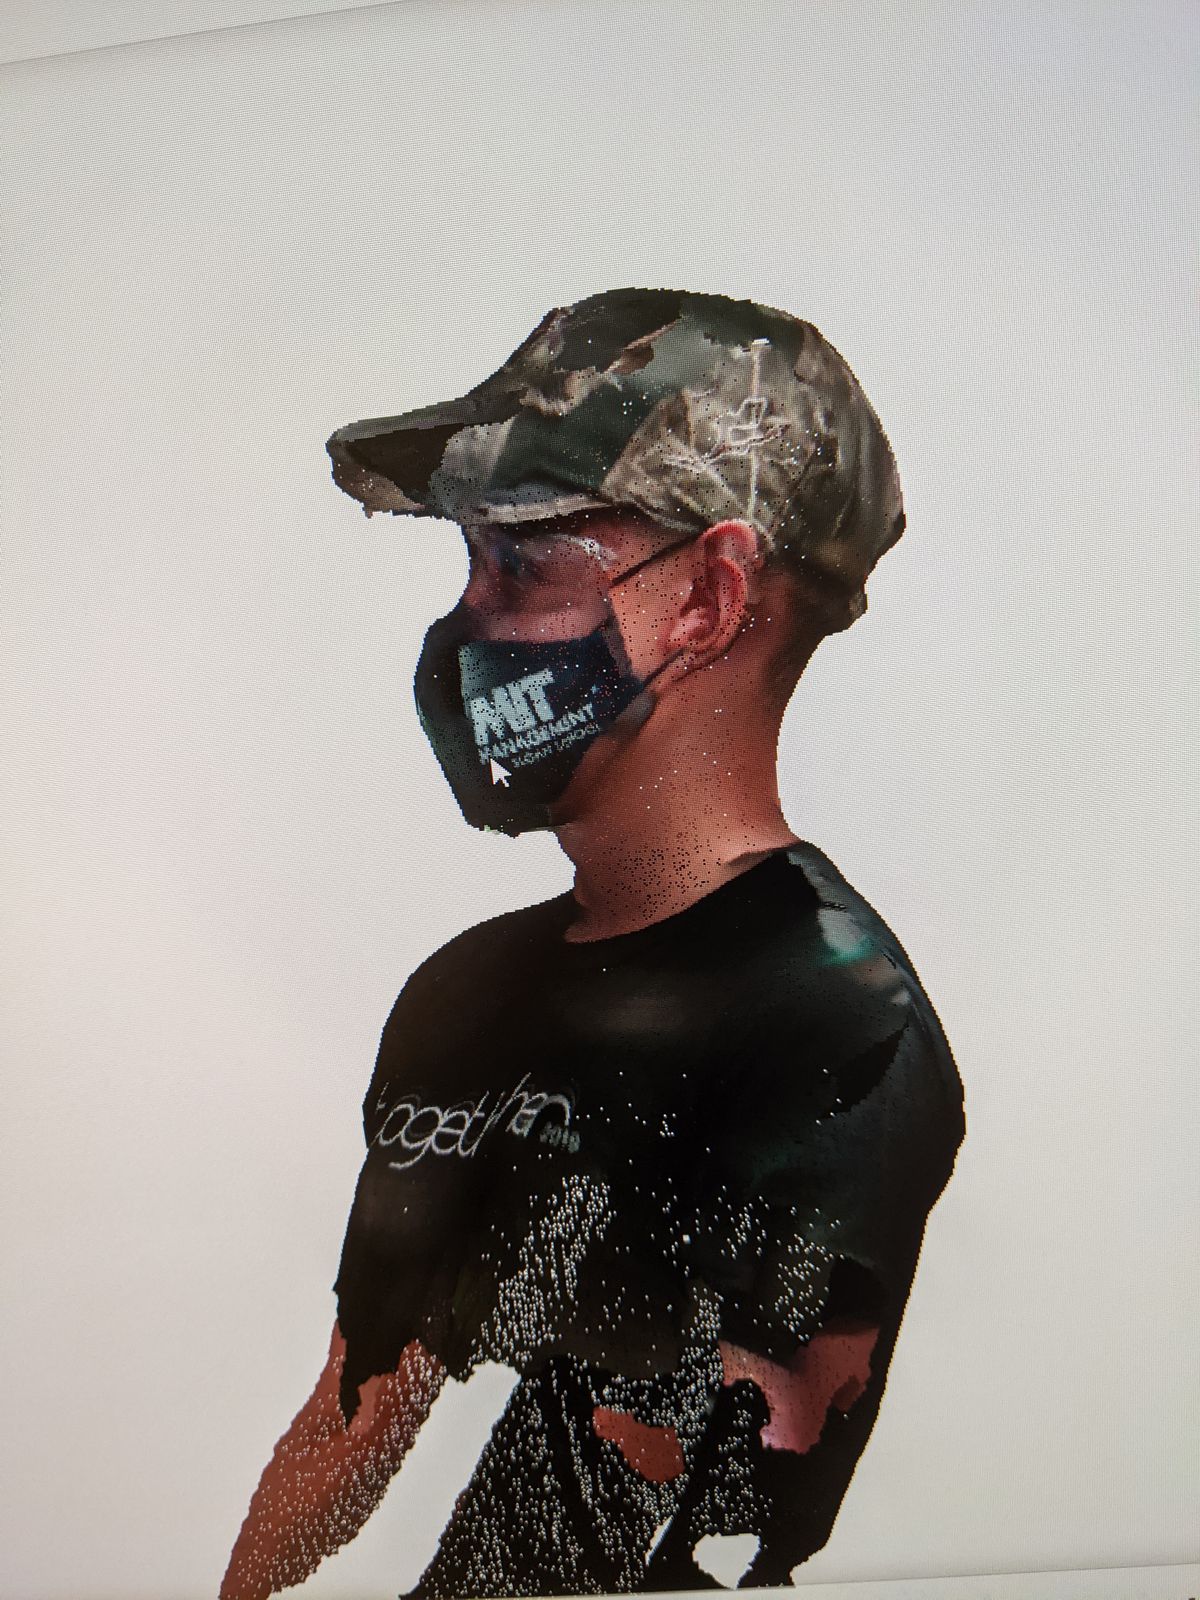
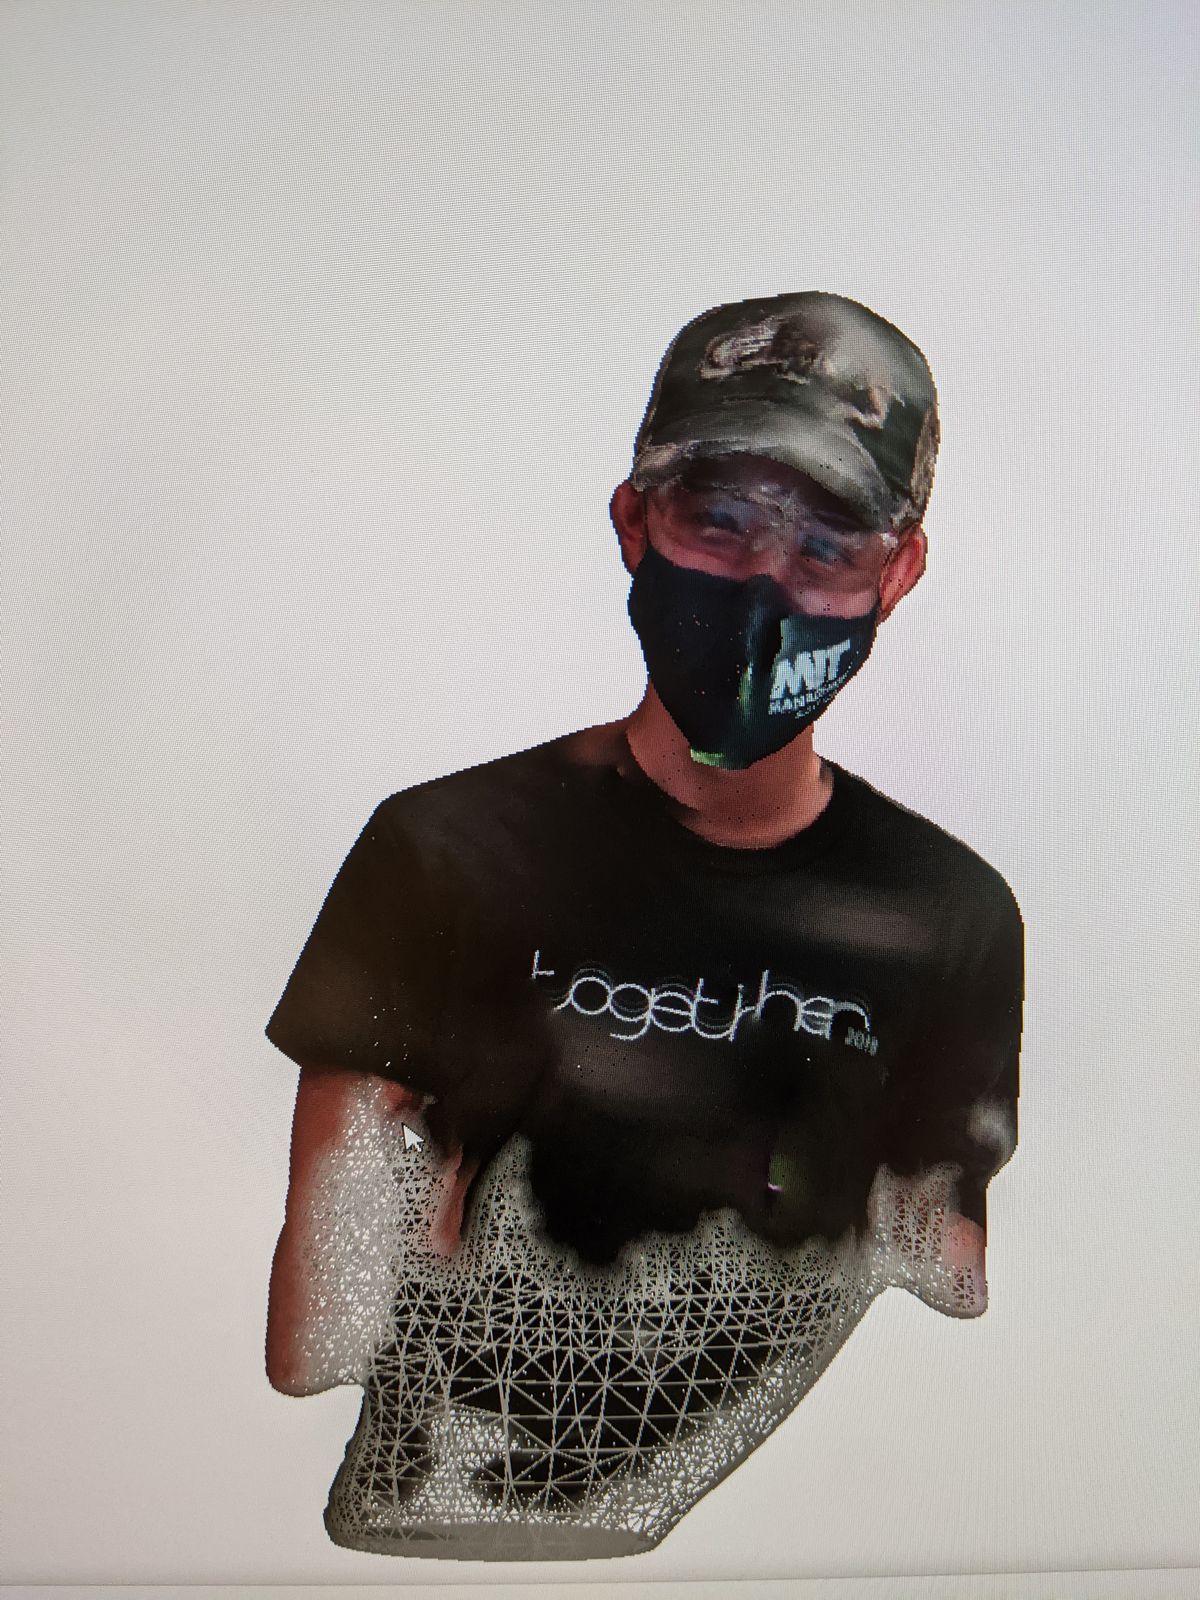
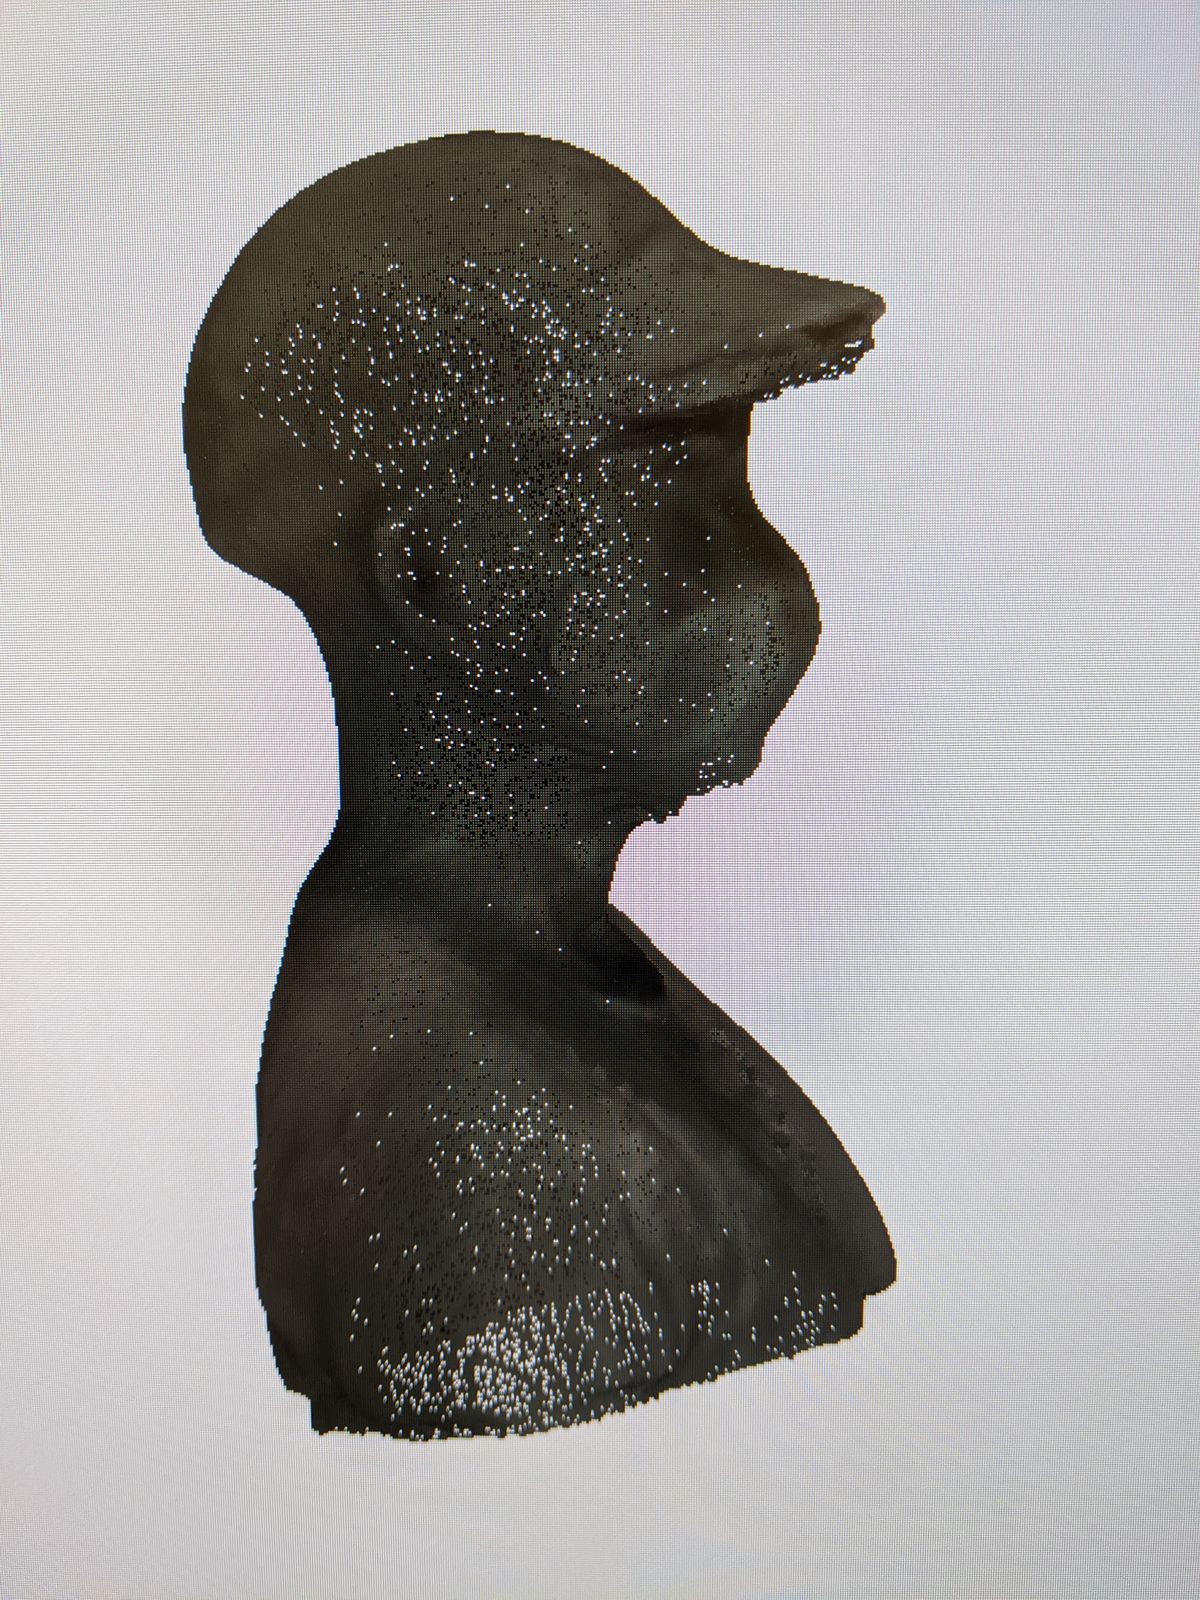
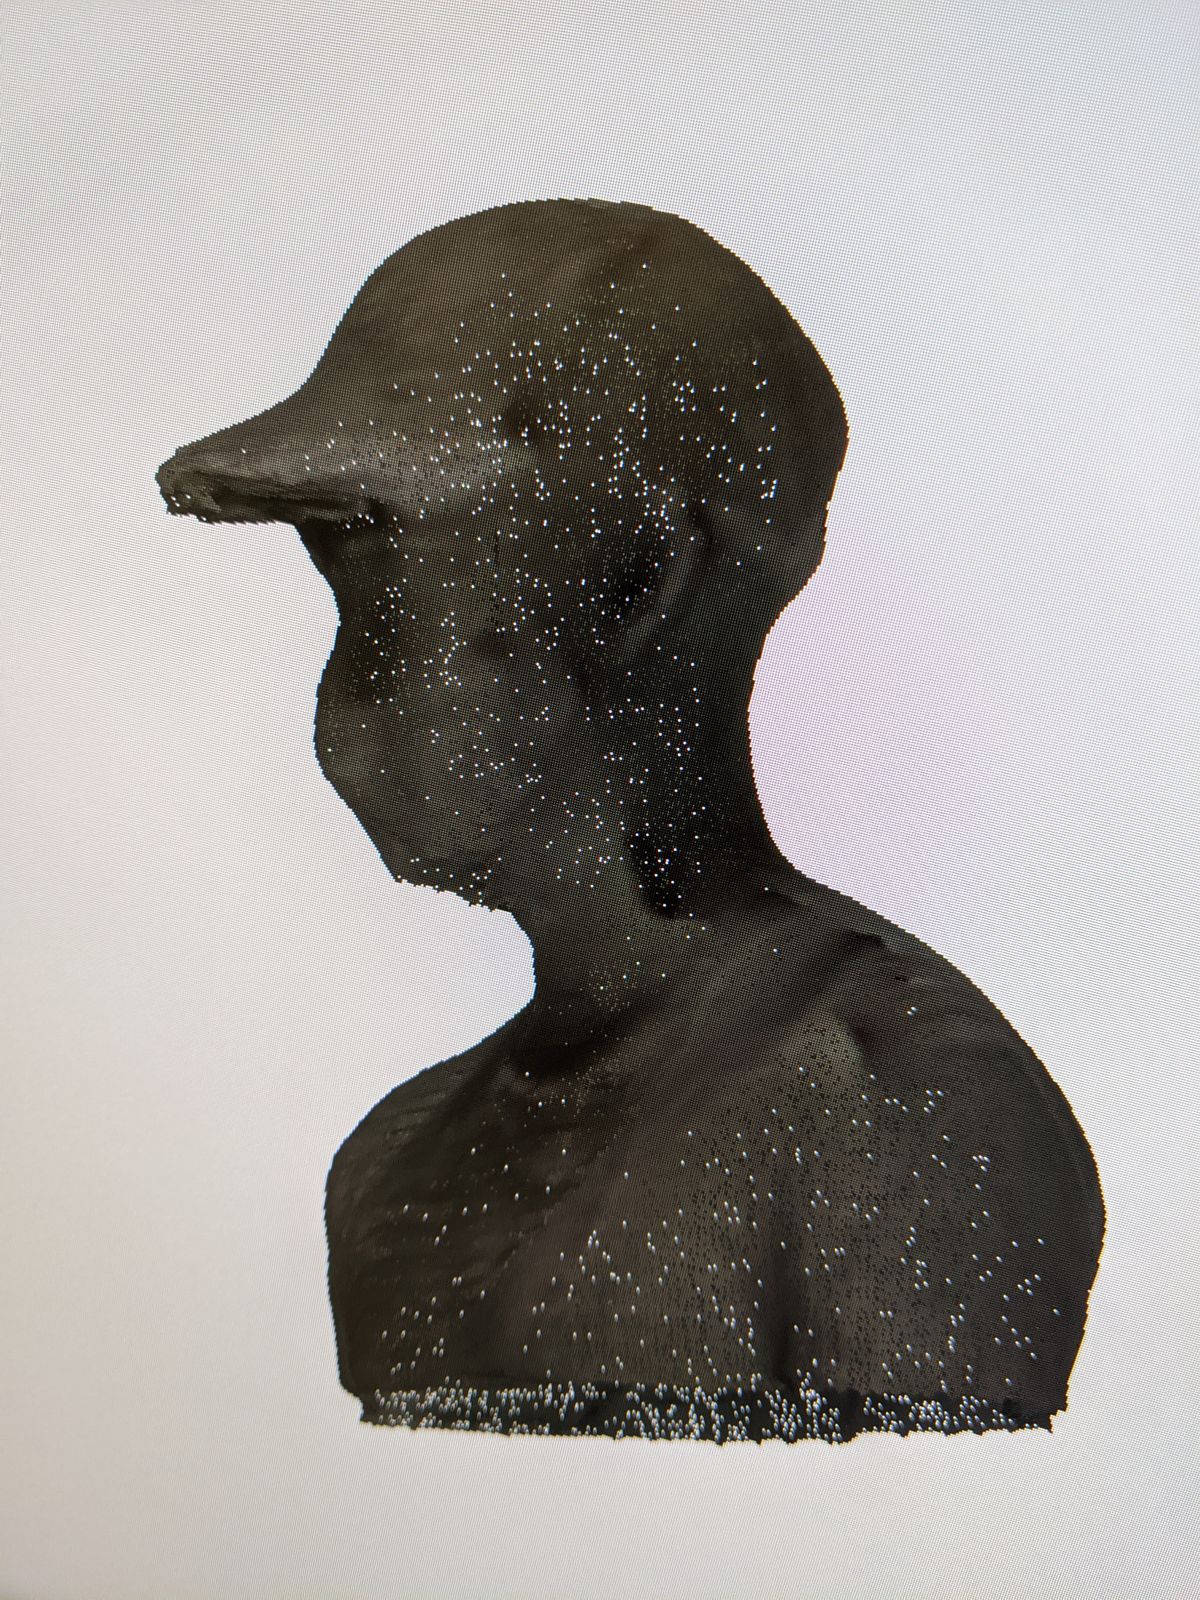
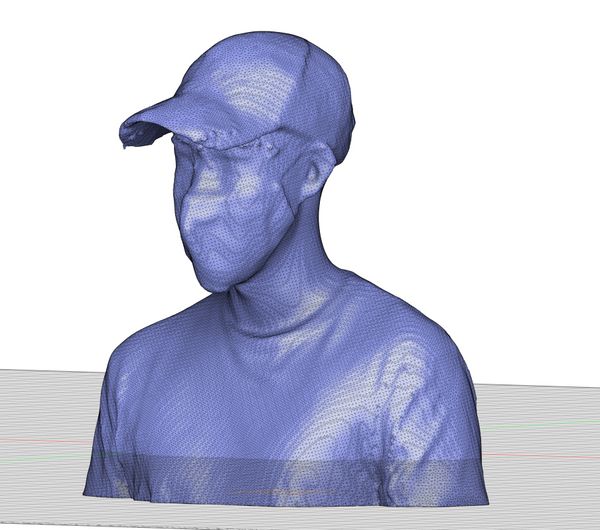
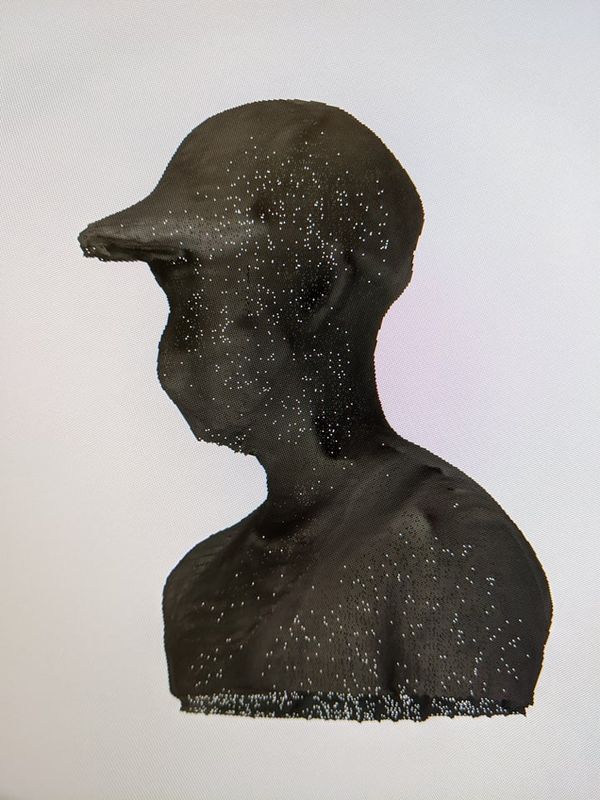
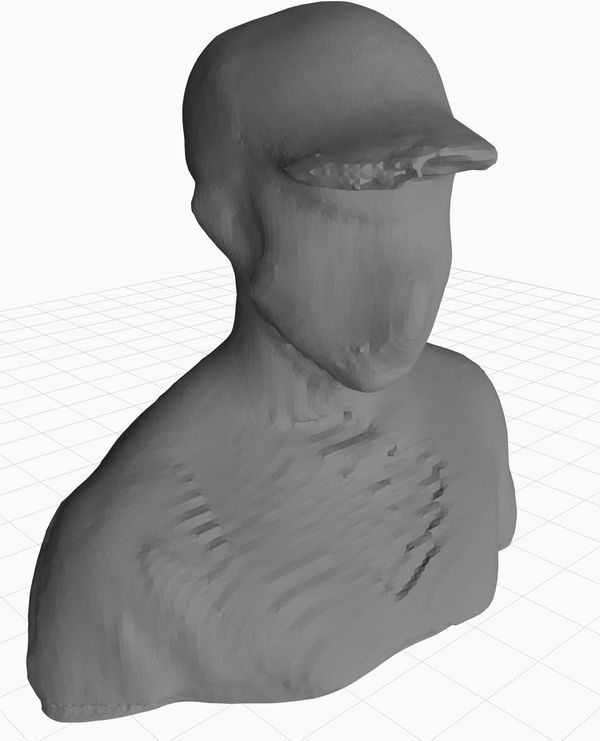
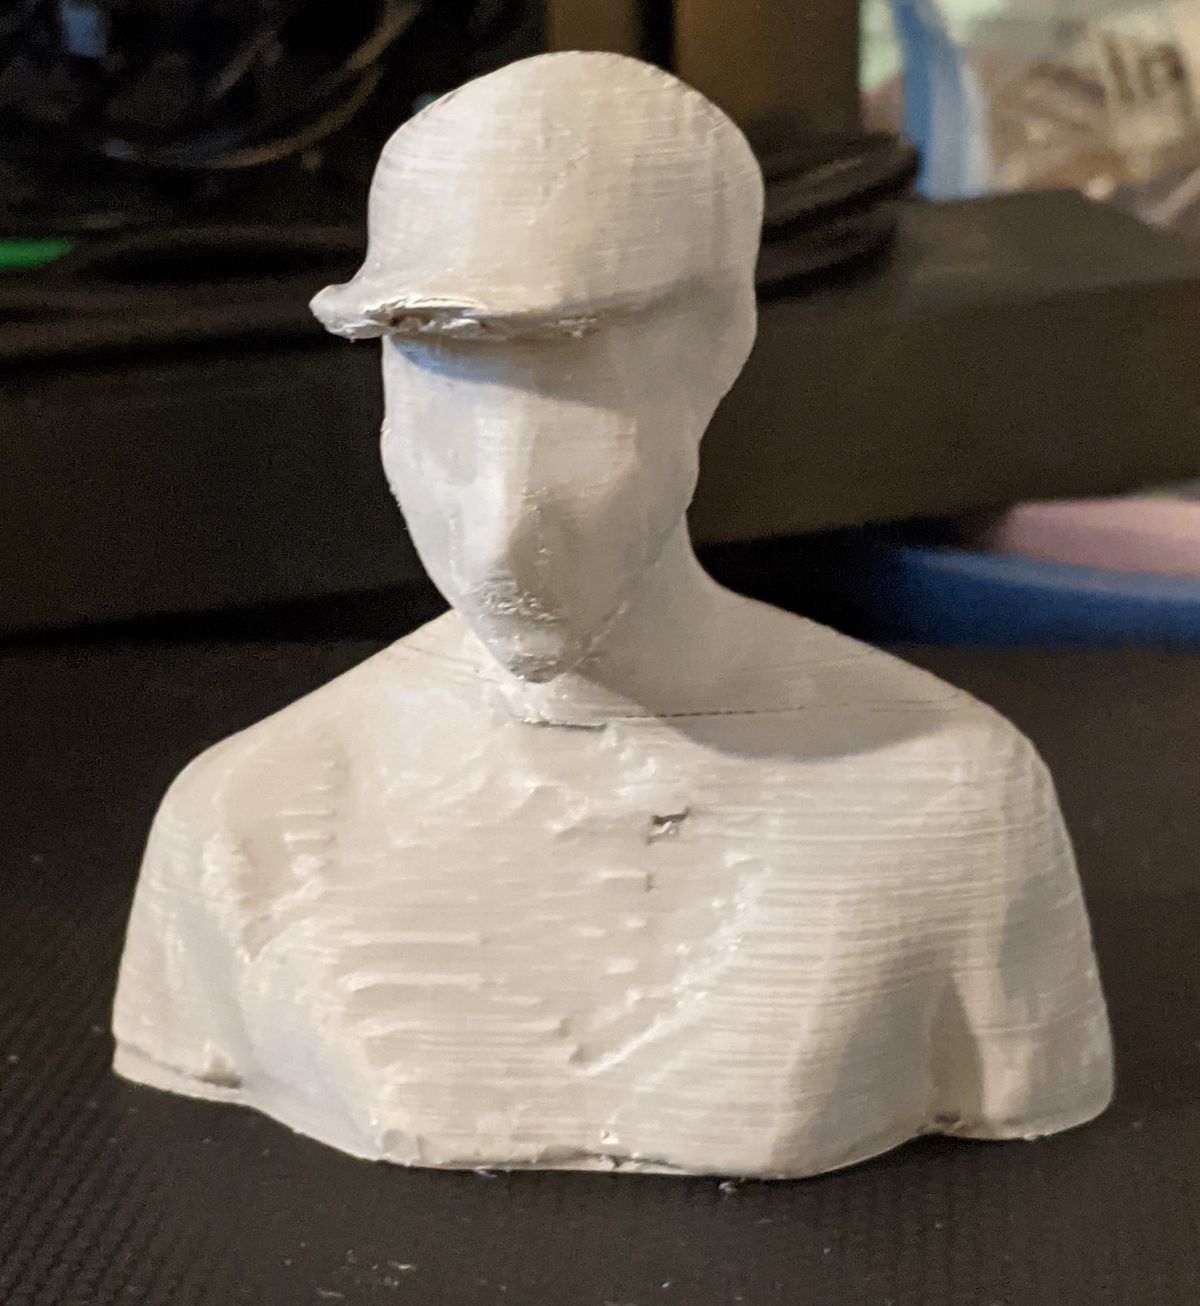
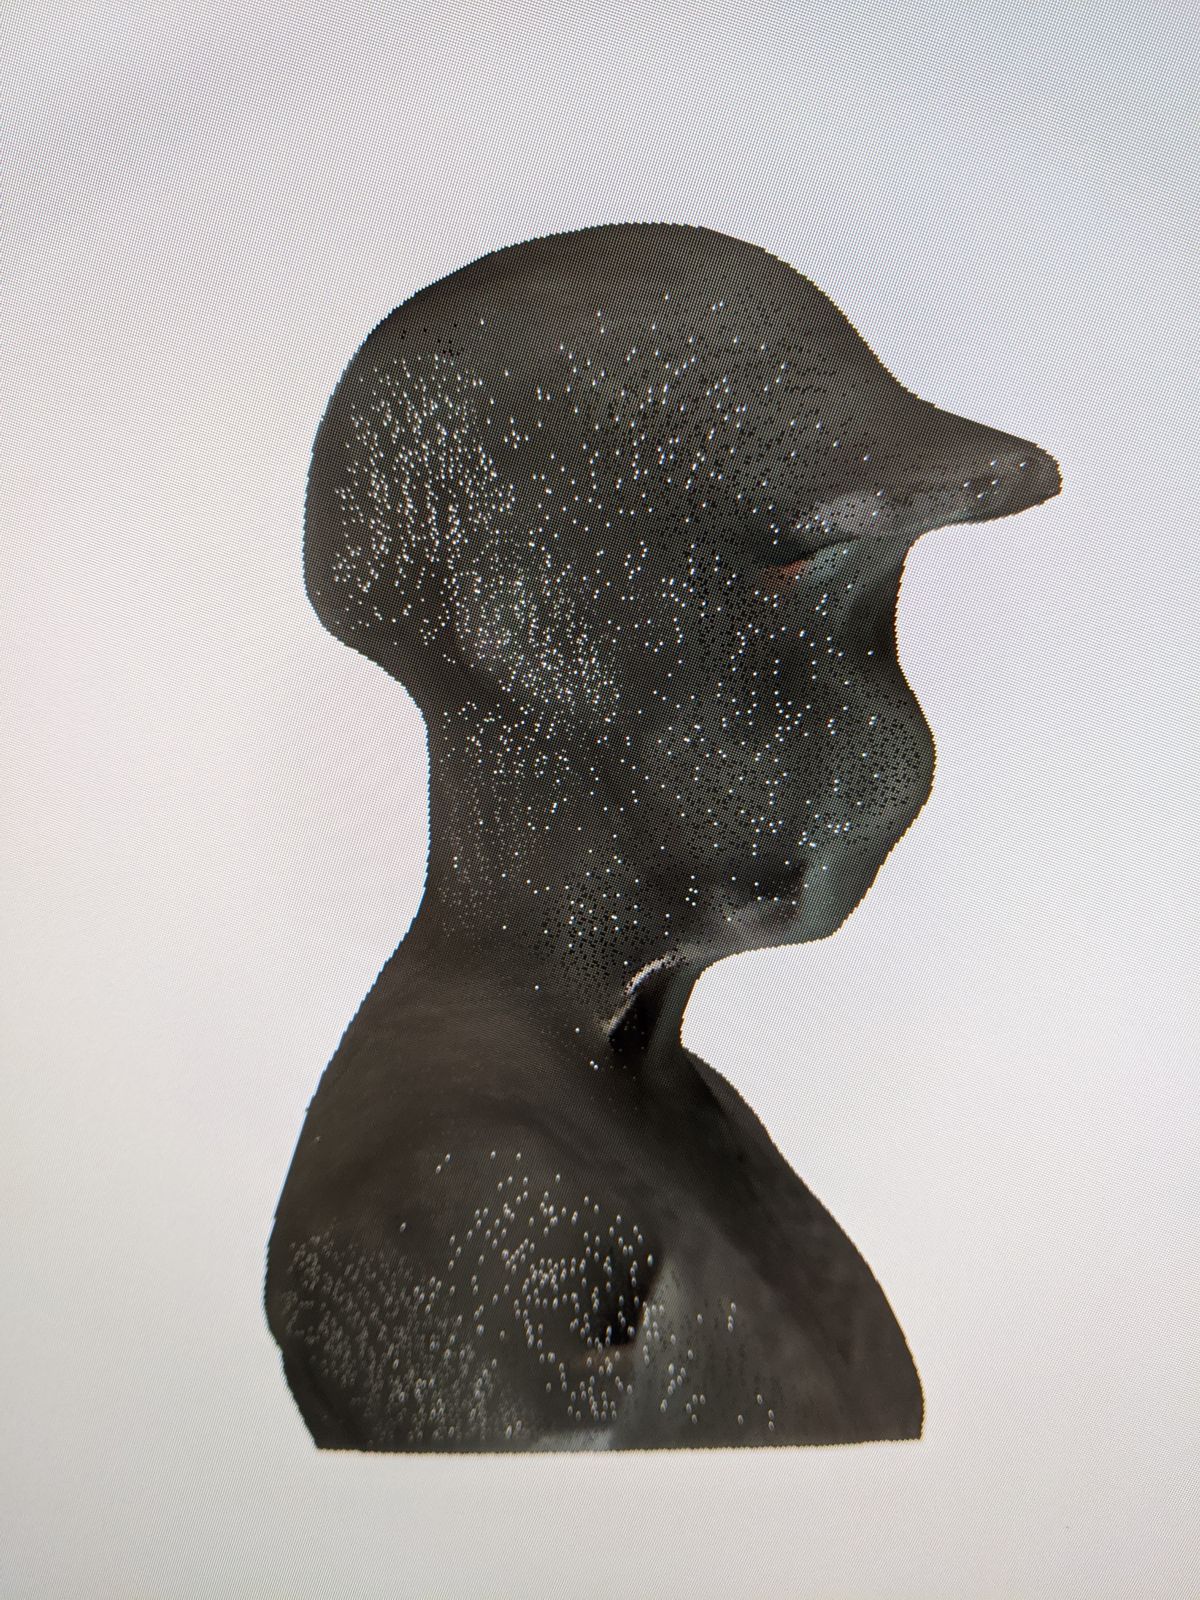
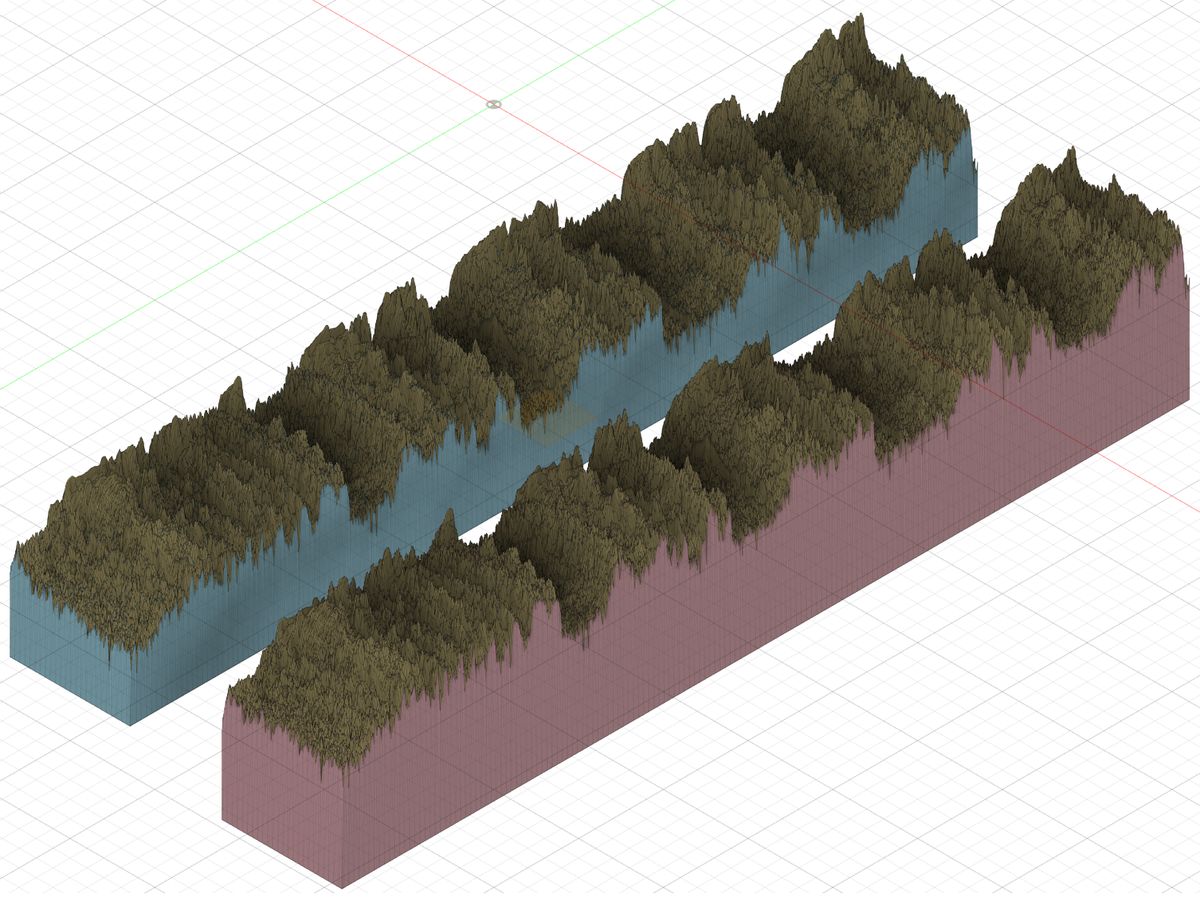
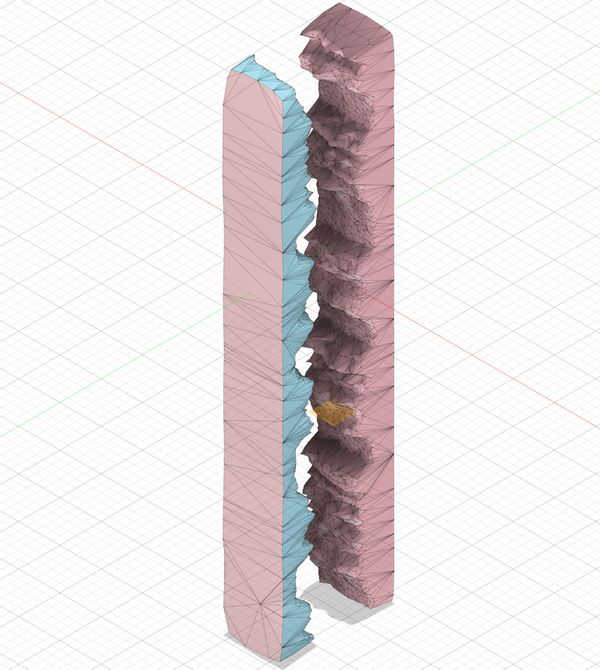
The concept behind this was to examine how much detail would be lost if I were to repeatly scan and print an object over and over again, similar to the experiment of compressing a JPEG several hundred times over (to demonstrate to novice photographers why to work in RAW, rather than lossly formats!). This also nods to error propagation in software (and end-to-end machine learning models), since I do not intend to clean up any mistakes or issues in the process!I chose the name "Photo(de)grammetry" as a play on the term "Photogrammetry" (using photos to 3D scan), and how absolutely garbage the open-source form of that technology appears to be at the moment. Even though I never ended up using photogrammetry to do my scans, I thought it was appropriate given the ordeal I
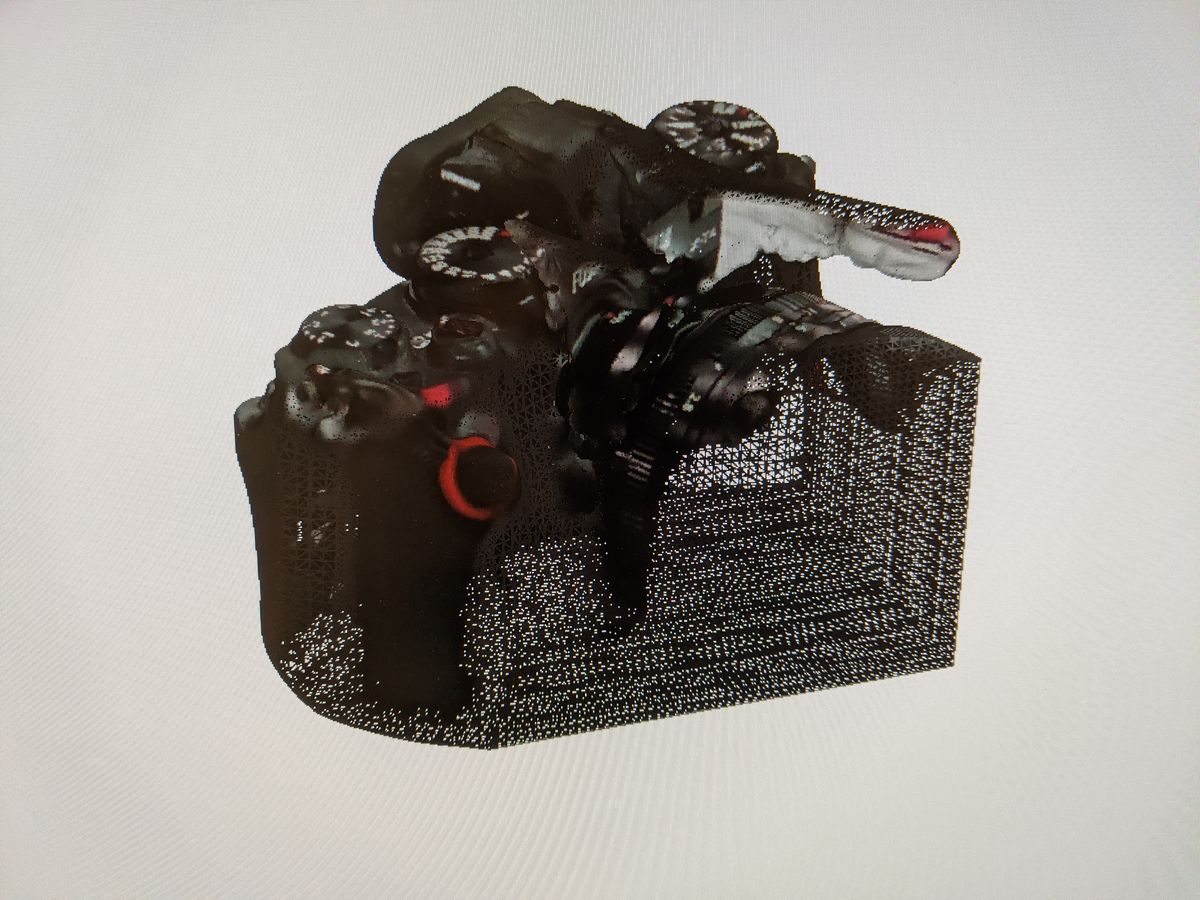
Although the scans of her were hilariously terrible, it planted the seed for what became my idea to get a good scan of myself, print it, scan that, print that, scan that, and print that. The question in my mind was "how many iterations does it take before I become an amorphous blob?"

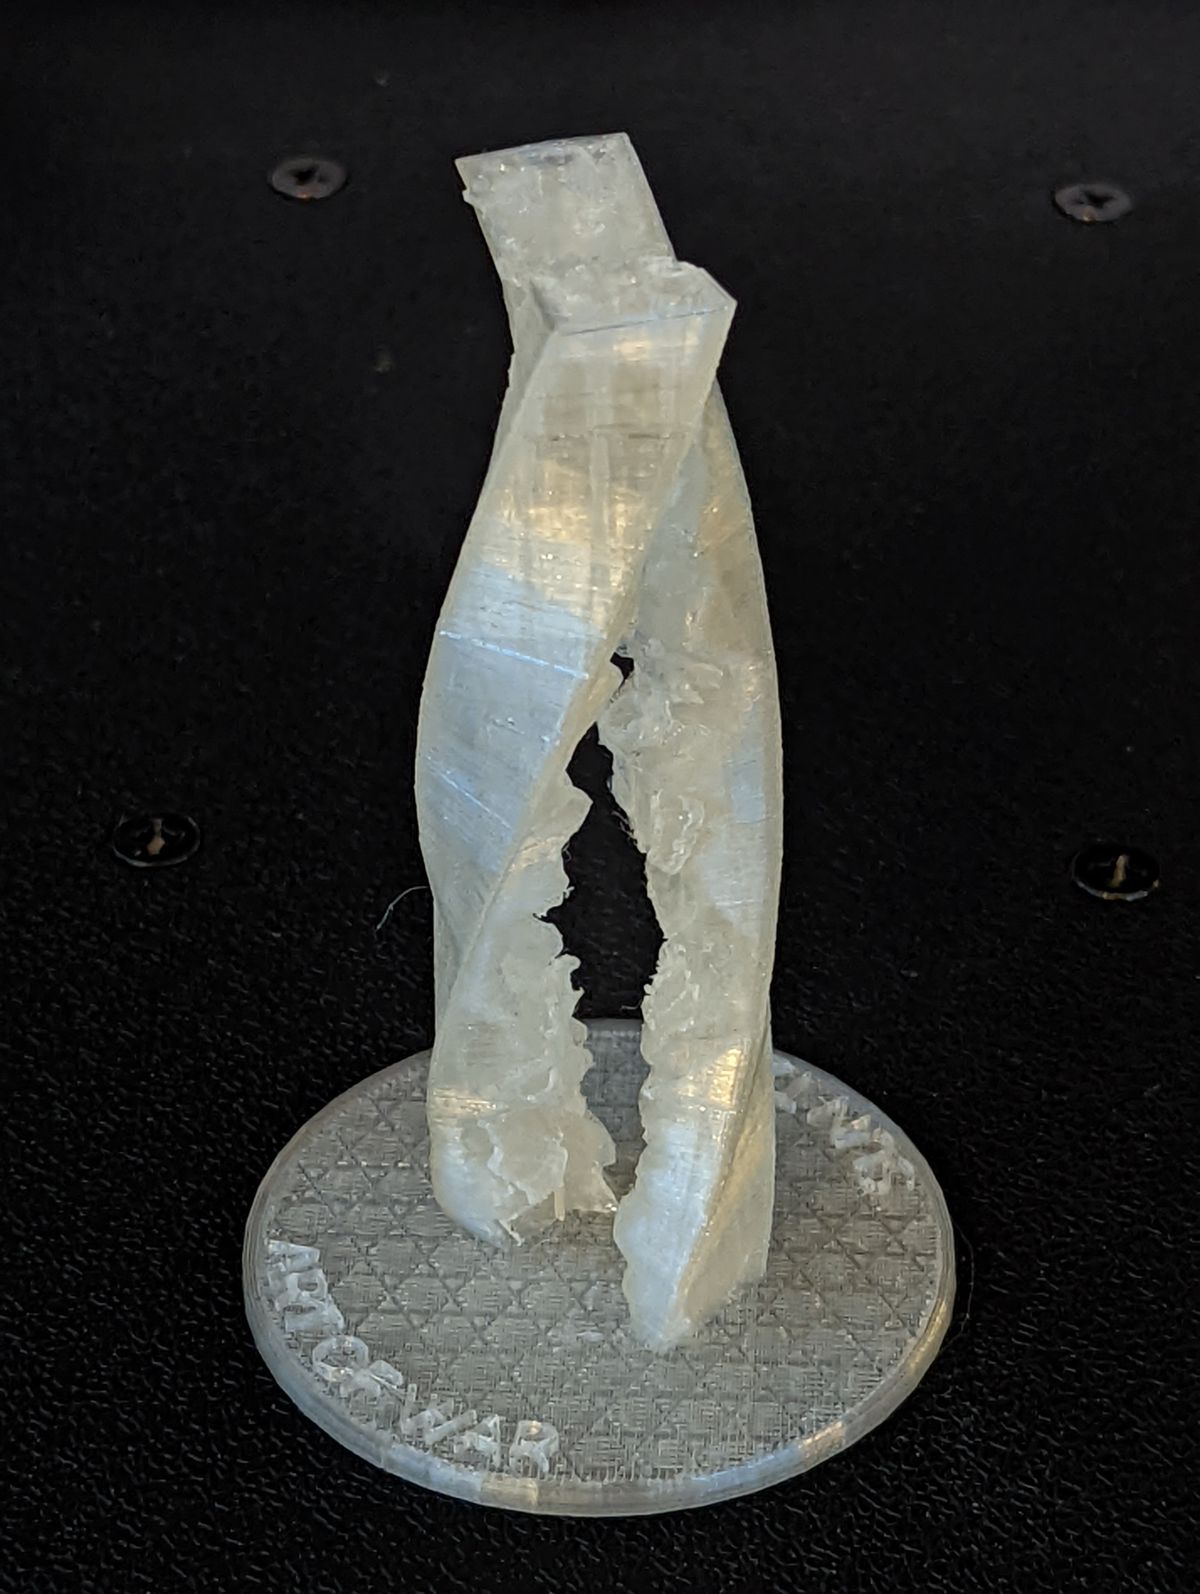
3D Printing: 'Yin & Yang'
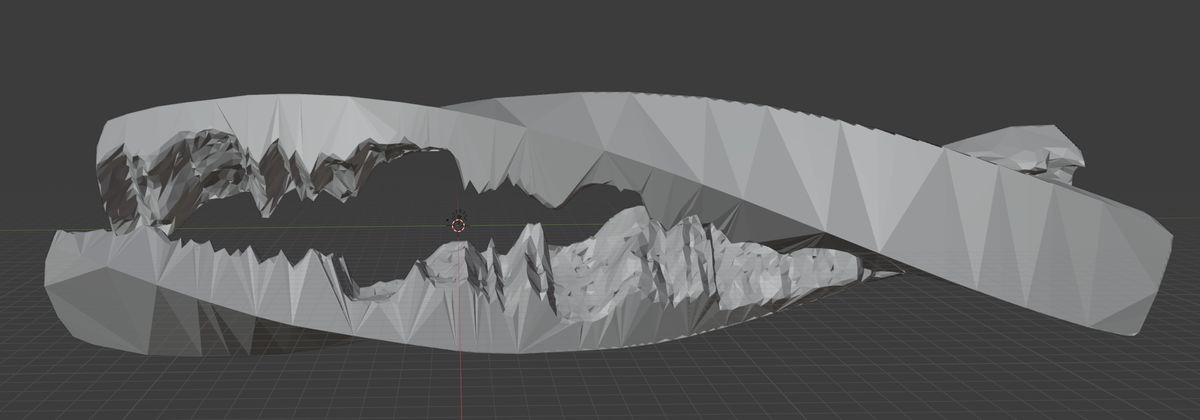
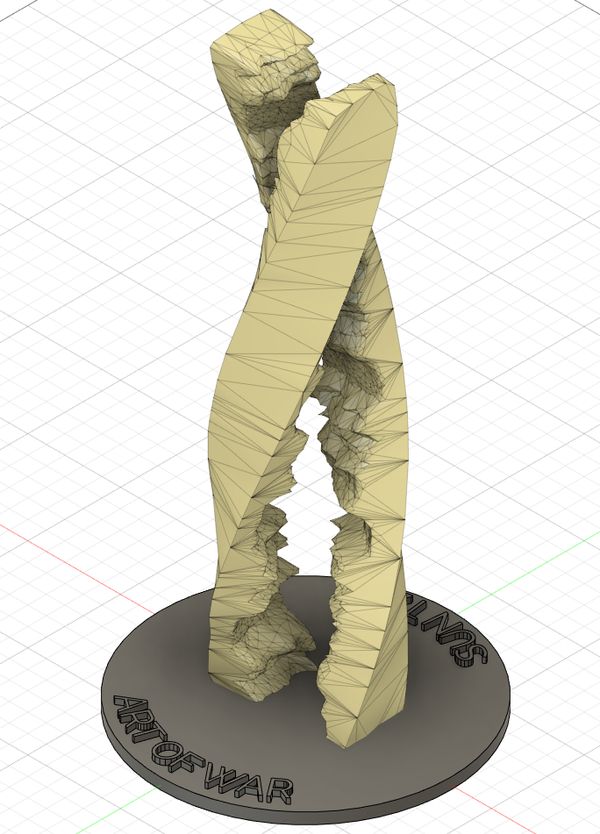
The core concept for this piece was to take audio recordings, process them into spectrograms, and print them into a 3D sculpture. I envisioned separate audio tracks "twisting" around each other in a helix-like pattern, with the spectrograms facing inside as a nod to the "secret nature" of the conversation (or the "hidden nature" of the actual audio), while also acknowledging the interconnectedness of our conversations and relations with one another. I opted to print with a transparent/clear filament, in order to emphasize the invisibility and ephemerality of conversations. My initial plan was to do a four-part piece, with one audio recording from each of my three teammates from the TangiBel Soundscapes project at the Media Lab (who also happen to be in HTMAA: Cathy, Joanne, Olivia), but I realized that everyone was incredibly busy with this assignment, and resolved to do that at a later time (and first establish my workflow for this art piece).I chose a two-part passage from Sun Tzu's Art of War that have held significant meaning for me since my teenage years, and recorded myself speaking those lines. The audio clips were pre-processed and down-sampled in a combination of Ableton Live, TouchDesigner, and some Python scripting to generate a 3D spectrogram (plotting frequency and amplitude over time) that was exported to an .STL file. However, it became apparently that despite my down-sampling, artifacts from the export process did not have the desired "low-poly" effect I was hoping for. In Fusion 360, I iteratively processed it with the Mesh Reduce and then Mesh Smooth functions, producing a much cleaner "low-poly" mesh.
Let me preface this by saying that in my engineering undergrad, I have never ever crashed Solidworks, even on a crappy management student Lenovo laptop.
(Is it just me, or is modern software incredibly brittle?)
I spent the better part of an entire day trying to further reduce my poly count in order to not break Solidworks, letting Solidworks try to run, and trying a bunch of other tools (including Adobe Meshmixer). Finally, at almost midnight on Monday, after a frustrating series of venting messages to the TangiBel Soundscapes Whatsapp chat, Cathy helpfully suggests, "maybe blender?"
Blender. The software that, when I was first learning to model in Maya (and later 3DS Max, then Solidworks for CAD), was dismissed as a not-serious, amateur's tool. Alright, well, what's the harm in trying? I told myself. "good shout, I'll probs try that tonight", I responded as I set Blender to download while I went to look for dinner.
Food in hand and a quick install later, I Googled a quick tutorial, imported the .obj file, and applied the Simple Deform Modifier to it. It. Just. Worked. Where hours beating my head on Fusion 360, Solidworks, and a host of other tools and workarounds didn't work, Blender applied the 180-degree twist perfectly.

3D Printer Design Rules Characterization
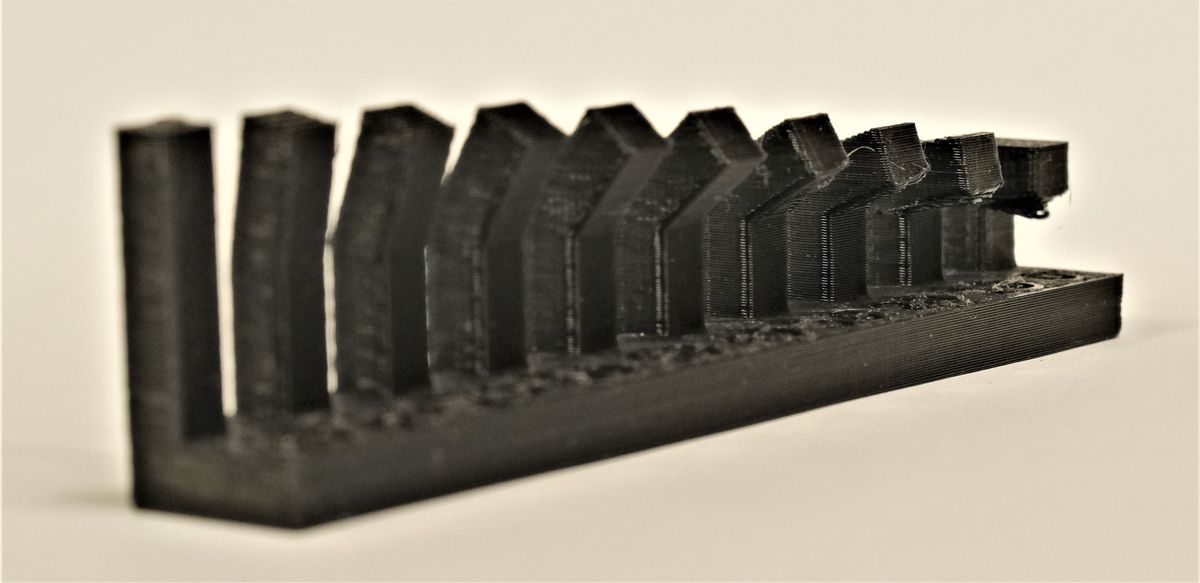
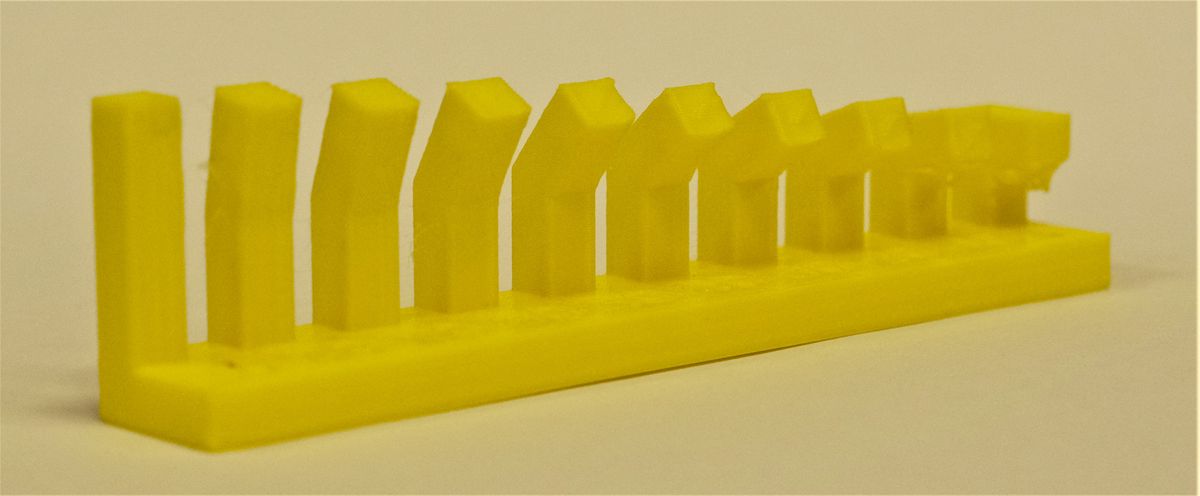
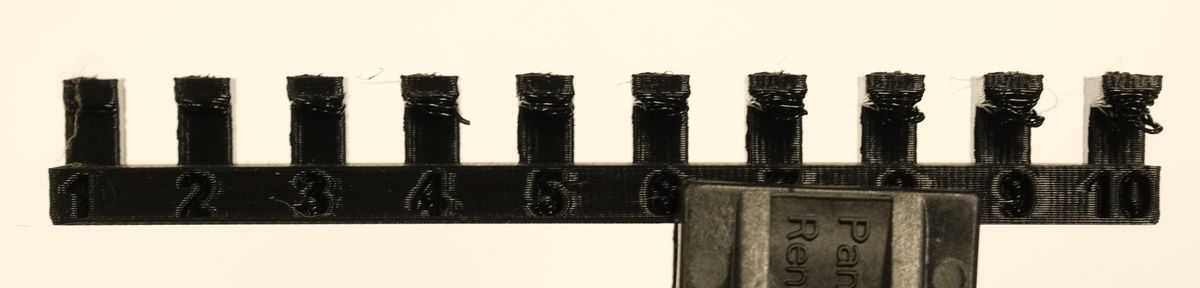
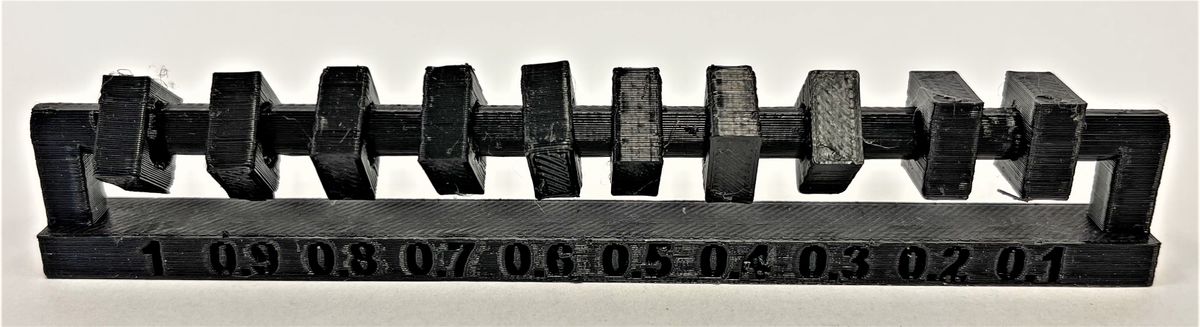
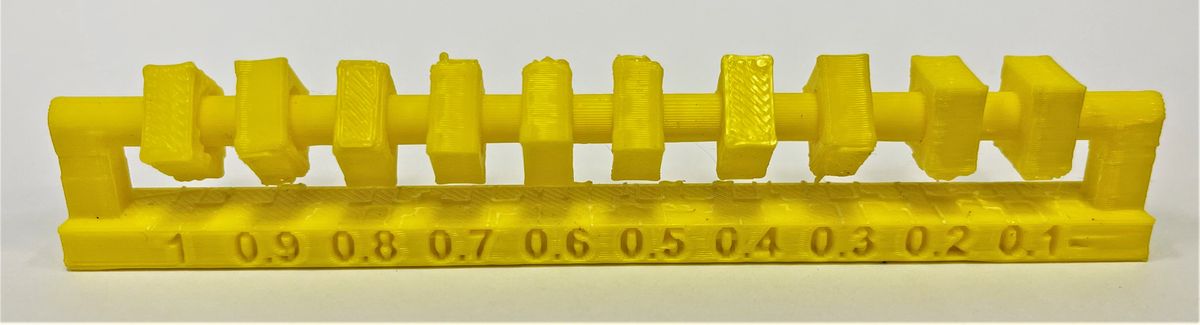
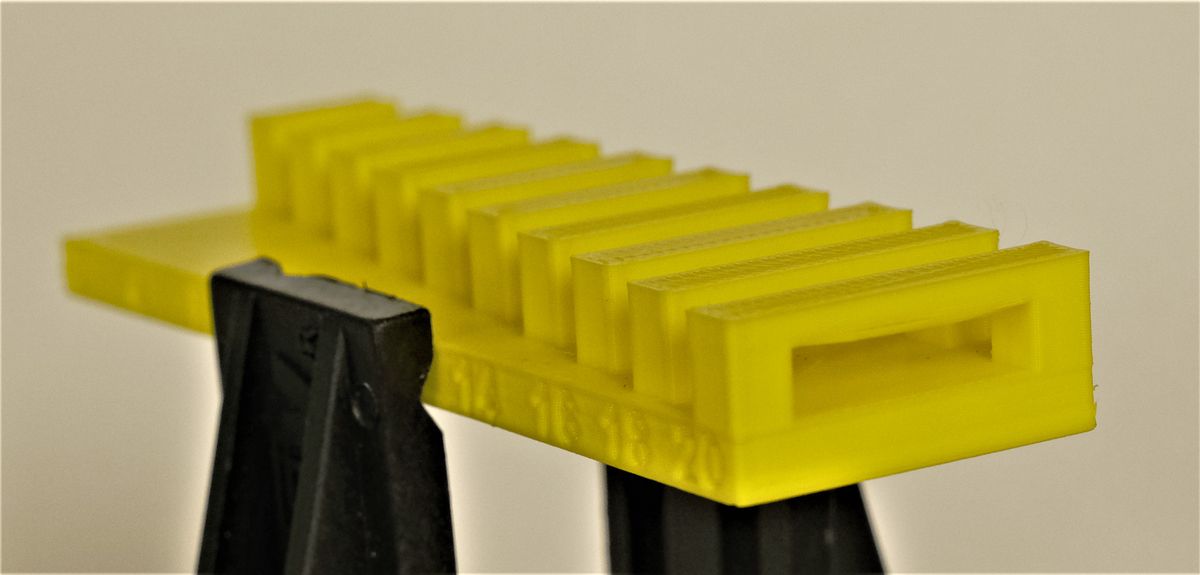
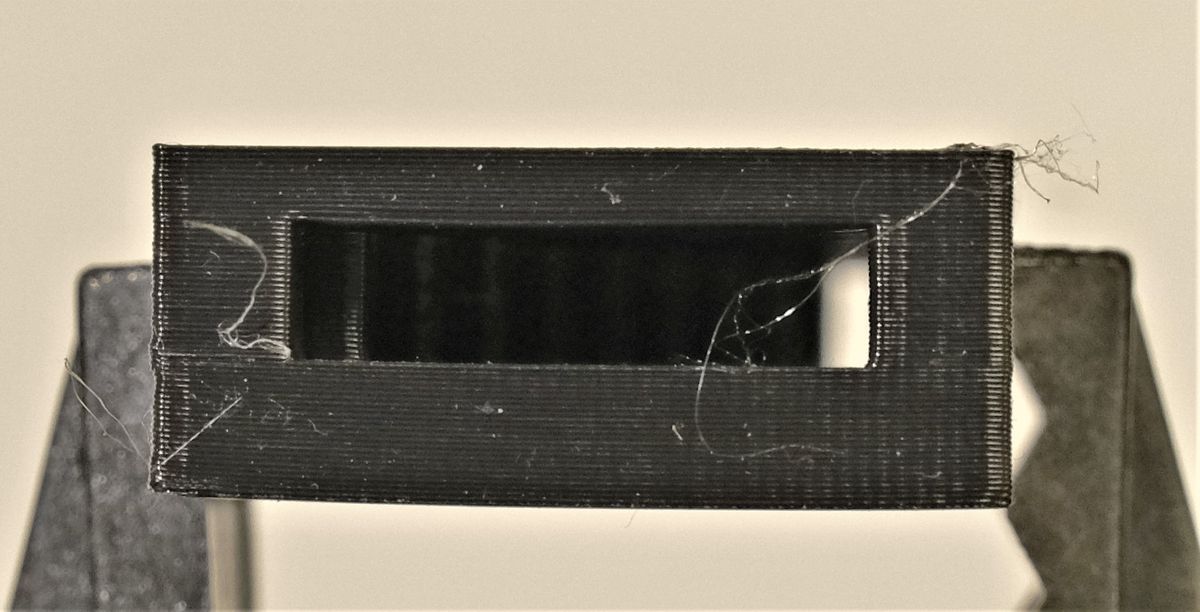
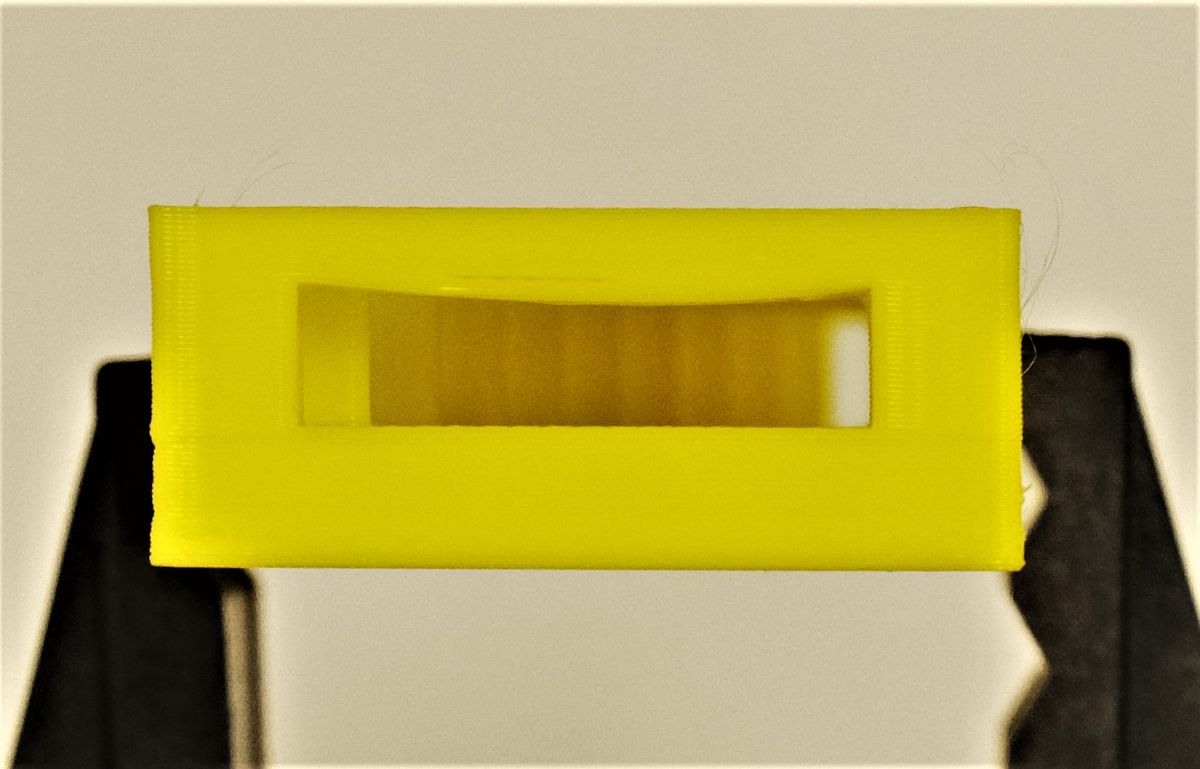
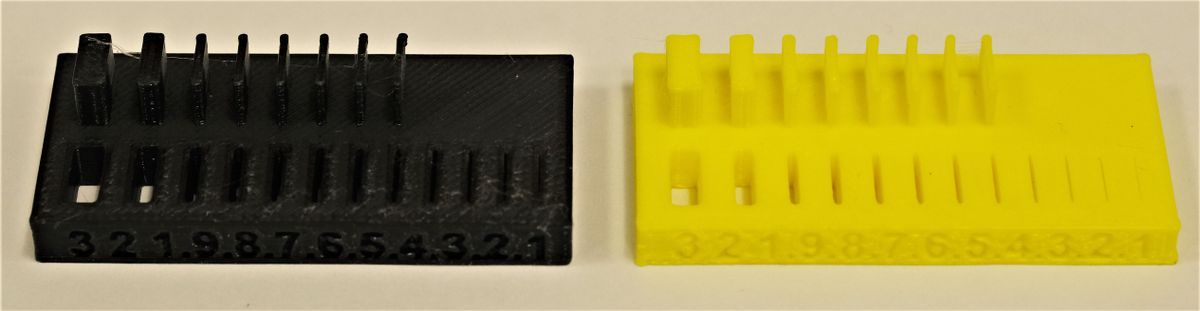
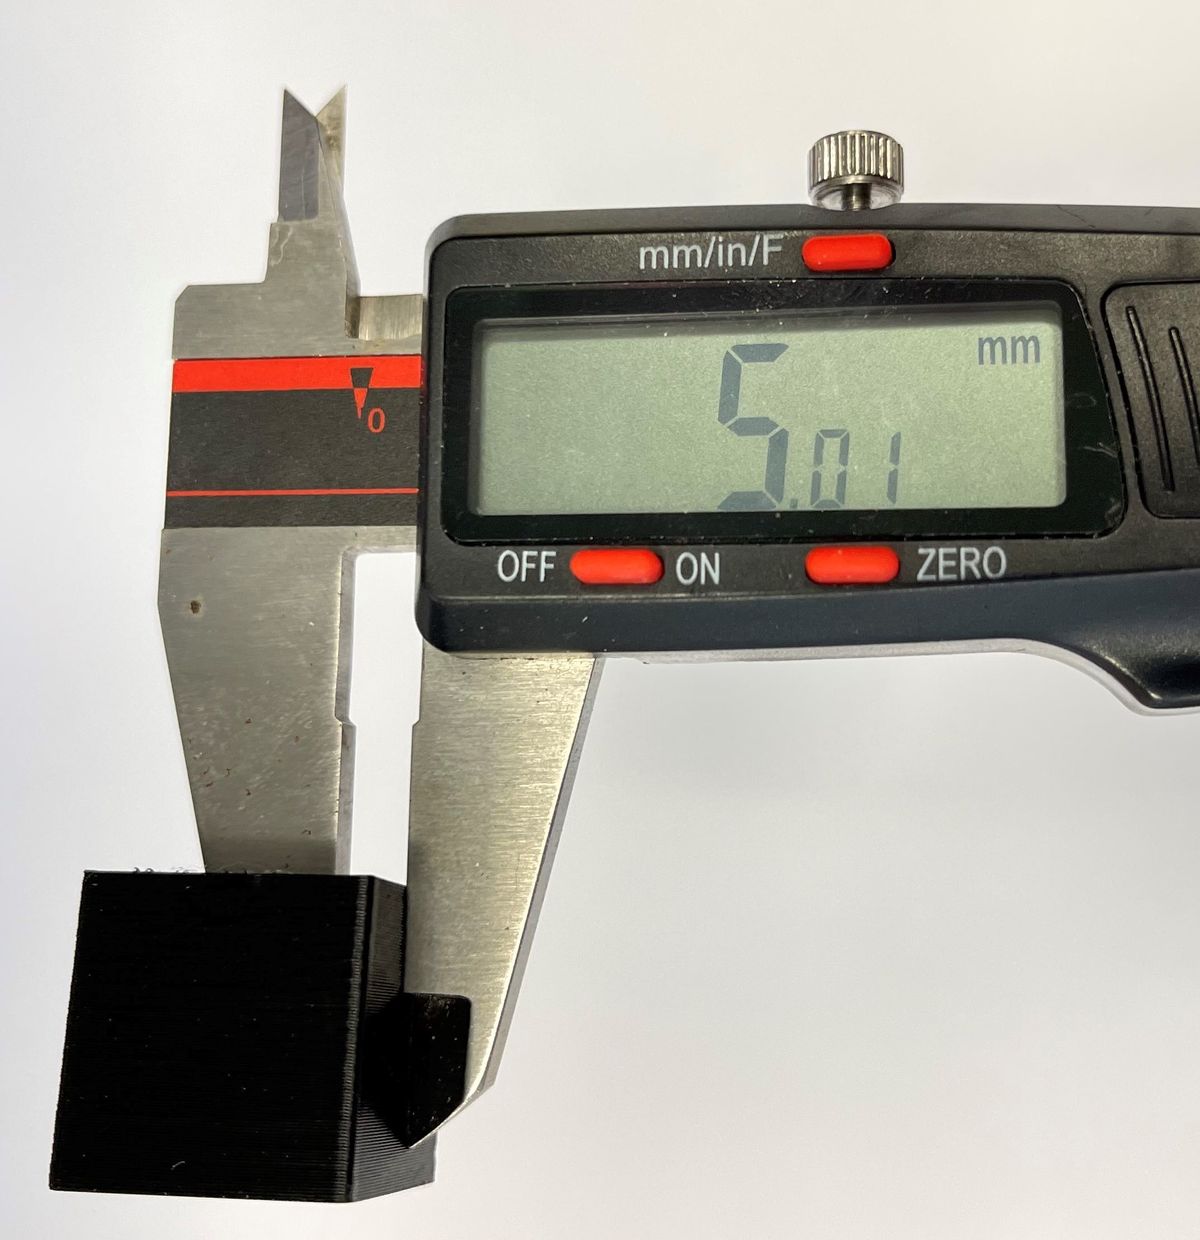
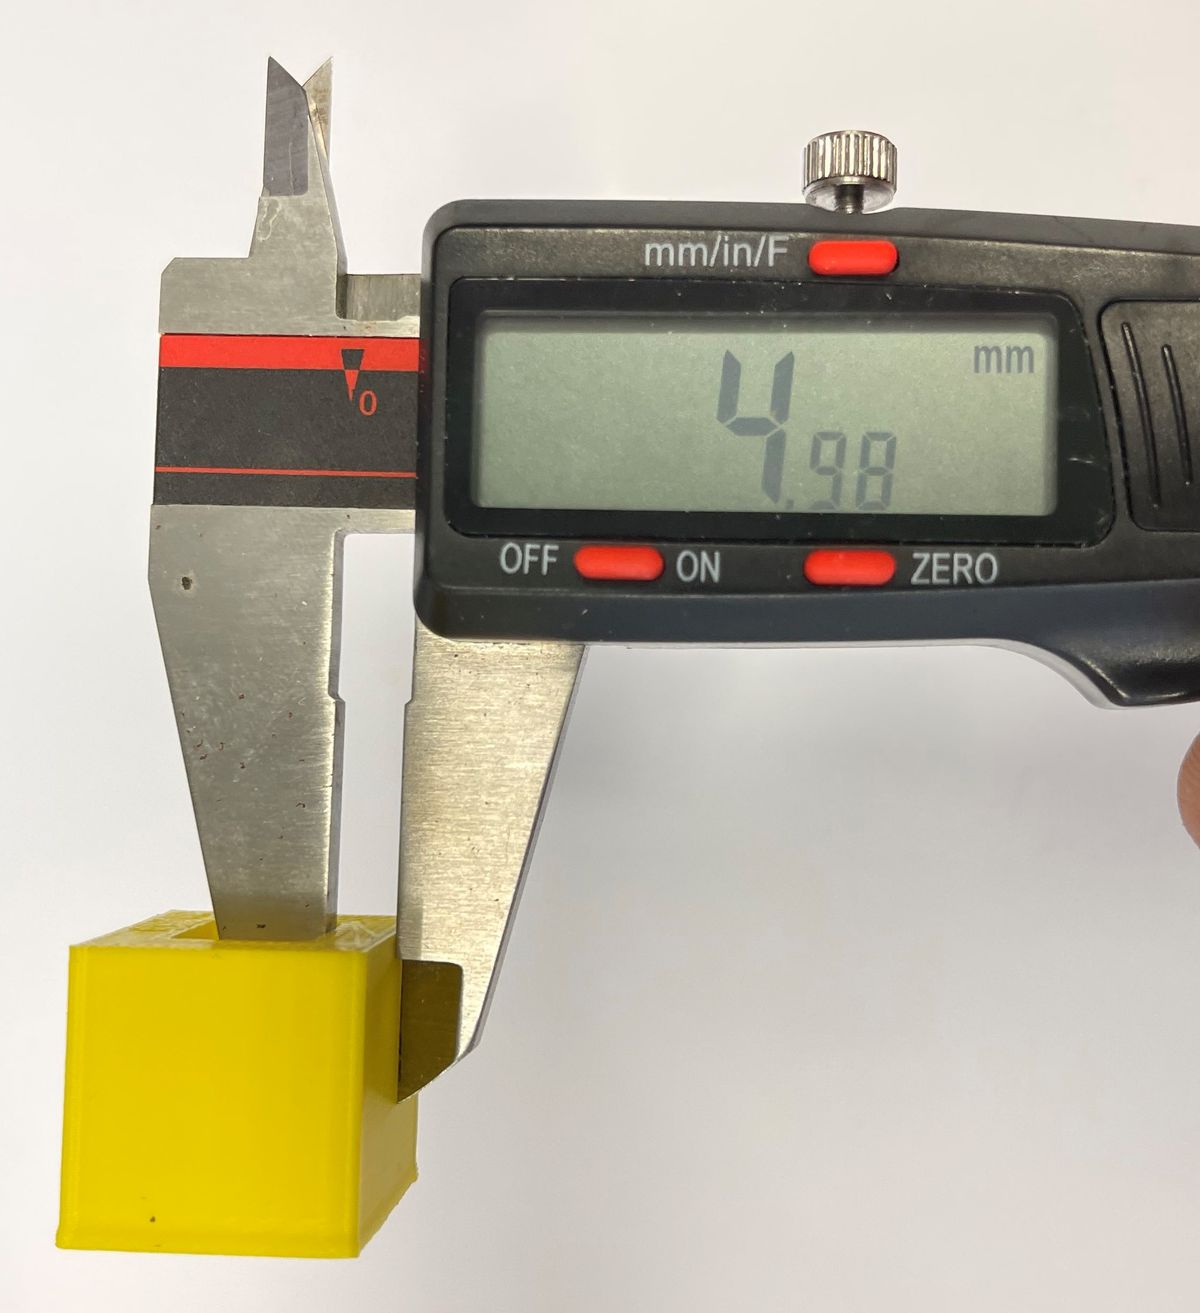
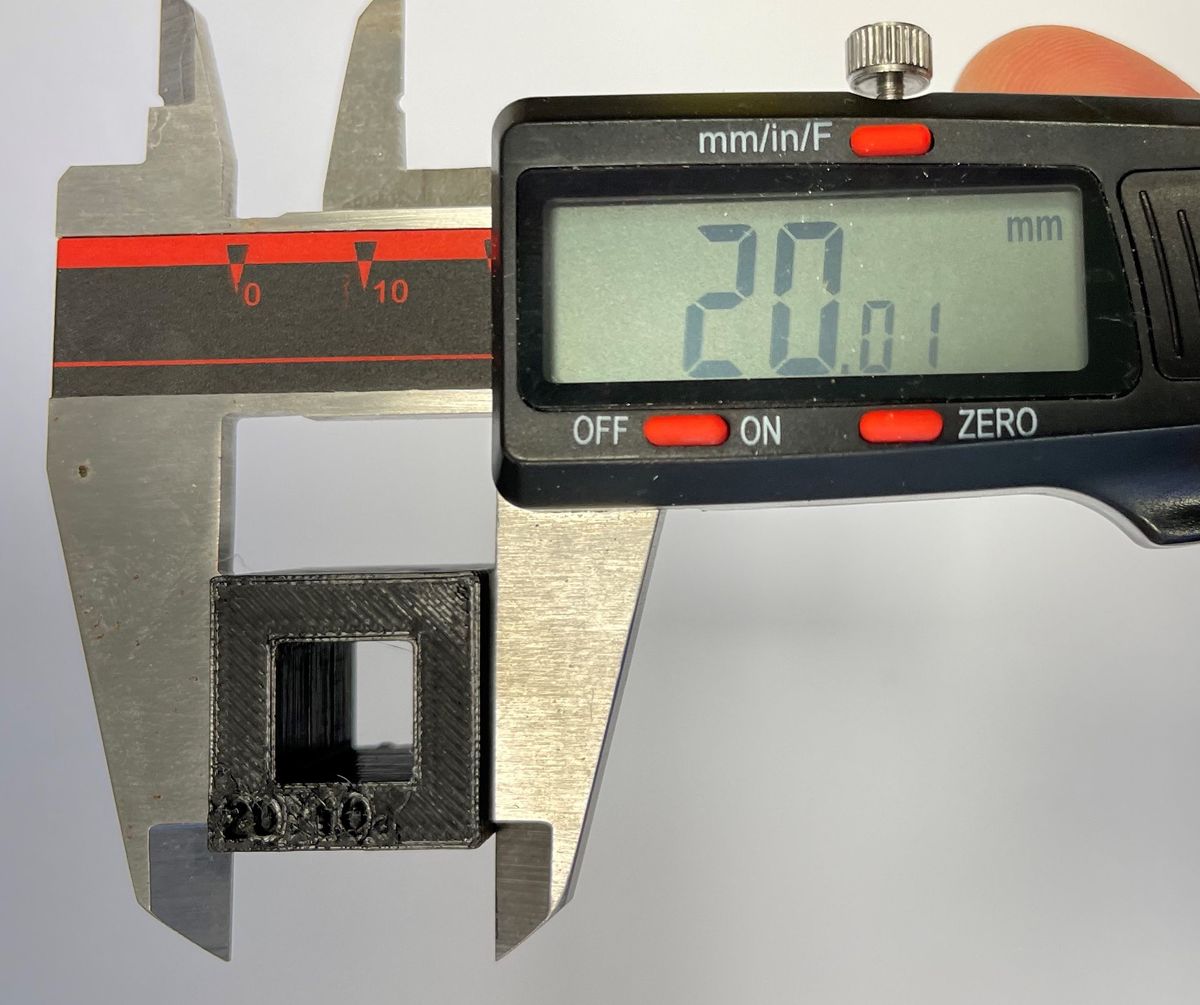
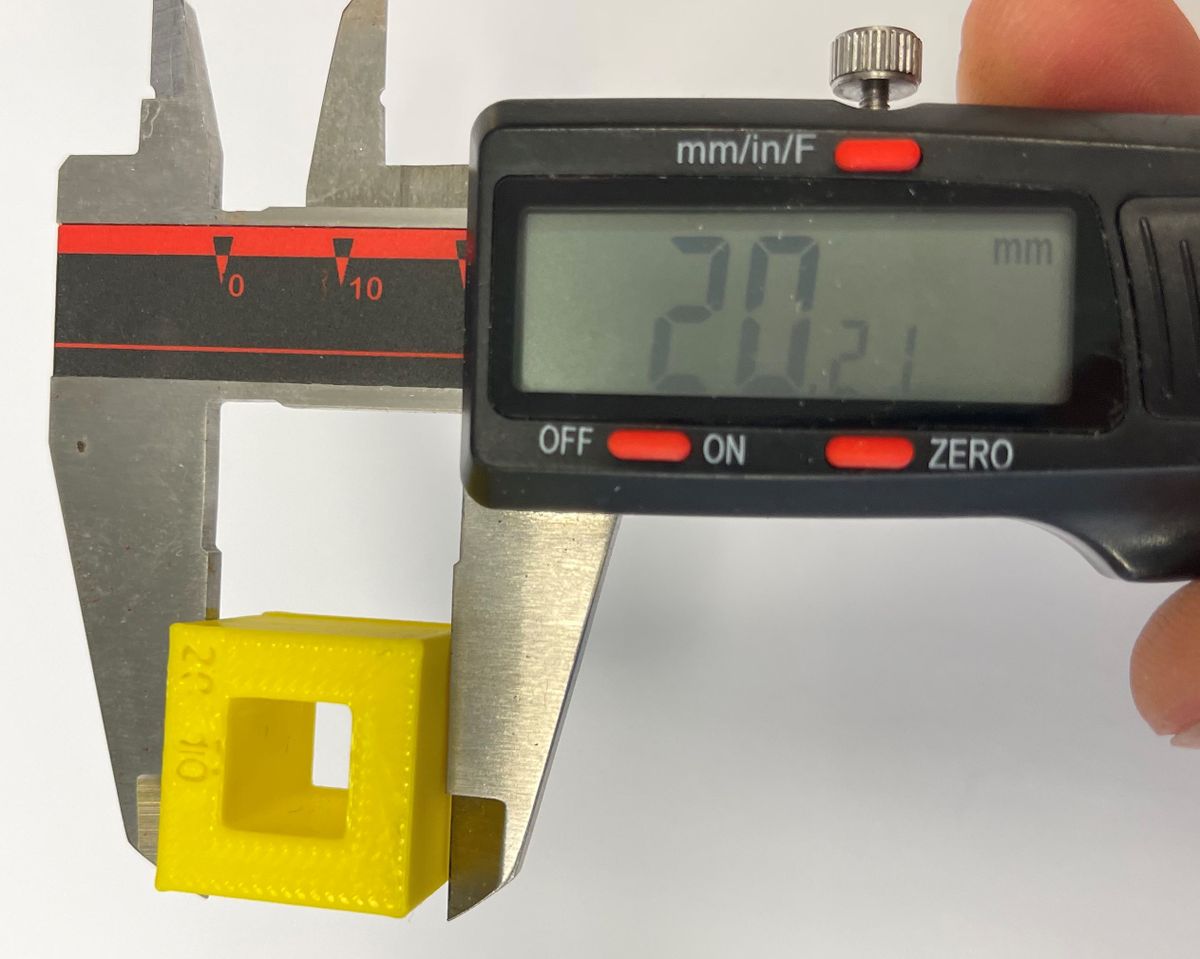
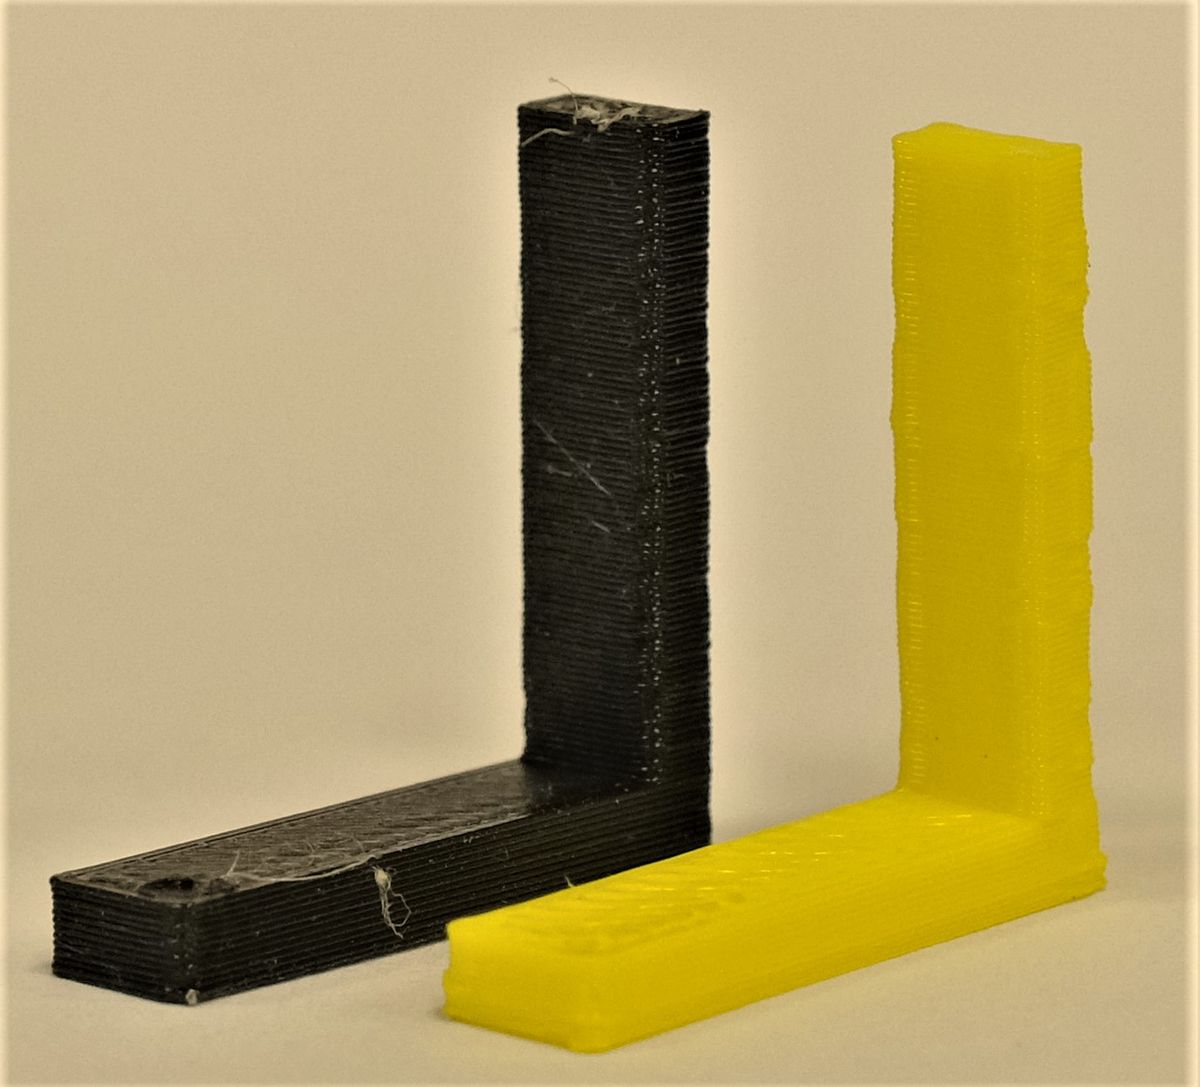
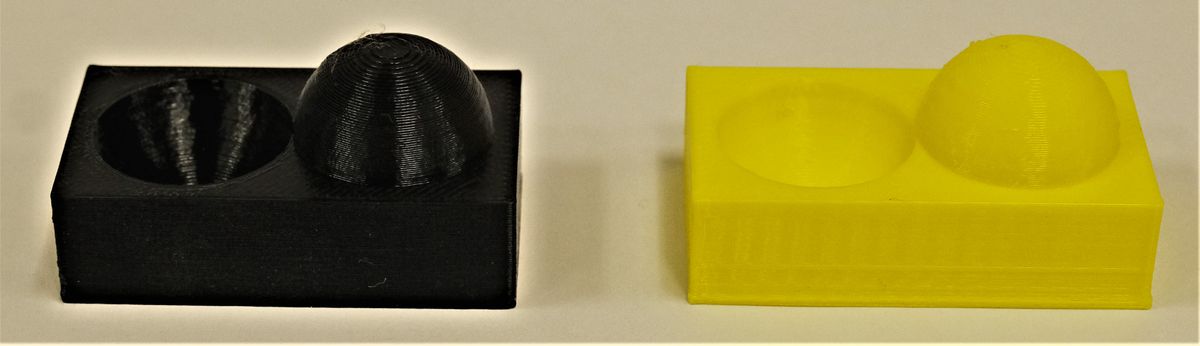
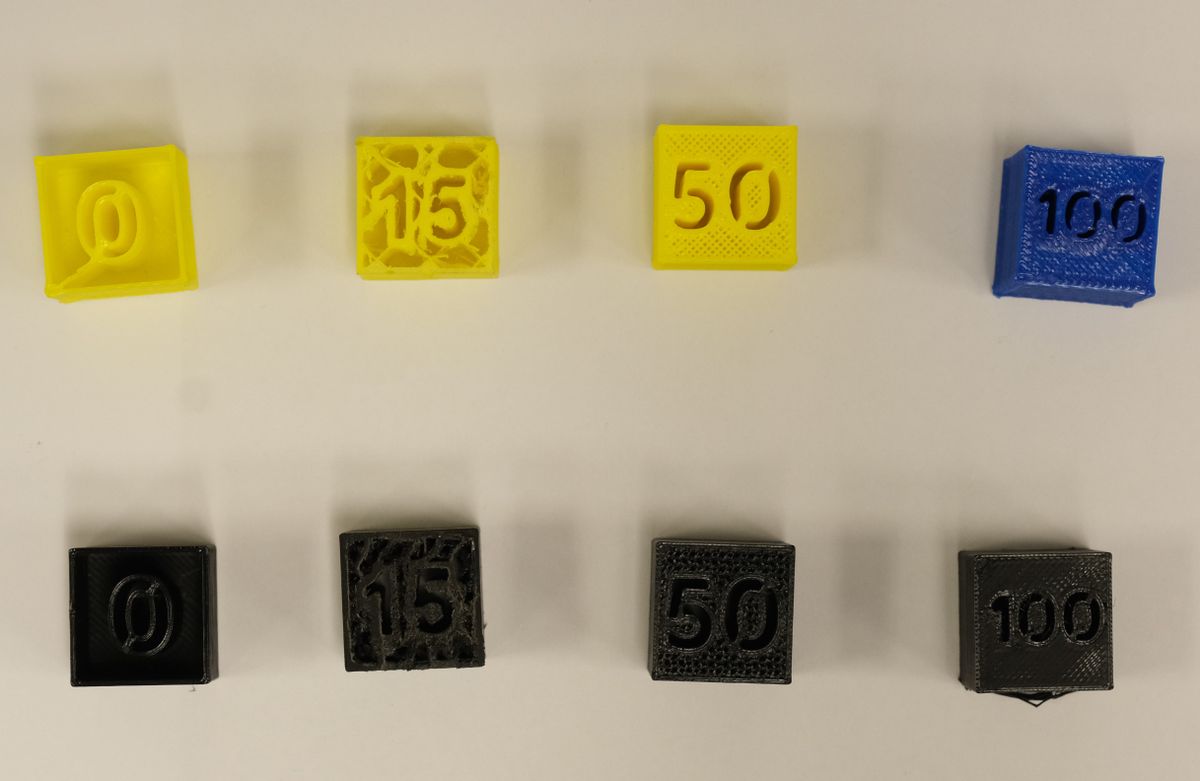
As a group, we printed a set of test pieces to characterize both the Prusa and Sindoh printers. Michelle and I further examined and tested each test part's characteristics to determine the design rules. For 3D printing, every design rule is incredibly important, as it determines the limitations of your print designs and has the potential to save hours of time! While I have not done a formal design rules characterization for my own 3D printer (and I ought to, honestly!), I have learned most of the design rules through trial and error.The below design rules characterization are in fulfillment of the group component of this assignment. In the below images, all black (left) prints are that of the Prusa, and yellow/blue (right) prints that of the Sindoh.
Overhang Angle
| Printer | Angle | Result |
|---|---|---|
| Prusa | 0 | Spaghetti. |
| 10-30 | Passable, increasingly better. One bottom corner partially slanted. | |
| 40+ | No issues | |
| Sindoh | 0-10 | Spaghetti. |
| 20 | Minor spaghetti'ing. Diagonal lines on the angled face due to the directional change of the hotend. | |
| 30+ | No issues. |
Freestanding Overhang
Supported Overhang
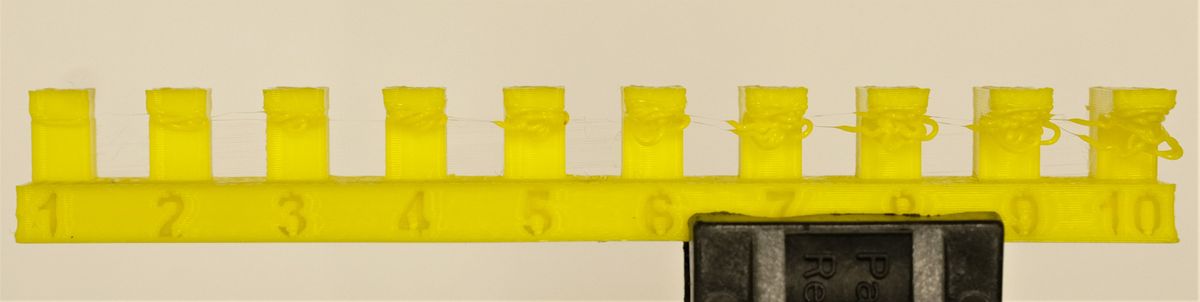
Our section mistakenly printed these without the supports; we understand the point in combination with the freestanding overhang test, however - supports are needed for 0-degree overhangs!Support Clearance
| Printer | Gap | Result |
|---|---|---|
| Prusa | 0.1-0.2 | Stayed stuck. |
| 0.3 | Spun with difficulty, required a lot of force. | |
| 0.4 | Spun, with less force needed. | |
| 0.5 | Spun, with some difficulty rounding corners. | |
| 0.6 | Ideal. | |
| 0.7+ | Too loose, wobbly. | |
| Sindoh | 0.1-0.2 | Stayed stuck. |
| 0.3 | Some wobble, no spin. | |
| 0.4 | Spun, with some difficulty rounding corners | |
| 0.5 | Spun, but not quite smoothly. | |
| 0.6 | Ideal. | |
| 0.7+ | Too loose, wobbly. |
Bridging
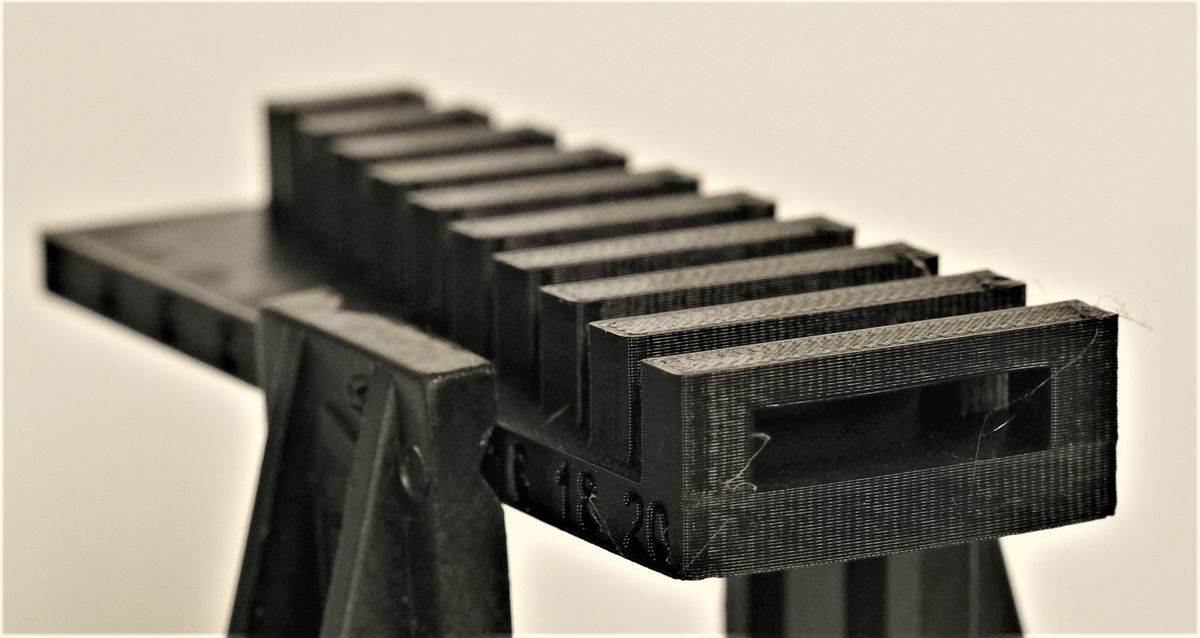
Wall Thickness
Dimensions (Calibration Cube)
Anisotropy
Print Finish
Infill
3D Scanning Bloopers
Lol.