Gabriella Perry
Embedded Programming
"read the data sheet for your microcontroller + program your board to do something"
For embedded programming week I decided to tackle another project for a different class that required programming and physical prototype. My assignment was to design Tangibles for Small Colocated Groups to Think/Work/Play Together for my "Tangible Interfaces" class. My group and I settled on creating a prototype called "Tangi-Belt" a wearable haptic device for hide and seek related games. This belt would have directional IR sensors and vibrating motors to alert the "it" person of the other players wearing IR LED belts. Tangi-Belt could be used to play childhood games like Marco polo, hide and seek, red rover, etc.
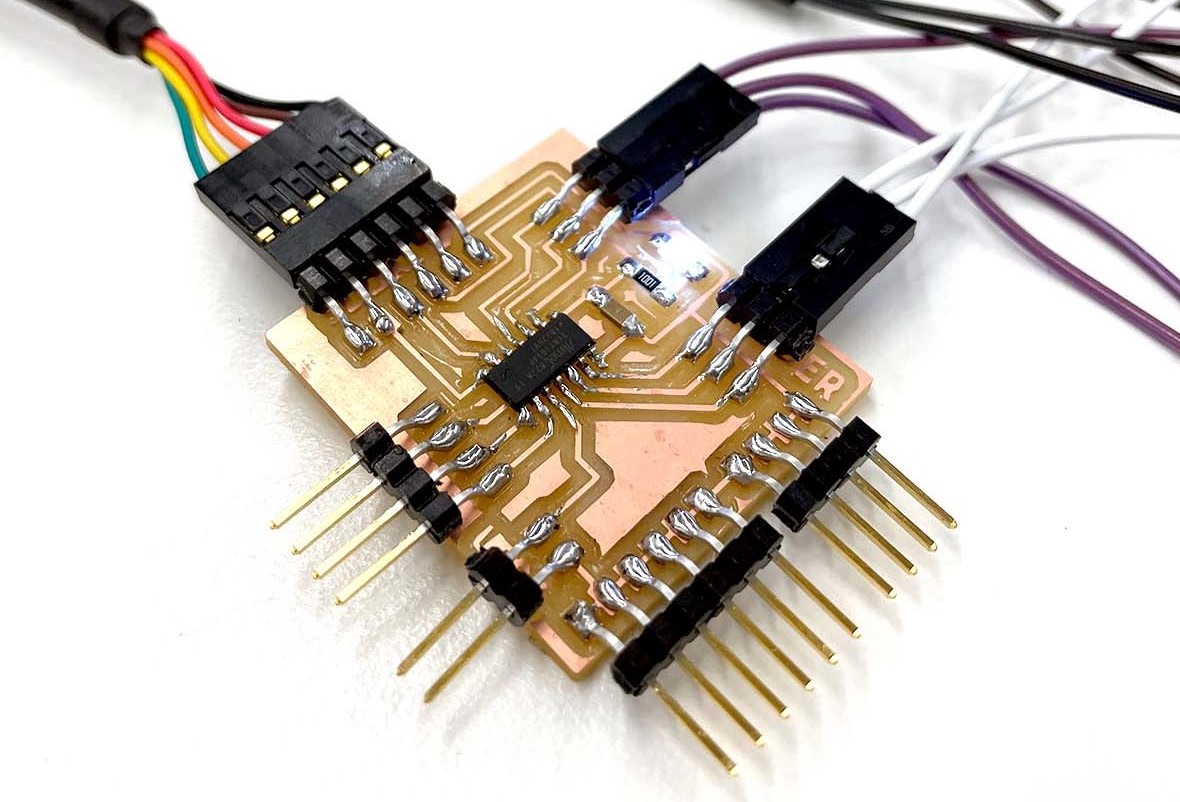
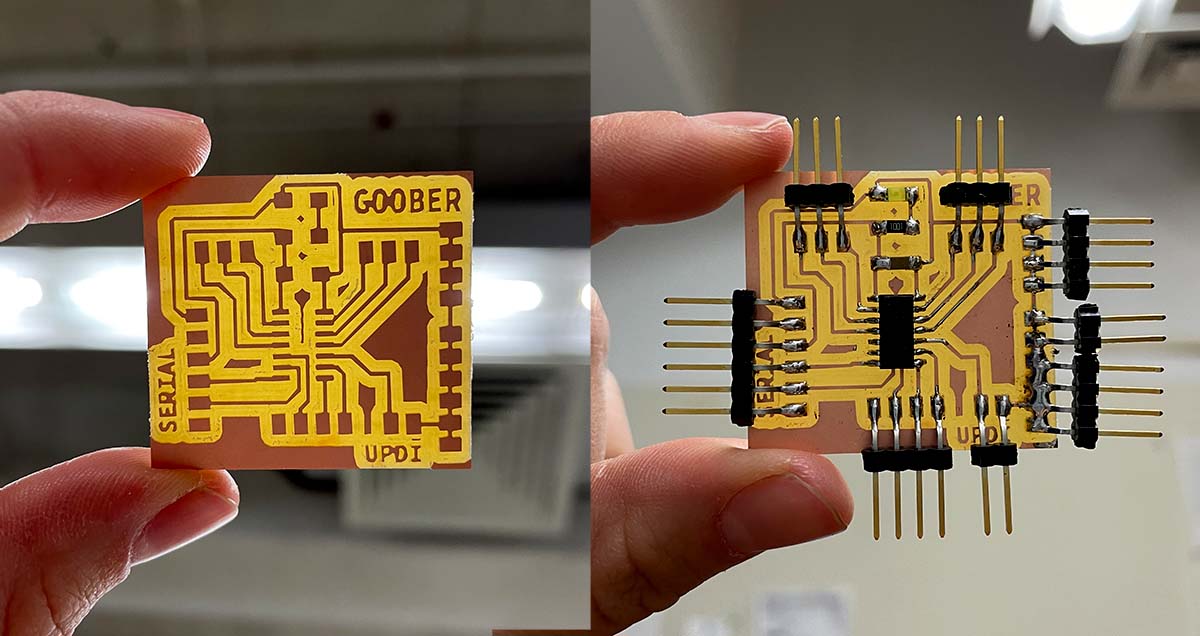
To start this project, I redesigned my board with all of my pins pulled out to header pins to quickly test out the sensors and motors needed for the prototype. I named the board "Goober" as it is a silly board meant for testing out lots of random configurations.
I initially selected the ATtiny 3216 chip since it had more pins than the ATtiny 1614, but our lab was unfortunately out of this chip so I switched to the ATtiny 1614.


Once I had the Goober milled and stuffed I tested the IR sensor and IR LED configuration using jumper cables and a quick Arduino program. The ATtiny's use UPDI programming, so I used a CH340 board to program my Goober to serial read the IR sensor. I also tested out powering the small vibration motor in this stage as well.

Since the IR transmitter and IR LED set up and the motor set up worked well, I began to prototype the belt. I sewed together some fabric to fashion a red cloth belt to embed the sensors. To connect the sensors, LEDs, and motors, I designed smaller boards to account for the necessary resistors and transistors. My groupmate Doria handled the motor board with the Mosfet N Channel transistor, and I handled the IR transmitter and IR LED boards with the appropriate resistors (100K and 100, respectively). I designed the IR boards with circular openings at the ends to sew the boards into the belt. I also added pockets on the inside of the belt to hold the motors.


When it came time to assemble the full belt, I ended up needing extra Goober boards. I had one Goober powering the IR LED used to test the IR sensors, one Goober powering the IR sensors and the motors, and the final Goober reading the information from the sensor and triggering the motor if it went above a certain threshold. The Arduino code for this is quite simple. If the sensor value goes above a specific number, then that triggers the relative motor. The sensor value increases depending on the level of IR light coming into the sensor. So if someone with an IR LED belt crosses paths with one of the sensors o the IR sensor Tangibelt, then the sensor will trigger the motor pointing in the direction of the IR LED Light, aka the other player in the game.


Viola! Here is Tangi-Belt's Final Project video. Done in Collaboration with Doria Spiegel, Gabriel Lam, and Erica Luzzi