Week 7: Embedded Programming
Assignments
This week’s assignment was to program the boards we made last week to do something. Since my board last week didn’t initialize and I couldn’t identify the reason(both software and hardware), I decided to rebuild a board that I knew could function and that I could program. I reached out to a classmate, Reuben, and asked if I could rebuild the board he designed, as it appeared to work great with the Arduino uploads and programs. This week was very busy for me, as I had been dealing with external personal issues within my family, but I was still able to mill another board and program it to perform several functions.
Rebuilding the Board
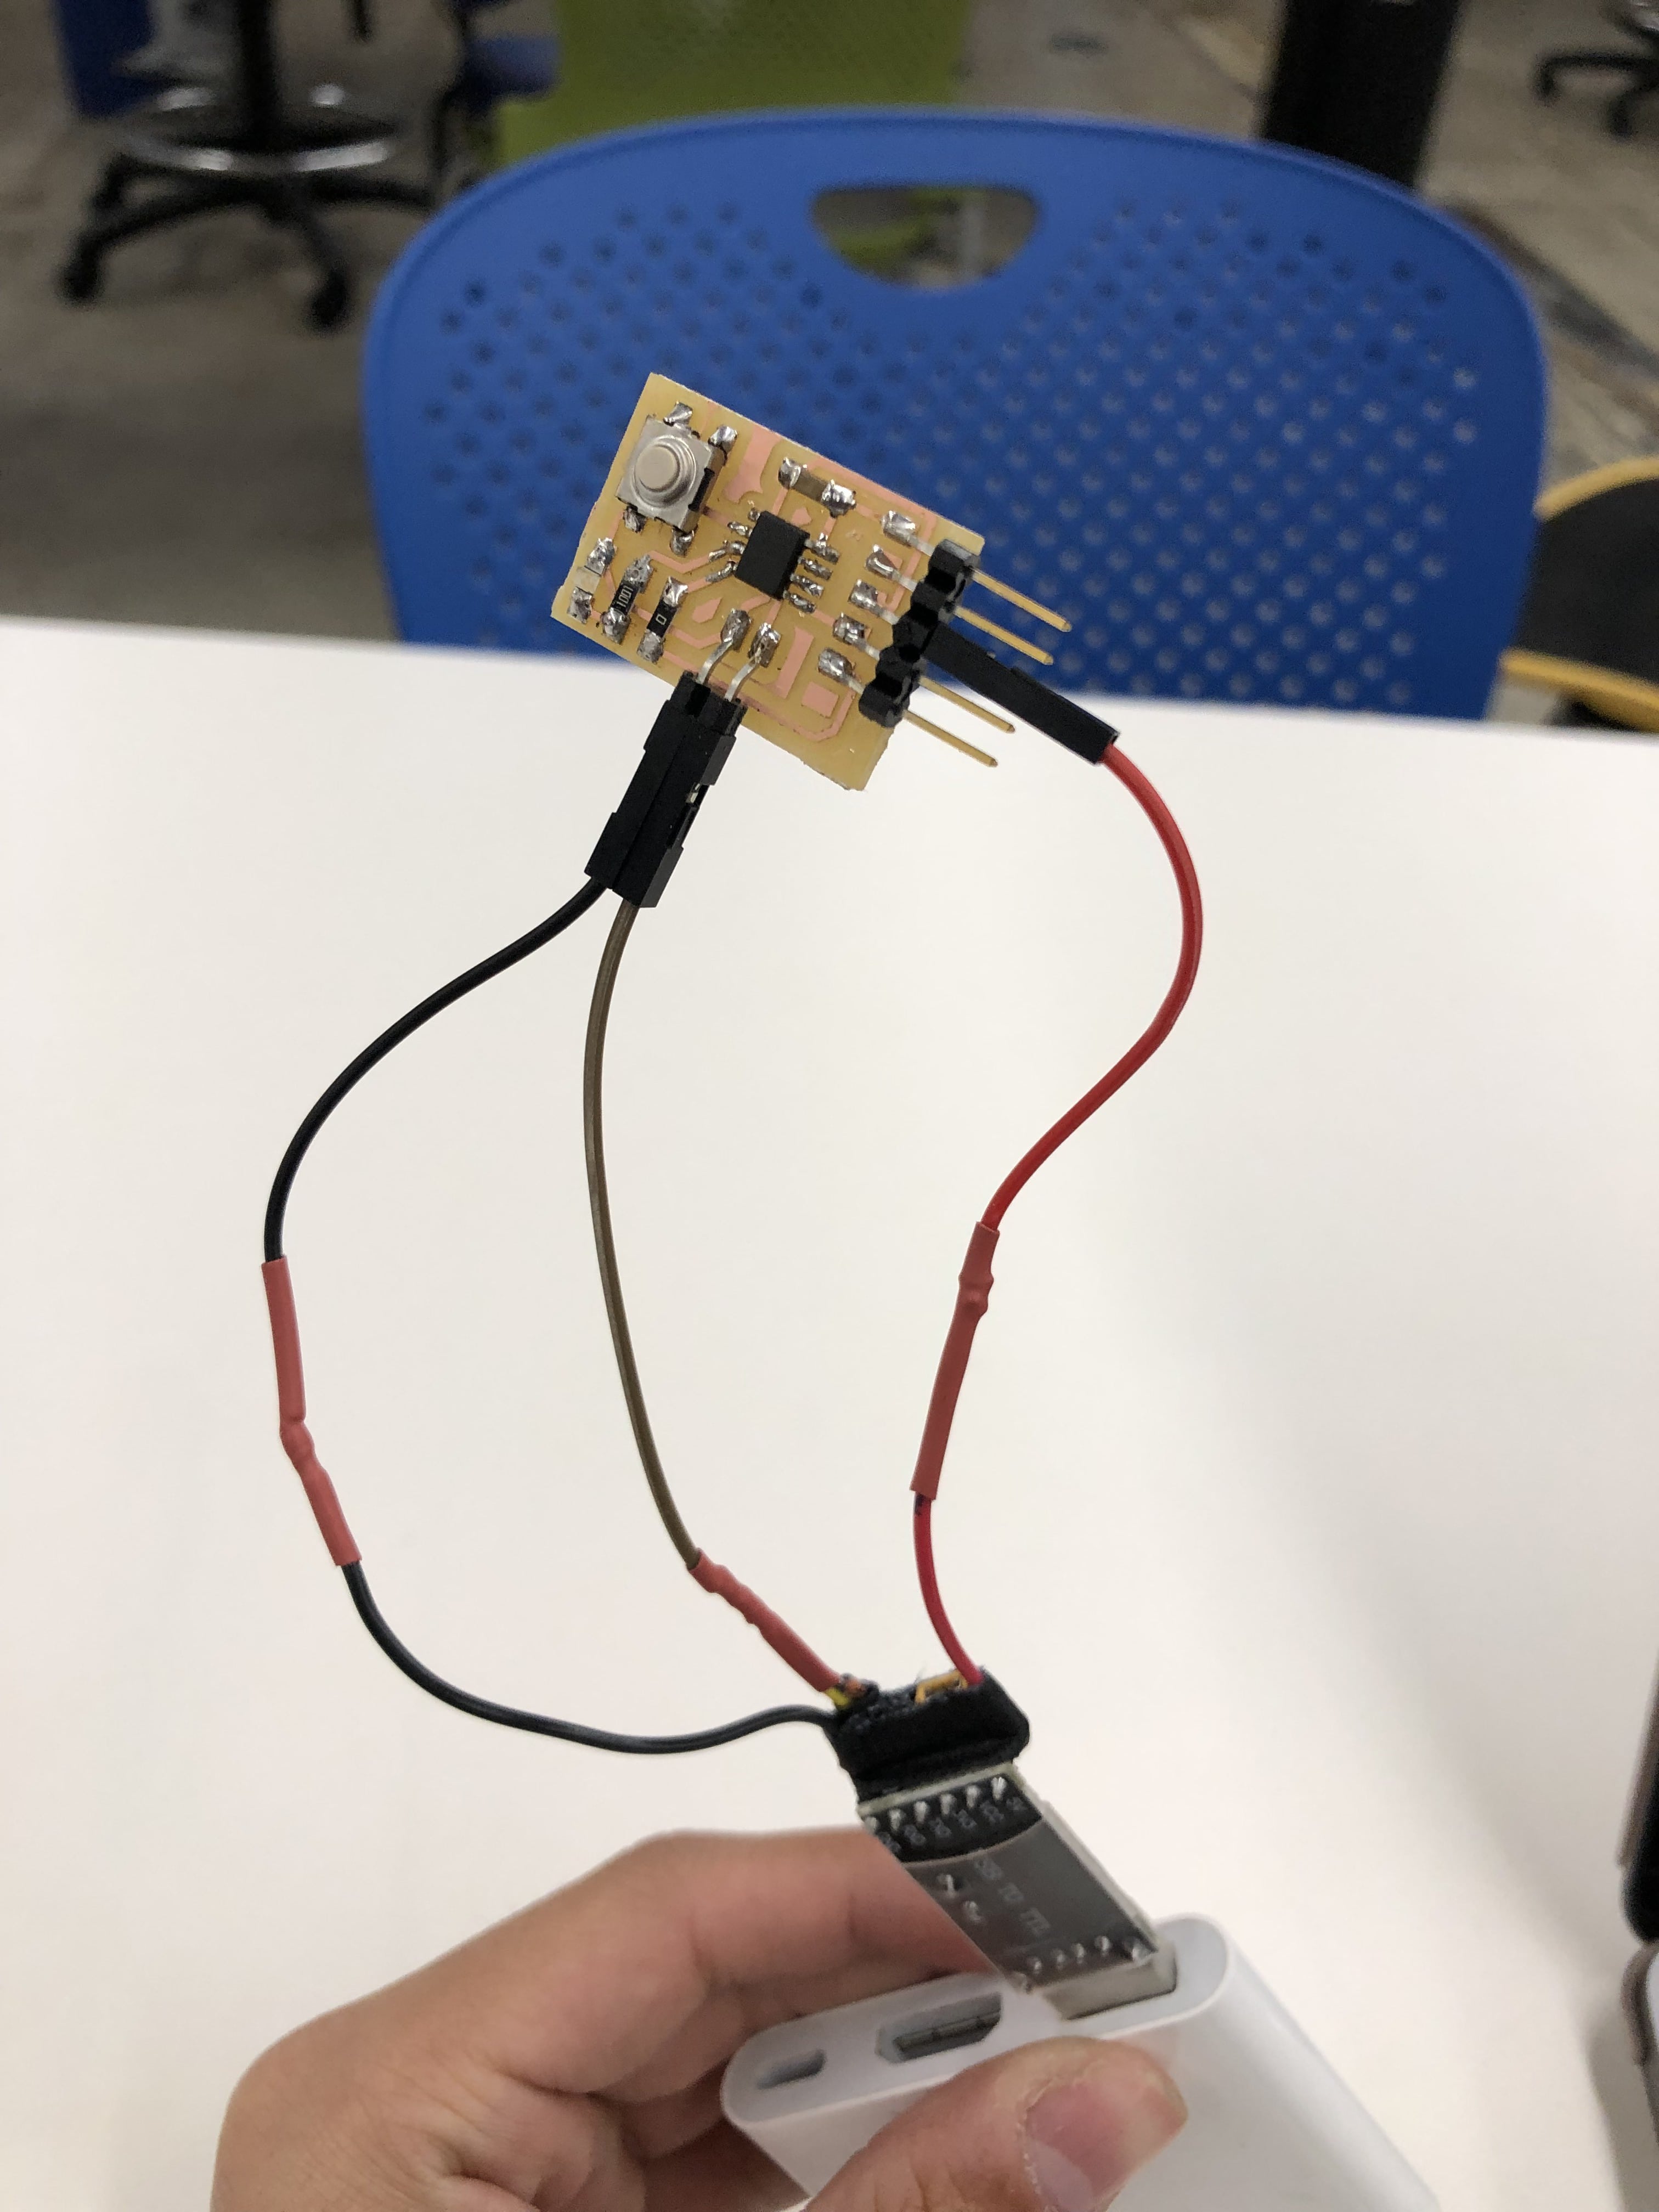
I’m glad that I’ve gotten a lot better at this process. Milling the board went smoothly without a hitch, and I gathered the parts I needed based on his schematic quickly and soldered them on within 30 minutes.
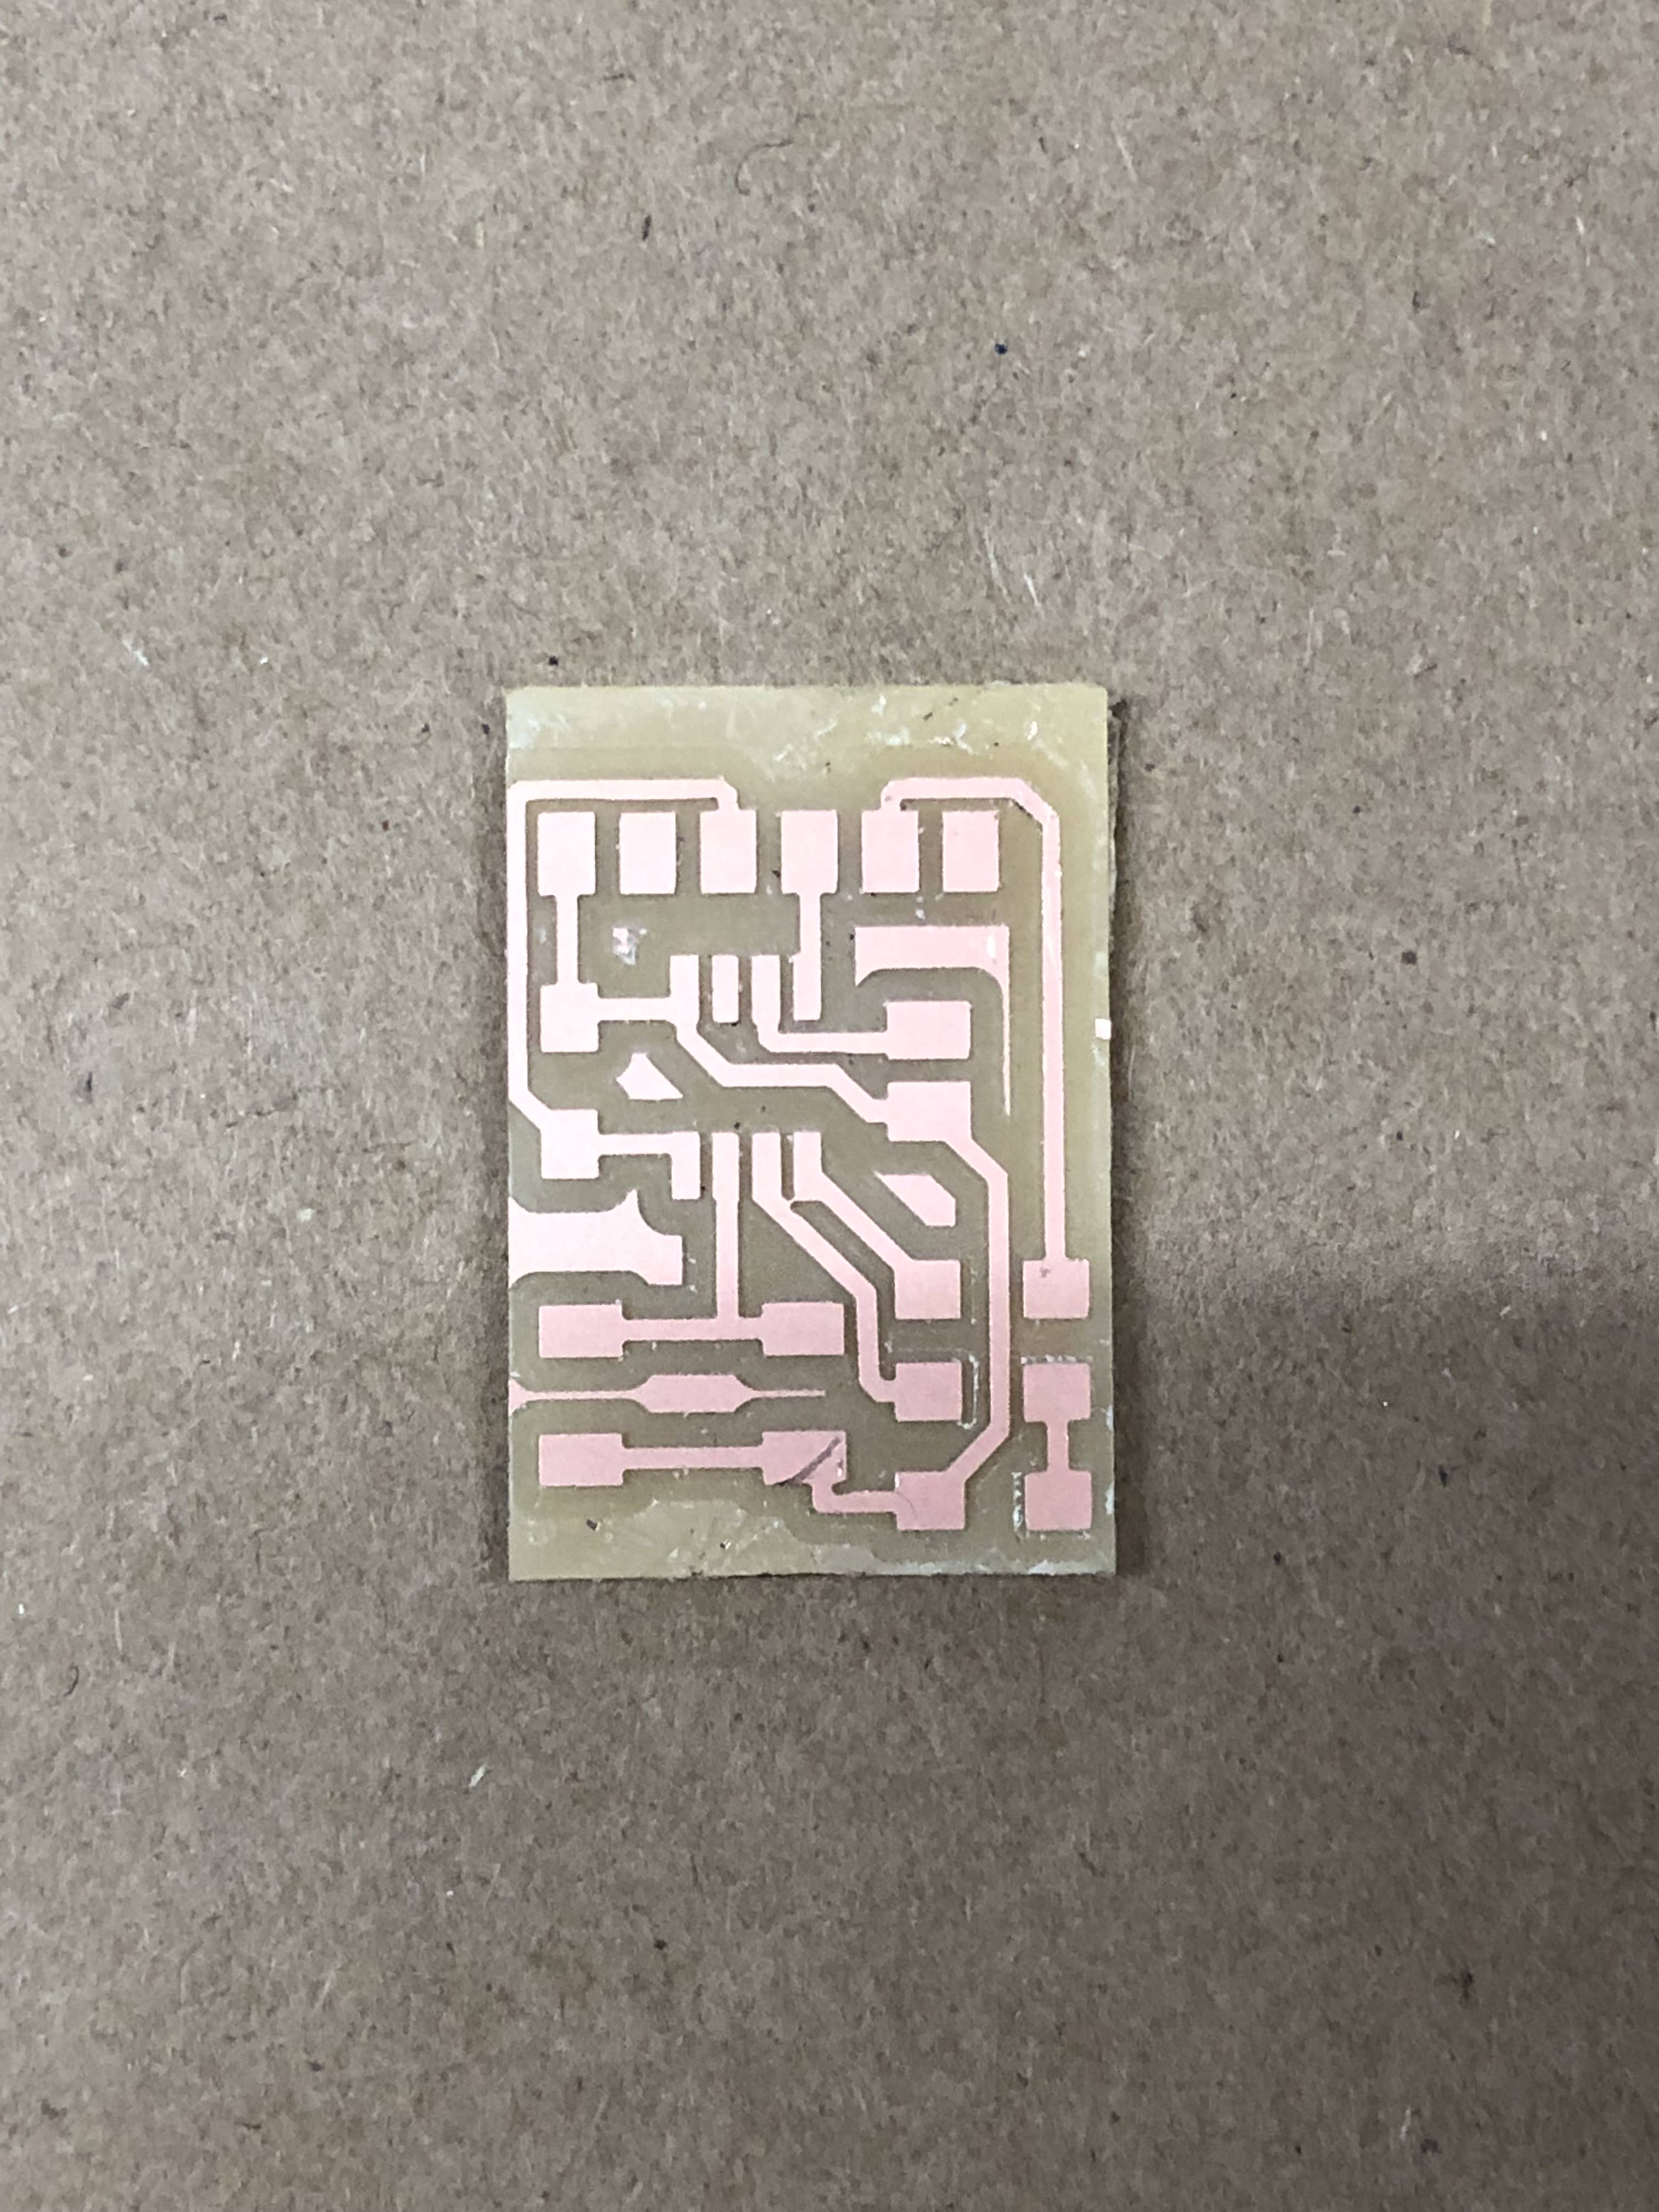
This has been the neatest mill I've done in this class so far.
Programming
The Harvard section has a convenient USB-to-serial converter that I used to run the ATTiny412. I connected the 3 output pins to power, ground, and UPDI on the board.
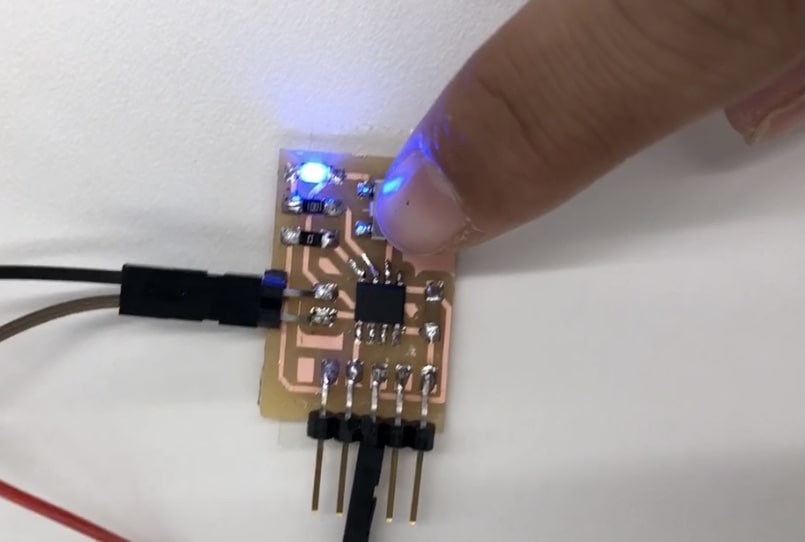
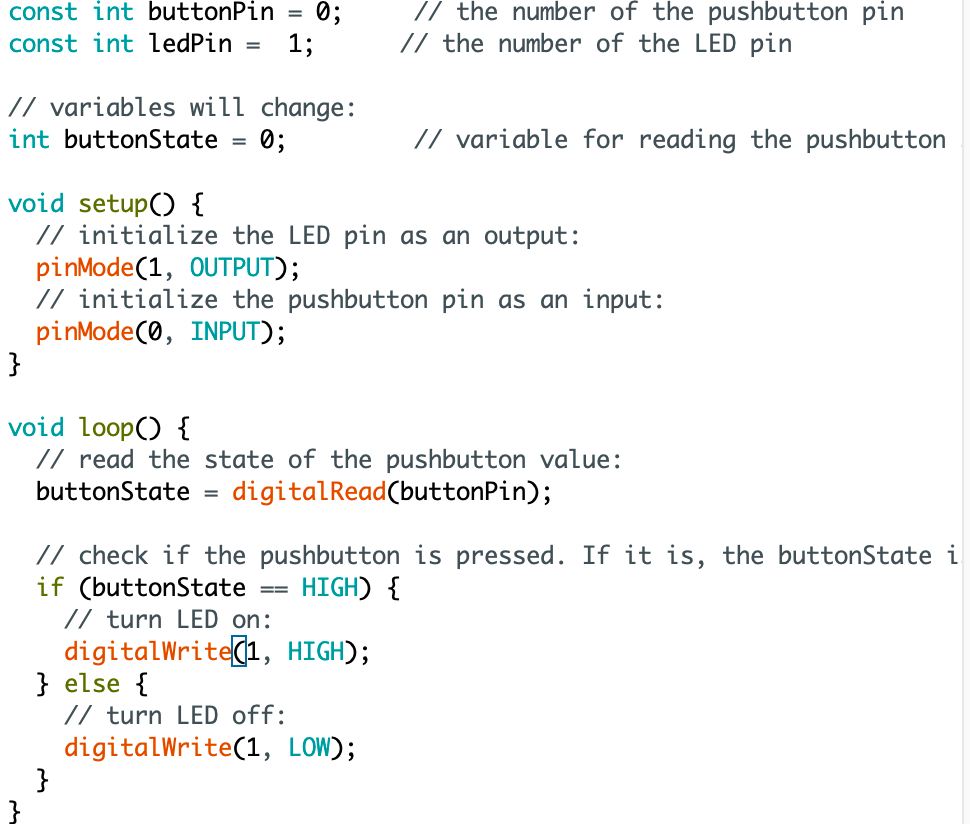
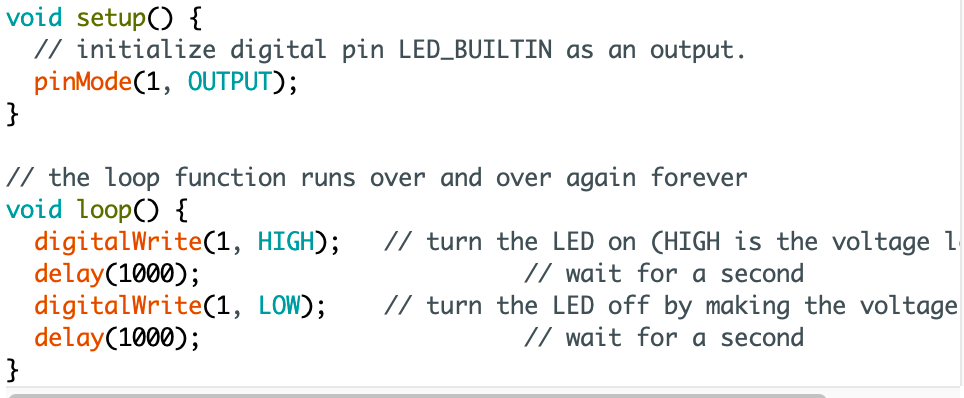
I first programmed the board to have the LED blink forever using some example code that I adapted. I replaced the LED label with pin #1, which I found out by looking at this schematic. The board easily accepted the upload and this worked successfully, which made my entire week better instantly.
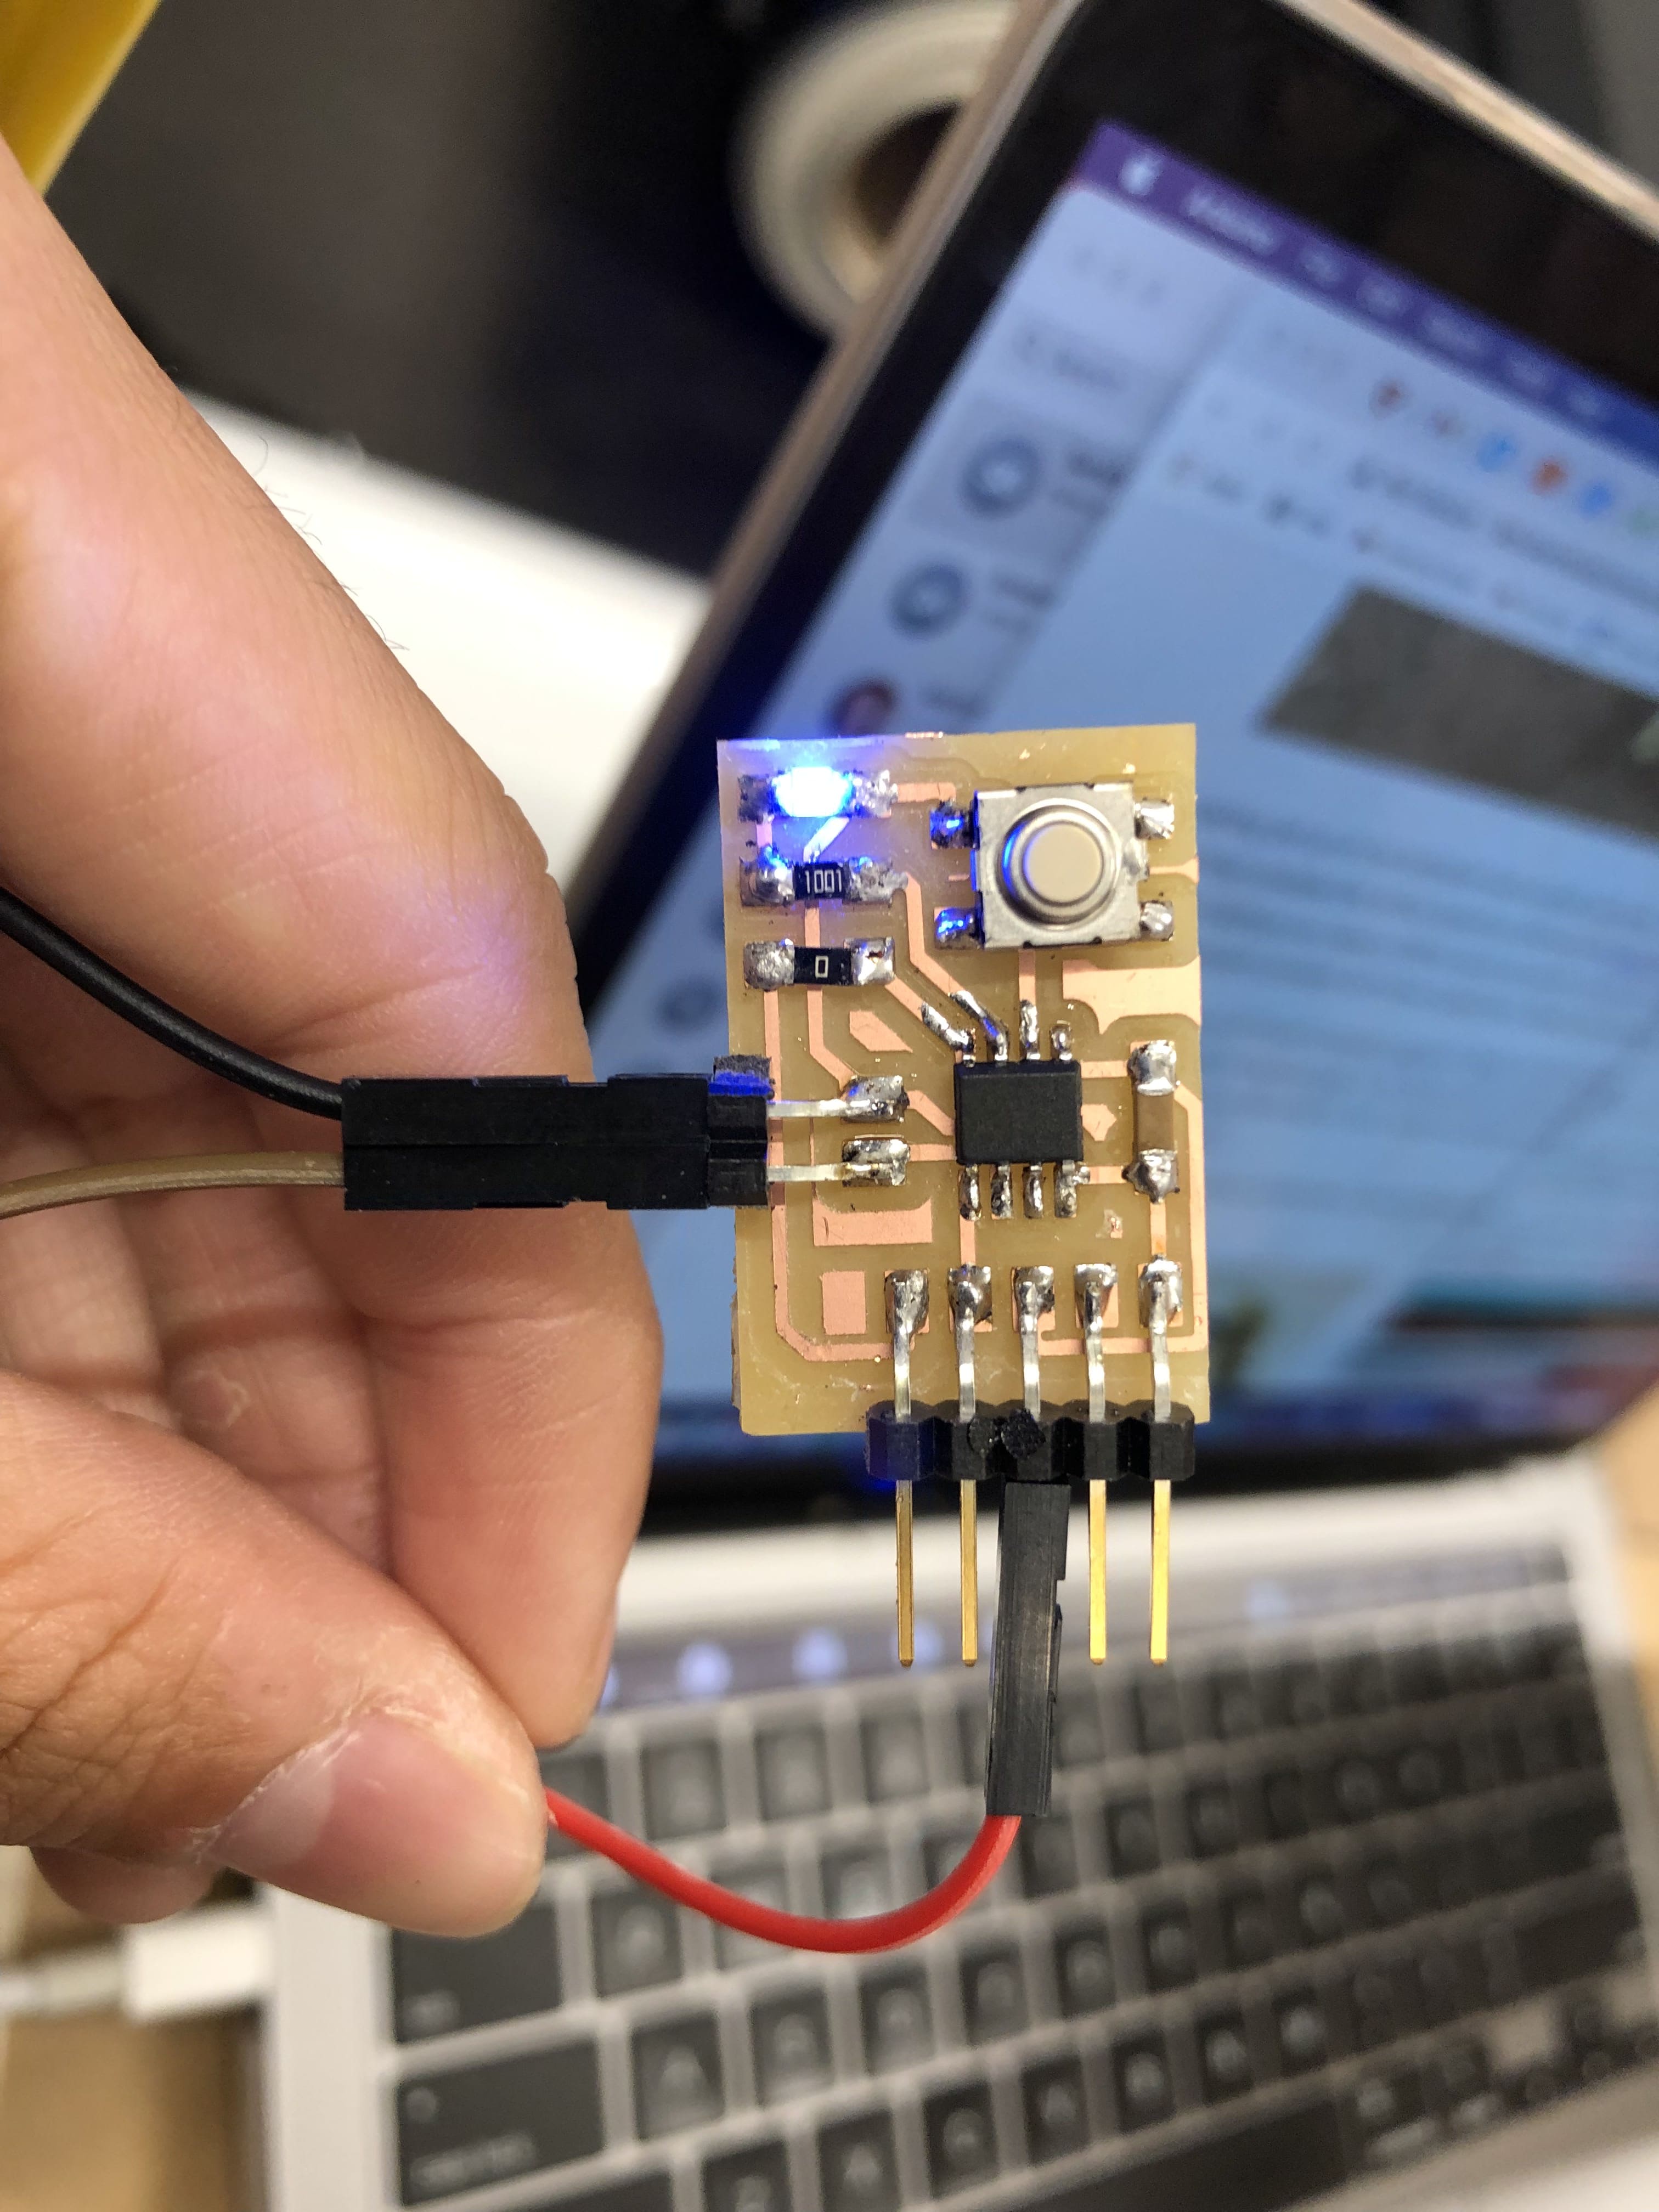
I then programmed the board to allow for the LED to turn on when the button was pressed, and to turn off the LED when the button was pressed again. I figured out that the pin for the button was #0, and replaced the buttonPin label with 0 in the code. Success again!