3D Scanning and Printing

Acknowledgements
John DiFrancisco for being an amazing help, yet again. Nadya Peek for showing us the CT scanner and for pointing out the vibrator on the iPhone. Matt Blackshaw for shooting the video of the CT scanner.
Related Links
University of Washington's Bundler
University of Washington's Grail
Hokuyo UTM 30-LX
“In recent years 3D printers have become financially accessible to small- and medium-sized business, thereby taking prototyping out of the heavy industry and into the office environment.”
- Wikipedia
During my time with the Army, I spent time researching methods of accurately 3D scanning a forest with the purpose of classifying and characterizing the vegetation and measuring stem diameters. To accomplish this we used a 3D planar laser scanner mounted on a tilt stage, referenced by an IMU. Once the ranges are referenced back to an inertial frame, the scene can be reconstructed.
3D Scanning
Having a background in 3D scanning, I decided to branch out. I’m more interested in scanning large environments. The human brain brain can reconstruct a scene just from imagery, so I researched methods of doing this. I found a recent paper from the University of Cambridge on how to reconstruct a 3D image using just a web cam, but for a week of work, implementing his paper is too much.
For my 3D scanning project, I looked into the University of Washington’s Bundler, but from what I’ve read, it only creates sparse point clouds. On that page there was a link to Grail. After spending hours trying to generate a 3D point cloud, I got things running. Problem was the lense I was using was a fisheye and it couldn’t reconstruct the points accurately due to lense distortion.
One large problem when scanning extremely large areas is the process of referencing back the scans to a reference frame. Here is one approach using SLAM6x.
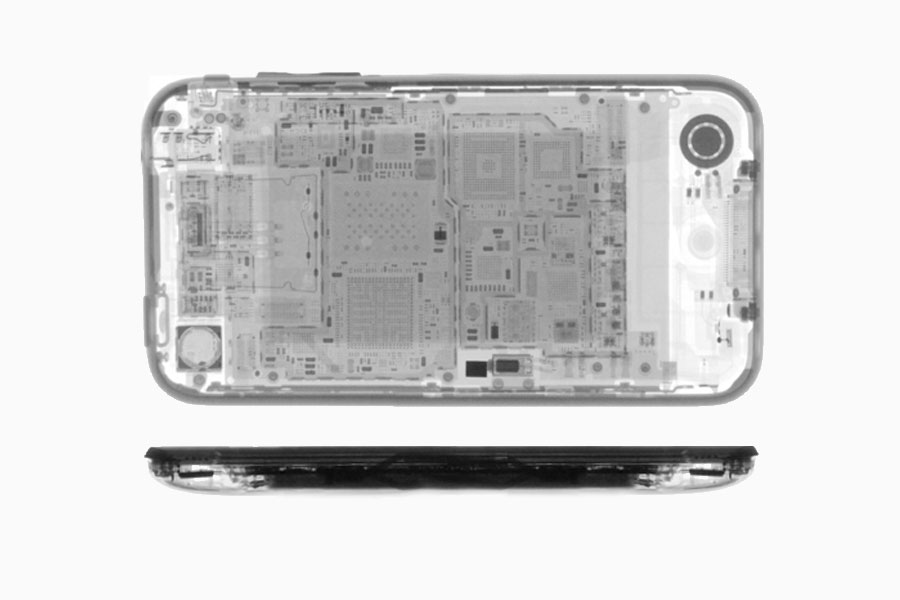
Here is the video of the iPhone vibrating while in the xRay.
3D Printing
For 3D printing, I decided to test the limits of the printer, to see how much detail I could squeeze out and what the strength was for the corresponding part. I modeled my clock in modo and tried to export to a dxf. Problem was, modo only lets you export polygons with 3 or 4 vertices. So many parts of my clock, that had complex curves, were not exported.
I tried to simplify my design, by including more polygons for the faces, but when I exported, it was still terribly ugly.
Faced with no options for getting my design out of modo, I decided to go a different route. I fired up Google SketchUp and downloaded a model of my task chair. After editing it a bit, I exported to .stl and it was off to the printer. John helped me at the last minute and created the chair in acrylic. The chair had some problems, apparently the normal was off, so things were broken right off the bat.


